I love nothing more than strolling around our neighborhood with El Granto & Odin. Coffee in hand, walking wherever our feet will take us. We like to stroll and visit new areas, window shop, and often come home with some new purchases.
One of my favorite places to window shop is the Junction. There are some great shops, and two of my absolute fave shops; Smash and Post & Beam Reclamation.
Storefront of Post & Beam Reclamation
This past weekend I was wandering through Post & Beam and thought I’d share some of the awesome things I spied there. I would have loved to have brought home every last one of these pieces, but alas our budget is being directed at the coffee bar & backyard this spring.
So here are some of my picks.
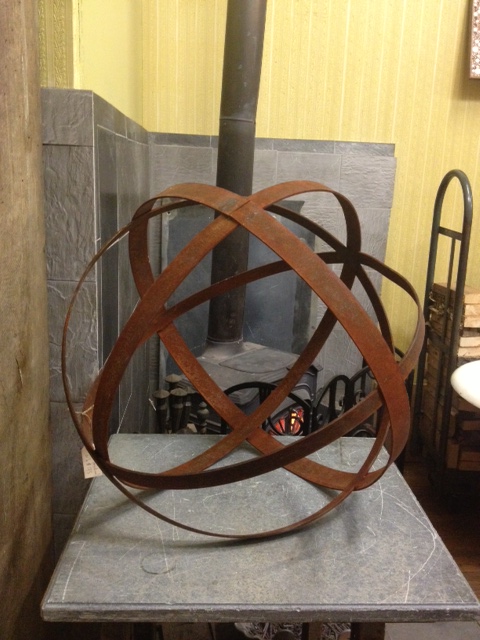
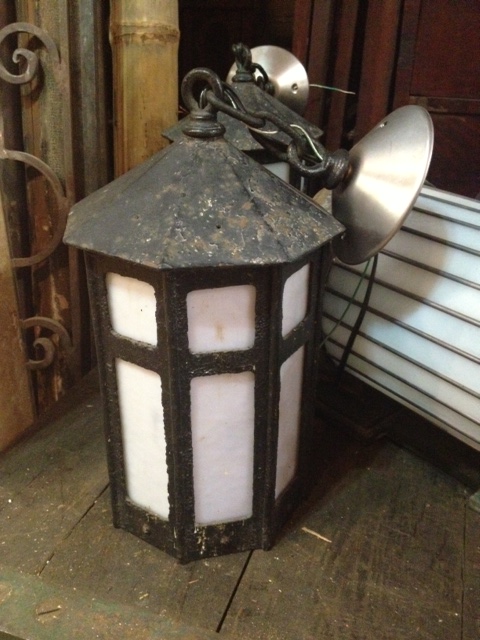
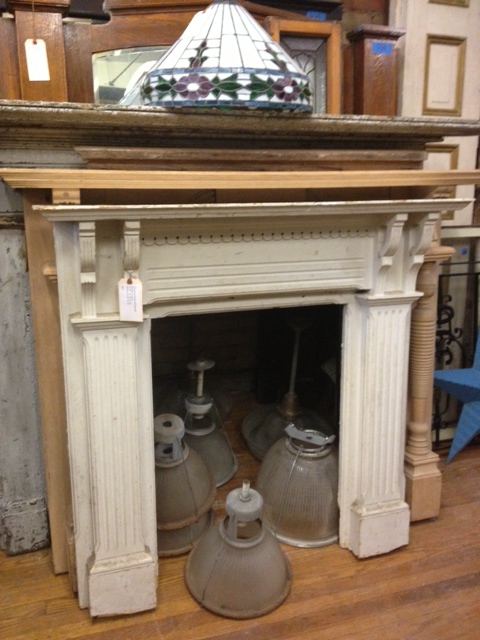
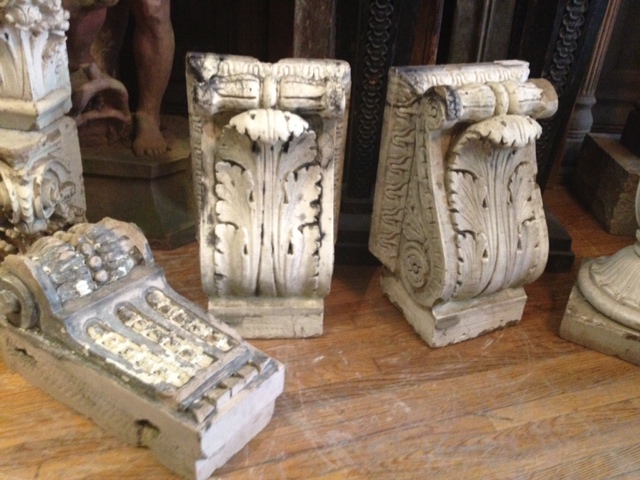
The front window display showcasing some awesome lights and iron orbsHere’s a closer detail of one of the iron orbs. Wouldn’t this be great with a hanging fixture and Edison bulb? (or take a cue from Restoration Hardware and hang a small chandelier inside)Wouldn’t this lantern be gorgeous hanging from the ceiling of a lovely gazebo? Or as the entryway light for a coach house.Loving this classic mantle. Made we want to bring it home even though the storefront doesn’t have a fireplace! Would be cute with stacked logs in the hearth. Oh and check out those warehouse lights! Fab over an island or dining tableAren’t these lovely? Would be great feature in a stately kitchenThese lights would be great in a powder room or boys bedroom or office (although those bulbs are all wrong)Love their outdoor pieces including this fella. Would be perfect for an English style gardenMade from reclaimed materials, these industrial stools would be great at a dining table or as end tables
Did you fall in love with any of these finds? Whats your favorite place to window shop?
***UPDATE! THESE DO NOT WORK WITH BILLY BOOKCASES***
So you know how Ikea (or any prefab) cabinets & bookcases have all those shelf holes for allowing you to move your shelves around willy nilly? They’re super useful, but they leave unsightly dark holes that clearly give your shelving unit away as not being custom built. I happen to hate these holes. So much so, that I painstakingly filled them all with paintable caulking in my Custom Ikea Billy Built-In Bookcase project. This took me 6 hours to do, but well worth it. At the time I thought there could be no easier way…
This past weekend, the clouds opened, angels sang, and I found the answer to all your shelf hole problems.
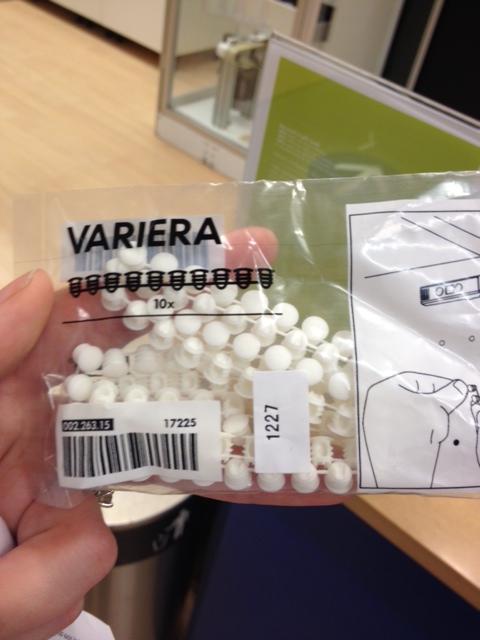
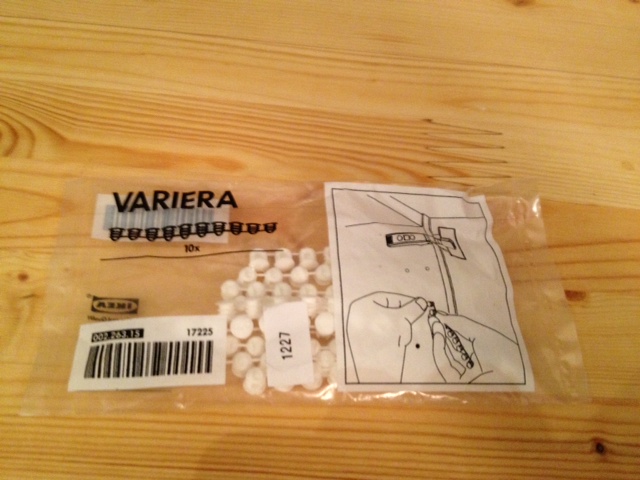
While waiting in the Ikea Kitchen infodesk line last Saturday night, I spied a basket full of strange little objects. I picked one package up and regarded it curiously, then a light bulb went off in my head!
Do you know what these are?
Yes, brilliant brillant Ikea has made SHELF HOLE FILLERS! They’re little plastic pieces that you pop into your unused shelf holes. AWESOMESAUCE! These little guys come in packages of 100 for a whopping $1, and in either black or white.
I swiftly grabbed 4 packages, and then insisted on telling the helpfull (but probably slightly scared) Ikea sales rep about how amazing this invention was.
As soon as I got home I set to filling all the holes in my upper cabinets in the coffee bar & the rest of the glass door fronted cabinets in my kitchen.
Shelf Holes BeforeShelf Holes After
YOUR MIND IS BLOWN, RIGHT?! (or am I the only person in the world who gets this excited about filled shelf holes…)
Total Cost: $3 ($1 per cabinet) my fingers did get a bit sore after pushing in 300 of these puppies, but a small price to pay for sexy looking cabinets.
Go pick some of these up at your local Ikea, then send me tearful letters about how they changed your life.
best.invention.ever
*UPDATE!* Variera Cover Cap’s are now available online at Ikea.ca
Last summer, while at Canadian Tire, El Granto picked up a doorbell cover that was a bit more fitting for our house. Our old one was basic and worked just fine, it was just a bit boring. Continue reading “Ding-Dong”
Have you purchased any Ikea (or similar) frames only to have the provided mat be completely the wrong size for your art? You could go to an art or framing store and pay (heavily) for custom cut mats, or if you’ve got a few dollars and some time and patience you can do it yourself.
Back in my art school days, sick of trying (and failing) to cut mats with a straight edge, I broke down spent $50 of my poor ass college budget on a mat cutting kit. I then proceeded to cut all my art school project mats, as well as did a pretty handsome black market trade in cutting mats for my fellow students.
Mat Cutting Kit
That (old battered) mat cutting kit still gets used several times a year, and has paid for itself many times over. If you are in need of several mats cut (doing a gallery wall any time soon?) If so, this may be the tool for you. Let me show you how it works.
A few weeks ago we purchased a beautiful print from a great local shop Town Moto. This vintage inspired motorcycle gear shop is one of El Granto’s favorite places. They have great gear & accessories as well as an in house design & print shop. They produce some beautiful motorcycle themed prints, and we brought a purdy new Moto print home. The print is gorgeous. Its printed on a lovely heavy paper, and its signed, stamped and numbered. A print like this needs to be presented in a way that equals its awesomeness. So I went frame hunting in the basement and found a great big Ikea Ribba frame previously used for an old highschool drawing. I ousted the drawing from its frame and stole the mat to use with the Moto print.
Reclaimed Mat
Problem is, the mat hole is MUCH too small for my print. The easiest thing to do here is flat mount the print, but that doesn’t look as nice.
Print much too big for the old mat
So I got out my mat cutting kit and set to work.
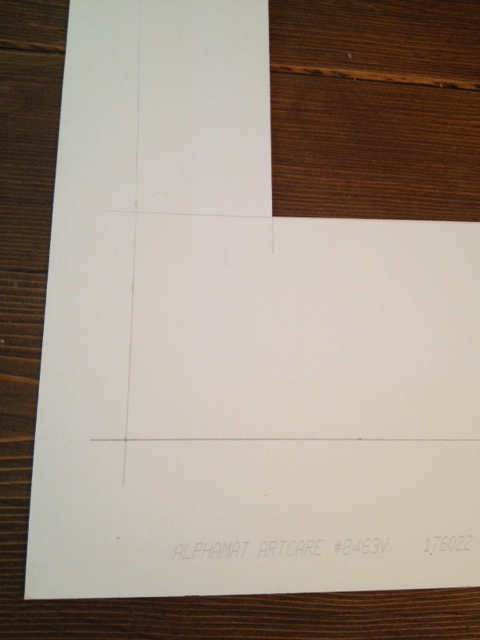
You need to figure out how big you want the new mat hole to be, and you need to draw the location of the new hole on the back of the mat so you can cut it. There are several different ways to do this. We wanted our print centered, so we did a bit of math (minusing the size of the new cut hole from the overall size of the mat to figure out how far from each side the cut hole needed to be.) Measure twice, if not three times before you cut, its easy to go astray especially if you’re dealing with 16ths of an inch etc. If you’re having problems with this step, feel free to ask questions and I will try (as best I can!) to explain in greater detail.
New cut lines drawn on mat
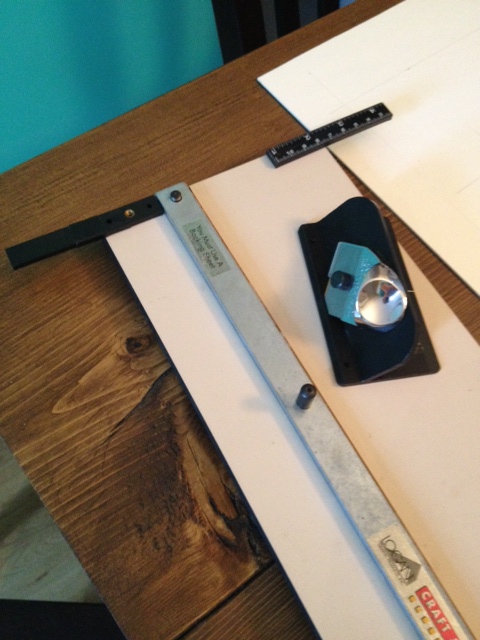
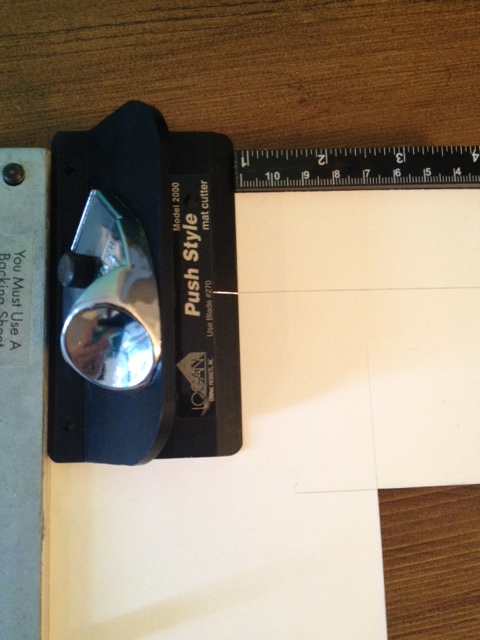
Place the mat (still upside down) into the mat cutter, and align one of your lines to the straight edge of the cutter.
Your vertical cut line is aligned with the straight edge and see how there’s a line on the cutter? Match that up to your horizontal cut line. It will ensure that you start & stop the cut right where you need to
Now starting at the bottom of the mat, place your cutter onto the mat, matching up the starting line on the cutter with the corner of the intersecting cut line. Push the blade into the mat, while holding the straight edge steady, and push the cutter along the straight edge, stopping at the top line of your cut hole. The key to this step is using a steady hand and pressure. Proceed to do all four sides of the mat, and ta da! Beautifully cut mat.
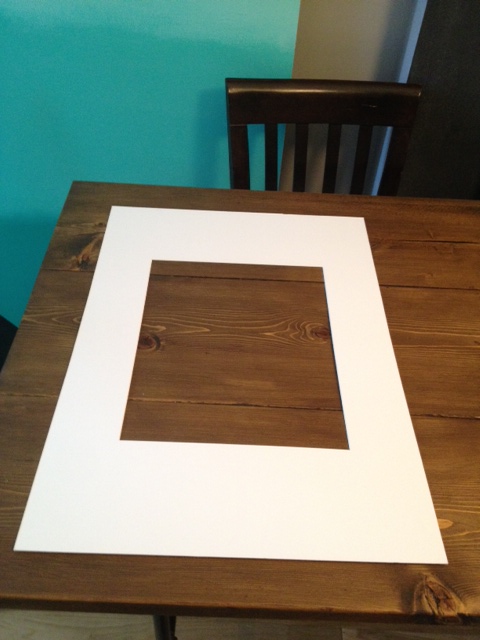
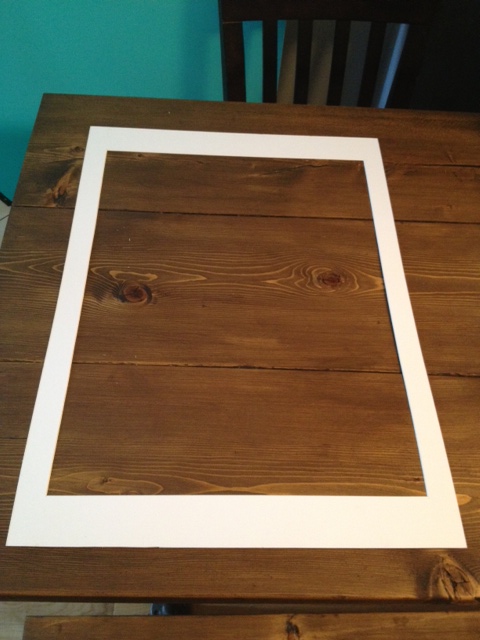
Newly cut mat with larger hole for our printTesting to see how our new mat fits. Its perfect!We framed the print so you could still see the signature and the embossed stamp on the print
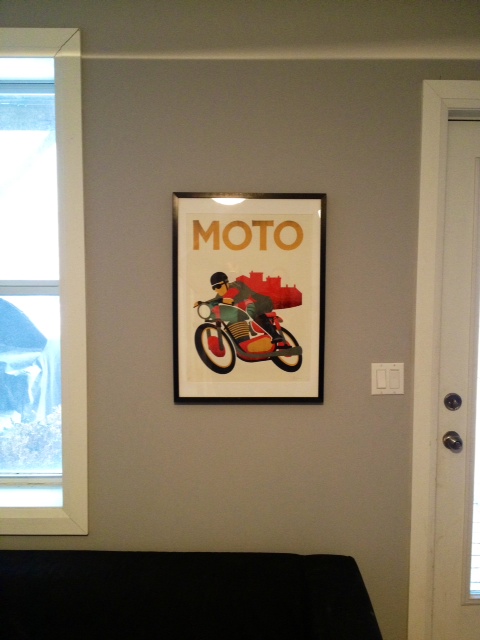
Now insert your print, attach the back and hang your professional framed print on your wall.
Print framedThe new print is hanging out on our back livingroom wall
*If my instructions are confusing, let me know. This may be a situation where its easier explained by a video tutorial*
SOURCE LIST:
Materials:
Print – Town Moto
Frame – Ikea
Mat – Art Store
Tools Used:
Mat Cutting Kit (we have the Logan one, you can pick up a basic mat cutting kit for about $50 at art stores)
Measuring tape or ruler
Hammer & Nail (to hang)
Old Butter Knife (my secret for prying up the tabs on the back of the frame)
One of my faults is that I am a bit of a dreamer. El Granto is the realist, and I have my head perpetually stuck in the clouds. I think we can do anything we put our minds to (within reason). I will research the hell out of things, and have confidence I can do a task before setting out. I may not however estimate how hard (mentally or physically) the task may be. I have confidence in our abilities, and often tooo much confidence.
Here are some examples:
I thought I could totes carry home two 8 foot lengths of 10″ tall mdf crown moulding on my own, walking, the 4km home from the lumber yard. Half way home I called El Granto begging him to come help me.
I bought a kiddie pool for the dog and then had to carry it home (on my head) through busy streets during a heat wave.
When I bought 2 4×8 sheets of mdf for the guest room board & batten, got the lumber yard to cut into into 2″ x 8′ strips, then tried to carry the 50 pieces of wood home on a borrowed moving dolly that had a mind of its own. It kept trying to weave into traffic, or jackknife and spilling the boards everywhere. El Granto had to steer it with a piece of wood like a gondola all the way home.
Last night was another example. A nearby house is doing a bunch of renos, and I noticed some bricks in the construction debris. I really want to make a backyard patio area with red bricks, so I stopped by and talked to the contractor and asked what they were doing with the bricks. Yesterday he gave us the all clear to come take as many bricks as we wanted. Awesomesauce! Now we just needed to get them home. El Granto tried to book a Zipcar van or truck, but as its the beginning of the month (and people are moving) there were no large vehicles available for the next few days.
Unperturbed by this, I convinced El Granto that we should go to the building site armed with a dolly, a granny cart, some milk crates and a bucket. We could fill up the containers with bricks, pile them into our dolly and cart and that we could make a few trips bringing bricks home. We loaded up the first cart worth, realized bricks weigh about 5lbs a piece, struggled home with them and swore to never do that again.
Hopefully this weekend we can convince bribe a truck owning friend with beer to help us shuttle the bricks. After they get home, and dry out, they will need some cleaning up, removal of mortar, and then hopefully they can become an awesome patio in the backyard this spring.
One milk crate holds 12 bricks. Each brick weighs 5lbs. So this crate-o-bricks is weighing in at 60lbs.
Have you taken on a task that’s too big (or heavy) lately?
Last week I had an especially bad week. I went in for my second round of iron infusions, and this session was not kind to me. I came home with a fever and my whole body felt like it had been run over by a truck. I took a few days off and got some rest, and finally this week things are starting to get better. Continue reading “Is it Spring Yet?”
We had so much fun doing the Fall Pinterest Challenge, that we jumped at the opportunity to do it again this time. The jist of the Pinterest Challenge is to stop just pinning ideas, and start creating. You’re supposed to DIY something from Pinterest. Whether it be a recipe, craft, home project etc.
I have a few pins over on Pinterest (only 2,555 or so…) so I had a good amount of things to choose from! I figured this was a good opportunity to knock something off the to-do list as well.
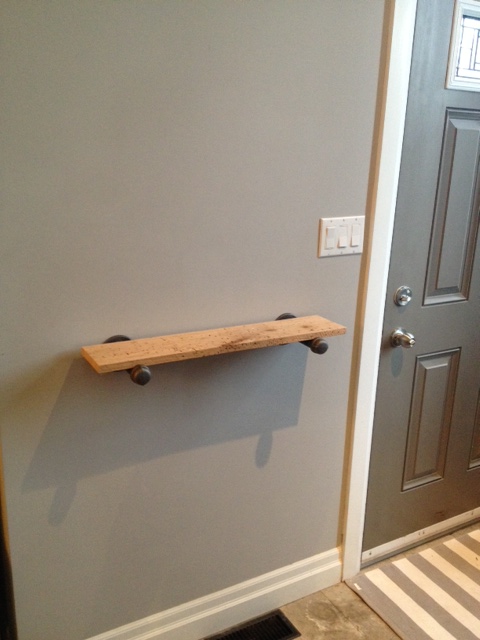
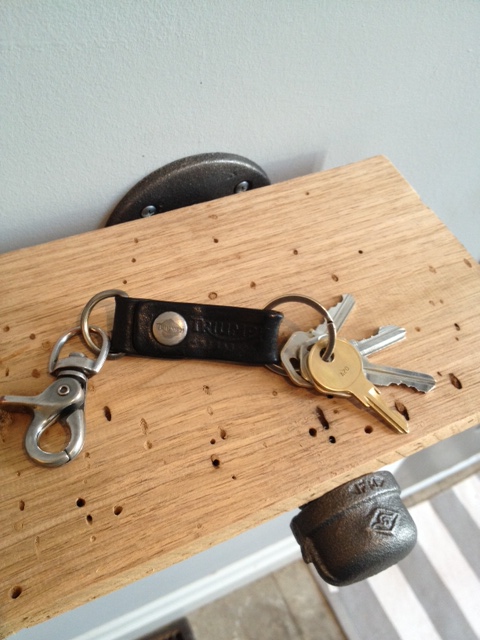
Our front door opens onto the dining room. We have built a coat rack, installed an Ikea wardrobe and we have a nice bench and mirror. The only thing lacking in the entry was somewhere to put your keys and mail, or to keep a coffee away from the dog while you’re tying your shoes pre-puppy walk. We don’t have a lot of space, so a traditional console table was going to be too big.
Entry Before. Isn’t that wall crying out for a table/shelf for keys & mail?
If we love the shelf so much, why didn’t we just go buy one? errrr… The price for shelf + brackets was $240. Yep, for one lil shelf. Ouch. We just don’t roll like that.
So we made it (with our spin on it of course)
Storefront Life’s Take on Restoration Hardware’s Reclaimed Wood Shelf
So how’d we do it?
Bought some 1″ gas line pipe (it matches our dining table!) from Home Depot.
Supply List:
2 – Floor Flanges
2 – 6″ Nipples (teehee)
2 – End Caps
Flange + Nipple + End Cap
Assemble them all together and this is what you get:
Shelf Brackets
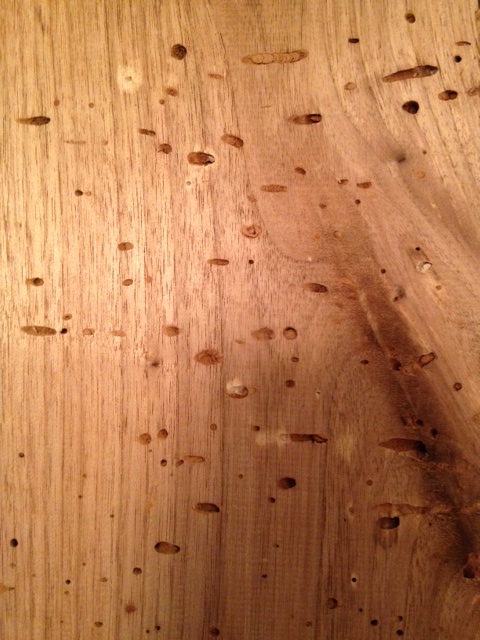
Now you need a shelf. We headed to the garage to check out what cool wood we had. We found some awesome worm eaten Butternut that El Granto had gotten for Christmas (yep we ask for building materials for Christmas). We loved the character of the butternut and decided it was the way to go.
Butternut Wood. Check out all those awesome worm holes!
We cut the piece of wood 28″ long, and trimmed the width to 5.5″. This would enable the wood to sit on the pipe, but inside the edges of the end cap and flange. We wanted to be able to see the cool bracket. You can easily make the shelf wider by resting it on top instead of inset.
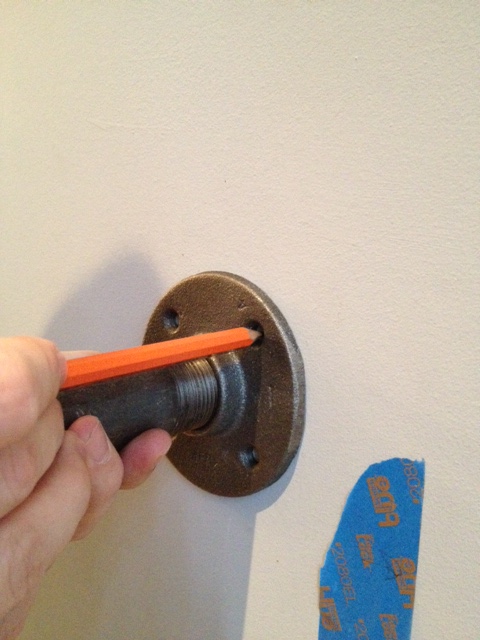
Next up, after deciding on placement and height (centered on the wall and 40″ off the floor) we went stud hunting, and found that we could hit one of our brackets into a stud. So we marked out the placement.
Marking the shelf bracket holes
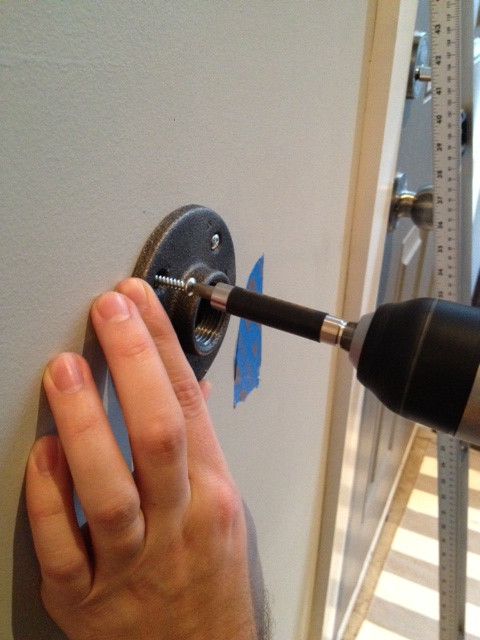
After the holes were marked, El Granto screwed the bracket into the studs.
Attaching the Bracket to the Wall
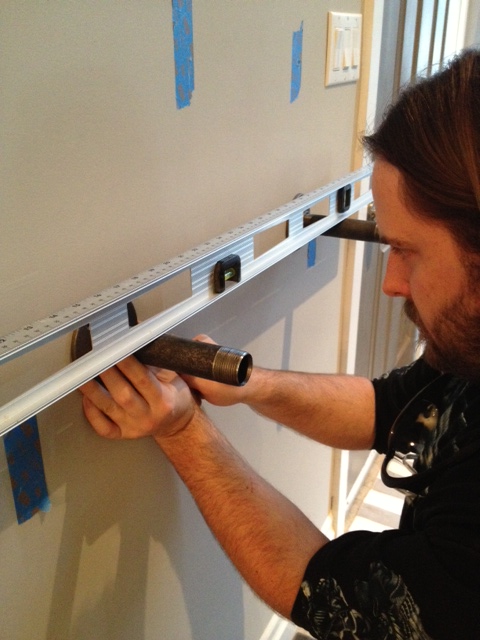
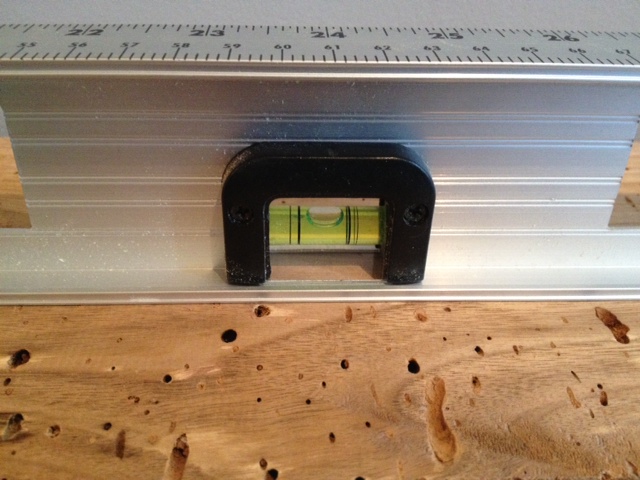
After the first bracket was attached, we attached the pipe nipple and used it to help us level the second bracket.
Ensuring the Brackets are Level
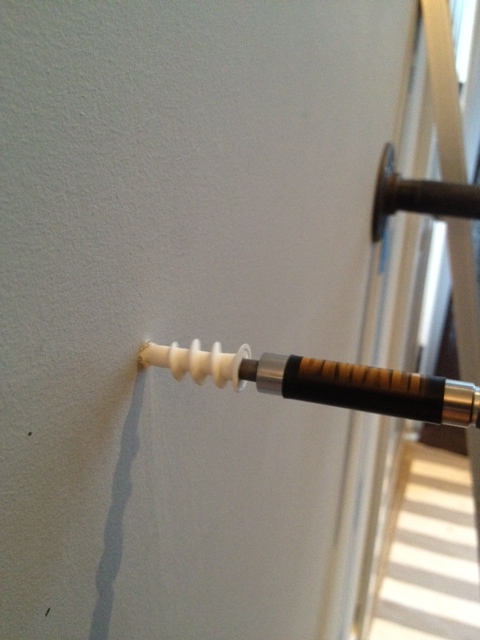
Next up we marked the second bracket, and used EZ Ancors to ensure the shelf would be attached to the drywall nice and sturdy.
Installing the EZ Ancor`s
We then attached the other flange to the wall with screws into the wall anchors, and then screwed on the pipe nipple and end cap.
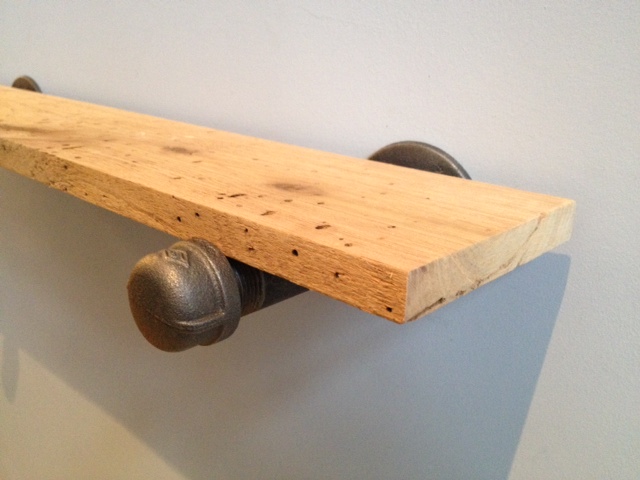
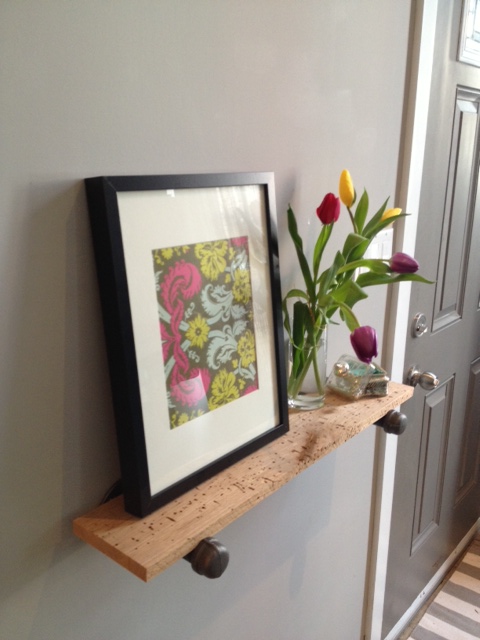
We gave our wood two coats of furniture wax and laid it on top of the pipe, screwing the end caps against the wood to hold it steady. Oh and it’s nice and level!
TA DA! What do you think of our DIY Restoration Hardware Shelf & Bracket?
Three weekends of sore muscles and standing on ladders are over, and we are now the proud (and tired) owners of a reclaimed tin ceiling. We first showed you how we prepped the ceiling, then how we prepped the tiles, today you finally get to see the finished product.
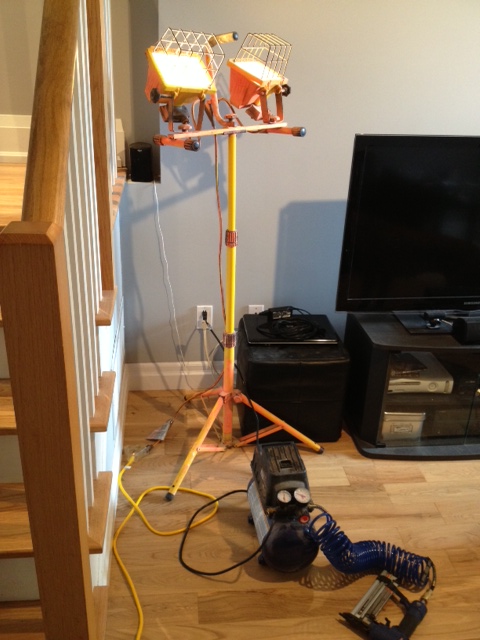
It was a bigger project than we anticipated. Anything where you’re working on the ceiling is exponentially harder. If we were to do it again, we would rent some scaffolding, as moving ladders around was a pain. We did borrow a work light from our neighbours, which was a necessity.
Work Light & Brad Nailer, our tools for the day
This is what the ceiling looked like before.
Ceiling Before
This is what we started with on installation day.
Ceiling Sheeted Ready for Tiles
When installing the tiles you need to decide where you enter the room the most. The tiles overlap, so you want to make sure the edges overlap away from where you see the ceiling from most. We enter the living room from the hallway so we started the tiles at the corner farthest from the entryway (kitty-corner to the hallway).
The tiles overlap and have little notches where they fit in together. We figured this was enough to be able to line up the tiles properly, but once you’re standing on the ladder with the tile over your head, it’s much harder. We wish we had laid out a chalk line grid, it would have made the installation quicker and preventing one crooked tile that moved when I was nailing it. (arg)
After the first tile is up, we continued along that row to the end, then started the next now. Your arms get very tired, so this process ended up taking us two weekends to get done.
First Tile Up!
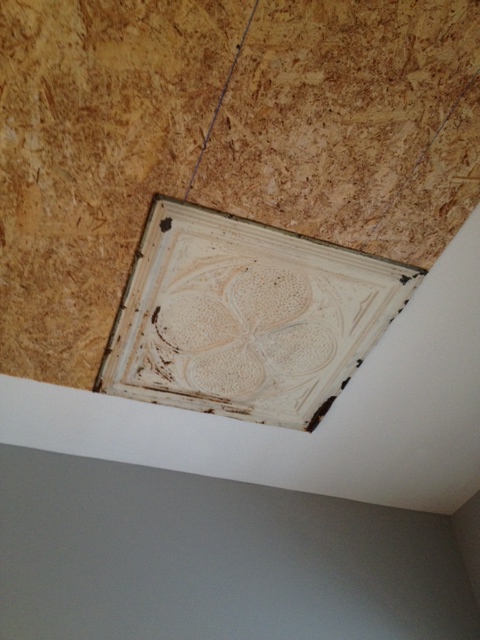
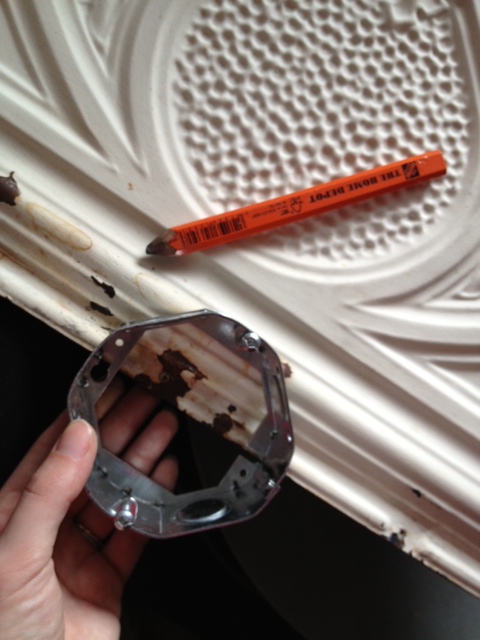
When we got to the middle of the ceiling we needed to deal with the electrical box. We had planned the tiles so that the light ended up in the middle of two tiles. We just needed to cut a half circle out of each tile around the light, and it should work perfectly. We traced the shape of the electrical box onto the tiles that needed to be cut.
Tracing for Electrical Box Cut-Out
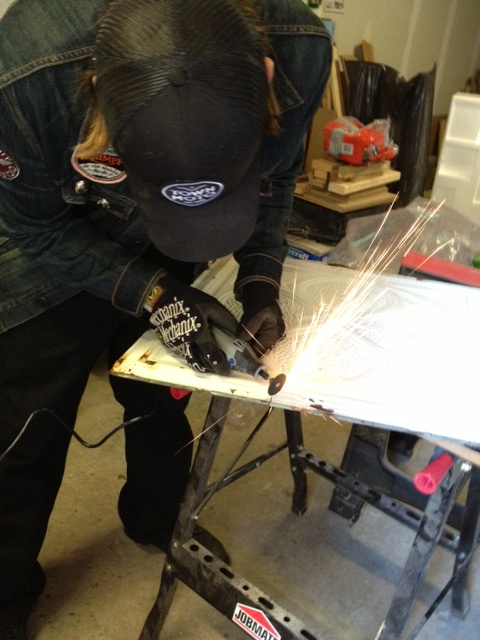
Then headed out to the garage and El Granto cut the tiles with a metal cutting blade on his Dremel. (We could have used tin snips, but the curve is a bit tricky and the Dremel is waaaay easier.)
Cutting the Tile
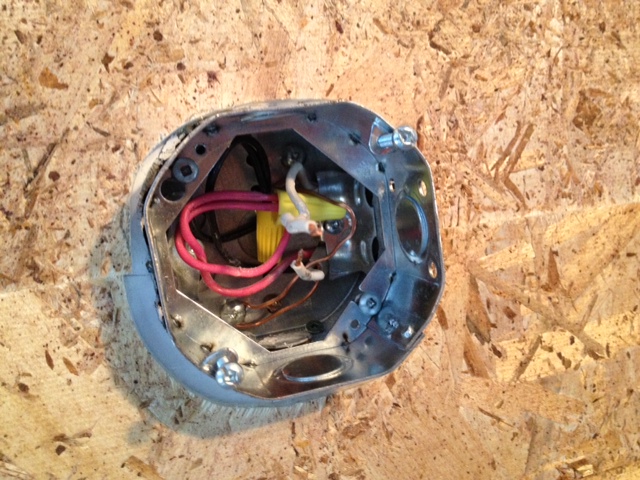
After the tiles were cut, we added an extension box onto our ceiling electrical box so that it would allow us room for the plywood and the tin tile. The box is easy to install (again the power is still OFF to this room!)
El Granto Installing Box ExtensionBox Extender Installed
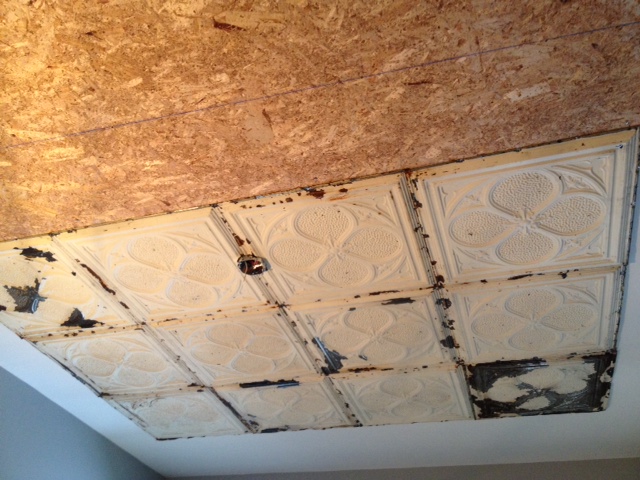
After the box was up we installed the cut tiles around it.
Cut Tiles Installed
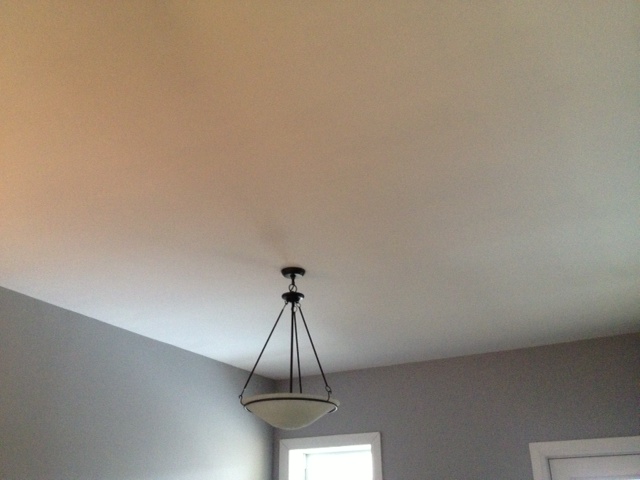
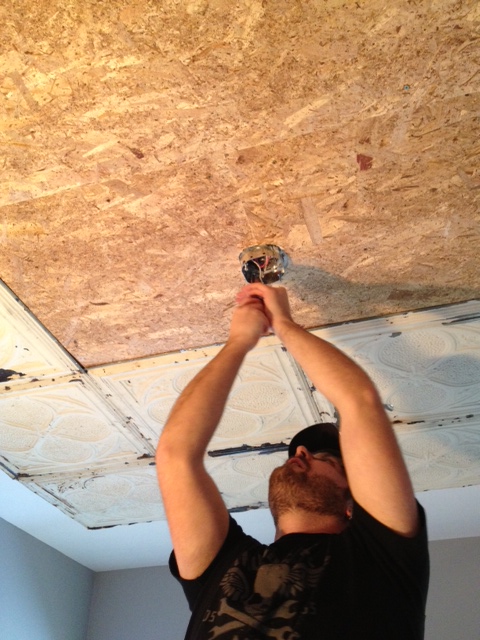
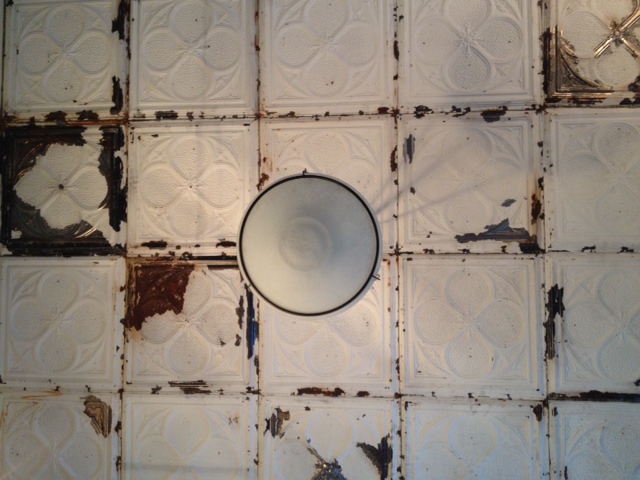
Then re-installed the light fixture.
Light Installed
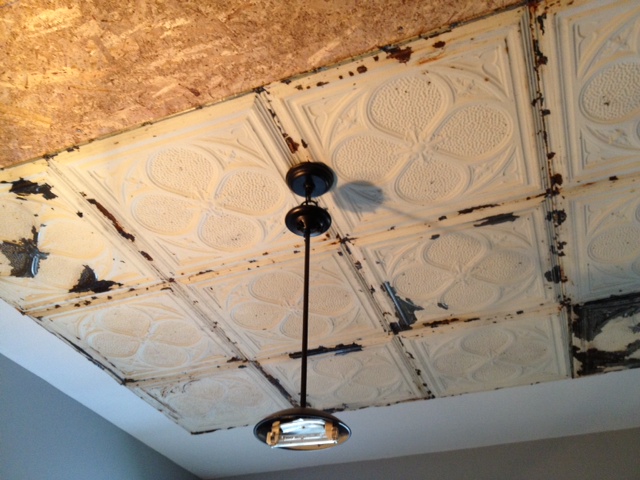
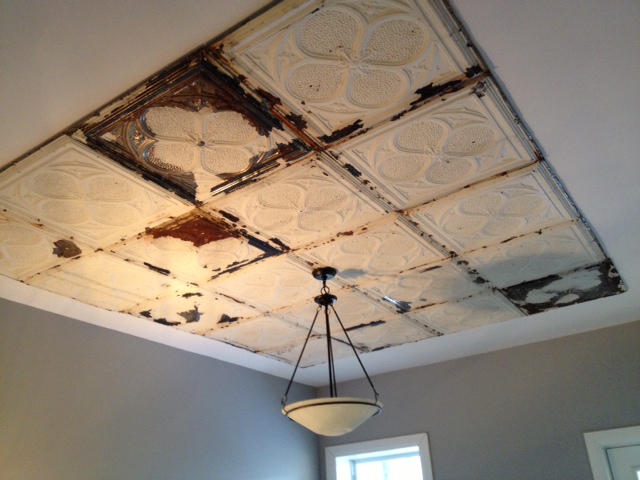
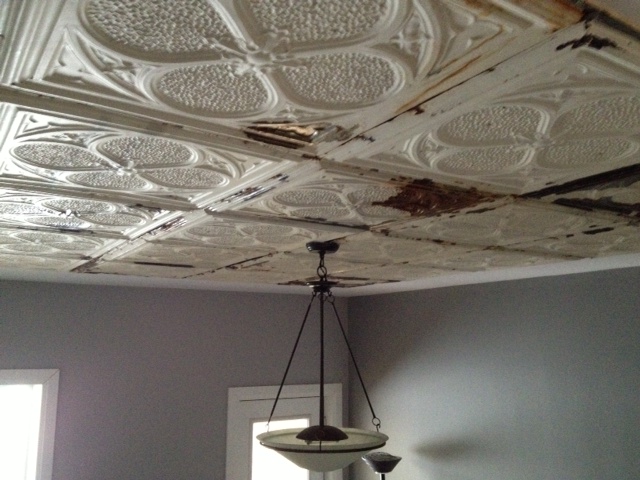
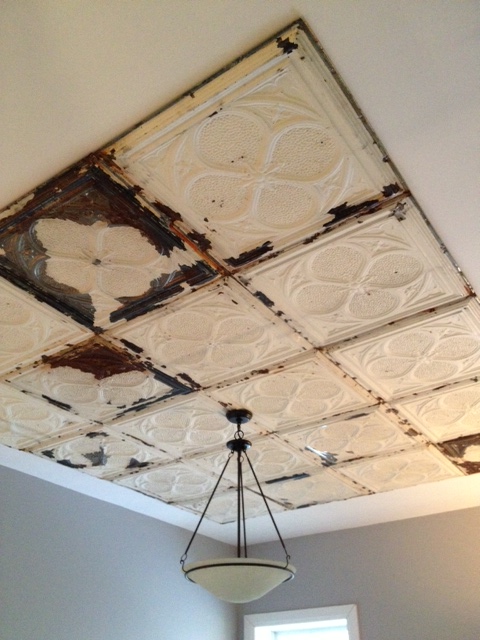
We then installed the remainder of the tiles. The result is a very eclectic ceiling, but we love it. Some of the tiles are much more worn than others. We tried to make the layout look random, but still balanced. We would like to add some panel molding around the edges, but that will have to wait until we have access to a truck or van.
Without further adieu, here is the finished product.
The living room is starting to come along now. Next up, we need to trim out the tin ceiling, and swap out the light fixture for a more elaborate chandelier. A few more big projects and it will hopefully start looking more like the period building it once was.
SOURCE LIST:
Materials:
20 2′ Square Reclaimed Tin Ceiling Tiles – Aberfoyle Antique Market
3 4×8 Sheets of 3/8″ chipboard – Rona
Round Electrical Box Extender – Home Depot
Screws – Home Depot
Brad Nails – Home Depot
Clear Coat – Canadian Tire
Tools Used:
Drill
Compressor & Brad Nailer
Ladder(s)
Work Light
Chalk Line
Dremel
Difficulty Level (on a scale of 1-5):
four out of five
(Really it deserves about a 3.5 it was just a pain as you are standing on a ladder working over your head)
Total Cost: $430