How was your weekend? We knocked out our Pinterest Challenge project (check back Wednesday to see it!), we fixed a few nagging things around the house. (Our front door finally shuts/locks without jiggling the handle and shoving the door with your shoulder.) Unfortunately our doorbell still isnt working, but you cant win em all. Any doorbell experts out there that want to lend a hand?! (and/or any leads on where to buy Victorian Twist Doorbells?)
We have finished our tin ceiling project (full reveal tomorrow, I promise) but first I wanted to talk a bit about prepping the tiles for installation.
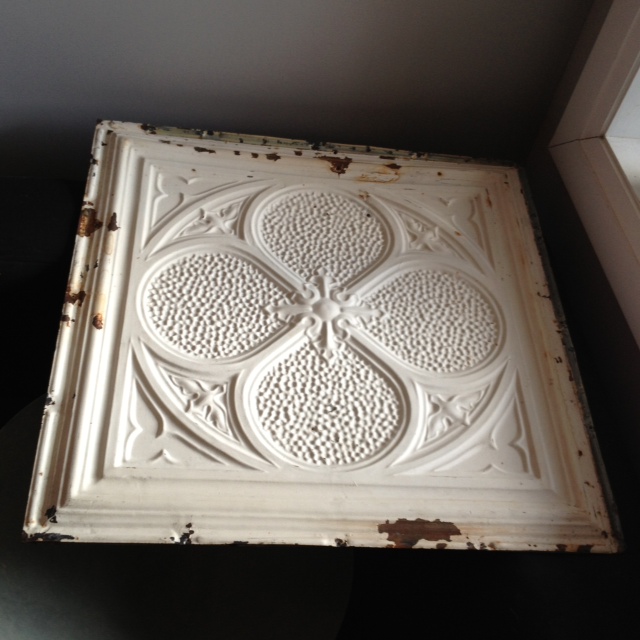
Our reclaimed tin tiles are 100+ years old, and covered in paint (which is most probably lead based paint.) The paint on our tiles had over the years seen some wear and tear. Some of the tiles were chipping, and the paint flaking off. Now the last thing you’re going to want is flaking lead paint falling from your ceiling, babies and puppies eating it and growing two heads so prep is important. (although two headed puppies would be cute)
*This is what WE did, we’re not experts, so please don’t take our story as gospel. Lead paint is a serious toxic substance, so ensure you contact your local government for how to safely handle & dispose of lead paint, and seriously consider calling in the pros*
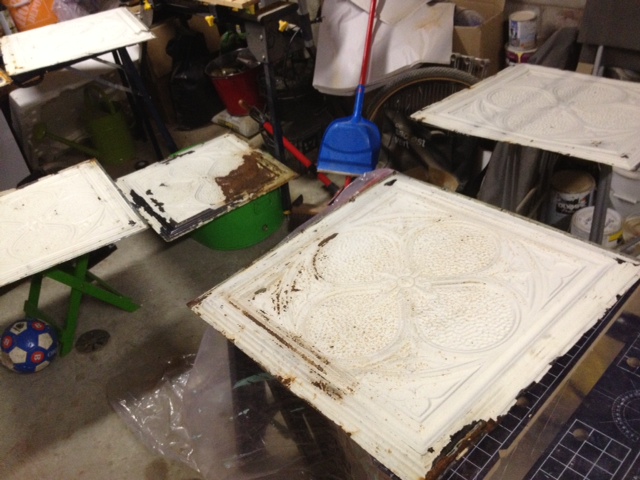
To curb loose paint falling on heads, I took all the tiles to the basement, covered the floor in a plastic drop cloth, donned work clothes, heavy gloves, a respirator and safety glasses. I then proceeded to wire brush all the loose paint off the tiles. It was a bit of hard work, but worth it. I brushed quite aggressively ensuring all the loose paint came off. This process took a solid few hours. I then carefully folded the drop cloth in on itself, ensuring all the flaked off paint was trapped inside. I then sealed the drop cloth in a garbage bag, and its ready to head off to our city’s next hazardous waste drop off day. * DON’T PUT IT IN YOUR REGULAR GARBAGE! Lead = toxic! *

After the tiles were wire brushed, I headed to the garage and gave each tile two coats of clear coat. I then laid them out on every single surface of the garage to dry. I even gathered things for them to sit on; styrofoam pieces, boxes, bar stools, patio furniture etc. It looked like a very strange game of True American without the booze (any other New Girl fans out there?)
After the tiles are dry, its time to install (but you still have some prep left!) Some more paint MAY fall off when you’re installing the tiles. They are thin metal. and when you nail them up, they will flex and more paint may flake off (even though you carefully clear coated them!) SO, to ensure you don’t have lead paint all over your furniture, cover your floor & all surfaces where any paint may land, with more plastic drop cloths.
When installing, ensure you are again wearing eye protection (safety first kids!) and heavy gloves. The tin tiles can be sharp!
Geeze this post has been preachy. I expect I will make quite the nagging mother should I ever have children.