Houseaversary – Closing Time

Last post of Houseaversary week! In case you missed it, be sure to check out our posts on how we almost missed out on even seeing the house, the offer process and the inspection. Today is all about closing day.

We used a quick closing date as a negotiating tactic in the purchase of our house. We closed in 30 days. Originally we planned to give our rental landlord two months notice, and have a month overlap to do some painting and move in at our leisure.  Our landlord however rented our loft to the first people who viewed it, and they were able to move in a month early if we wanted out. We agreed as it saved us a months rent! The only problem was that we needed to move into our house on closing day. We were only moving two blocks south of where we were living, and we were moving ourselves using borrowed truck & trailer from Mom & Dad and the vehicles and muscles of friends, so we figured we were flexable enough to roll with it whenever we closed. Our lawyer and bank got us to pre-sign all the paper work a week before the closing, and we expected no issues. We loaded up the trailer the night before with all the boxes, and sat around drinking coffee waiting for the call from our lawyer.

A pic of the boxes piled up in our loft ready to move (man have cell phone cameras improved it the last two years or what?!)

The first sign that the day was not going to go as planned was when the furniture store called saying that they had delivered our new mattress set to the storefront. (We had requested the LAST delivery of the day, not the first.) The furniture store left the mattress on the front covered porch of the house (they were in big plastic bags). So not only was our brand new mattress sitting on the door of the house we didn’t have the keys for, but no one was there, and it was raining out. We couldn’t even take the trailer there and pick up the mattress, cause brilliant me had said to load the trailer TO THE BRIM the night before. We figured closing was right around the corner, so my Mom & Dad headed down there with the truck & trailer to park out front and make sure no crack heads took off with our new pillow top dream machine. Speaking of the new mattresses, the furniture company delivered them but not the new bed frame…so a very agitated Kristen spent several minutes bitching pleading her case to get them to pick up another frame from the warehouse in Brampton and deliver it that evening so that I would have a bed to sleep on (I was not going to put my brand new mattress on the floor thank you very much!)

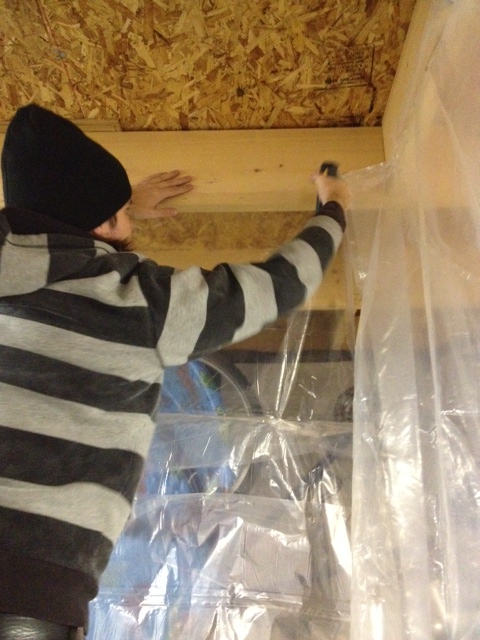
Then I started to get antsy. I called and pestered our lawyer, who informed us that there was a problem with the sellers banking info. Apparently the seller wanted our bank to split up the money and send it to several different institutions. Our bank said hell no. If they needed that done, the money should have went to the lawyer in escrow and been split up by their lawyer. It wasn’t our banks job. So we waited, and waited, and waited some more… After lunch time rolled around I headed down to keep my parents company and keep watch while they stretched their legs and walked to a local coffee shop to get a cup of coffee and use the loo. Finally at about 4pm we got the call that we could pick up the keys. The problem now was that our lawyers office was smack dab downtown, and it was now RUSH HOUR. It took El Granto over an hour and a half to get down there, get the keys and get to the new house. Where it promptly started to really rain. Luckily we have amazing friends and family who lugged, and carried, and go soaked to the bone. We took a pizza break around 9pm, but didn’t make the final trip until almost midnight.

Holy Crap we have a lot of stuff

Then of course we needed a place to sleep…Exhausted and sweaty/rained on I insisted that we assemble the beds for both El Granto & I and my out of town parents who had come to help. So we allen wrenched and bolted, and eventually had beds built. At about that point in time we realized that we didnt have either a shower curtain rod not a bath tub stopper, so no one was even getting a nice hot shower that evening. We crawled into bed, and were promptly woken at the crack of dawn by the lack of curtains in the whole house.

So lessons learned kids: Dont move on the day you close. Hire movers.  Don’t get furniture delivered on closing day. Label each box with not only the room its headed to, but whats inside it. Buy copious amounts of liquor for drowning your stresses. Make sure you have window coverings, a shower curtain and remember where you packed the coffee maker. Those are the keys to a smooth move.

Houseaversary – Inspection

Day 3 of Houseaversary week! Today’s post is about the inspection.

As you may know, El Granto & I (and the Storefront of course) appeared in an episode of Mike Holmes’ TV show Holmes Inspection.

The show Holmes Inspection is all about how a home inspection failed the home owners in some way. This is absolutely the case in our story. Did we forgo an inspection? Nope. Did we hire a cheap company that we found on Craigslist? Nope, we went with one of the most reputable (and NOT cheap) companies in the city.

Then what went wrong? To be honest, we thought we’d done everything right. We hired an inspector we trusted. We had worked with him before on a house we previously put an offer on. That offer was conditional on inspection, and we walked away from the house when our inspector found termites and a toxic heating oil spill. So what went wrong this time? I think we were all fooled with how nice the house looked. We walked through the house with our inspector looking at everything with him (except the roof). We both have handy parents, and are not house stupid. We knew to look at the windows, furnace, hot water heater, support beams in the basement, electrical etc. We also asked to see the building permits, and we checked with the city that assured us they had passed all their inspections and the permits were all closed. We looked at the architectural drawings, and read the extensive report the Home Inspector gave us. It stated a few things, but here were no big issues. The house looked great, and all the renos appeared to be done very well.

We signed back our purchase agreement and removed the inspection clause, and officially bought the house. We moved in a month later.  I wish the story had ended there on that happy note. What the inspection missed was asbestos wrapped ducts, a poor hvac job, some shotty plumbing, illegal venting, a brand new dishwasher that didn’t work, a stacked washer & dryer that were not attached to each other, lead pipe in the basement, a leaky sink and a very leaky skylight, roof and window.

What would we have done differently? We would have checked each and every working item in the house ourselves. We would have looked in duct work, turned on appliances, furnaces, hot water heaters and ran every single tap in the whole house. We would have looked for wrapped pipes and ductwork in the basement and paid for an inspector who had an infrared camera and who was willing to look at every single detail of our house. The BIG thing we would have done differently was head up on the roof along with the inspector. Photos can be deceiving. In pictures our roof looked okay, in reality the skylight had its own chimney and there was probably 20 different patches of roofing material over the roof. Do I blame the inspector? He couldn’t possibly have known about all those things, but he did miss a few clues that the reno’s were not done so well. Who do I really blame? The previous homeowner who COVERED UP THE PROBLEMS and the city inspector who passed the work. There was an HVAC permit, so why did my asbestos wrapped ducts get missed? How did no one notice that my dryer vent connected to an old cast iron plumbing stack to the roof? I also blame ourselves, we got caught up in how nice the reno was as well. Next time I will go into an inspection like I am adopting a stinky dog at the pound, and want to make sure he doesn’t have fleas before I bring him home.

A view in to our home during the renovations (from next door) to fix all the problems with our house

So my best advice? Have a home inspector you trust long before you put in an offer. Do your research, and take a good hard look at the house. I mean all of it. Take out the drains and look into the pipes. Stick your head in cold air returns, bring a tissue to test the force of the furnace in every room. Follow your gut and your nose. Does anything smell moldy or musty? And look at everything in that basement. Does the plumbing look like it was done by a pro? Or does it have terribly messy joints? Does the electrical look like a rats nest or is it all neat and tidy? I have learned that the contractors that do things right usually care to make it look nice as well. They are proud of their work.

Good luck on your inspection, and I really hope you don’t end up like us!

Houseaversary – Almost Didnt Happen

This week marks the anniversary of closing on our house. This week I will share with you with some of our house buying ups and downs. Today’s topic is about how we almost didn’t go see the house at all.

The Storefront you see was on the walking path to El Granto’s work. Every day he walked past the house and he knew exactly which one it was when I sent him the listing. He said. “NO, that place is a dump, we’re not going to see it”. I said “What?! Look how nice the photos look!” And he told me to look it up on google streetview.

The house we were looking at was the one on the left with the brown front

Eeek. That DID look pretty bad. Then El Granto dropped the bomb that for the last year or so it had been boarded up, and was covered in errant graffitti. Double Eeek.

But…this was the pic on the listing:

See…it didn’t look anything like a graffiti covered boarded up shack…

El Granto still insisted it was a dump, and we had been through a lot of dumps lately. This was just weeks after we had viewed a hoarder’s house and a moth ball laced home that we couldn’t even breathe in…

But I persisted. The house was right by the subway and we had to meet our agent at the subway anyways. Why not just schedule it as our first viewing and we would quickly pop in? El Granto grumbled about it being a waste of time, it only being 12.5′ wide, and on a main street etc. To get me off his back he gave in, and we had our agent schedule a viewing.

I got to the viewing late and I walked up to the front of the house to find it looking just as pretty as the listing pic. No graffiti, no boarded windows, no hobos.  I opened the front door to find a BEAMING El Granto. He looked like a cat who swallowed a canary. I quickly did a tour of the house to discover that holy crap, it was great! A brilliant use of space, the rooms were laid out just how we would have done it, and it had a nice new kitchen and bath. A garage, a yard for future dog, and a big basement for storage. It also didn’t appear to have any squatters, dead bodies nor did it appear to be hiding Jimmy Hoffa. This was the best house we’d seen in…months. BUT it was over budget. It was 5k over our max cap. Our recently (but reluctantly) raised cap. AND it was beautiful, so we figured it would go for over asking. So we didn’t get our hopes up, and moved off to our other scheduled listings that night (which were mostly hell holes BTW).

That night all we did was rave about the house, and debated putting in an offer, but the more we raved the more we worried that we’d hyped the house up too much, and that our memories were failing us, and it wasn’t as great as we thought it was. So first thing the next morning we emailed our agent and got her to schedule us another viewing that night.

We hustled to the showing right after work, and damned if the house wasn’t BETTER than we remembered it! We started freaking out, and decided right then and there that we needed the house…

Stay tuned! Later this week I will post about the buying process, inspection, closing & moving.

Under the Weather

Hey Kids! Just a quick note today to say that posting and projects may be a bit light around here for the next little while. I have been suffering some health issues that are really taking it out of me. My energy levels are non existant, and while I really want to be writing and project doing, my body has alas told me that aint gonna happen. I also will be heading in for a gaggle of tests at the end of this week, and will be even more under the weather. Please have patience with me, I will be back again soon I promise. I have a load of house buying info coming up next week in celebration of the anniversary of closing on our house, as well I have been working on some gift buying and DIY holiday projects. I shall be back in full force soon, until then I am going go get some much needed love and snuggles from my puppy & hubby. xox – Kristen Continue reading “Under the Weather”

Guest Room Art Project

We needed some art to flank the bed in the guest room. I wanted something fun and lighthearted, and to bring a bit of colour to our now grey and white guest room. I rummaged through my box-o-frames and found a couple black gallery frames that had seen better days. They were a bit bashed and mangled and were not looking their best. I decided to give them a bit of a facelift. I painted them a shade of pinky coral (although in hindsight I wish they were a bit more red). Then I set out to find some prints. As you may know we have a crazy Vizsla named Odin who I love to bits and have tons of photos of, but I didn’t want the guestroom to be a creepy shrine to my dog. Instead I set to look for Vizsla themed prints, that were not shots of  Odin. I found a great print of a vintage stamp from Hungary (where Vizsla’s are from) as well as a fun “Obey the Vizsla” propaganda style poster. I cut new mats for the frames with my mat cutter (a handy tool if you frame a lot!)

Here they are in the space. I like how they add a bit of colour to the space.

The guest room still needs a few more things. Accent pillows, some sort of art above the bed, a chair for reading or putting on your shoes, bedside lamps, a new light fixture, and some closet organization.

Adding a Transom Window

As you may remember I went buck wild a few weeks ago and cut a hole above our guest room door to make a transom window. I really need to get out more if thats I what I called buck wild…eep.

So I cut a hole in the wall, and then 4 days later my in-laws were set be rolling into my house for Thanksgiving. I know…who starts a project days before company is due to arrive and sleep IN the room where the project is happening… Dont worry, it wasnt such an epic fail. I may not have finished the transom in time, but it was presentable. Now after a few more days work, and some custom cut glass, I am pleased to reveal our new transom.

How how’d we do it?

  • We used a stud finder to generally figure out what was behind the wall above the door. We found studs on either side of the door, and one right in the middle above it.
  • We did our research, and found that building code in our area has doors framed with King Studs and Jack Studs and a Header, and that the cripple stud above the door was nothing structural. (which means we can take it out without having to reinforce anything else)
  • Using the markings of our stud finder, we drew straight lines on the insides of the studs to use as a guide for cutting.
  • We cut our hole using a drywall hand saw (or should I say I cut 1/4 of it, then wussed out and El Granto cut the rest…there are you happy you got your due Mr. Granto?)

  •  We removed the cripple stud with a combination of a reciprocating saw and a hammer.

  • We cleaned up our drywall ensuring there wasn’t any in our way for when we put casing on the transom hole.

  • We cased the window using 5/8″ mdf that we had laying around the house. It also happened to be the same thickness as our current door trim. We measured the depth of our transom hole and ripped some mdf with our circular saw to fit. We then brad nailed it in place.

  • We trimmed the transom frame with more of our 5/8″ mdf.
  • We made a little frame inside the casings to hold the window. Filled, caulked and sanded.

  • We painted two coats of our trim paint.
  • We measured our hole and got a piece of glass cut at an awesome local glass shop Snap Services.
  • We installed the glass with some silicone caulking and a couple glazing points. Now if you’re home owner with an old home you’re probably asking why we didn’t use glazing compound? Well it’s an interior window, and it wont be subject to direct sunlight or weather of any kind. SO, silicone will hold it in just fine (and keep it from moving rattling around when a truck drives by.) The glazing points combined with the mini frame we built for it will ensure the glass never moves.
Transom Painted
See how much light it brings to the hallway?!
Ta Da Transom!

SOURCE LIST:

Materials:
5/8″ MDF – Home Depot (scraps from our bedside table project)
CIL Trim Paint – Home Depot
Caulking
Custom Cut Glass – Snap Services

Tools Used:
Circular Saw
Mitre Saw
Brad Nailer
Caulking Gun
Paint Brush & Tray

Difficulty Level (on a scale of 1-5):

Two out of five

Total Cost: $10

Exterior of the Storefront

You’ve seen pics of the first floor of the storefront’s exterior, but what you haven’t seen is what the second story of our house looks like. That’s for one very good reason; its pretty ugly. Nah, I’m being mean to my poor house, its not THAT bad, but its not how we’d like it to look.  Continue reading “Exterior of the Storefront”

Knobs as Hooks

Girls come with a lot of accessories. We have purses, shoes, scarves, jewelry and a plethora of other crap things. This is often why we require so much closet space to store it all. Most of my rarely used handbags and shoes are packed away, but my often used purses, scarves and shoes need to be close at hand, and thus can be kind of a mess.

To get them out of the way, yet keep them accessible I decided to hang some knobs inside our new master closet to hang my favorite accessories.

The problem with knobs is that they are meant to be screwed into a cabinet. This means that they have what you call machine screws (screws without a pointy bit) to attach them to the cabinet. They screw through the back of the cabinet into the knob. This makes them impossible to attach to a wall without some DIY’ing.

Here’s what you need to do. Take your knob screws out to the garage and cut off the heads of the screws using a  saw with a metal blade. This now makes them headless screws (which means they can be screwed into things on both ends. )

Knobs

Head back inside wielding drywall anchors and a drill. Attach your wall anchors into the wall where you want your knobs.

Drywall Anchors in Wall

Then simply thread your now double sided screws into your knobs and your wall anchors. Ta Da! Knobs on a wall.

Knobs Screwed into Wall

Now hang your accessories, and get your nagging husband off your back.

Wheres my white Coach Purse? Hung up of course!
Knobs Holding Accessories

You can easily do this with all sorts of knobs, for holding towels in the bathroom, coats at the front door, or even the dog’s leash handy but out of the way.

SOURCE LIST:

Materials:
Saata Knobs (6 pack $1.49) – Ikea
EZ Ancors – Home Depot

Tools Used:
Hack Saw
Drill

Difficulty Level (on a scale of 1-5):

One out of five

Total Cost: $1.50

Making a Paint Booth

When I need to spray paint a small item (knob, handle or vent cover) I usually put it on some cardboard and head out into the alleyway behind our house to paint. I then bring it inside our garage to dry. However when the weather turns cold, or when you’re painting a big item, that may not be an option. Such was the case this past weekend when we needed to spray paint a rocking chair we were working on. It was BIG and I needed a lot of space to paint, which mean a lot of over spray. We decided to set up a temporary spray booth in our garage. Which El Granto proceeded to call my Dexter Kill Room for the entire weekend. He even posted this pic on facebook with the caption “Built Kristen her own Kill Room”. No wonder no one wants to come over for dinner…

So here’s how we did it. I bought some heavy weight plastic drop sheets. We stapled them to the ceiling rafters in our garage in a 6’x6′  square.

El Granto Stapling up Drop Sheets
Inside the Spray Booth

We laid down a canvas drop cloth on the ground (which was an old wall hanging in our loft!) And using plastic clamps, shut the sides.

Clamp Holding Sides Shut

I left one side open for easy entry to the spray booth. We moved in our project.

Ready to Paint

After I finished painting (wearing a mask of course!), I opened up the sides of the spray booth and let the paint dry (note the garage was getting a bit cool by then, so to ensure my paint dried right I put a heater on to warm up the garage a bit.)

Chair Painted

The next day after everything had dried, we took down the plastic, folded it up and its ready to go for next time.

SOURCE LIST:

Materials:
10×25′ Heavy Weight Plastic Drop Cloth – Home Depot (note, the so called 25′ drop cloth was less than 20 feet long! We didnt have enough plastic, and had to use an old drop sheet we had laying around… insert grumpy face here.)

Tools Used:
Scissors for Cutting Drop Cloth
Staple Gun

Difficulty Level (on a scale of 1-5):

One out of five

Total Cost: $8