
Watching grass grow isn’t the most interesting topic in blog land, but hey, at least it’s not another mason jar project.
Pergola Progress
Not quite sure where this week went. Last time I checked it was somewhere around Tuesday, and then BAM! Friday!
Hey, I’m not complaining, but I sure do wish I got more accomplished around the house this week.
Here is what we’ve been up to.
The pergola started creeping off paper and into fruition. We made a stop at our local lumber yard and picked up all the wood, including the 12′ pieces. Thanks again goes to El Granto’s Mum and Dad for the car loan.

After some demolition of the current deck’s fence/top posts, a big shout out goes to the previous owner for stripping Every. Single. Screw he used to assemble the deck. Really awesome work… A sawzall with a nail cutter blade later, and a pry bar, and we were rid of them, busted screws and all.
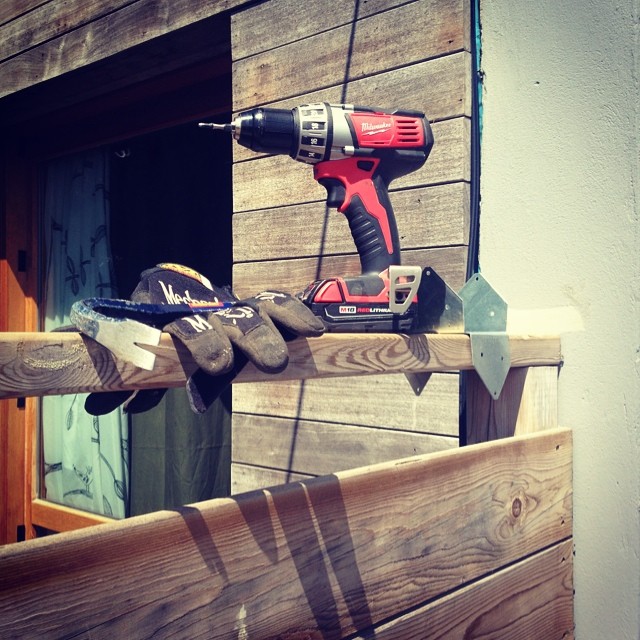
With demo complete, we started building anew.
The new posts were measured, kerfed (to go around the ledger on the wall), and up they went.
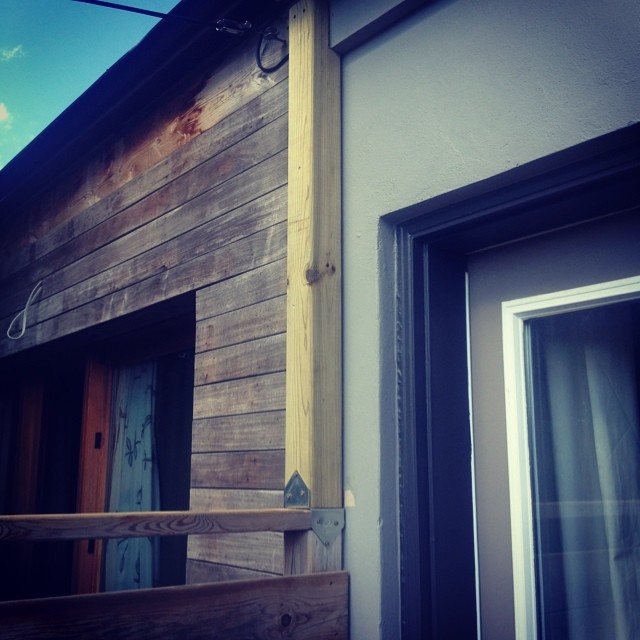
Then the front and side beams followed suit.

This was a bit of a scary ladder moment (14′ drop to our new concrete walkway with hands above head holding a 2x6x12), but El Granto took over for me, and got it done.
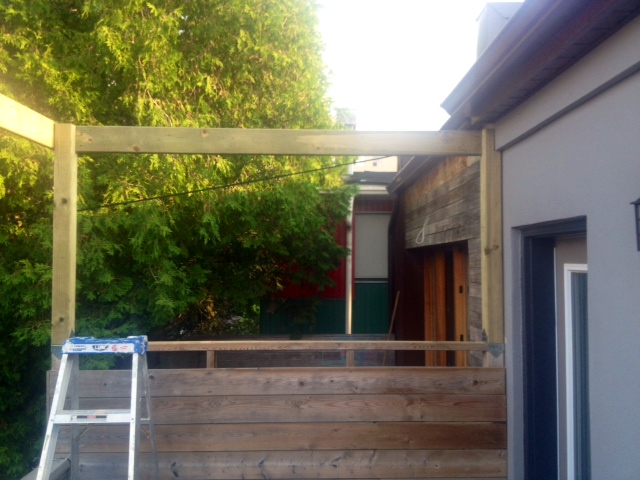
Decent progress, but still a ways to go. We have to add the cross beams, which overlap each other, so some careful math and half lap joints are in our future. Then we have to add some more fence boards. This kinda sucks. As our new pressure treated lumber is greener than a 19 year old after St. Paddy’s Day and our current fence/privacy screen has faded nicely. I know you’re going to lay into me about staining the deck. That is a ton of upkeep, and I’d like to ride the bare wood train as long as we can. I bought some Cabot deck wash, so here’s hoping I can brighten up the old bits a little, and that those new PT boards will fade quickly.
Back to the pergola. Our plan for the is to have a large open pergola like our inspiration:
This means not a lot of cross beams for shade, but what it does mean is that we are adding a fabric shade canopy.
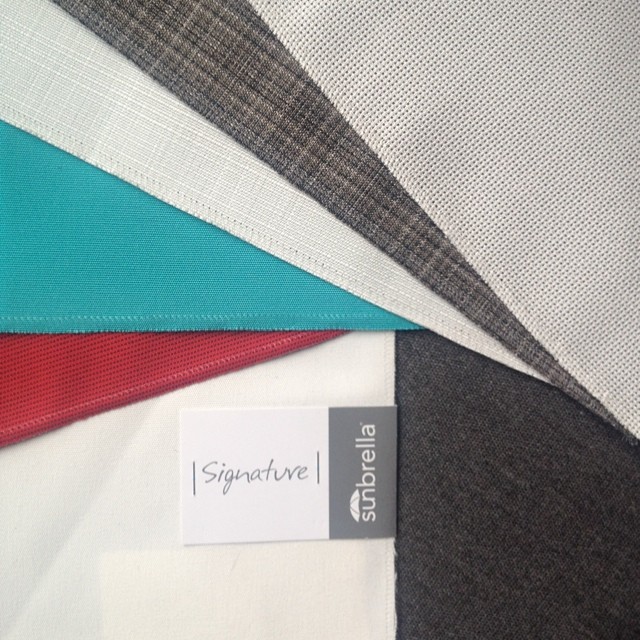
We selected a Sunbrella sheer outdoor fabric for the canopy, Shadow Snow. It will filter out the harsh sunlight, but not block it completely. The last thing we wanted to do is remove all the beautiful natural light from our bedroom. The canopy will be loosely draped over the frame, and removable for winter. (Thinking corner grommets and hooks on the top of the pergola.)
Speaking of fabric. Our whole Sunbrella order arrived this week, and I’m super stoked.
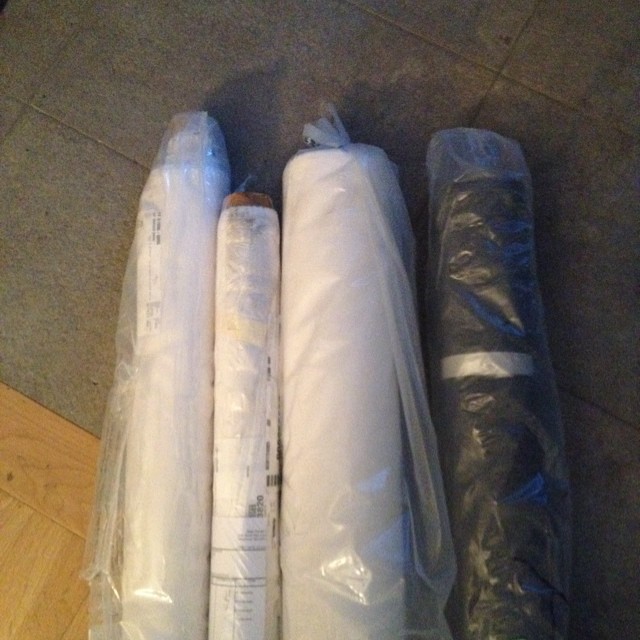
Looks like I’ve got a hell of a lot of sewing to do! Anyone want to come help? I’ve got two machines! That or I teach El Granto. I think that’s a damn good idea actually! He’s a great hand sewer. He’s the king of sewing motorcycle patches to his denim jacket and vest. No, not the gang variety. We’re friendly neighbourhood bikers, not Sons of Anarchy bikers.
Where was I? Busying myself with projects apparently. Looks like we’re going to have another full weekend.
P.S. It was my birthday yesterday, and my awesome husband baked me a gluten free cake. The dog was a bit jealous, but man was it good. Best. Husband. Ever.

Have a great weekend, and follow us on Instagram to see what we get up to!
The Time Mike Holmes Fixed our House
I completely missed our Blog Anniversary last week!
On July 5th, we officially turned two!
I had plans of a whole Blogaversary week with my fave stuff, behind the scenes etc, but heck, summer happened, and so did work in our backyard. However, I will give you one flash back post!
I was talking to a good blog friend a few weeks ago, and mentioned that my lifelong dream was to have my own show on HGTV, and that we had loved being on Holmes Inspection. She gave me the WAIT WAIT WAIT, you were on HOLMES INSPECTION? And I was all like “yeah dude, Mike Holmes fixed our house! It’s on my blog!”. Then I realized I posted about being on the show on my 2nd ever blog post. Back when…oh about two people read the blog (Thanks Moms!)

So I said to myself. “Maybe my new readers don’t know about the time I cried on international TV, and Mike Holmes saved our butts”.
Here’s the scoop. We moved into our place, and had big problems from day one. We were in over our heads, and had spent ALL our money on buying the place. We had a home inspection (from a VERY reputable company) but a lot of things were missed.
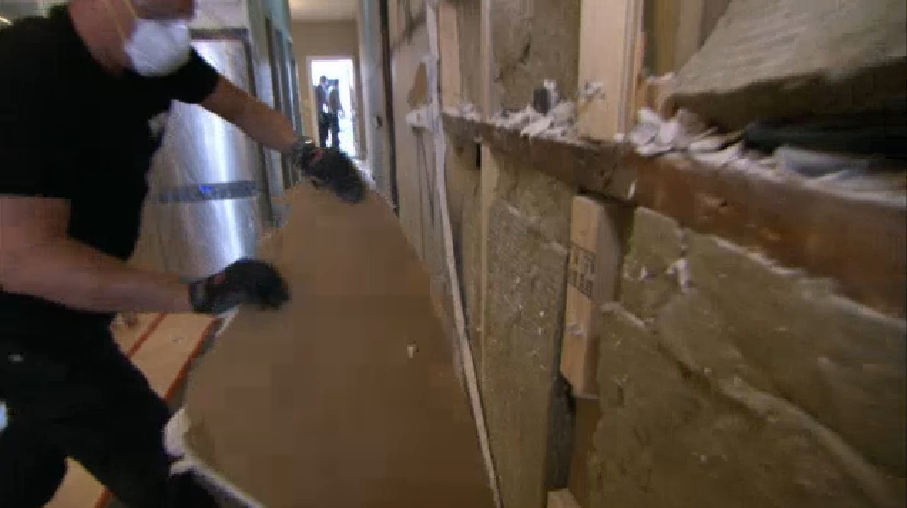
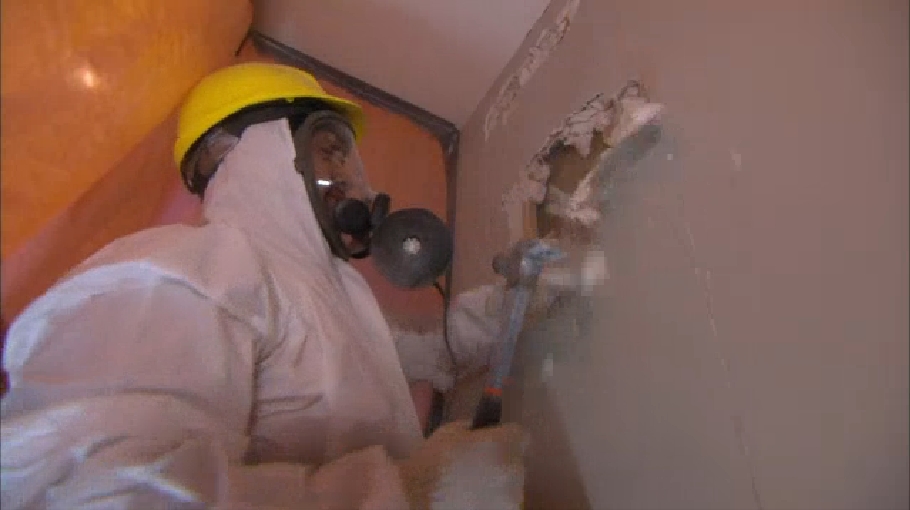
Mike, Damon & the team stepped in, and fixed all the problems hiding behind the walls of the Storefront.
I wont spoil the show for you, so head on over to HGTV and give it a watch!

For my American & International readers, I don’t think it will let you watch it on the Canadian site, and I do not see whole episode listed as streaming on hgtv.com. Keep an eye out for our episode on your local listings, or give it a google and see if you can find it.
Our Episode: Holmes Inspection Moisture Madness.
FAQ
We get a ton of questions about the show. Here are answers to your most asked questions!
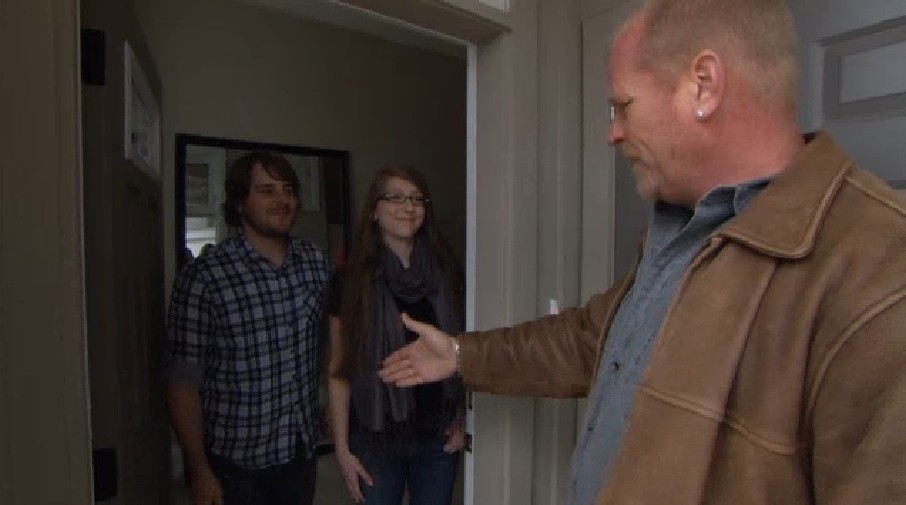
Whats Mike Like? Exactly as you see him on TV! He is kind, friendly, funny, and cares sooo much about quality construction, and helping people! The first time we met him was literally when he knocked on our door in the show. Nothing is scripted. He is genuine, and it was awesome to have Mike and his team come to our rescue.
Did we have to move out? Yep! We had a lot of construction going on, and some safety concerns, so we moved out for the duration of the show. We stayed at Grant’s Mom & Dad’s place, and the only time mid construction that we came back to the house was when you see us come back in the show.
How did we get on the show, and why did we apply? It was Christmas time, the house was falling apart around us, and no contractors were returning our calls as it was the Holidays. Defeated, we were sitting on the sofa watching TV, and a Holmes Inspection marathon was on HGTV. El Granto turned to me and said we should apply. I said, oh our house isn’t THAT bad, is it? He said…well, yeah it is. We emailed them our story via their casting call on hgtv.ca. I drafted the email, read it back aloud to El Granto, and burst into tears, as yeah, it did sound pretty terrible when you put it all on paper. Our story must have been compelling, as they picked us!
When did the show air? It aired in September 2011, a week and a half before our wedding! Don’t worry, we still got married, although we did have to postpone our honeymoon, and never did get to go to Europe. Instead we took a short tropical honeymoon six months later.
Did you have to pay? How much? Sorry guys, we’re not discussing anything about money. That’s private!
Would we do it again? OF COURSE! They saved our butts! We owe Mile & the team a world of gratitude and I don’t know where we’d be without them. We now have an awesome home, that we are loving putting our own stamp on.
Let me know if you have any more questions, and I will do the best to answer them.
Have you ever be on TV? Have any television aspirations? What did you think of our episode?
Sore Muscles & Dirt
The pathway & lawn are done. I may have killed El Granto in the process, but they’re done.
No really, El Granto is a wreck. I think the sheer amount of sunlight, heat & heavy lifting was too much for the poor Englishman. He’s got a bit of heat exhaustion, and is spending the day in the a/c topping up his fluids. I feel like a bit of a jerk, cause my girly muscles couldn’t really help him as much as I would have liked.
Here is what we accomplished, although it doesn’t look like much, it was an absolute ton of work.
Recap from last weekends progress: We took up the path, laid down new rock bedding, and re-laid the pathway, this time with the concrete pavers upside down.
Now, here’s what we did this weekend:
We rented a rototiller, and tilled the whole lawn. Yep, the whole thing, even where we had bits of grass growing. We wanted a fresh clean start, and to get our really packed down lawn a loosening up, and re-grading.
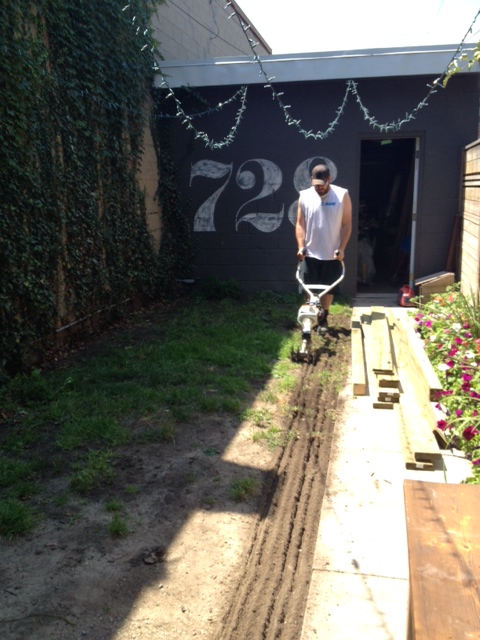
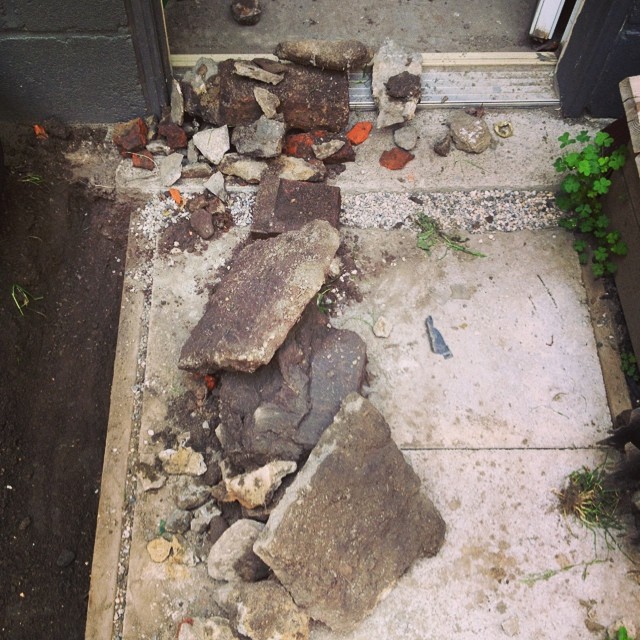
While we were tilling, we ran into a few bumps err rocks. As I started to dig further to get the rocks out, we realized the back half of the lawn was filled with rubble, and then topped with a tiny bit of topsoil. We’re not talking a few stones, we’re talking a bunch of whole bricks, chunks of concrete and other junk. We dug them all out, and bagged them up. They will go out with our trash in our Bagster in the next week or so.
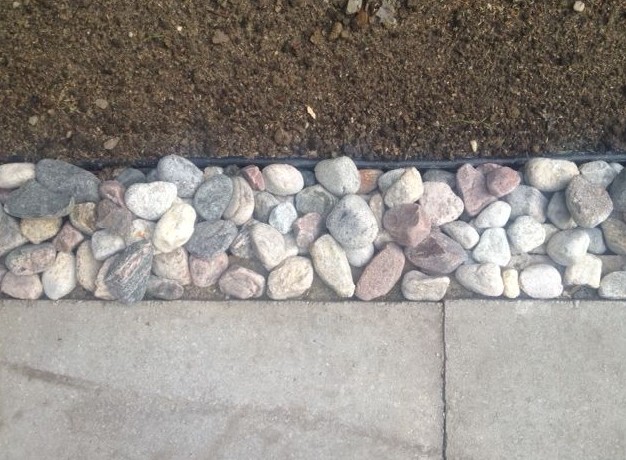
After we tilled and removed the junk, we dug out a trough beside the pathway.

We edged it with plastic edging, and lined it with landscaping fabric.
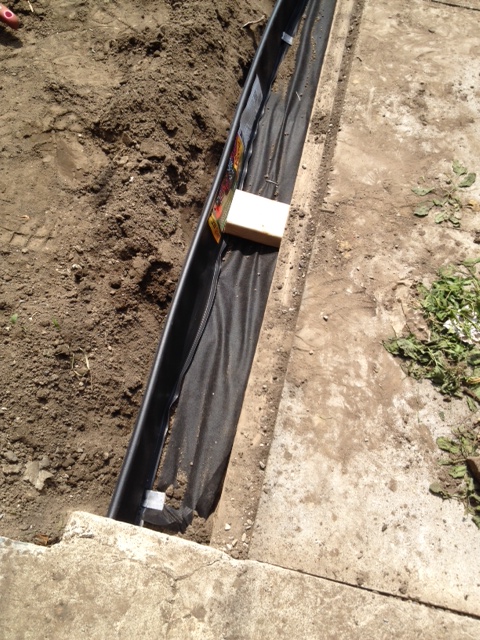
We then filled the trough with large river rock. This will not only be good for drainage, but it also gives a nice custom look to the otherwise cheapo concrete path. Like putting lipstick on a pig. You know its still a pig, but at least you’ve got something else to look at.

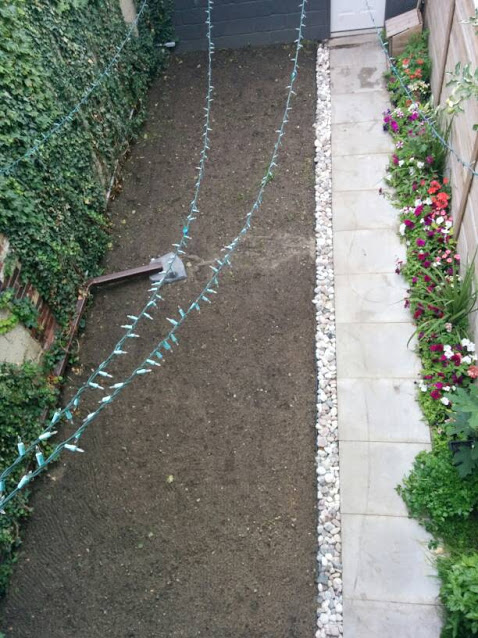
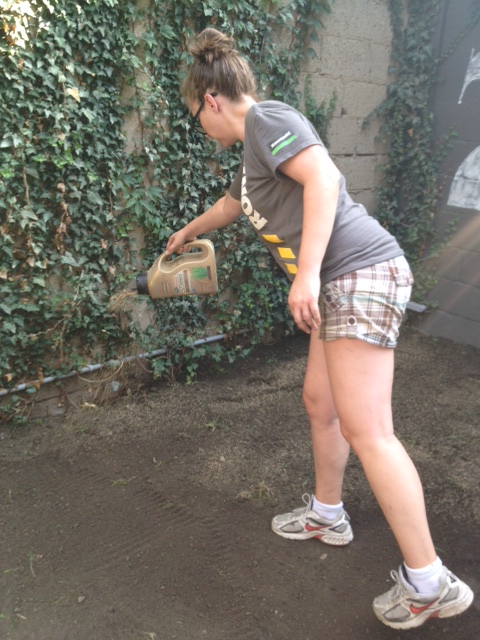
After the rocks were laid, we raked and re-graded the lawn, and seeded it. We used a combination of sun/shade grass seed and white clover, and used an old EZ seed container we had laying around to distribute the seed.
After we seeded, we raked over the lawn, and have been watering perpetually ever since. It isn’t ideal to seed in July, but we will try our hardest to make this grass & clover grow! For the next couple weeks, Odin is blocked from the yard, and we will have to do walks for all his dog needs. Hopefully this will actually give the lawn a shot to get going!
A full reveal is a few weeks away. We’ve gotta turn this dirt patch into a lawn. You can follow along on grass watch 2014 on Instagram. Cause you know, watching grass grow is super interesting. We know how to party round here!
We also got started on our deck pergola. An update will come on that later this week!
Excuse me while I go mow down on copious amounts of ibuprofen.
Bring It, Weekend!
I am counting down the minutes to the weekend. This one is going to be EPIC.
We have El Granto’s Mum’s SUV and a very long to-do list. When I say very long, I really mean it. We’ve started tracking our home to-do list, broken down into tasks on a project manager website called Trello. Our Backyard & Balcony lists are almost off the page. It gives me anxiety just looking at them.
However, we are making some progress! (even above and beyond our progress here.) We made all our outdoor fabric choices, and I ordered all the Sunbrella fabric for the whole backyard. We’re talking new curtains, a daybed cover etc. As soon as the fabric arrives, we can get started sewing. Little secret… sewing was the first DIY I ever learned, and I almost went to school in Halifax for textiles. However, since we moved to the Storefront, I haven’t gotten a sewing machine out ONCE. Literally, I have not sewn a single thing in over three years. I hope I’m not too rusty, and I still remember how to make cording, and how to sew a zipper panel.
Here is what our weekend plans are:
Till backyard, and plant grass & clover seed.
Finish pathway.
Dig garden beds, edge and plant.
Buy lumber for deck pergola.
Build pergola.
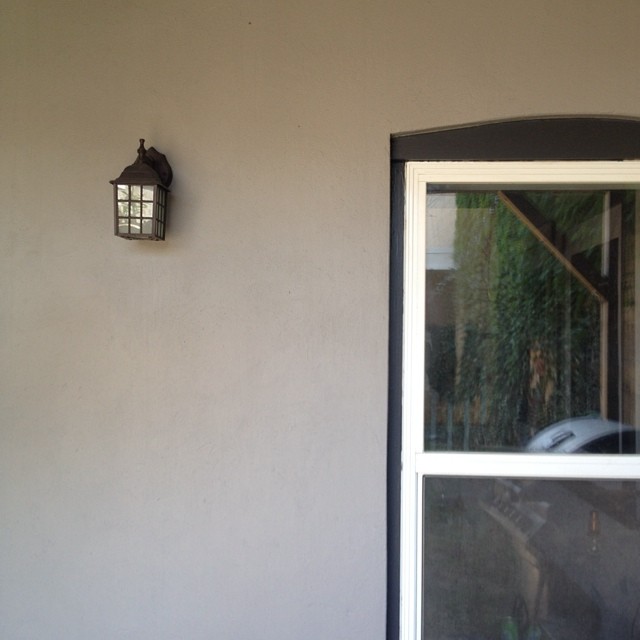
Buy & install new exterior lights.
Install new door hardware.
Paint Doors.
Wash deck.
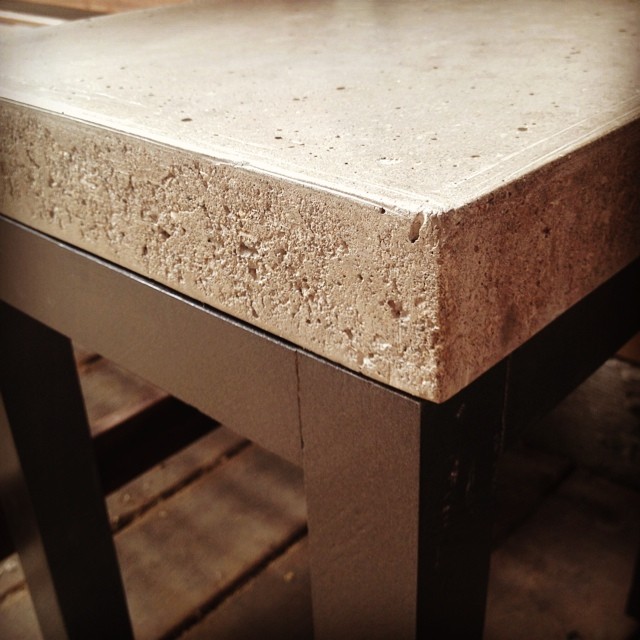
Finish this little outdoor side table project I started this week.
Bonus Project: We got a Bagster! This means we also hope to clear out all the reno debris and junk in the garage. [yeah, we still have reno debris from our kitchen reno, yikes!] We cant wait to get rid of all that junk.
Once the debris is out of the garage, El Granto can get to building a new work bench, and we can get permanent homes for some new tools we acquired over the winter (and we even added a few more new ones this past week.)
What have you got planned for the weekend? Wanna come over and lend us some muscle?
Wood Stained Wine Glass Holder

I received a sample in the mail the other day from Minwax. It included a couple packages of their wood finishing cloths, and a small piece of wood. At first glance the wood looked like an artists palette.
Backyard Progress Report
While I don’t yet have a stunning after shot of the backyard, we are making some progress!
Here’s what we’ve been up to the last few weeks:
We painted the back of the Storefront. This was a bigger task than you’d think, after scraping, caulking, priming, and two coats of paint, only painting in mornings so there would be no direct sun on the paint, it took a whole long while! Glad to have this one done.
We almost choose a door paint color, but then decided to get sample fabrics, and decide on all the colors at once. We will be making new outdoor drapes (this time out of real outdoor fabric instead of drop cloths.) We will also be making a nice permanent cover for our outdoor daybed, again using the super durable and water repellent fabrics from Sunbrella.
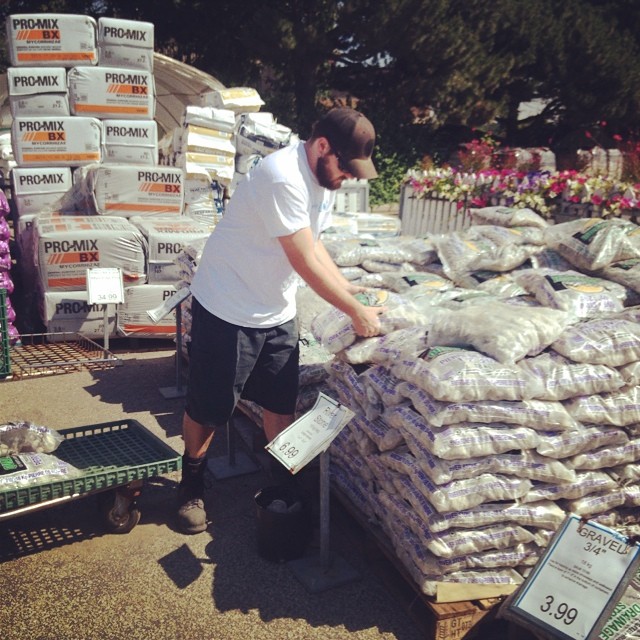
We borrowed Grant’s Mum’s car, and loaded it up with HPB (High Performance Bedding), a cool rock product that is the perfect bedding for pavers, and requires no sand or compacting. We purchased 12 cubic foot bags of it from the super nice & helpful guys at Van Beek’s Garden Supplies and lugged it home and into the yard.
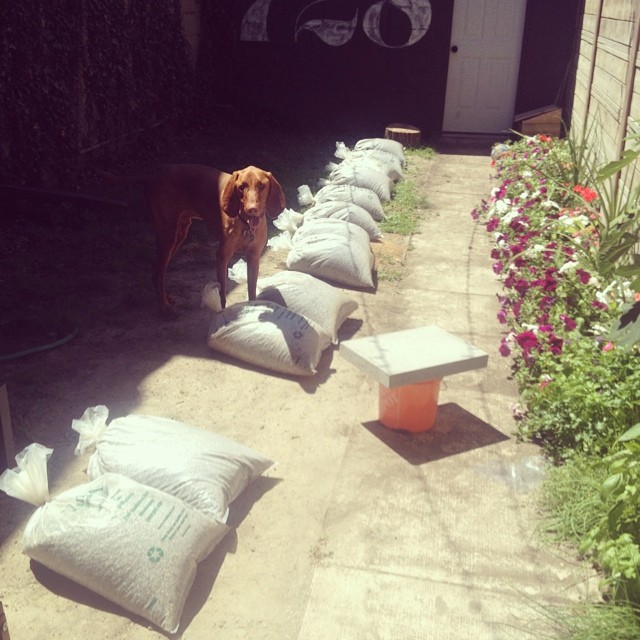
We then pulled up the old 30″ x 24″ pavers (man they we’re heavy!), laid down the rock, screeded, and laid the pavers back down. We really wish we had the budget for new pavers, but the most important part of this job was to fix the drainage problems.
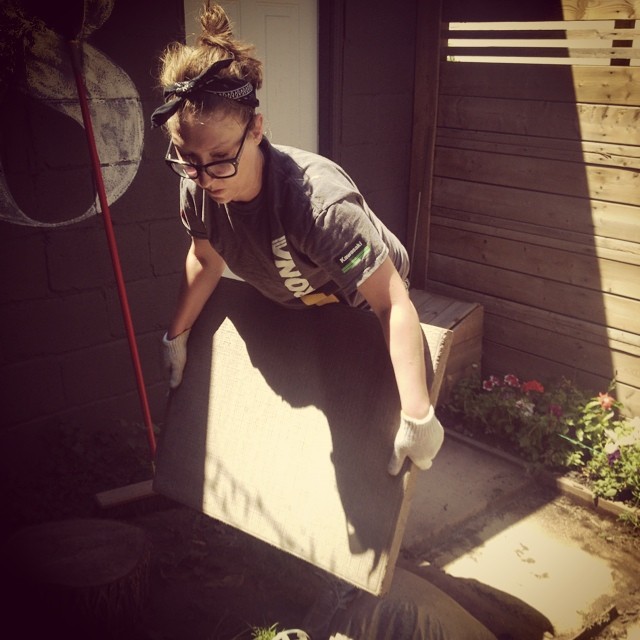
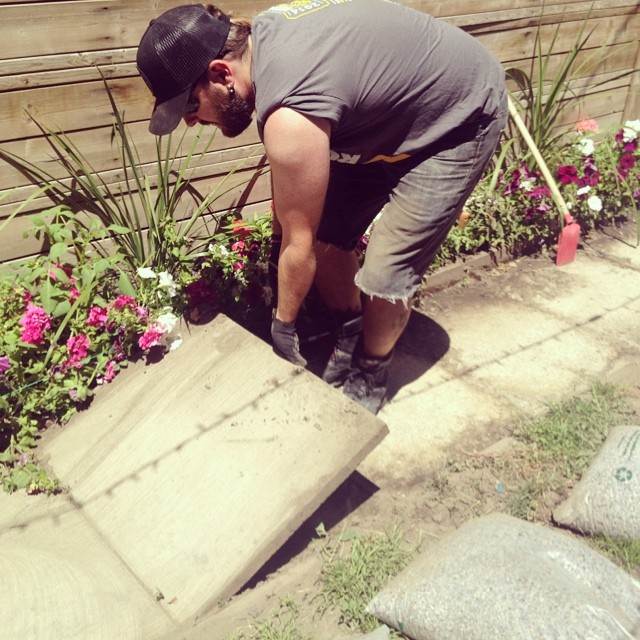
We did have one ace in our sleeve however. We flipped over the paving stones, so instead of having a fugly textured concrete pattern, they are now just plain concrete. A lot more industrial looking, and surprisingly a big transformation. I’m not going to spoil the after yet, so you will have to wait a bit longer to see what they look like. The most important thing however is we had a huge rain storm last night, and there was ZERO lake in the backyard! No dirt on the path, and no puddles! Big win for the Storefront.
As much progress as we’ve made, we still have a lot to do. Whats left on our list?
TO DO:
- Till up the grass, create and edge garden bed by the ivy, top dress lawn, and seed with clover and grass.
- Get & install new exterior lights. I have my eye on these.
- Get fabric, and sew new outdoor drapes.
- Sew cover for outdoor daybed.
- Make 2 new outdoor side tables.
- Paint doors.
- Add some more flowers & landscaping.
- Replace door knobs.
ANNNNNND we found another project to add to the list. A few weeks ago we were out at a rooftop patio downtown, and they had this draped pergola shade structure.

How perfect would that be on our upstairs deck? Yep! Add another project to the list.
- Build badass shade pergola.
So what did you get up to on the weekend? Any backyard projects?
Removing Great Stuff Spray Foam From Hair/Dog Fur.
Having a dog is akin to having a gaggle of small children. You turn your back for one second, and they can manage to ruin more stuff than the Tasmanian Devil.
Enter last weekend, when on a whirlwind (pun intended) of home maintenance, I was using Great Stuff expanding foam to fill in some holes on the exterior of the Storefront and the garage. The garage door had quite a few gaps between the frame and the cinderblock, and I was filling them up with spray foam to keep out any unwanted bugs, creatures, neighbors, as well as prep the garage for insulation.
I had sprayed one whole side of the door, and was up on the ladder spraying the other side when I heard El Granto exclaim “ODIN! What are you doing?!” His voice had an unequivocal edge to it, so I instantly knew it wasn’t a “did you poop in the alleyway” kind of problem. It could only mean an actual, legitimate, serious problem. I looked down and Odin was on the end of his leash, trying to make his way into the alley. He had pressed himself against the garage wall in an effort to see around the corner (and chase squirrels I’d imagine). In his plan of escape he had pressed himself so closely to the wall, that he had in fact rubbed his face, ear and neck into the wet expanding foam.
If you have seen Odin before you will know that his giant velvet soft ears are his crowning glory. His pièce de résistance. His lady killer ears. Those things are so big that Odin is anything but breed standard Vizsla. They are the thing we fell in love with when we met Odin as a puppy.
His right glorious velvet vizsla ear was now covered in molten plastic.
We panicked. Would it burn his skin? Did he eat any? Is his hair going to fall out?
It was a Saturday of the long weekend, rushing him to a vet wasn’t the best option. We needed to figure out how to remove the wet foam before it dried and was (cue dramatic reading) stuck forever.
I ran to the Great Stuff container (cause I’m a direction reader) and low and behold it gives you clear instructions on of what to do if you get it on your skin. I figured dogs are close enough to humans. They have skin and hair errr fur. So good enough! Okay, all we have to do is “remove with acetone”. Acetone? Why would I have acetone? That’s not part of my standard garage chemicals. I mean I’ve got varsol and paint thinner, but acetone….not in the garage.
BUT wait! Isn’t acetone…nail polish remover?
I ran into the house yelling at El Granto to get the dog in the tub. He yelled back that water speeds the foam curing. I yelled back no water! I grabbed the acetone nail polish remover, and jumped in the tub (fully clothed in my maintenance/painting clothes). We got to work applying acetone to his ears gently with a cotton pad. While this worked, it wasn’t going fast enough. Eventually we just started squirting his fur with the acetone, and working loose the spray foam with our fingers. This worked much better.
We removed the spray foam from Odin’s skin and hair like it was a bad manicure.
After we were finished, we rinsed him off with warm water, and shampooed and conditioned him with his soothing oatmeal boutique dog shampoo. (Yes, yes I know, we’re yuppie dog owners who treat their dog like a child, I’m fine with it.)
By the end of it, there was clumps of dog hair littering the tub, a dog with bits of spray foam still lodged in his hair, and two very unimpressed dog owners. El Granto even had the foresight to snap a pic of the dog & I in the throws of foam removal. You can see the enjoyment in both our faces.
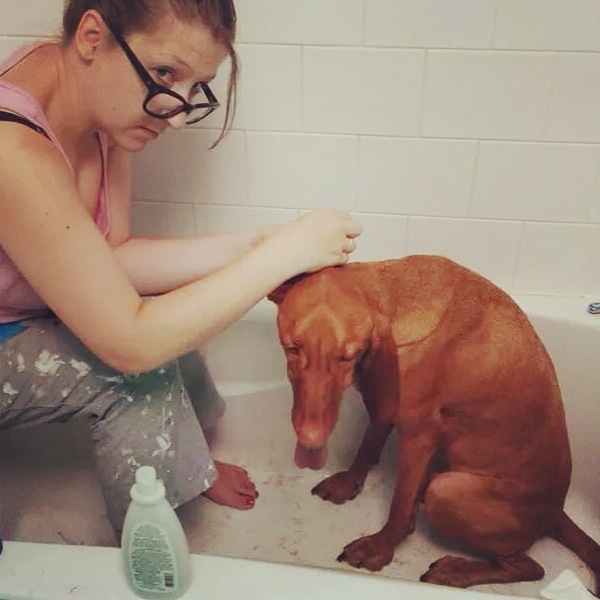
But Odin was alive, not burned or maimed, or missing an ear. The only evidence of foamagedden was the few errant bits stuck in his hair. He didn’t break out in a rash, have shortness of breath or do anything else scary enough to warrant a trip to to the 24 hour vet.
Shortly after his bath after everyone had calmed down he was again a happy pup sitting in the sun.

So there you have it. Use acetone (or acetone nail polish remover) to remove Great Stuff Expanding Foam from your hair or your fur. Hey, we’re not judging, that sweater vest of chest hair you’ve got going on could certainly be considered fur. And yes, I’m a good enough friend to not bring up your mustache or back hair.
Oh and don’t be stupid, call poison control if you get any in your eye, nose, mouth, or any other hole (again…not judging). Well…maybe a little.
Leaded Glass Storefront Window
Almost two years ago, I started adding lead strips to the storefront transom windows, to create a faux leaded glass effect. I ran out of lead when I was halfway through, leaving one window unfinished. El Granto even purchased me a new roll of lead last summer, but I had yet to get around to finishing the project. I often have trouble finishing projects. Once the project goes from fun to mundane, pulling the trigger on the last 10% is tough. I often find myself running onto the next project with full steam, and forgetting the last finishing bits.
Well this past weekend was finishing up projects & home maintenance weekend. From weed pulling and grass cutting to touch up painting, and yes that’s right, finishing the lead windows.
Armed with soap and water, windex and a broom, I headed out to the front of the Storefront and gave everything a thorough cleaning. The windows were washed, porch swept, doors and trim cleaned, and I even managed to clean out the leaf littered garbage room.
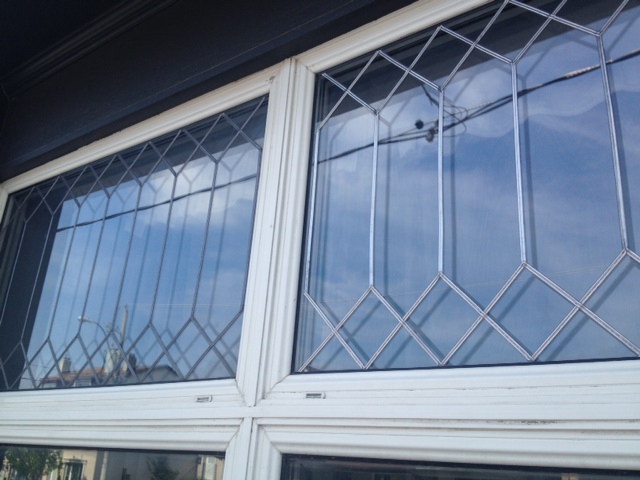
While up on the ladder washing the windows, I opted to get out my leaded glass drawing, a roll of Pebeo Vitrail Stained Glass Effect Self Adhesive Lead Strip, and finish the damn leaded glass windows. I taped my template on the inside of the window, and started measuring and cutting strips to length. I applied the lead strips starting with the long tall vertical pieces, then worked my way out from the middle adding the shorter criss-cross strips.
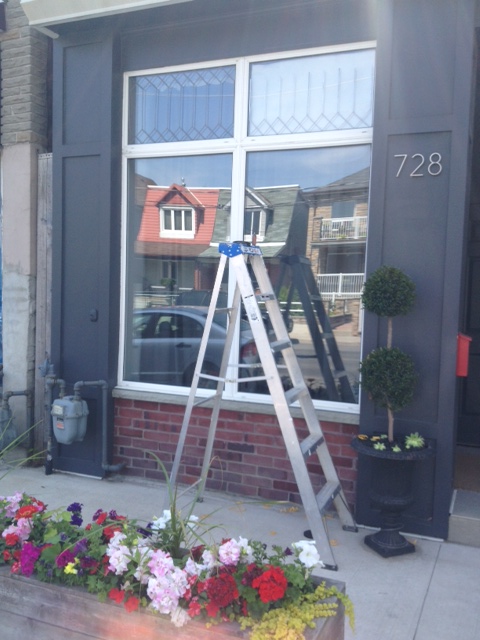
The strips are not very adhesive, and don’t really stay on the glass until you burnish them with the provided tool. This project would be a lot easier on the ground. Being up on a 8′ ladder applying the lead to the 12′ tall windows was definitely the hardest part.
All told it took me about an hour and a half to complete the project, and now I can finally knock it off my to-do list!

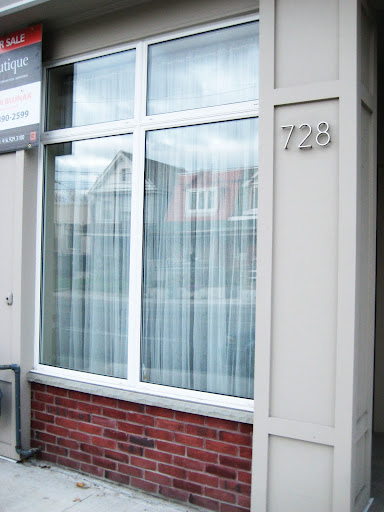
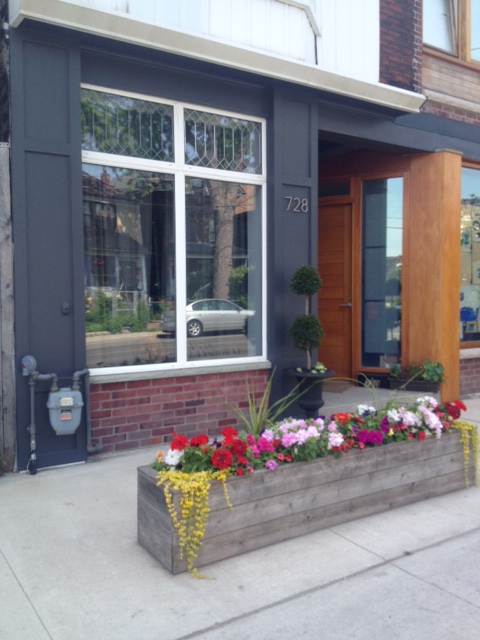
In fact, the exterior of the Storefront now complete!
BEFORE:
Here is what we have done so far:
- Built an 8’x2′ cedar planter box to soften the concrete front “lawn”.
- Painted the wood siding in a dark grey, and the door in a bright red.
- Added a new custom color mailbox.
- Made a custom door mat.
- Added address decal to the front window.
- Installed a new doorbell.
- Added a cast iron urn, and new foliage.
- Installed extra tall dark grey curtain panels.
- Completed the leaded glass windows in a regent pattern.
AFTER:
The only remaining tasks for the Storefront exterior are wish list items, that will likely never get done. We would love to remove the vinyl siding on the second floor, repoint and clean the brick, and have the window & roof overhang re-flashed. Would also love to install a gooseneck light above the house number. This would involve drilling through brick, cutting through spray foam, running new electrical, then patching everything up. So until pigs fly, I hereby pronounce the exterior completed!
P.S. I have had several comments and emails about the lead strips. You can purchase them online from Amazon, or from local art stores. We found ours at Curry’s art store on Queen West in Toronto. The price varies, but is usually about $25-30 per roll. We need two rolls to complete our two windows. Each window is just shy of 24″x48″.
The lead has been exposed to the elements for two years, and has not fallen off the window, or ruined the glass in any way. The only change to the lead was it’s patina. It has not run, rusted, or in anyway discolored the glass.
Eugenia; Our New Pet Poodle Tree.

If you follow me on Intsagram, you will note that I have been having a string of bad luck with my garden this year.
I lost my fig tree, a whole lot of ivy, the backyard boxwoods, and most recently, my hostas have been withering up and dying. Yes, I can even kill hostas.
To remedy the situation, I have been making weekly trips to the garden center bringing home new plants. I have replaced everything except the poor dead boxwood who lived in our front door urn.
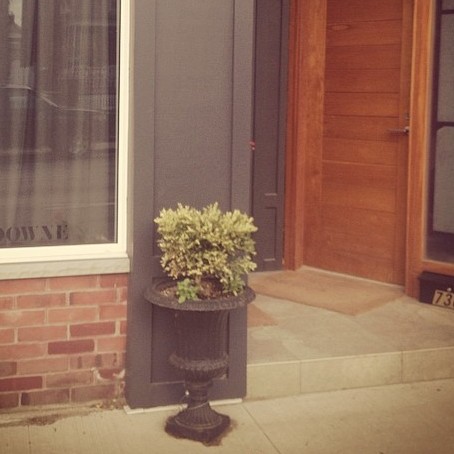
I added the cast iron urn & boxwood last summer, and it was adding a bit of class to the Storefront. Well it was looking anything but classy with the dead and yellowing boxwood. Something needed to be done.
I started searching for new replacement trees & shrubs, but they are expensive! I didn’t want to invest too much, as I am still worried our plant thief will come back and take them. With decorative trees in the $60+ range, I held off to find the perfect tree.
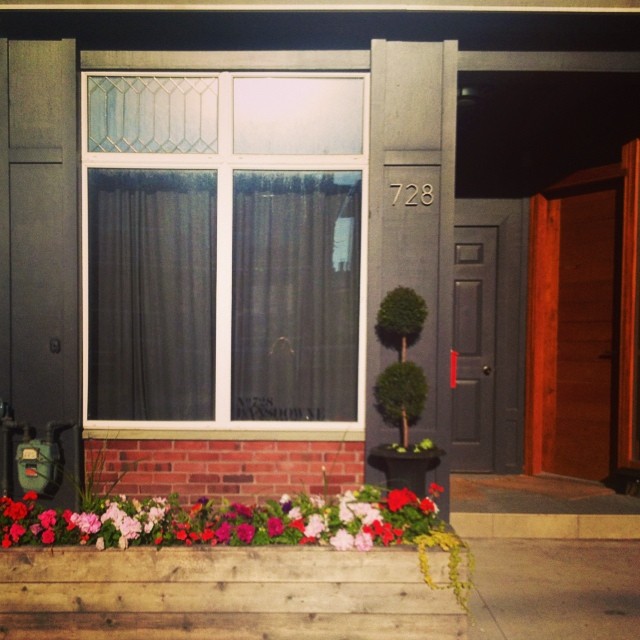
Surprisingly my waffling paid off. Last weekend while perusing the local Loblaws garden center, I spied a pretty ball topiary tree. You know the ones, they look like a show poodle’s tail. Well this pretty topiary had a too good to be true price on it. The poodlesque Eugenia was a good 4′ tall and had a $29 price tag. Yes you read right, $29! I thought it must be a mistake, and lugged it to the checkout. Sure enough, it was on sale, at over 50% off! Woot woot! I snatched it up, and carried it the 5 blocks home.
I planted my new pet poodle tree in the urn, and surrounded it with a few succulents and some mulch, and we now have a regal poodle topiary. We’re back to being classy. Well as classy as you can possibly be when you call your topiary a poodle.

What do you think? Any guesses on how long it will take me to kill it and/or butcher its pretty poodle haircut?