While the East coast is getting hit with a big snowstorm, here in Toronto its cold. Like really cold. For the third time in three weeks its dipped into the -30’s with the windchill. For my American friends that’s about -22 Fahrenheit. A week an a half ago it actually went below -40c (-40f).
While it was only -32 when we woke up this morning, we were greeted with frost on the inside of our front door.
Yep, that’s INSIDE THE HOUSE.
Yes, I know I live in Canada. Yes I know it gets cold here.
However Toronto usually doesn’t get this kind of cold. We are usually buffeted by the lake and get very little in the way of snowfall, and usually we are about 5 degrees warmer that other areas. Apparently Mother Nature decided to teach Torontonians a lesson this year, and show us what a real winter is like. (p.s. it’s a bitch)
So as you can imagine, we haven’t done much on the house in the last few weeks! We are working away on a lighting project that we hope to finish this week. We are bundling up on the sofa watching Klondike, and HGTV on repeat. The dog refuses to go out for walks, and wants to be underneath blankets at all times, and we had soup for dinner last night (I hate soup.)
Excuse me while I go drown my cold weary bones in hot hot coffee.
Do you have a favorite TV channel? One that you turn to first to see what’s on? Mine is HGTV. Before owning a home I lusted after every home and project and reno on the TV just itching to get my own place. I wanted to learn how to frame a wall, why plumbing needed to be vented and how to tile and drywall. I wanted to be a handy(wo)man.
Needless to say Canada’s Handyman Challenge is one of my favorite shows. It takes average handy Joe’s, and puts them to the test in home building/repair challenges. To top it off, the judges are my favorite hosts on HGTV. Bryan Baeumler, Scott McGillivray and Paul Lafrance. The new season of CHC is about to kick into high gear, premiering tomorrow night (Tuesday January 21st at 10pm ET|PT) on HGTV Canada.
One afternoon when I was busy working on the kitchen project my phone buzzed with an email asking me if I’d like to come down to the set of Canada’s Handyman Challenge and sit down with the judges and host Jenn Robertson. Would I like to visit behind the scenes of one of my fave shows and interview three of my heros? Nah. I’m good. I’d rather be elbows deep in plumbing.
So I went (of course!) I battled a closed road and an out of the way set location and literally ran to make it in time.
When I arrived, I got to tour the set (which was freakin’ awesome!) and then sat down with Bryan, Scott, Paul and Jenn with surprise guest (our buddy) Mike Holmes.
My first realization: Scott’s hair really is that great.
Next realization: The guys are old friends, who get along great and enjoy taking the piss out of one another. Throughout our round table the guys were super relaxed and personable. Scott even told us bloggers that he checked out our blogs (swoon). The strange thing is that you watch these guys on TV so much you kinda think that you know them. That they’re your friends, when really you’ve just been voyeuristic looking at their lives from a box in your living room! They quickly put us at ease and were very candid with our questions.
The four lucky bloggers attending got to ask the gang a question. My question was a bit self serving (I was trying to get the inside scoop so I could take the prize at next years competition.)
I asked this: “What is the one skill that the candidates and handymen in general are lacking?”
I LOVED their answers. Here is what they said:
Scott: Passion.
Paul: Math, Science.
Mike: Confidence.
Jenn: Ability to hang wallpaper! She says there’s always a wallpaper challenge. PRACTICE HOW TO WALLPAPER!
And my favorite response:
Bryan: Planning.
Bryan says people don’t stop and think/plan out what they are doing, they just go head long into the project without thinking how they’re going to do it. I couldn’t agree more. I see my projects going downhill fast unless I plan it out beforehand. I plan on taking Bryan’s advice and planning out my projects more!
I can’t wait to see the judges in action (and what candidates posses the skills the judges are looking for!) I will also start planning my plywood challenge for next year.
Here are a few more behind the scenes pics (I couldn’t share all of my pictures as I was invited on set during the FINAL challenge. So check back after the finale and I will be sharing more pics!.)
I will be chatting on twitter tomorrow night during the premier (Tuesday January 21st at 10pm ET|PT) on HGTV Canada. Follow me @storefrontlife for my witty remarks about my new best friends Bryan, Scott, Paul, & Jenn.
Until then you can get your CHC fix by checking out host bios and behind the scenes videos about the show here.
Would you ever try out for Canada’s Handyman Challenge? Will you be watching tomorrow night?
Focus on the journey, not the destination. Joy is found not in finishing an activity but in doing it. -Greg Anderson
That is crappy advice. Cause sometimes the journey SUCKS.
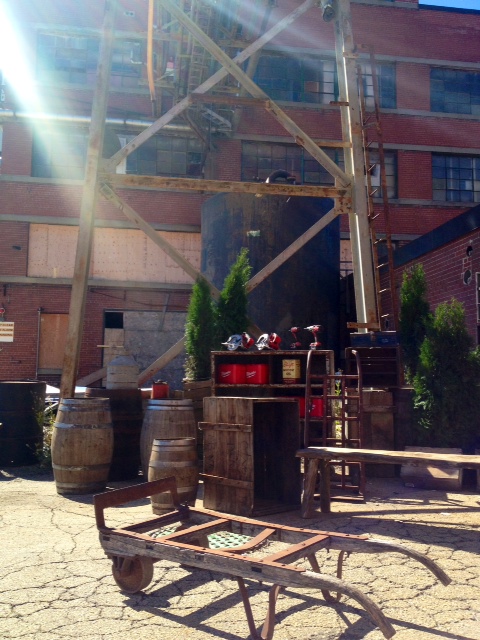
Case in point: Gathering supplies for an industrial chandelier project in mid January in Canada without a car.
This is how our weekend went:
Friday after work I took three buses and a shuttle to get to Ikea North York (aka the Ikea in the opposite end of Toronto from where we live.) Getting two lights (which have been sold out at my local Ikea for months). Then taking a shuttle, three subways and a bus to get home. Three and a half hours later I had my lights, and fro-yo. So there’s that saving grace.
Ikea Ranarp Pendants. I purchased two!
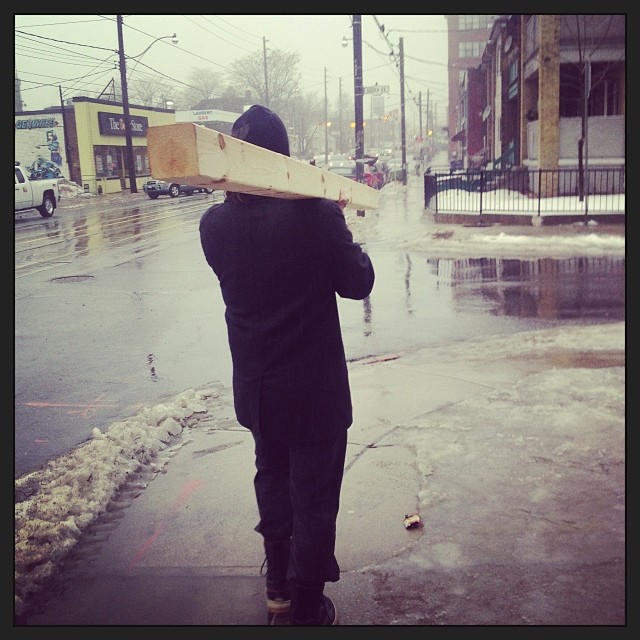
Saturday El Granto, myself and the dog headed out to the lumber yard. We took our favorite route along the West Toronto Railpath only to find halfway along our route the path turned into 2″ of solid ice covered in water. AKA the most slippery walk ever. Then it started to rain. We proceeded on city streets, which weren’t much better. Why cant people with corner lots SHOVEL THEIR SIDEWALKS?! Insert blood pressure rising. We got our needed lumber, and El Granto carried it home while I wrangled the bags of supplies and the pooch.
El Granto carrying home a 4×4 8 foot post.
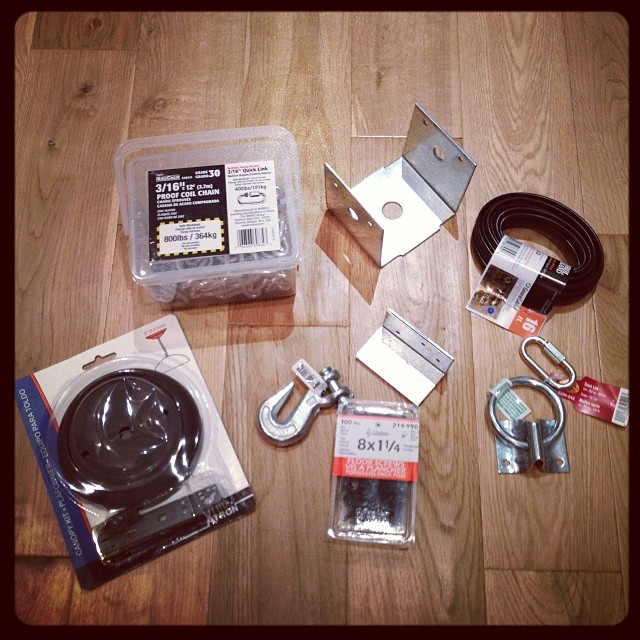
Next we dropped off the dog at home, and took the bus & streetcar to Home Depot to get everything else we needed.
Our menagerie of weird supplies for this project.
I then braved the skating rink which is our backyard, and headed into the garage to spray paint while the weather was warm enough. (It had reached +6 in Toronto, and with the heater on in the garage I could get it to +10, which is the minimum temperature for my spray paint to cure.) I set up my drop cloth and painted three light coats on all my lights & supplies, and left it to dry.
Sunday I went to check on my paint, and discovered that the drop cloth had fallen onto the lights and f@#ked up my paint job. Insert string of expletives. I conquered my anger, sanded down my newly painted lights, and painted another two coats of paint. I then marched them inside to safely dry in the basement. Where no big mean drop cloths could fall on them and make me cry.
Our light(s) after 5 coats of paint. Three would have done it except for the damn drop cloth that decided to fall on it and wreck everything.
SO three days of journey, very little accomplished, and no actual “industrial chandelier” made.
El Granto is a bit of a tech nerd. He’s not quite Howard Wallowitz, but the man likes him some gadgets. Hell he even has a watch that receives his texts and emails.
I may not be the biggest techy, but when it comes to our home I really have been taken up with home tech. From the simplest touches such as our bathroom fan with a timer, to our IR repeater and of course to our Nest thermostat. I love them all. I want to turn our house into robot house. Bring it Jarvis.
While we’re not quite at the whole home automation level, we have just added three super cool new smart home additions.
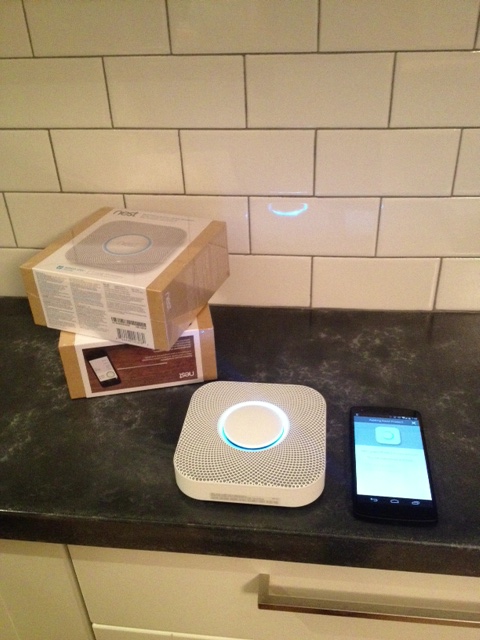
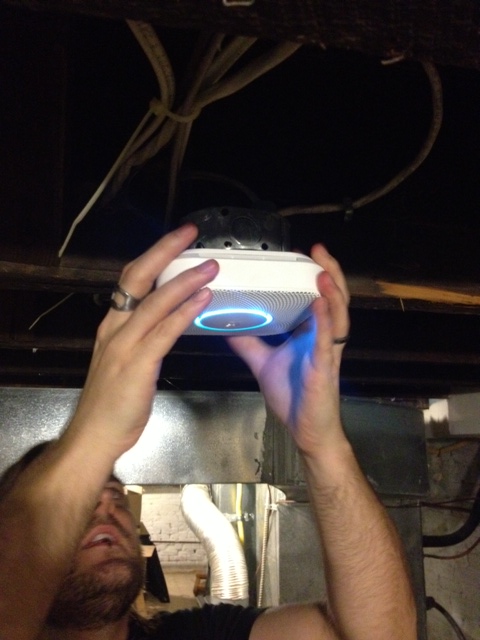
Meet our Nest Protect Minions.
Nest Protect
When I posted a pic of our install on Instagram I had quite a few questions asking what on earth these things are.
They’re awesome, that’s what.
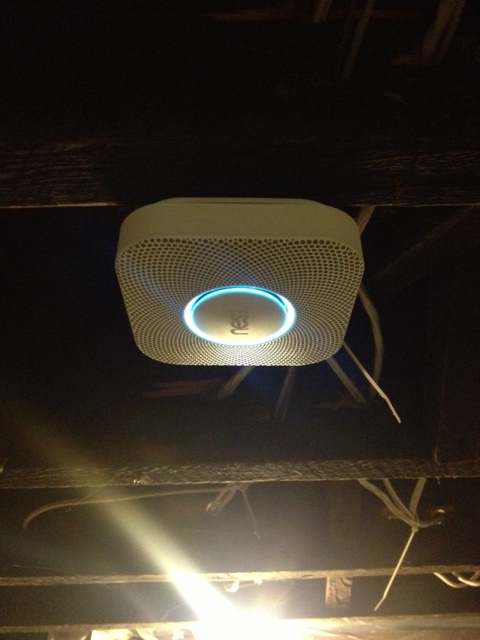
They also happen to be super smart smoke/co2 detectors that help keep us safe whether we’re burning dinner (that never happens I swear) or fast asleep. They sense smoke and co and will give you vocal warnings when something goes wrong. There is two levels of warning. I like to call them “burnt the toast” and “the effing house is on fire!”. The former will let you know when things are a bit smokey and let you turn off the warning with a wave of your hand. The latter will tell you to get the hell out of your house and notify you via the Nest app to let you know your house is burning down.
It’s a bit hard for me to explain their awesomeness in prose alone, so I will let this video do all the hard work for me.
My favorite part has to be the “nite nite” check, when you turn out the lights for the night the system does a full check and a pulse of green light on all the Nest Protect units lets you know that everything is working and you can safely go to sleep. I also really like that if the Nest Protect senses co2, it will talk to our Nest thermostat and tell it to shut off our gas furnace. Pretty darn cool.
The Nest Protect works with our Nest app, so everything is working together and updating you on one app.
We installed right before Christmas, and just like the Nest Thermostat install it was super easy.
Read and follow the simple instructions.
Read instructions kids
Scan the QR code on the back of the Nest Protect, enter in your settings and wait for it to sync itself.
Nest Protect doin’ its thing
Then attach it to the ceiling and pop it into place.
Installing Nest Protect in the basement
After all of them are installed (we have one in our basement, one on the main floor and one on the second floor). You test the whole system and relax, cause your house is now way smarter than you are.
Nest Installed in (scary) basement
The current weather has put the system through its paces. We were able to check on the system and up the heat during the ice storm & cold snap to make sure the dog wasn’t freezing, and neither were our pipes. We also had the peace of mind that the house was safe, and we could also use it to check and see if we had power when most of the city was dark.
Are they worth the price? I say yes! And if you’re in Canada and don’t already have a CO detector, as of Jan 1, 2014 it became law that you have to have one. So get a co detector!
*BTW We really truly have no affiliation with Nest, we just love their stuff.
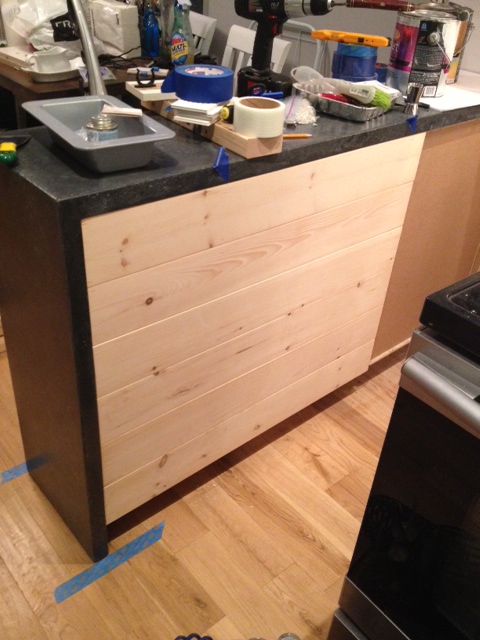
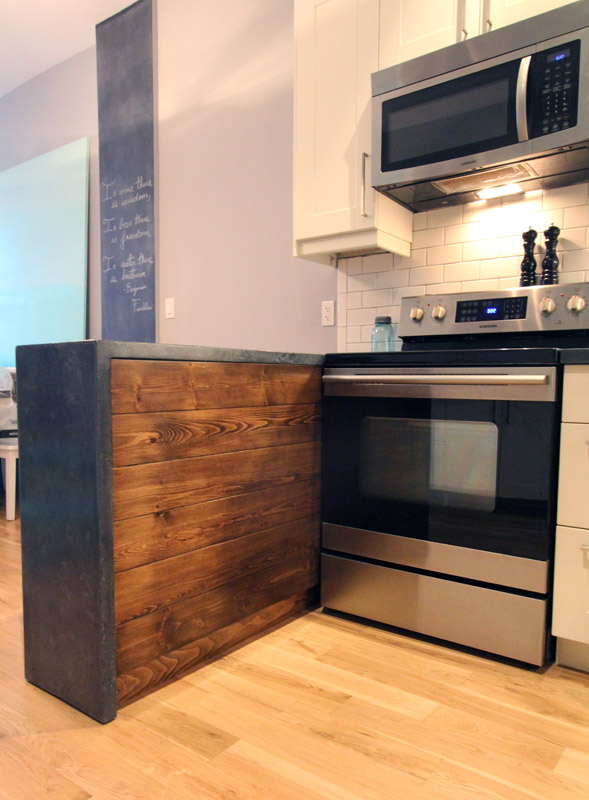
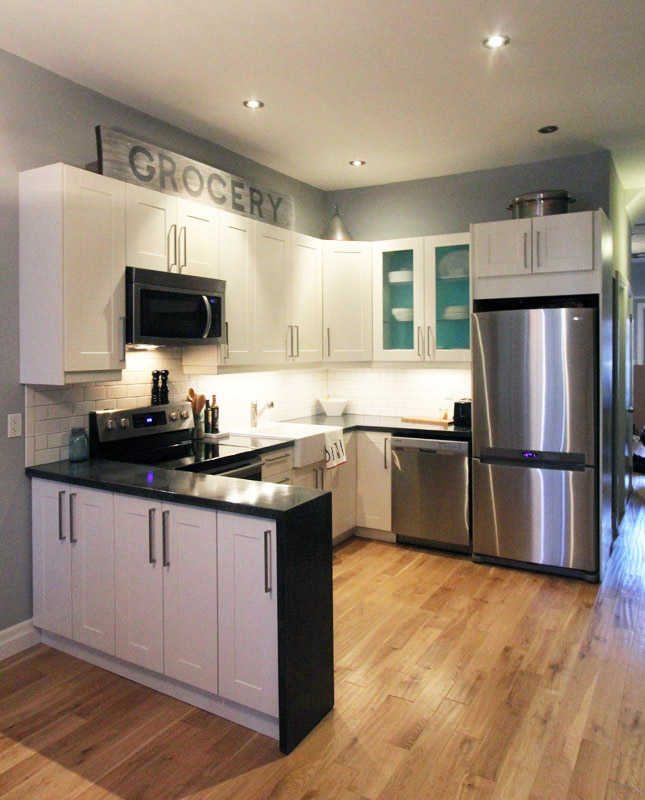
My least favourite part of the kitchen used to be the peninsula. It was short and stubby, too small to use as a prep space and looked awkward.
I had originally hoped to build the peninsula deeper to house a beverage fridge and get full counter depth cupboards & drawers. However it became apparent that to do that we would loose valuable dining room space, and be unable to have a 6 person dining table.
We were not willing to compromise on the dining table (we love to entertain!) so the peninsula needed to stay skinny. If we couldnt make it wider we could at least make it longer. We added only one more cabinet, which not only made the kitchen symetrical, but made so much more work space. Its amazing what a foot can do. Now you can stand comfortably at the peninsula and chop veggies or converse with someone in the diningroom.
Such a small change, but a world of difference. Now the peninsula is my favourite part of the kitchen. The concrete waterfall is the icing on the cake, but you may have noticed we added a bit of a special touch on the back of the peninsula as well.
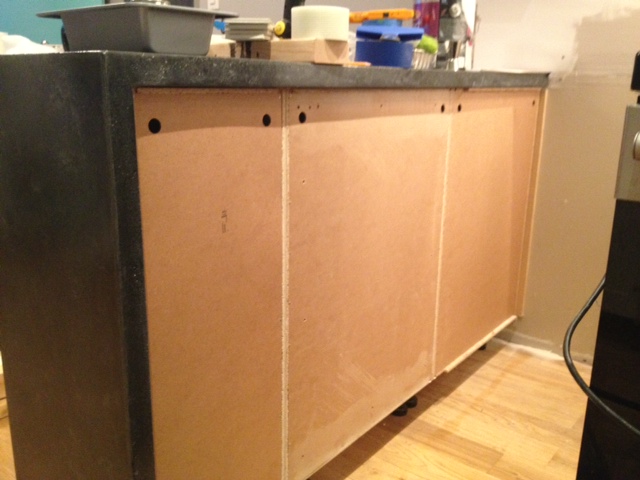
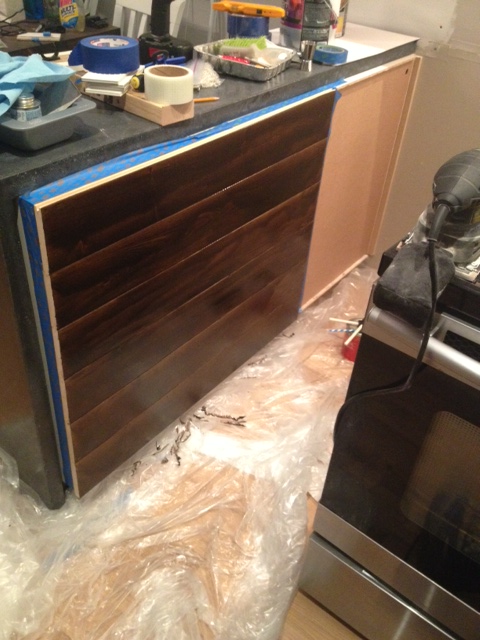
The peninsula used to be backed in an Ikea cover panel that matched the Ikea Adel kitchen cabinets. It worked just fine, but after we added the extra cabinet, the old cover panel wasn’t big enough.
Naked Peninsula Back
We could have went out and bought a larger one, but thought it might be a fun area to add something special, and make our kitchen look a bit more custom. Enter a trip to the hardware store.
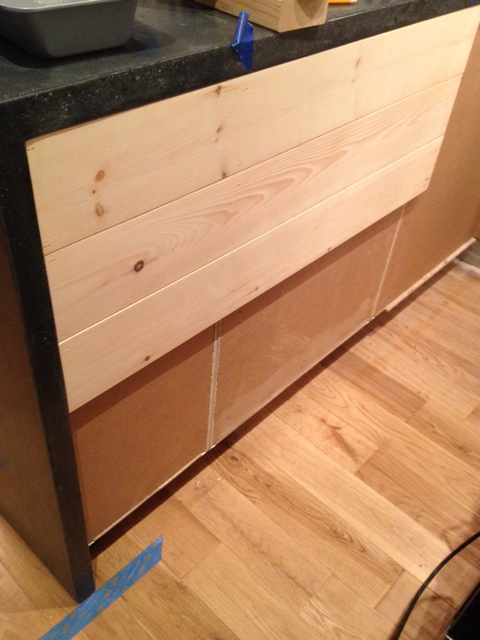
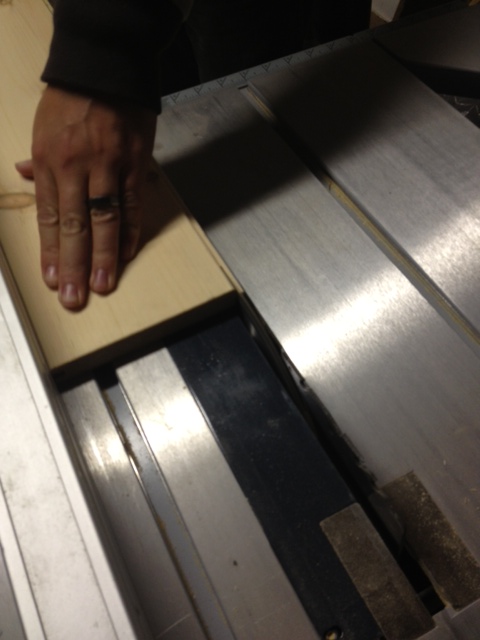
We picked up three 6 foot long pieces of tongue and groove 1×6 unfinished pine flooring from Home Depot along with a 1×4 piece of kiln dried pine. Back in the garage we cut down our lumber to three feet long on the miter saw, and headed into the house armed with some wood glue and a brad nailer.
We started at the top of the peninsula with a board facing groove up. We brad nailed it into the cabinets making sure we nailed through the sides of the cabinet frames, not just the backer. When attaching the second board we added a bit of glue to the groove, slid it tightly against the other board, and continued nailing. You will notice that we didn’t run the wood all the way to the wall. The stove is tucked into that corner, and to give the stove a bit more breathing room, we opted to only panel to just past the oven door. It saves on wood, and I will worry less that I will light my house on fire when I run the self cleaning oven.
Nailing up boards
Once we reached the bottom, we went to the garage and cut the groove off the past piece with the table saw so we would end with a nice smooth board.
Cutting off the last tongue with the table sawLast board installed (note the absolute chaos of the kitchen in the background!)
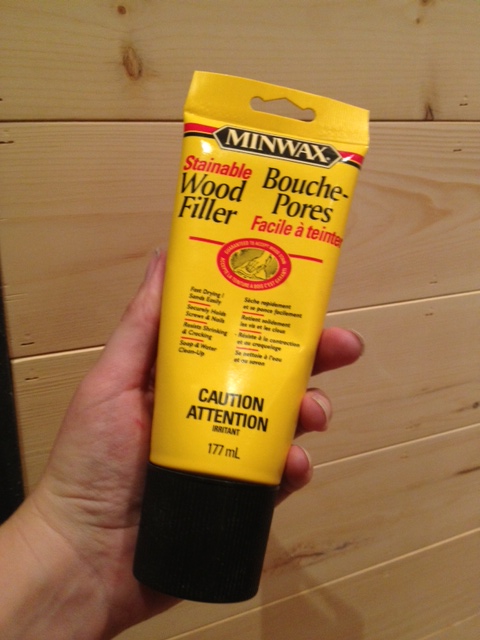
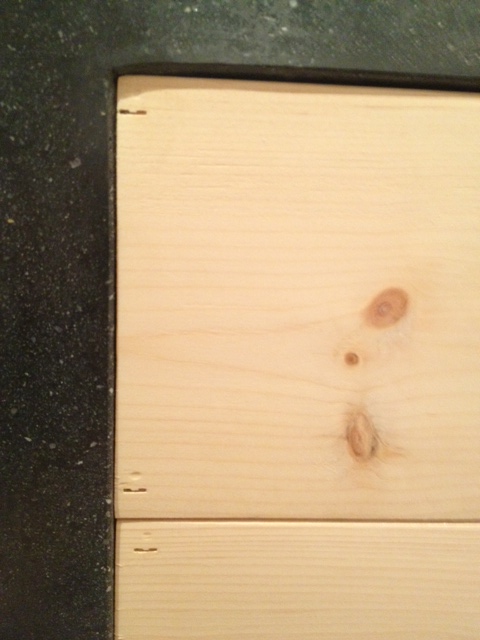
After the boards were installed we got out the wood filler and filled in the brad nail holes.
Wood FillerNail holes (and the stupid little divot my brad nailer leaves)
After letting the filler dry, we took the sander to the boards and gave it a quick finish sand.
Now we were ready to finish it. We pushed back the countertop (we hadn’t yet adhered it to the cabinets at this point) taped off the area, and added a coat of wood conditioner then two coats of stain (same color as our dining table & coffee bar shelves).
Staining the paneling
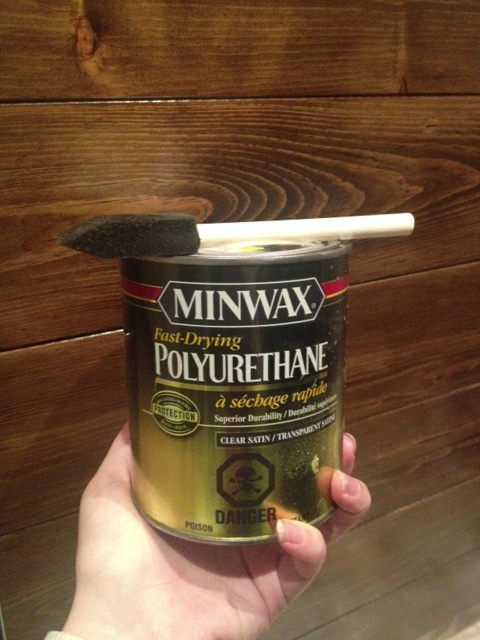
After staining we finished it up with 5 coats of Satin Poly. Five coats may have been a bit of overkill, but its beside the stove and oven, and will get its fair share of abuse.
Poly & foam brush
Next up we needed to address the toe kick. For the rest of the kitchen we have plain white toe kicks, but it just seemed weird to carry on the white for the back of the peninsula, so we opted to use a piece of 1×4 pine stained & polyed to match.
We then moved the countertop back in place, making sure the wood was flush with the countertop edge, attached the countertop to the cabinet, and slid the stove back in place.
Making sure the countertop was flush with the panelingPeninsula Back & Toe Kick
We didn’t fall on our asses completely with our 2013 DIY goals, but I’d like to do even better this year.
This year my goal is to not fall on my ass.
Likelihood of success: slim to none.
Well there you have it, list done, I’m going back to bed.
Oh… about those real 2014 DIY Goals. Okay okay, here they are.
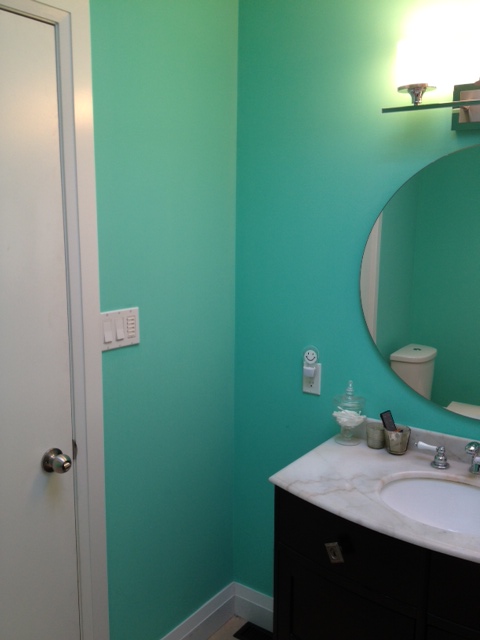
Main Bathroom Makeover: You’ve never even SEEN this room! When we moved in we gave it a coat of Tiffany blue paint, hung a white shower curtain and that’s about it. After living with the bathroom for three years, we’ve noticed it’s a bit lacking in functionality. The vanity is too small for El Granto and I to get ready at the same time (which we do) and the storage is not as useful as it could be. (Aka too little and of the unorganized variety.)
Bathroom Vanity & Mirror (sorry about this terrible picture, I shot it months ago and apparently forgot how awful/out of focus it was)The strange (useless) gap between the vanity and the wall (and hells yeah, we have a happy face nightlight)
Our goal is to build a larger vanity with drawers and his and hers doors and storage. We’d also like to build a new counter with built in trough sink and two faucets. A new mirror and lighting will have to follow as they will be off center and dorky looking after the new vanity.
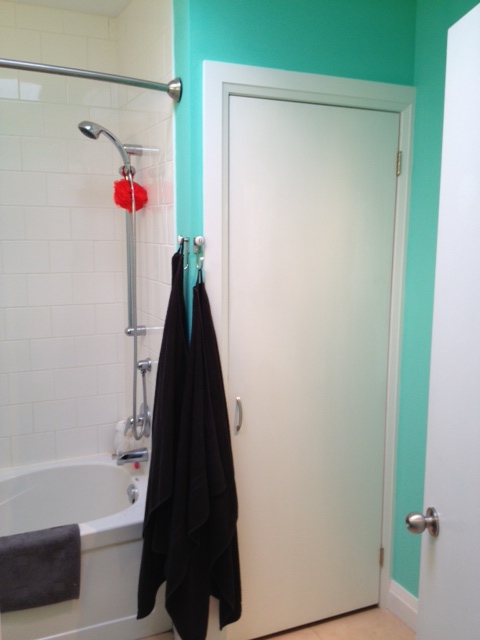
Old Laundry Closet
When we moved into the Storefront there was a stacked washer/dryer in our main second floor bathroom. This dryer and it’s poorly constructed venting was the start of our water woes that resulted in Mike Holmes coming to fix our house. During the reno, Mike & the crew moved our laundry to a safer location in the basement. What was left is a large (empty) closet in our main bathroom which thus far just holds a laundry basket and some extra TP. We’d like to conquer the closet and custom build a linen closet with glass doors for pretty storage, and drawers for other not so pretty storage (I’m looking at you toilet paper). We’d also like to build in a hidden laundry basket door/drawer system. I really enjoyed making the media cabinet last year and am itching to do some more cabinet making in the bathroom.
To complete the bathroom will be a new shower curtain, towel hooks, art etc. I am also hoping for new tile (but that may be wishful thinking.) It’s a BIG project that we hope to start sometime in the spring.
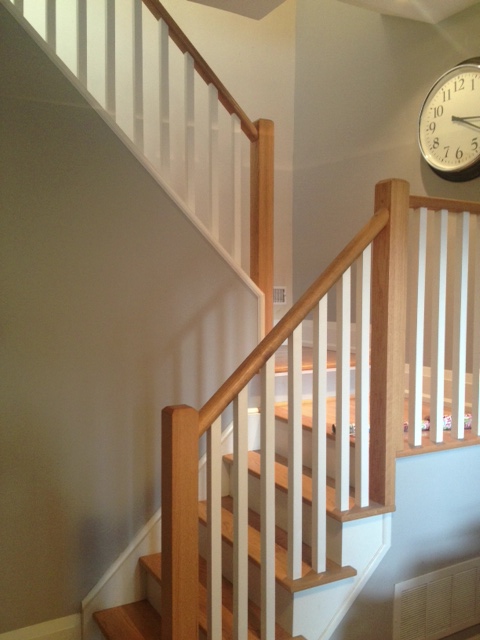
Staircase/Hallway: The upstairs hallway was on my list last year and it never got done. I would like to finish it off, and continue down the staircase and knock that off the list as well. The staircase is the ONLY remaining beige wall inside. The reason it’s remaining as it’s hella tall, and going to be a pain in the ass to paint. While I’m at it, I’d like to do some trim work in the staircase, and beef up our newel posts to make them more appropriate to the period of the Storefront. Aka less 1990’s more 1910.
The Staircase
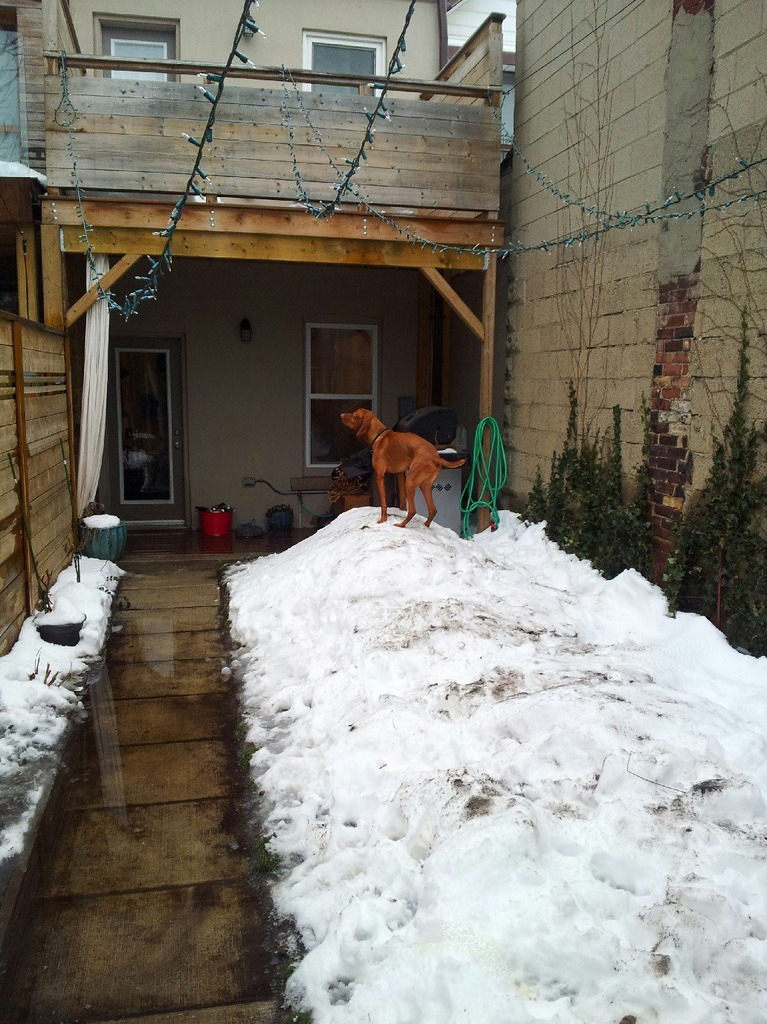
Do something with the backyard: The grading is sliding sideways and we’ve lost half the dirt/sand in the backyard in the last year. The pathway is sinking, creating a lake when it rains and the grass refuses to grow in the shifty sandy soil. I would also still like to put in a patio of some sort and build some patio furniture. This looks like an easy task but is HUGE. It may not get done this year.
Backyard Lake created by the sinking pathway.
Garage Love: The garage needs a little TLC. We need to add some lumber storage, make a new workbench for our bench top tools, add some insulation and figure out some sort of sawdust control system. As El Granto got a new belt/disc sander for Christmas, I think this project will be starting sometime soon.
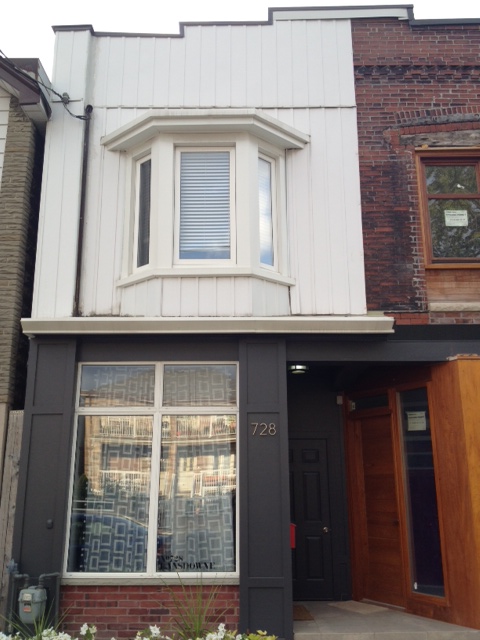
Paint the exterior of the Storefront: I would love love love to remove the siding on the front of the house, re-point the brick, clean it, and re-do all the flashing. Unless I somehow come into a lot of money, this is not going to happen in the next year. To live with the front of the house for now, I would like to prime & paint the siding to give it a new lease on life. While we’re at it, I’d like to de-beige the back of the house with some paint as well. I would also like to try a new paint color on the front door & mailbox. I’m thinking something fun, like green or blue.
I hate the ugly siding
What do you think? Is it a do-able list, or am I going to fail miserably?
Way way back on January 1, 2013 I shared a little list of my 2013 DIY Goals. Did we complete them all, or did we fail miserably? Here’s a little recap of what was on my list, and how we did:
As the Holidays are fast approaching, I am rapidly trying to knock a few items off the big old To-Do list, including making a few handmade gifts. This year has been a tough one to produce a lot of homemade gifts. Both El Granto and I have been working long hours at our day jobs, and by the time we get home we’d rather snuggle up on the sofa together than go back out to the garage and get to work.
This past weekend with nothing planned on the calendar, we decided to take a trip to the lumber yard, and start making some cutting boards for holiday host/hostess gifts.
After we had cut up all our wood, I noticed a few spare pieces too small to make into another cutting board, but rather than just toss them into the scrap bin pile, I opted to make a little side project.
Here’s what I did:
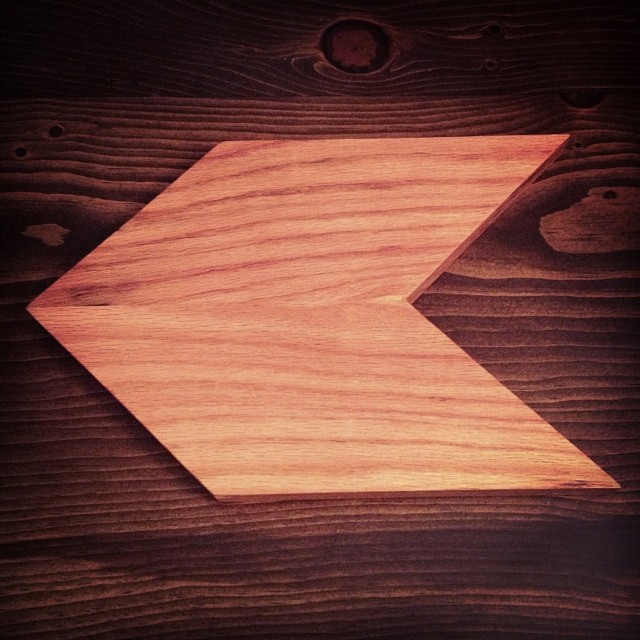
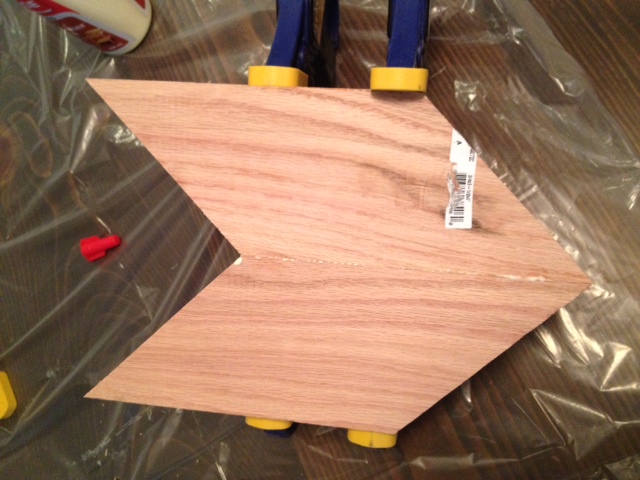
Set the miter saw to a 45. Took two scrap pieces of oak, stacked them on top of each other and cut a 45 through both of them at the same time. I then cut the same 45 at the other end of the pieces, again cutting through both boards at the same time.
Two pieces of wood cut into parallelograms
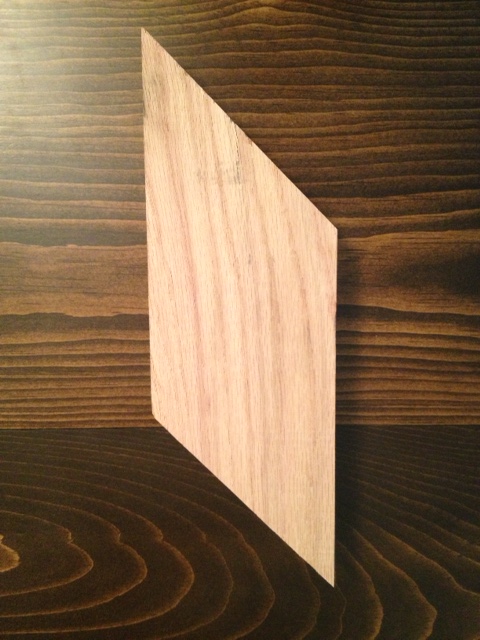
This made two pieces of wood about 9″ long that were EXACTLY the same. (the exactly the same is important.)
Two boards cut exactly the same, then one board flipped over
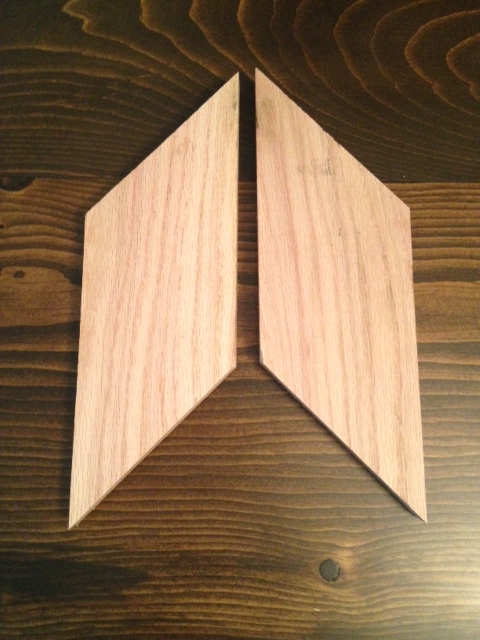
I then took those two boards, added glue, and clamped them together.
Boards glued & clamped
Once they were dry, I sanded, got the wood wet, let it dry, then sanded again. Why get the wood wet? It raises the grain, so you can sand it down again. If you don’t do this, then the first time the board is washed, the grain will raise and the wood will become rough again. It still may raise in the future, but at least you’ve sanded off the worst of it.
After everything is nice and sanded, I gave it a few coats of mineral oil, then followed up with some cutting board oil/wax.
Ta da: Hipster Chevron Cheese Board
Chevron Cheese Board
El Granto had the brilliant idea that we should make a few of these, then we can slide them together at parties to make larger boards. I see another trip to the lumber yard, and more parallelograms in my future.