Project Pantry

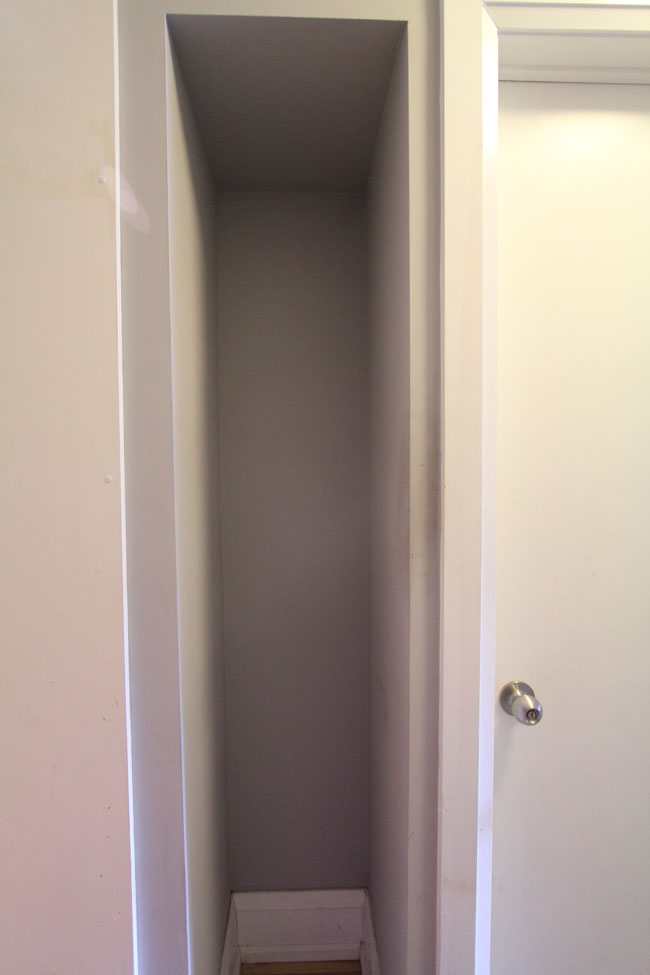
In our main floor hallway lives a strange small nook. He resides between the side of the refrigerator, and the powder room. He’s tall and skinny at 81″ high, 15″ wide and 18″ deep.

We have lived with this weird nook for four years, and during that time Mr. Nook has held the broom, dustbin, dog food, soda bottles, and a plethora of other things you had no idea where to put. At parties, I have come across one or more people just hanging out in the nook, having a jolly good time.

But seriously though, what the heck is Mr. Nooks purpose?! We live in a small 12′ wide house, and real estate is prime. Mr. Nook was taking up valuable space, and not being very helpful.

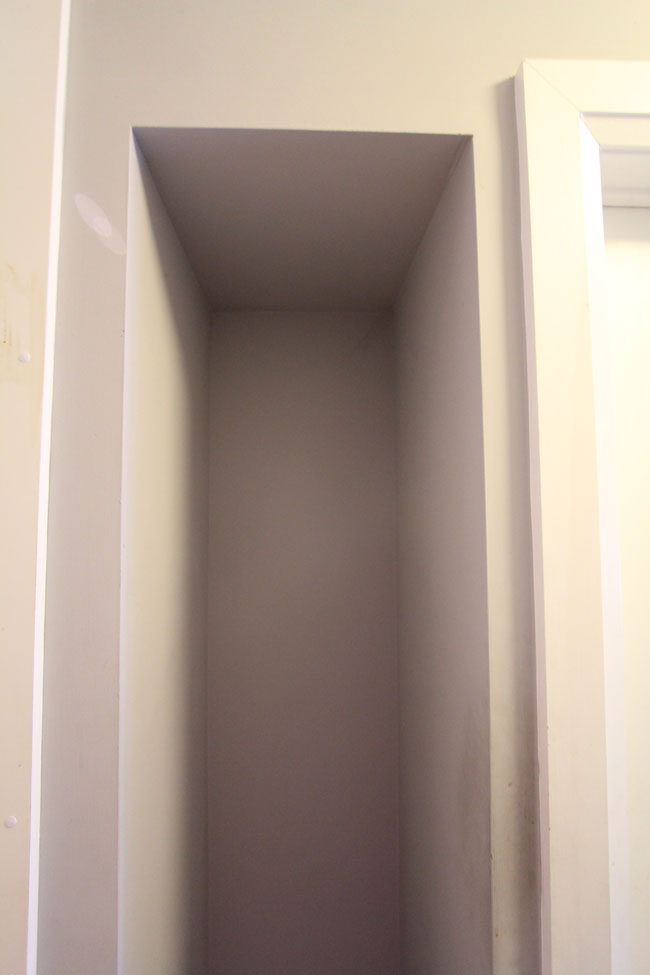
Here is a look at the nook in all its glory. Sorry for the closeups. Even with a wide angle lens, this nook is hard to photograph.

IMG_3006WEB

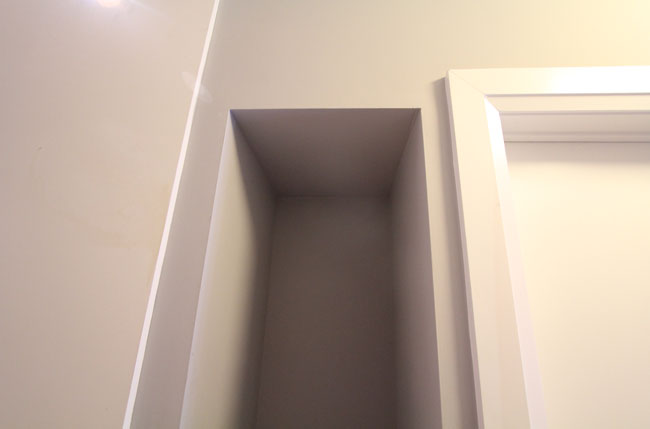
To the left of the nook is the cover panel covering the side of our refrigerator. To the right is the door to the powder room.

IMG_3010WEB

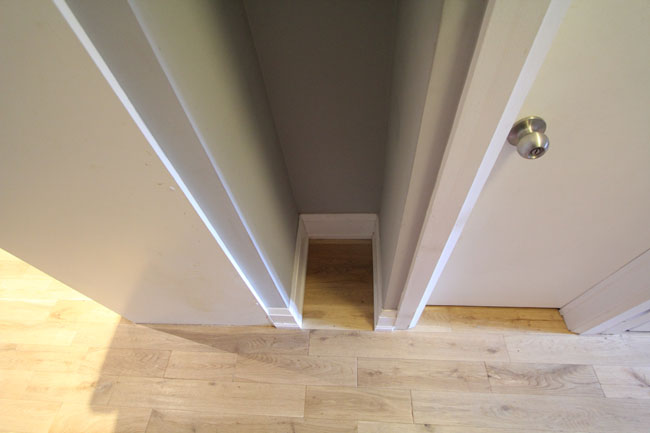
The nook is even trimmed out with baseboard! It’s like a tiny little room.


IMG_3005WEB

Here you can see that it is framed up to be the same height as a regular door (but only for really skinny people).

We were at Ikea the other day picking up the last of our glass doors for the coffee bar, as Ikea went and discontinued ALL their current kitchens. We were still missing a few glass doors, so we hustled there to grab them before they sold them off. As you know, I cannot go to Ikea without perusing the AS IS section for possible project supplies. I was sorting through loose cabinet doors when I struck upon these doors.

4dd4b32e38babc1a6216f401c5177275

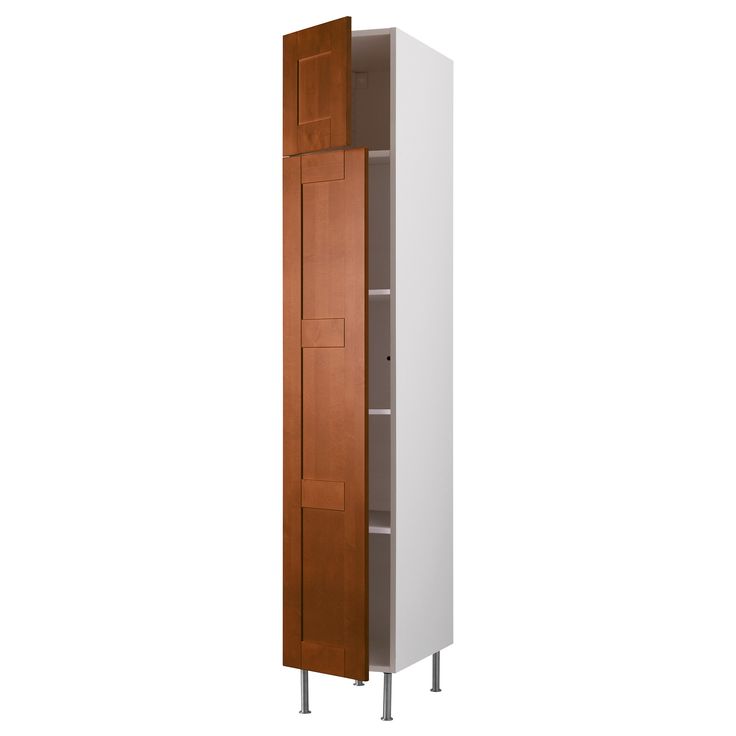
They are Adel brown high cabinet doors meant for Ikea’s pantry system. The door style is Adel (same as our Kitchen) but in brown. Armed with an Ikea paper measuring tape, I noticed that the doors were almost the same size as my nook. The total height of the two doors was 79″ (my opening is 81″) and the width is bang on at 15″.

The doors were the wrong color for my kitchen, but they were…wait for it…$23 total.

The doors promptly got tossed onto the cart, and brought home with us, while I was giving fist bumps to random strangers and congratulating myself on a badass score.

I know what you’re thinking:

A.) The doors don’t even match my kitchen

B.) The nook isn’t even IN my kitchen

C.) I didn’t buy a cabinet to go along with the doors

All true. BUT I have a PLAN!

IMG_3001WEB

Step One: Lengthen the door an extra two inches. Fill the current hardware holes on the door, lightly sand, prime and paint to match my kitchen cabinets. (no really, it will match, I promise. I already tested it out by making my own cabinet cover panels for the coffee bar.)

Step Two: Trim out the door opening, add reinforcement for the hinges, hang the doors and add hardware.

Step Three: Deck out the inside of Mr. Nook with some badass storage solutions.

What kind of storage you say? Drumroll please…..PANTRY!

Here is the pantry plan:

Drawers for spice, pasta & boxed good storage.

Shelves for tins, bottles, jars and canisters of dry goods.

Sheet pan vertical storage.

Counter to set things down on. (Inspired by Karen’s pantry)

I will get started as weather permits (it’s darn cold in our garage right now!)

In the interim, check out my Kitchen board for some of my pantry inspiration.

Follow Kristen – Storefront Life’s board Kitchen: Modern + Industrial + Traditional on Pinterest.

What are your must haves for a pantry?


Concrete Swiss Cross

In the modern and Scandinavian home scene you notice a lot of similar trends. Monochromatic palettes, clean uncluttered design, negative space, candles, wood, black and white etc. One other motif you will note is Swiss crosses. They’re on blankets, pillows, art and accessories. Find a scandi home pic on Pinterest, and play the find the Swiss cross game. Why is this motif so popular? It’s simple, bold and classic. Not a design fad, but a timeless design element.

I’ve been Scandinspired as of late, so when I spotted X silicone ice cube trays at Ikea, I saw them not as X’s but as +’s. With silicone + tray in hand, I used some leftover concrete from my concrete clock project to make concrete Swiss crosses.

Concrete Swiss Crosses

I poured excess grey concrete into my silicone ice cube trays, and covered with plastic. I left them to cure overnight, then easily popped them out of the silicone mold. [see how to mix & pour the concrete here.]

Concrete Poured into Ice Cube mold

Any excess concrete was lightly sanded off, and the crosses were lightly sanded the edges of the +’s so they would stand up easily.

Concrete Swiss Cross

Not only did I use up my excess mixed concrete, I also made a cute decor item. The little Swiss crosses look sweet in my black and white powder room.

Concrete Swiss Cross

Concrete Swiss Cross

Working with concrete and silicone molds was incredibly easy. I am now on the hunt for other cool silicone molds. One of those sphere ice cube trays perhaps?

SOURCES:
Concrete – Buddy Rhodes 10lb Artisan Mix
Silicone Ice Cube Tray – Ikea

See post on mixing the concrete here.

Difficulty Level (on a scale of 1-5):

one out of five


Total Cost: $3

Tool Test Drive – Milwaukee M18 Fuel 7 1/4″ Cordless Circular Saw

There is nothing more infuriating than being knee deep in a project, then realizing you don’t have the correct material or tool. It stops you dead in your tracks and you’re left spending your Saturday at the hardware store instead of working.

For instance, we were working on the tabletop for Project Nelson. We had planed, measured and glued up the top, and were just about to square up the edges. See it’s a lot easier to do a rough cut to length of all your boards, glue them together then draw a nice square line and then cut the top to square. We were just ready to cut when we realized we didn’t have the tool we needed. The tabletop was built with 1 3/4″ pine, and our corded circular saw had given up the ghost on the last project. Our cordless circular saw was a 6 1/2″, and does not have the cut depth to cut through 1 3/4″. Womp womp.

Our current saw with a blade depth if 1 1/2". Not deep enough to cut through our project.
Our current saw with a blade depth if 1 1/2″. Not deep enough to cut through our project.


We were at a standstill. What to do? Our options were to buy, rent or borrow. I don’t like renting woodworking tools from the big box store. They tend to have terrible blades, and it’s not worth risking your project on. So that left us with buy or borrow. I hate rushing to buy a tool without doing my research first. Borrow it is.

We happen have made friends with our local tool rep; James. I actually call him Toolman James. (Get it, like Tim the Toolman Taylor?) I shot him out an email saying “Hey James! We’re in a pickle! Do you have a circular saw we could borrow?” He responded with “Actually I do! But you have to promise to give it back, it’s brand new.” Fair enough. I can be a tad bit delinquent with my tool returns.

James sent over the saw, we took one look at it, and were pretty darn happy to have Toolman James as a friend. He sent us over the brand spankin new Milwaukee M18 Fuel 7 1/4″ cordless circular saw. Holy cow. Now this is a saw. Where our 6 1/2″  saw maxed out at a 1 1/2″ cut depth, the Milwaukee cuts through 2 1/2″. This is exactly what we needed.

Milwaukee M18 Fuel 7 1/4" Cordless Circular Saw
Milwaukee M18 Fuel 7 1/4″ Cordless Circular Saw

With saw in hand, we headed out to the workshop to do some test cuts. Cordless saws can often have a tough time of cutting thick lumber. They can burn and bind, and generally not have enough power. Our first cut was to put it to the test. We grabbed a scrap 2×12, drew a square line, and El Granto handheld the cut.

Milwaukee M18 Fuel 7 1/4" Cordless Circular Saw
Making a test cut

The saw had no problems with the 2×12. It cut through it like butter. No sticking or burning, and the best part; little to no tear out (even with the 24 tooth framing blade). The cut was spectacular. I was also impressed with El Granto’s cut. For handheld it was immaculate. When I commented on his prowess, he deferred credit to the saw saying it was smooth, didn’t kick back, fight him or try to drift. The saw was also incredibly quiet for such a big & powerful saw. It also has a handy LED to light up your cut area and a hook on top so you can hang the saw while not in use which is very handy for a large saw like this.

Impressed, we got ready for our big cuts. We set up a fence, raised the blade height so it would cut through our lumber, but the motor wouldn’t get in the way of our fence, and made the first of two cuts.

Milwaukee M18 Fuel 7 1/4" Cordless Circular Saw
Making the cut

Holy crap. The cut was perfect. Absolutely perfect. Even on the 30″ span, the brushless motor didn’t run out of power in the least. The cut was clean with no tear out, burning or blade wobble. The thin kerf blade didn’t produce a ton of sawdust, and the extended capacity M18 battery didn’t even register a drop on charge. It is hands down the most powerful circular saw I’ve ever used, and that’s corded or cordless. It has a heavy duty ridged metal base, a 50 degree miter swivel, and adjustable blade depth.

Milwaukee M18 Fuel 7 1/4" Cordless Circular Saw
Now that is a deep blade. Our lumber is 1 3/4″ thick, and the blade can cut even thicker, all the way up to 2 1/2″

A second hand hold makes it comfortable for two handed use, yet the saw is operable one handed. It’s powerful yet not heavy and unwieldy. I think the saw is perfect for job site use, yet still accessible to the amateur woodworker. Overall, I give the saw 4 1/2 hammers out of five.

five out of five
Milwaukee M18 Fuel 7 1/4" Cordless Circular Saw
Overall, an absolutely great saw.

Now, I need to think up some creative excuses for when Toolman James asks when I’m giving back his saw. “The dog ate it” really is not applicable in this situation.


10 Awesome Handmade Gifts

Holy cow, December is upon us, and I am slacking in the Holiday department. I better get off my tush and start making my handmade gifts for this year. If I am this far behind in my holiday gifting, I thought you may need a hand. I have rounded up a few of my favorite DIY gift projects that we have made in the last few years. Happy crafting!

Kristen’s Awesome List of Handmade Gifts


Maple and Oak Cutting Boards

Maple & Oak DIY Cutting Boards

These boards are a fab gift for the foodie or the entertainer. You can make them a traditional shape, or simple & modern. This gift also goes beyond the holidays, and is great for a house warming. Check out the how to here.


Cutting Board Oil/Wax

Cutting Board Oil and Wax

While you’re making your cutting board, make up a batch of Cutting Board Oil/Wax and a pretty tag, and give it along with the cutting board. This oil/wax is the perfect wood conditioner for all your wooden items. From Grandmas vintage salad bowl, to your every day wooden spoons. See the how to here.


House Shaped Candle Holder

House Shaped Candle Holder

This makes for a perfect housewarming or hostess gift. Its a small gift that you can give in addition to a bottle of wine, or just a little something for a teacher or coworker. Check out the how to here.


Beer Can Carrier & Custom Pint Glasses

beercarrierWEB

This is the gift for the beer lover in your life. You know you have one. Pair it with their fave beer, or better yet some new microbrews. Check out the how to here.


Wood & Nail Bottle Opener

DIY Wood and Nail Bottle Opener

This is another good man gift. Its also a small enough that it can slip easily in a stocking, or pairs well with a six pack at a holiday party. Check out the how to here.


Chevron Cheese Board

Chevron Cheese Board

Another awesome board, but this time just for cheese. This chevron cheese board is perfect for setting up a cheese tray. You can arrange one or multiple boards along the center of a table and let your inner foodie out. This is the perfect gift for the entertainer in your life. Pair with a nice cheese knife, and a bottle of wine, and expect to be invited over for the next party. View the how to here.


Custom Door Mat

Custom Door Mat

A custom door mat is a great for the newlyweds, or a first time homeowner.  Heck, its even a great gift for the in-laws. For a classic look, use a monogram, or for the hipster in your life consider a cheeky saying. Check out the tutorial here.


Custom Mailbox

Custom Mailbox

A custom mailbox is another great home owner gift. You can personalize it with their address, or their family name. See the how to here.


Wooden Bath Table

DIY Bath Table

This is a gift perfect for the overworked, stressed out people in your life. Bathtime (when you’re over the age of 8) is a time for relaxation, and a moment of peace and quiet. Pair the bath table with some swanky bath products or a fluffy robe and a bottle of time, and the Moms, sisters, or athletes in your life will love you forever. Bonus points if you offer to take the kids/dog/whining husband out of the house so they can really enjoy their bath. Check out the super simple instructions here.


Concrete Clock

DIY Concrete Clock

Last but not least is the awesome concrete clock project we showed you earlier this week. It would be a great gift for your secret santa, your city dwelling brother, or surprise your spouse with it for their office. See the full tutorial here.


I hope these ideas help you out with your handmade gift ideas! Happy gifting!

10 Awesome Handmade Gifts


DIY Concrete Clock

I’m so excited to share today’s project! It’s something I’ve wanted to make for over a year. When I first started talking to Jeremy at Buddy Rhodes about making our concrete counters, he told me to take a look at his portfolio of work. He wanted me to be inspired by the awesome stuff you could do with artisan concrete, and to brag a bit about how awesome he is.

One of the first projects of his that caught my eye was a series of concrete clocks. I sent him an email saying something along the lines of “omggggg I need to make a clock!” said in over excited girl squeal. He kept saying clocks were easy, and after we pour our kitchen including a badass one piece waterfall countertop, I will be able to make a clock in my sleep. But clocks seemed like such a big project. So much so that I never tried to make one. Then a few buckets of Buddy Rhodes 10lb artisan mix showed up at my door a few weeks ago, with a few curse words gentle push from Jeremy to get off my butt and make something. So I made this:


DIY Concrete Clock

DIY concrete clock! It was so easy. Really truly so easy. Here’s how I did it:

Milwaukee M18 Hammer Drill  + Mixing Paddle + Small Bucket + 10lbs Buddy Rhodes Artisan Mix


photo 3(3)

I sourced a mold in a shape I liked. I went with a $1 Christmas Snowman cookie tray from the dollar store.

photo 1(3)

The only other item I used for my mold was an empty plastic screw container. It was the perfect size for a inset in the back of the clock for my clock works. Note, you don’t even have to do this, your clock works can totally stick off the back of your clock.

photo 2(2)

I mixed up a small batch of the BR mix, with a teaspoon of coal coloring & a dash of water reducer. This is also optional. The water reducer will let me put less water in the mix, but still get a nice workable mix. I used coloring to get a grey color, but the BR mix is bone white, and If you don’t want to tint it, you don’t have to. The mix has no large aggregate (gravel) so it can be made into tiny or thin molds without issue. I mixed up my concrete with a paint mixing paddle from the hardware store. My Milwaukee Hammer Drill made quick and easy work of mixing.

photo 3(1)

Once it was to the viscosity of a milkshake, I poured it into my mold. I filled it 3/4 full. I inset in the screw container, and weighed it down with a jar of Vaseline (Vaseline can be used as a mold release, so I had it on hand. I’m not a creepy weirdo who keeps Vaseline in their basement workshop for no good reason).

photo 5(3)

I gave it a shake to level everything out, and a bit if vibration from a palm sander. I covered with plastic sheeting, and left to cure in our nice warm basement.

I had a bit of extra mix left over, and I also had some simple silicone molds nearby, so I poured the excess in to them. (I will show you how they turned out next week.)

The next day I unmolded it by very carefully flexing the tray until it popped out. This is what it looked like after unmolding.

concrete clock demolded

It was almost perfect, except you could just slightly see the outline of the snowman design. To remedy this I lightly wet sanded with 400 grit diamond hand sander. In hindsight, I would have not sanded. The finish was even more perfect before sanding, and I don’t think you would have seen the snowman after a quick buff. Where I did need to sand however was the back of the clock. I evened things out and took off any roughness around the edges.

Next we drilled out a hole for the clock works. Note, each brand requires a different size. We used one from Lee Valley, and it required a 5/16 hole. We purchased a masonry bit, marked the center of the clock and got drilling.

Drilling hole in concrete for clock works

I applied four coats of Buddy Rhodes satin sealer with a lint free cloth. After the sealer dried, the clock & hands were quickly installed with the provided hardware (read the directions for your brand). My clock works came with a hanging attachment, which wrapped around the clock works. It saved me figuring a way to attach a hanger to a piece of concrete. I opted to not apply any hour indicators to keep it more modern, but adhesive ones are sold in the clockmaking isle at your local craft store. For my next clock I think I may just put one number on. Perhaps a three? You can also make your own with adhesive vinyl. If you’ve got a craft cutter, you can easily make anything you’d like. Heck, even make an Alice in Wonderland clock with wonky numbers. (Storing that idea for LATER!)

The clock has a nice polished concrete surface, in fact, it’s so polished its hard to photograph. I have tried the clock in a few places in the house. Here is is against the black wall of our powder room. I love the contrast.

Completed DIY Concrete Clock
The concrete surface is nice and uniform with a few tiny bubble holes where I could have given it a bit more vibration. Honestly, if it was any more perfect it would look like plastic, so I don’t mind the imperfections much.

detail shot of concrete clock

Overall I’m very happy with the results, and am itching to make concrete clocks for everyone for the holidays.

DIY Concrete Clock

SOURCE INFO:

Materials:
Clock Works $5.40 – Lee Valley
Clock Hands $1.95 – Lee Valley
10lb bucket Buddy Rhodes Artisan Concrete Mix – $18.95 (one bucket would easily make 3-4 clocks)
Buddy Rhodes Water Reducer – $25 (optional)
Buddy Rhodes Coal Coloring – $9.85 (optional)
Buddy Rhodes Satin Sealer – $45 (optional – this will last you for a ton of projects, we did our countertops and still have a bunch left over)

Tools:
Milwaukee M18 Hammer Drill
Bucket
Paint mixing paddle – Paint isle at the hardware store
Buddy Rhodes diamond hand sanding pads
Trowel for scraping bucket
Dust mask (wear during mixing)
Rubber Gloves (concrete dries out your hands)
Plastic drop cloth
Masonry drill bit (the size recommended for your clock works)

Difficulty Level (on a scale of 1-5):

two out of five


Total Cost: $25

Disclosure: Buddy Rhodes sent me a sample of their new mix, with no obligation or compensation for me to post about it.

What We’re Working On – Nov 28

Hope all my Amerifriends had a great Thanksgiving!! Hopefully you are lounging off the turkey in your sweat pants, with a good cup of coffee. In Canada we celebrate our Thanksgiving back in October, so it was business as usual this week.

This is what we’ve been up to. Continue reading “What We’re Working On – Nov 28”

Handmade Holiday – Custom Beer Glasses & Carrier

Handmade gifts are one of my most cherished things. When someone spends time creating me the perfect gift, it means more to me than if they were to have bought me the most expensive gift around (except maybe an Audi R8, I’d jump in front of a bus for one of those.) Creating the perfect gift is rewarding both for the giver and the givee. Nothing is more awesome than the look on someones face when you give them the most badass gift around. To give you a helping hand on your quest for the epic gift, today a group of Canadian bloggers are showing you their best handmade holiday gifts for under $25. Check out #CDNHandmadeHoliday on social media to find some great gift ideas. Want to see what we made?

Custom Monogram Pint Glasses & Beer Carrier.


Wood Beer Carrier & Monogrammed Pint Glasses

This gift is a remake of an old classic. Starting with our simple beer carrier plans, we made a pine carrier with brass nails, and added a brass bottle opener.

Wood Beer Carrier

The holder will hold six short or tall cans, six bottles, or three bottles or cans and two pint glasses.

beercarrier3WEB

Next we created some custom monogrammed etched glasses. Using our Silhouette SD and a piece of adhesive vinyl, we cut out vinyl stencils.

Cutting Vinyl with Silhouette Stencil made with adhesive vinyl

The stencils were applied to the pint glasses, and firmly burnished in place. Masking tape was applied around the stencil to make sure no errant etching cream got on the glass.

glasses ready for etching

The etching cream was applied with a paint brush while wearing gloves, and left on for ten minutes.

Applying etching cream to glass

Then it was washed away and glasses dried. The simple yet classic monogram is the perfect addition to the classic pint glass.

Custom Monogrammed Beer Glass

The carrier & the glasses were all made for under $25! Just fill with your friends fave beer, and show up to your Holiday party like a boss.

SOURCE LIST:

Beer Carrier:

Materials:
Pine (1×6 x 2′) $3
Poplar (1/4″) $2
Dowel (3/4″) $2
Brass Finishing Nails $1
Bottle Opener – Target $5

Cut List:
2 – 9″x5 3/4″  – 1″ thick Pine
2 – 2″x 9 1/2″ – 1/4″ thick poplar (sides)
2 – 2 5/8″ x 9 1/2″ – 1/4″ thick poplar (bottom)
1 – 9 1/2″ dowel (handle)

Tools Used:
Miter saw – Milwaukee 12″
Combination Square
Drill – Milwaukee M18
3/4″ Spade Drill Bit
Orbital sander – Milwaukee
Measuring Tape


Etched Custom Beer Glasses:

Materials:
2 – Pint Glasses – The Bay $4
Etching Cream – Lee Valley -3oz $8

Tools Used:
Vinyl stencil – Silhouette SD
Paint brush
Gloves


Difficulty Level (on a scale of 1-5):

two out of five


Total Cost: $25

Wood Beer Carrier

What do you think? Would you like to find this gift under your tree?


Check out the #CDNHandmadeHoliday projects from other awesome Canadian bloggers:

Mason Jar Leather Lantern – NorthStory

Fabric Handmade Gifts – Rambling Renovators

Needle Felted Wool Socks – Fynes Designs

DIY Winterberry Branches – Vin’yet Etc

Homemade Sweater Mittens – Life is a Party

Pottery Barn Inspired Advent Calendar – New House New Home

Mr. & Mrs. Rudolph Towels – SewCreative

Mini Yarn Wreath Christmas Tree Ornaments – A Pretty Life in the Suburbs

Santa’s Sleigh Gingerbread Cookie Garland – Kitchen Counter Chronicles

DIY Anchor Fridge Magnets – Swell Conditions

Cranberry Pear Relish – Time with Thea

Burlap Photo Frame Display – Joy in Our Home

DIY Felted Bowls – Bear & Lion

DIY Beaded Star Ornament – lifeovereasy

Handmade Clipboard Photo Book – Personally Andrea

Handmade Holiday Decor – Brooklyn Berry Designs

What We’re Working On – Nov 21

What a week! Snowstorms, parkas, winter boots. It feels like mid December, not November. For any of you in Buffalo, I hope you’re digging out, that you don’t get rain and flooding this weekend, and that the Bills stadium will be rid of its snow so they can get back to playing there sometime soon.

10817813_1582114338689685_918035796_n

Enough about snow! Here is what we’ve been working on this past week.

Progress has continued on Project Nelson. The bench frames were assembled (using lots of clamps!)

photo 1(1)

While El Granto was working on cutting the frames, I was outside sanding the bench tops. It got a wee bit cold last weekend in Canada, so I was sporting a parka & snow mitts while sanding away.

10809486_731607070264566_483158886_n

Boy I wish we had a bigger workshop! There just is not enough room for a motorcycle, woodworking tools & me sanding two 7 foot long benches.

We also learned that our new shop heater could not be run at the same time as say the miter saw or the table saw… guess 200 amp service to the garage is on the wish list. Cause you know, turning the heater off every time you need to use a tool is not my idea of practical. The wee little heater does a good job of warming the air, but the cold concrete floor in the garage is still a load of trouble. We need to get some sort of flooring in there to keep the cold from transferring up through our feet. Any recommendations? Do those rubber puzzle piece flooring mats do anything? Does such a thing as insulated flooring exist?

Last weekend we also celebrated our good friend Josh’s birthday. It was a heck of a good time, that included some beers at Steam Whistle Brewery, and a trip to the Gentleman’s Expo.

photo 1(2)

You may notice most of the boys are sporting moustaches. They are raising funds for mens health as part of Movember. You can see their team the Lip Wigs here, and if you’d like to contribute, check out El Granto’s fundraising page.

When the weather turned super cold & snowy, I moved down to the basement and got started on a couple small concrete projects using the new 10lb mix from Buddy Rhodes. I’m super stoked with how they turned out, and hope to have something to show you early next week.

10809476_565232583577297_1119788269_n photo 3(1)

This is going to be epic, it just doesn’t look that way right now. You will never guess what I’m making with a dollar store Christmas cookie tray,  an old plastic screw box, and a jar of Vaseline.

photo 5(3)

The Vaseline was something I had on hand and is just there for weight purposes. Before you ask me why I have Vaseline in my basement,  you use Vaseline as a mold release. I just don’t randomly keep a jar of Vaseline in my workshop. I’m not that weird.

Wednesday night out of nowhere the city got hit with a snowstorm, that made commuting a nightmare. I braved the weather and headed to my local Target (Stockyards) for a Red Card event.

A Target Red Card chocolate. I only wish I could shop with it AND eat it.

They had a bunch of cool activities set up, such as a makeup consultations, a nice gentleman making ice cream in a Vitamix (seriously), a fashion designer who would do a sketch of you etc.

The fabulous Jen from Rambling Renovators was giving out styling advice. I even caught this behind the scenes shot while she was about to give an interview.

photo 5(2)

Oh and loved this Holiday table setting! Those candlesticks are fab, and who can resist that dapper deer sporting a mink stole.

photo 5

The highlight of the evening however was a book signing with Sarah Richardson for hew new book Sarah Style. Sarah is one of my design idols, and I was super excited to meet her and get my book signed! Such a fangirl!

10817732_1511441525772049_538890434_n

So that’s our week in review. What have you been working on?

We have a bunch of work on the docket for this weekend, and I will be sharing a great handmade gift idea for you on Monday. Have a great weekend!