Girls come with a lot of accessories. We have purses, shoes, scarves, jewelry and a plethora of other crap things. This is often why we require so much closet space to store it all. Most of my rarely used handbags and shoes are packed away, but my often used purses, scarves and shoes need to be close at hand, and thus can be kind of a mess.
To get them out of the way, yet keep them accessible I decided to hang some knobs inside our new master closet to hang my favorite accessories.
The problem with knobs is that they are meant to be screwed into a cabinet. This means that they have what you call machine screws (screws without a pointy bit) to attach them to the cabinet. They screw through the back of the cabinet into the knob. This makes them impossible to attach to a wall without some DIY’ing.
Here’s what you need to do. Take your knob screws out to the garage and cut off the heads of the screws using a saw with a metal blade. This now makes them headless screws (which means they can be screwed into things on both ends. )
Knobs
Head back inside wielding drywall anchors and a drill. Attach your wall anchors into the wall where you want your knobs.
Drywall Anchors in Wall
Then simply thread your now double sided screws into your knobs and your wall anchors. Ta Da! Knobs on a wall.
Knobs Screwed into Wall
Now hang your accessories, and get your nagging husband off your back.
Wheres my white Coach Purse? Hung up of course!Knobs Holding Accessories
You can easily do this with all sorts of knobs, for holding towels in the bathroom, coats at the front door, or even the dog’s leash handy but out of the way.
SOURCE LIST:
Materials: Saata Knobs (6 pack $1.49) – Ikea
EZ Ancors – Home Depot
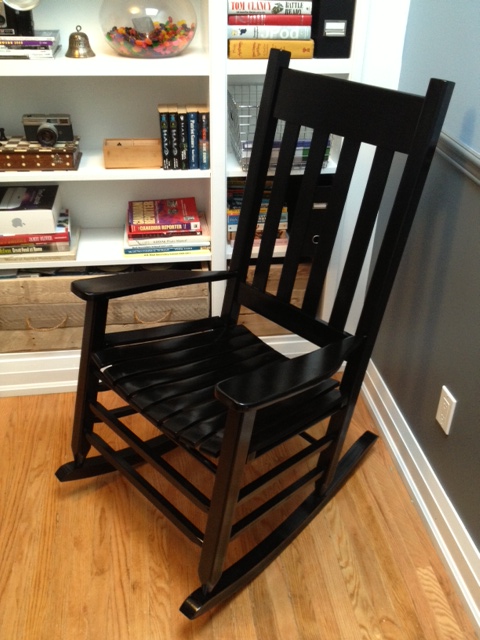
When I need to spray paint a small item (knob, handle or vent cover) I usually put it on some cardboard and head out into the alleyway behind our house to paint. I then bring it inside our garage to dry. However when the weather turns cold, or when you’re painting a big item, that may not be an option. Such was the case this past weekend when we needed to spray paint a rocking chair we were working on. It was BIG and I needed a lot of space to paint, which mean a lot of over spray. We decided to set up a temporary spray booth in our garage. Which El Granto proceeded to call my Dexter Kill Room for the entire weekend. He even posted this pic on facebook with the caption “Built Kristen her own Kill Room”. No wonder no one wants to come over for dinner…
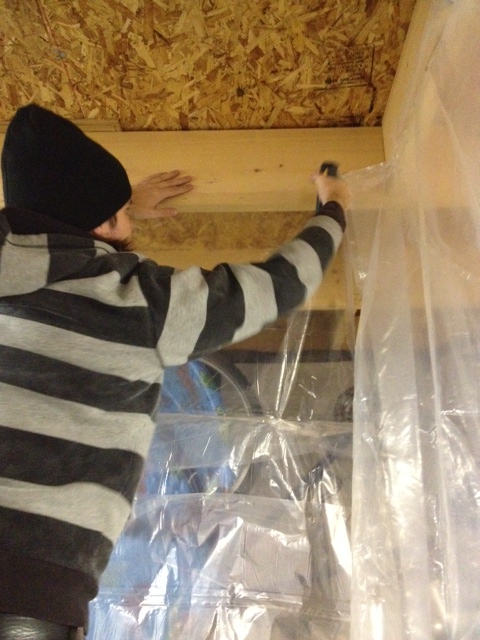
So here’s how we did it. I bought some heavy weight plastic drop sheets. We stapled them to the ceiling rafters in our garage in a 6’x6′ square.
El Granto Stapling up Drop SheetsInside the Spray Booth
We laid down a canvas drop cloth on the ground (which was an old wall hanging in our loft!) And using plastic clamps, shut the sides.
Clamp Holding Sides Shut
I left one side open for easy entry to the spray booth. We moved in our project.
Ready to Paint
After I finished painting (wearing a mask of course!), I opened up the sides of the spray booth and let the paint dry (note the garage was getting a bit cool by then, so to ensure my paint dried right I put a heater on to warm up the garage a bit.)
Chair Painted
The next day after everything had dried, we took down the plastic, folded it up and its ready to go for next time.
SOURCE LIST:
Materials:
10×25′ Heavy Weight Plastic Drop Cloth – Home Depot (note, the so called 25′ drop cloth was less than 20 feet long! We didnt have enough plastic, and had to use an old drop sheet we had laying around… insert grumpy face here.)
Tools Used:
Scissors for Cutting Drop Cloth
Staple Gun
If you follow us over on the new fangled thing called facebook you may have noticed a photo El Granto uploaded the other day of a busted rocking chair that followed him home. Continue reading “Repairing a Broken Chair”
When we moved into our house, we bought our first big kid bed. By that, I mean one that had a boxspring, had an actual frame, and that was big enough that hubby & I didn’t need to sleep like sardines. The problem with owning a big kid bed is that we didn’t own a headboard. Our bed looked giant and sad sitting in the middle of our master bedroom.
We needed to do something about it, but we didn’t have tons of coin to drop on it, and I wanted something specific. At this point in time, I called the only person I knew who could help me; Mom. Mom you see is an expert at all things Home Ec related. Cooking? Shes a pro. Sewing? She could sew a life sized stuffed moose in her sleep. Crafting? She is the Danish Martha Stewart. So you can see why I called in the big guns.
Mom rolled into town, accompanied with upholstery foam, tacks, and a shopping list. The only thing I brought to the table was the purple ultrasuede I had purchased the week before. Mom scrutinized my choice of fabrics, and although it wouldn’t be her first choice, she conceded to give it a try. We quickly measured up how tall we thought the headboard should be, and headed to HD to get some supplies. We had ¾” plywood cut to the width and height of our headboard by the nice fellow in the wood department.
We also picked up some 2×4’s to brace the headboard, and to connect it to the frame. Some staples, spray glue and a new jig saw later, and we were off to the races.
Back at home, we got out some large pieces of newsprint and taped them together to make a big piece of paper the same size as half the headboard (it’s always easier to draw half of your design, then when its time to trace your pattern, just trace one side of the pattern, flip it over and do the other side. It will be a perfectly symmetrical design). We then drew out the design we wanted. We futzed a bit with it, used a pencil and some string to make the curves, and when we were happy with it, we cut out the design to use as a pattern.
The Headboard Pattern
We then traced the pattern onto the plywood, and cut it out with a jig saw. We attached 2×4’s to the back of the wood as legs and braces. * Note if you are going to attach it directly to the wall, at this point in time instead of adding legs, you would need to purchase a flush mount bracket set from a hardware store, and follow the instructions on how to install (or check out this tutorial on eHow)
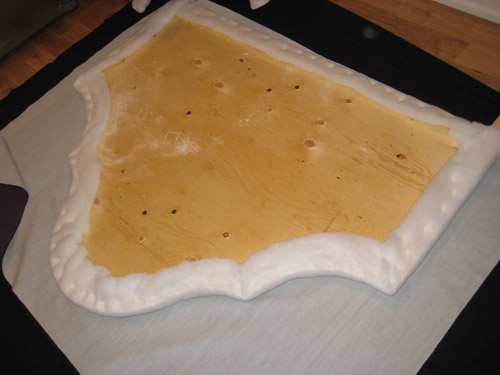
After the wood was cut, we took the pattern and cut it down one inch smaller on the outsides. We then traced this new smaller pattern onto our 1” foam, and cut out the foam with a sharp knife. We sprayed the back of the foam with spray glue, and placed it centered on the plywood.
The Foam Cut to Size/ShapeFoam Attached to Headboard Wood
Then came covering the headboard with cotton batting, folding it over the back of the plywood and stapling using a staple gun. I have this great backwards staple gun, that allows you to push the trigger forward instead of backwards, it’s much easier on your hand muscles.
Wrapping the Headboard in Cotton BattingHeadboard Wrapped in Batting
Next up, we laid our fabric face down on a clean surface (we used our kitchen floor covered in a sheet.)
Headboard Laid on Fabric Ready for Upholstering
We then wrapped the fabric around the back of the headboard. This is where it gets tricky, and requires as many hands as you can recruit. Starting with the bottom of the headboard, fold the fabric around to the back, make taut (but don’t over pull and stretch it) and staple to the back of the board. Do this all along the bottom every 4” or so. Then move to the top of the headboard, and starting at the center do the same thing, making sure that the fabric is nice and smooth and flat on the front of the headboard. If your headboard is square, this will all be pretty easy. We of course made a fancy-dancy curved headboard, so it’s a bit trickier. With a curved design, you will have to make relief cuts to get the curves nice and smooth. You will be using a LOT more staples on the curves, making sure you get all the fabric pulled taut and smooth. You may find that cutting some of the excess fabric off helps, but make sure you leave yourself enough fabric to get a good grip.
Stapling Fabric to Headboard
Work your way around the whole top of the headboard, one side at a time then move to the sides of the headboard.
You will probably want to go over and add a few more staples in places that you may have missed, and cut off some of the flaps of fabric to tidy everything up. Now flip it over, and admire your handy work!
Headboard Upholstered
You still probably want to know why we cut the foam one inch smaller that the wood? We did this as we wanted to add a decorative nail head trim, and we didn’t want it to get buried in the foam. By cutting the foam short, it left us a nice space to lay the trim. We used nail head strips from Lee Valley Tools. They were much quicker and easier to lay straight than using individual nails. You only actually have a nail once every 6 nail heads or so. This was great for the straight parts, but around the curves I wished for more nails. The trim just isn’t as smooth as I would like it. Make your way around the headboard nailing in as you go, and curving the strips to meet the curve of your headboard. We used a small hammer and it didn’t damage the nail heads, but a rubber mallet is recommended.
Headboard With Nailhead TrimNailhead Trim Detail
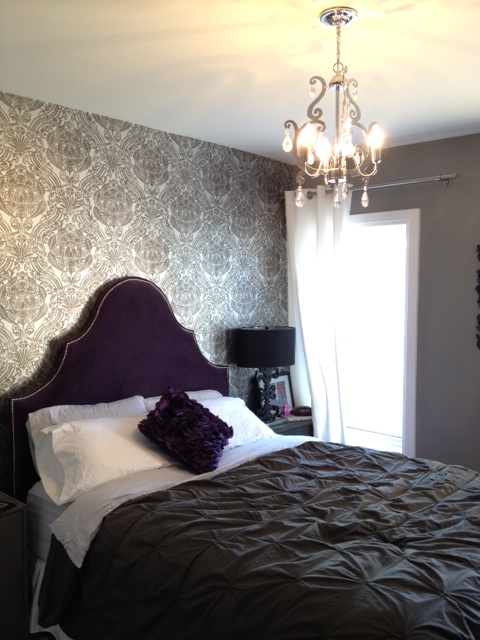
Now quickly rush your headboard up to your bedroom and place it behind your bed and pat yourself on the back. The get out the drill and some bolts, and bolt it to your bed frame, or attach it to the wall.
Headboard Complete & Installed
SOURCE LIST:
Materials:
Plywood- 3/4″ 4×8 sheet cut to size at the store – Home Depot
1″ Foam – Len’s Mill Store
Cotton Batting – Len’s Mill Store
Purple Ultrasuede Fabric – Designer Fabrics
Nailhead Trim – Lee Valley Tools
Spray Glue – Home Depot
Staples – Home Depot
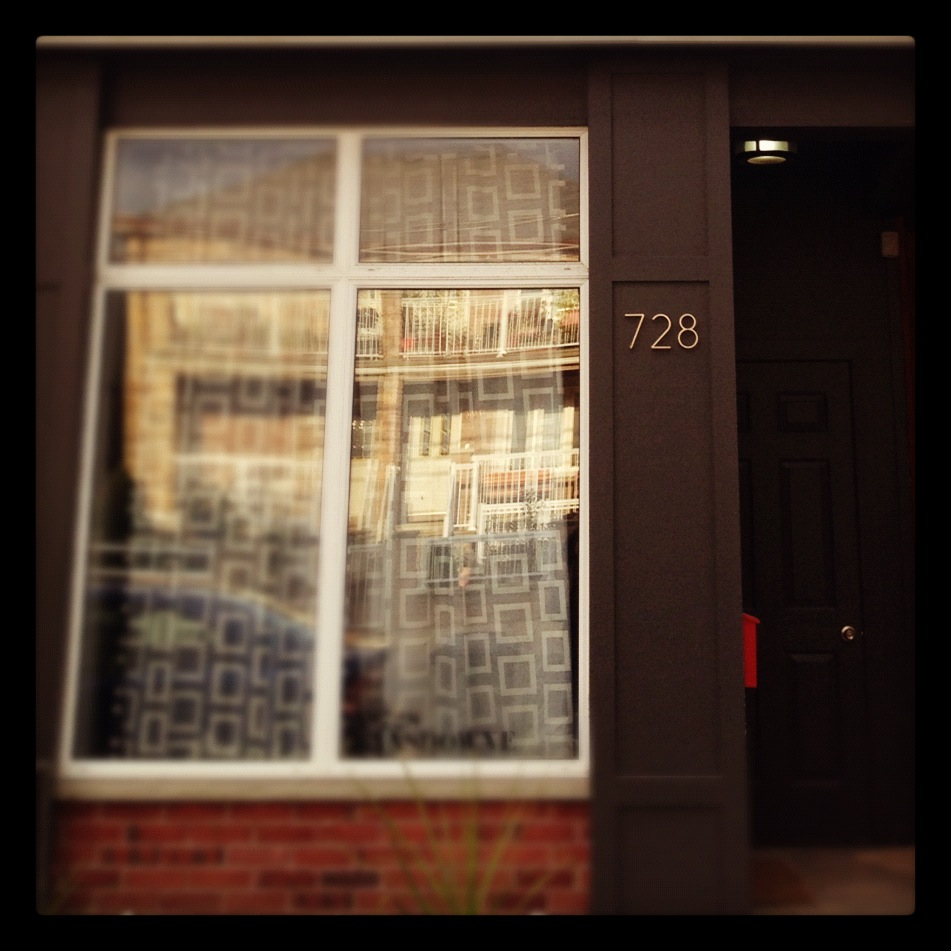
The Storefront has nice high ceilings on the main floor. At a little over 10 feet tall they visually make the house seem a lot bigger and more open, but it makes for a difficult time finding window coverings. Continue reading “Window Coverings for Tall Ceilings”
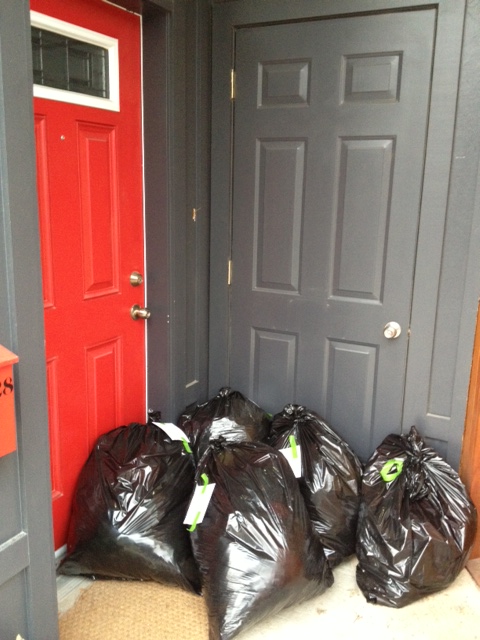
Fueled by El Granto’s searching for a specific article of clothing that never got unpacked when we moveed (yeah I know!), we did a bit of a mini organization session last weekend. It involved taking every single thing out of our closet, organizing and purging and filling five, yes FIVE! bags of clothes to donate.
Our Five Bags of Clothing Ready for Today’s Pick-Up
We also made some room in our closet and dressers by swapping all our summer wear into storage, and getting out all our cold weather clothing.
After doing all that work in our closet, it inspired us to clean out a few more areas around our house. We had a few bigger pieces (dvd bookcases, a dishwasher, an office chair & some bedside tables) that were taking up too much real estate. A few minutes taking photos and writing up Craigslist/Kijiji postings, and we’d sold over half of it in less than 24 hours! (and given away a few items for free!) The cash made will get re-invested in home projects, and now there’s some extra room in our garage and basement!
I always forget how easy it is to purge old unused things, and kick myself for not doing it more. I may not need things anymore, but I bet someone does.
For our clothing to donate, we set up a pick-up appointment with The Canadian Diabetes Association’s Clothesline program. You can call, or schedule it online, and they will come and pick up your donations. (and no one needs to be home, just label everything with a “D” and put it on your front doorstep.)
The garage also got a tidy, and up next I am looking at you basement…
I got a Pinterest account two years ago, mostly for pinning my wedding ideas, and then when we bought the house it extended into home decor. I am by no means popular on Pinterest, I just do my thing and at time of publishing this I only have 1576 followers and just over 2000 pins.
I do however have one popular Pin.
Yep that’s right, one. I am not even sure how or when it got popular. I posted it almost two years ago. One day it just had tons of repins.
I love Pinterest. I have used it for organizing my wedding ideas, dreaming and planning our home renos, and even a recipe or two.
Most of all it inspires me. It’s like looking through magazine after magazine of gorgeous ideas. A few minutes of Pinteresting and my head is full of great ideas and projects, much to the chagrin of my husband!
So when Sherry @ Young House Love was discussing this years fall edition of their Pinterest Challenge, I decided to jump in with both feet.
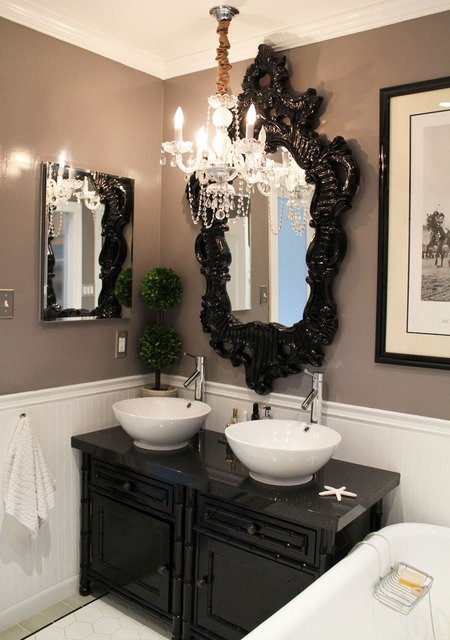
I have been obsessed as of late with paintable wallpaper. I just love the texture and depth of it. Take for instance my inspiration shot from Emma @ The Marion House Book. Her use of the paintable wallpaper with a dark dramatic colour in her office is just stunning!
I already have a wallpapered wall in my Master Bedroom, but I have been thinking about adding some drama to my master closet. It’s not a walk-in closet, nor does it have room for a chandelier or an ottoman or any sort of art. Its just a standard double closet, but why should that stop it from being awesome?!
So I set out to add some drama to my closet by wallpapering & painting the insides of my closet doors! Yeah that’s right, the insides of my closet doors, so that when you open the doors they will scream TA-DA! It will be like having your own sexy magicians assistant hidden inside your closet.
Closet Before
So to put inspiration to fruition. We picked up a roll of (0n sale!) Martha Stewart paintable wallpaper in a pressed tin design, as well as a tester jar of dark purple paint.
We removed the doors from their hinges, then set them up on some saw horses in the guest room. The doors were a bit wider than the roll of wallpaper, and I could have taken the easy way out and just done a paneled insert for the door, but I decided to do it right and cover the entire door. So I laid out my first sheet of paper, wet & booked it, then applied it to the straight edge of the door. We smoothed out the bubbles and ensured the edges were well pressed down.
One Sheet of Wallpaper Applied to Door
We then lined up a second 1/2 sheet of paper (split lengthwise, so I could use the other half for the second door). Matched the pattern, wet & booked and applied the wallpaper. We then did the same thing on the other door.
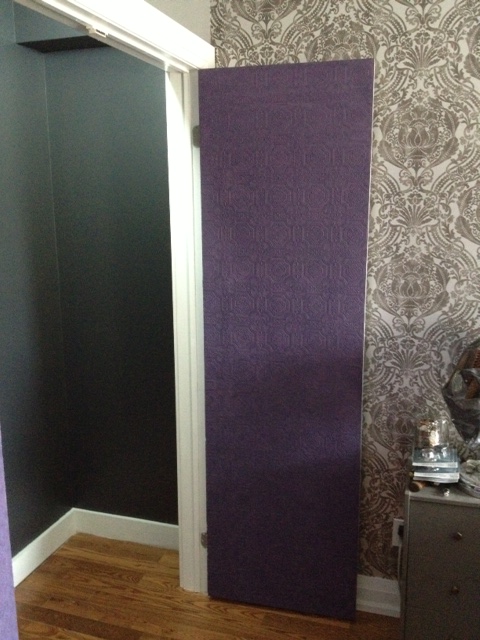
Wallpaper Applied to Doors
I left the wallpaper overhanging the edges until it all dried. At that point I flipped the doors over. Placed a piece of scrap wood underneath to use as a cutting board. I then cut along the edges of the door with a sharp blade, cutting off the excess wallpaper and leaving a smooth edge.
We then gave the wallpaper two coats of purple paint with a brush. It was a pain to get the paint into all the little crevices! The second coat went much faster than the first.
Painting the WallpaperDoors Wallpapered & Painted
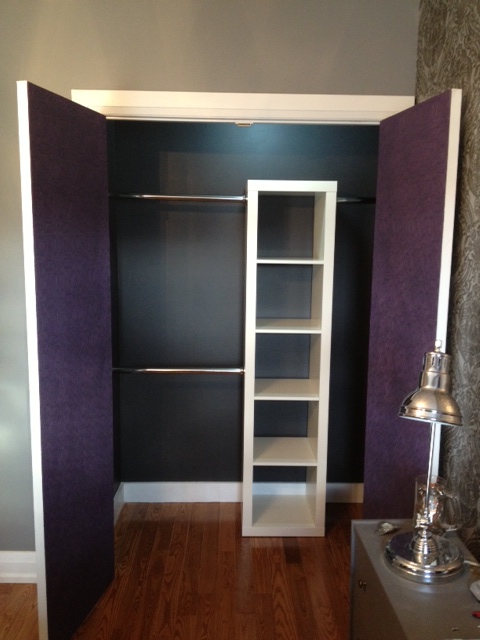
While the doors were drying, we gave a coat of dark grey paint to the closet, and prepped for new rods & organizers. We re-hung the doors, and this is what we have now! (sorry about the pic quality, we haven’t had an ounce of decent natural light in days with this storm!) I will take better pics once some sunshine decides to come out and play.
SOURCE LIST:
Materials:
Martha Stewart Paintable Wallpaper in Pressed Tin – Canadian Tire
Behr Sample paint – Home Depot


")


")