The Tale of a Too Tall Tree

I thought I’d keep things green around here in honor of St. Paddy’s day. I hope you’re enjoying a pint of beer and pretending to be Irish for a day. (I know…I know…you’re Grandmother was 1/8 Irish…sure.)

I’ve got a story for you about a tree plant.

Last week we had my mother in law’s car while she was on vacation. It was great! We bought so many large things, and forayed to places usually inaccessible to those without cars. We went to an outlet mall people! Urbanites don’t get to experience such things.

While we had a car I wanted to get a new plant. Odin is finally over his “eat all the plants!” obsession, so I went in search of a plant. I wanted a fiddle leaf fig tree. They’re beautiful and fancy and people on the web say they’re cool, so I needed one. Problem is, they can be expensive. However my main squeeze Ikea carries them. So off to Ikea I went in search of froyo and a fiddle leaf fig.

I get to Ikea, waited in line for my froyo and wandered the store eating my yogurty goodness and ended up in the plant department. I looked around and…NO FIDDLE LEAF FIGS.

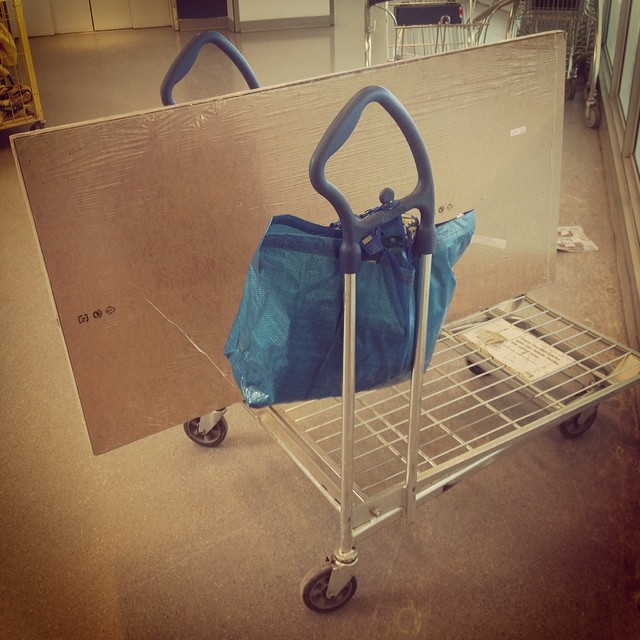
Sad yet determined, I picked the prettiest palm I could find, grabbed a basket and headed to the car.

First problem: Plant is too big for car. That’s okay, I can put the seats flat and lay down the plant. Huzza!

I drive it home willing it to not roll around and get dirt all over my MIL’s car.

Get it home, and wrangle it out of the car. I’m starting to get the feeling that this plant is a bit big. I get it into the house and carry it upstairs.

Oh wow, this plant is really big…I have to squish it through the hallway.

I place the plant in it’s intended destination, the alcove outside our master bedroom beside a full length mirror.

Oh…the plant completely hides the mirror and it sticks out blocking our bedroom doorway and the hall. Sh$t. Now what?

Oh! We have a big guest room (big in comparison to the rest of our house) I’ll put it in there!

*Squishes plant down long tiny hallway.

In front if the bay widow maybe?
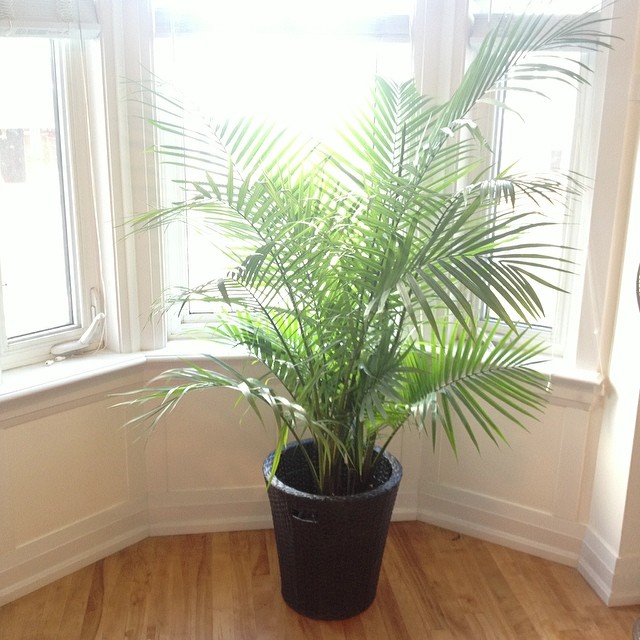
7b9ecdd8ac8511e3bdba1231f19b6e09_8
Umm…no.

Well crap. I don’t have anywhere else to put it. The only other place is in the corner where the hot pink chair lives.

1633de42805d11e3af9412422c162709_8

So I move out the chair, and slide in the plant, shoving his leaves against the
Wall and forcing him in. Ta-da! It fits(ish).

1922479_529097883869470_448614614_n

Uhhh…

What about the chair?

One can only do so many things with a hot pink bankers chair.

I know, I’ll shove it in front of the closet. No one needs to go in the guest room closet. The only thing in there is extra duvets and old clothes.

And. like. if you need to open the closet, the chair totally can be moved. Right? RIGHT?

2ce3b954ad2711e3b833123fdcabf3b2_8

Oh I give up.


El Granto’s New Baby

In the last 5 years our lives have gone through a lot of change. We got engaged, married, bought a house, got a dog etc. We became grown ups (well as much as we ever could). In the midst of saving for and paying for all these large milestones, one of El Granto’s passions got put on the backburner.

El Granto loves motorcycles. Especially the cafe racer variety. He purchased his first motorcycle about 7 years ago. A 1972 Honda CB360 lovingly named Penelope. She was a good little bike, but as she was 40 years old she needed some help. He had her running well for a while but when the above mentioned real life things came up, poor Penelope started to show her age. She ended up needing more work than was viable, and last spring El Granto sadly put her up for sale.

Ever since that day, the poor guy has had a sadness in his eyes when he watches a cafe racer (or any bike really) drive by on a sunny summer day. He looks wistfully at our friends motorcycles stored in our garage. He had new motorcycles set as his desktop wallpaper and I often caught him pricing out new bikes and doing quiet math sorting figures and determining how much he would have to save to make a new bike a reality.

After 3+ years of saving his pennies, El Granto has finally made his dream a reality. This past Saturday a truck and trailer pulled up in our neighbourhood and a nice man unloaded a shiny new 2014 Triumph Thruxton 900 and started it up. The odometer stated 000000km’s and the man handed El Granto a folio and a set of keys and said “She’s all yours.”

The grin on his face was priceless. More excited than a kid on Christmas, El Granto had gotten his dream new toy (I may have even seen a tear). He walked around it looking at all its shiny chrome and listening to the purr of the engine. He donned his helmet and gloves and took her around the block coming back to the garage with his horn blaring getting our neighbours to come out and see the new toy!

As it’s still (woefully) winter here in Toronto, he had to unfortunately pack her away in the garage and wait for spring.

I have caught him out there in the cold garage with a light on happily sitting on his new bike. Playing with the steering lock, or removing the cowl. He can’t wait for sunshine and dry pavement, and I can’t wait to see his smile as he revs her up and takes her for a spin.

Newmoto

Basement Progress Report

I was really hoping to have a completed DRIcore subfloor to show you guys today, but alas we ran out of leveling shims and left off about 80% done. We are pretty proud of how much we got done though! We got our DRIcore delivery on Friday and El Granto unloaded all the subfloor & SMARTWALL panels into our dining room. Thank goodness for big tough husband muscles. I would have broken down and cried just looking at all that stuff to unload!

DRIcore subfloor and SMARTWALL unloaded into our dining room.

We did knock a few other things off the list since we last spoke (pretend we’re old friends having a lovely chat over tea and scones).

I tried some more wiring scenarios with the basement hall light, and have still come up short. I can only manage to get either the staircase OR the rest of the basement lights to work, not both. Womp womp.

I can only manage to have either the staircase light work OR the basement lights. Not both.

Not to be deterred, I switched gears and set up some DIY scaffolding, which consisted of a leaning ladder and a 2×12.

Kristen's DIY "Scaffolding"
Kristen’s DIY “Scaffolding”

El Granto didn’t approve, but it actually felt quite sturdy to me! With the “scaffolding” in place I was able to reach most of the basement staircase ceiling (which happens to be the underside of the 2nd floor staircase). Now that we had access I could apply strapping to the staircase ceiling and prep for a new ceiling cladding.

After the strapping was up I could cut my V groove boards that I primed last week. A few cuts and out came the compressor and brad nailer. Most of the time my brad nailer and compressor do the job just fine, but when you’re standing 8 feet over the staircase putting up boards over your head and wrestling with the air cord, I really wish I’d splurged on a cordless brad nailer. This was especially so when my nailer kept misfiring and leaving nail-less holes in my board. Note to Santa, please bring Kristen a cordless brad nailer for Christmas, it will cut down on her volume of profanities exponentially. xox

Up went the first 8 boards and I was incredibly exited to see the transformation. The rest of the boards will have to hold off until I can fix the (insert string of expletives here) new staircase light. Then they need to be caulked, holes filled and painted.

Basement ceiling cladding going up

Next up was tackling another one of my problem areas from last weekend: the new washer & dryer countertop. It was too tall to fit under the wall mounted lint trap. So out came the washer & dryer (again!) and we lowered the leveling feet, re-leveled them and re-taped the dryer vent and voila! The counter now fits. To get the counter to slide all the way back to the wall we broke out the jig saw and cut a notch for the dryer vent. The counter slid in perfectly, and we will now have no lost socks behind the dryer! Can I get a woot woot?

Next up on the task list was installing a little shelf over the washer & dryer to hold laundry detergent etc. Two Ikea black shelf bracket and a scrap piece of pine later as we had ourselves a shelf.

Washer & Dryer countertop and new shelf installed

This week we would like to tackle painting the basement stairs, and this weekend finish off the DRIcore subfloor and start tackling the walls!

What project were you working on this weekend? How did it go?

Brass is Back

We have the most spectacular original farmhouse cast iron laundry sink in our basement. It’s one of the only original items left and as soon as we saw it we fell in love. I’m not gonna say it’s the only reason we bought the house, but damn… it helped sway us.

With the sink came an old brass faucet. It’s nowhere close to original, and it has seen better days. This sink and faucet went through two gut renos, countless paintbrush washings, and who knows what else. The faucet was tarnished and covered in dirt, grime and a myriad of old paint.

482ddd68911911e38e630e8f3fbee28a_8

I was temped to replace it, hell even spray paint it, and put my thoughts out to the world on Instagram. Then Carrie and Lindsay stepped in and convinced me to give the poor brass faucet some TLC and see if I could save him.

Out came the scotch pad, a whole lot of elbow grease and some Brasso, and these are the results.

photo(3)

What do you think? Is brass back?

I still haven’t fixed the rotated handle, simply because I can’t find the shutoff valve for the sink! Really! I have six million shutoffs everywhere in the basement, including 4 right beside the faucet, but none of those shuts off my sink. Until I find the magic valve, poor little faucet will have a broken wing.

Next up, I’ve got to tackle the sink. Anyone have any magic products for cleaning cast iron sinks? I’ve got to clean the raw cast iron base and the enameled bowls. I see more elbow grease in my future.

——————————————————————————————————-

Renovation Stress

Generally our projects tend to go fairly smoothly. We plan and prep a ton, and usually stay on budget and don’t have many delays. However, it’s not always sunshine and roses. We too can be plagued with reno stress and generally a whole lot of crap that doesn’t go right.

This weekend the basement project fell into the not going so well territory.

Saturday:

El Granto headed to the motorcycle show to see a man about a motorcycle (more on that later) . I saw the sunshine from my bedroom window and thought “oh what a nice day, I’ll go to Ikea”. What a mistake. It was sunny but frigidly cold and windy. I took the subway to Kipling, and waited 45 minutes in the middle of the parking lot for the Ikea shuttle. Bonus points for Ikea making their shuttle stop without any shelter, and not in viewing distance of the station. Good work Ikea. After arriving at Ikea I braved the Saturday crowd and the arguing couples and screaming parents to pick up a (very large) counter for the washer & dryer as well as a few other accessories. I also needed to make a stop at the lighting department, as I had purchased a purported “ceiling light” which was actually a plug in light. I hoped I purchased the wrong version, and that they magically had a hard wired option, but alas no. Nor does Ikea have conversion kits or any easy way to turn their plug in lights to hard wire.

Discouraged I left Ikea with my purchases and carried a 20lbs 5×2.5′ countertop home on the shuttle and subway. By this point I was cursing myself for not renting a car, or at least going to Ikea with a pal to help carry.

How am I going to get this home?

I finally got everything home and went to install the countertop and realized that my lint trap above the dryer was too low and the counter wouldn’t fit. Awesome. I left the counter and called it a day.

lint trap is line 1/2" too low.
Really? That darn lint trap is line 1/2″ too low.

Sunday:
We headed out early to catch brunch at one of our neighbourhood spots only to find that the drunken hipster hockey fans had been up since 6am and were looking for some breakfast to sop up the booze, and all our fave brunch spots has lines out the door. (*Note to all the non-Canadians, our bars don’t usually open at 6am, but because of the early morning gold metal Canada vs. Sweeden hockey match, the government changed the rules  for the day to allow bars to be open and serving for the big game. What can I say, Canadians love their hockey and beer.)

Sad and brunchless I gave up and headed out on some errands. I bused down to West Elm to pick up a light conversion kit. A $25 fix for my $15 Ikea lamp problem, but at least I knew it would work.

lights
The cute (but evil!) $15 Ikea light and the $25 West Elm Conversion kit to fix it

I headed home, dropped off my shopping then headed back out to Home Depot to pick  up the cladding for the basement staircase ceiling.

Ceiling cladding options: Beadboard or Barnboard

I decided on pine barnboard planking and proceeded to go through each and every board in stock to find only three acceptable boards. Well that’s not enough to plank a ceiling, so out went the barnboard and in came V groove tongue & groove. Another slog through the pile to find acceptable pieces and then a long hard trip home on public transit with the lumber and supplies.

After arriving home I set out to priming my planks and finish wiring and installing my Ikea light in the basement staircase (there is no light there and it’s pretty dark/sad.)

Priming the Ceiling Planks

After struggling with the wire I’ve discovered that the light switch isn’t wired with two hot wires and meretted neutrals, but alas is wired hot in, neutral out. Uhhhh… how am I going to add a light to this circuit? I tried a few wiring options and wired up the light to test, only to drop the two tiny black screws that hold the light to the ceiling down the stairs bouncing around and getting lost forever. Much swearing, yelling and a slam of a door ensued.

I unwired the light, reattached the existing wiring (so we would have some light in the basement) and left a ladder in the powder room, a compressor in the hall, beadboard covering every surface in the dining room, a nonworking light hanging from an unplanked ceiling and construction debris everywhere and went to bed.

Tonight I am going to try to muster up the courage to take another stab at it, or I may just sit on the sofa with a slice of pizza and hope that a DIY fairy comes to fix my problems.

Dirty Laundry

About a week and a half ago we unhooked our washer and dryer and moved them to the middle of the room so we could waterproof paint behind them. We also wanted to attach the laundry pedestals we have had in the boxes for (cough cough) two years.

We accomplished that last week, but we couldn’t put the laundry pair back until we installed the DRIcore subfloor below it. However, our DRIcore delivery isn’t scheduled until later this week. Aaaand the dirty laundry was starting to pile up.

With the subfloor project at least a week away we decided we needed to remedy the laundry situation. We picked up 6 DRIcore subfloor panels and some foil tape, and set to reinstalling the laundry.

We measured our room and planned our DRIcore subfloor layout (more on this in another post), and installed 6 pieces under the laundry pair.

Installing the first piece of Dricore Subfloor
Installing the first piece of DRIcore Subfloor

This isn’t ideal (we should really lay the whole floor at once) but this gal wanted some clean clothes to wear to the office that weren’t track paints and paint covered high school basketball T-shirts.

After the DRIcore was laid, we measured for our hard duct line for the dryer. As we had added laundry pedestals and the DRIcore subfloor,  the vent line needed to be over a foot shorter.  So out came the Dremel and a metal cutting wheel and El Granto cut down the dryer vent line.

El Granto cutting the dryer vent

We reinstalled and taped the seams with new foil tape. (or should I say I cut El Granto some pieces of tape, and he reinstalled).

Taping seams in the dryer duct-work with duct tape.
Taping seams in the dryer duct-work with foil tape.

Now we could level the dryer using the adjustable feet in the laundry pedestals. A few turns of the wrench and everything was nice and level. Next we replaced the washer, hooked it up and leveled it as well. We then matched the heights of the washer an dryer and placed them side by side.

Washer & Dryer re-installed

I am kicking myself for not installing the laundry pedestals sooner. It is so much nicer not to bend over to switch the laundry!

The room is also starting to come together. With the washer & dryer back in place, you can really start to see the contrast of what it used to look like.

Remember this?

Laundry room before
Laundry room before

I cant wait to get the rest of the DRIcore subfloor in and get started on the walls!