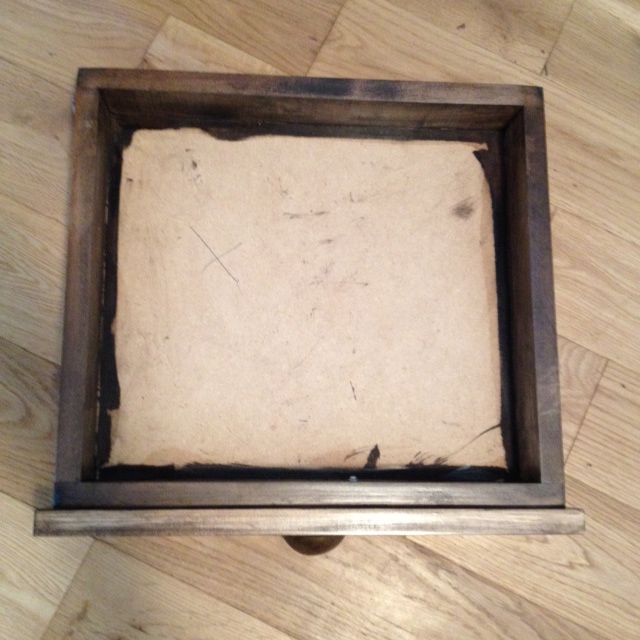
The bottoms of the drawers for our media cabinet were a bit, well…not living up to their potential. We used hardboard & chipboard as the drawer bottoms and compared to the stained wood on the rest of the piece, they look a bit shabby and out of place.
The poor shabby little drawer bottom, covered in stain and looking sad.
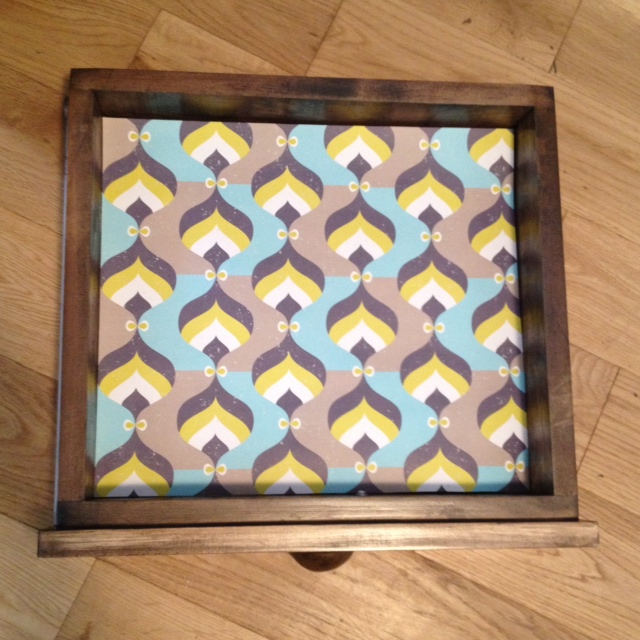
I knew all along that my anal retentive personality wouldn’t let the drawer bottoms live in such a state. Not only were they not up to par, but they were an excuse to add a bit of fun to an unexpected place. I love adding colour/drama where you least expect it (like my purple wallpapered closet doors.)
For the drawer bottoms, I narrowed it down to either paint or paper. While paint could be fun in a nice bright colour, I decided on paper in the end to add a bit of a graphic punch.
There is a newly opened store in my neighbourhood called TOWN that I knew would have some lovely papers. (They also have the best selection in cute cards!). The selection at TOWN did not disappoint, and we spent several minutes trying to decide on just one pattern (would have bought them all!) We took our sheets of heavy weight wrapping paper home, cut out squares to fit the drawer bottoms, and got to gluing. I used Elmer’s extra strong spray adhesive (the same spray adhesive I use to attach foam for upholstery projects). A few quick sprays of adhesive, and careful application onto the drawer bottom, and we had a much nicer looking drawer.
Drawer bottom lined with paperA little pop of sunshine every time you open one of the drawersAhhh, isn’t that much nicer?
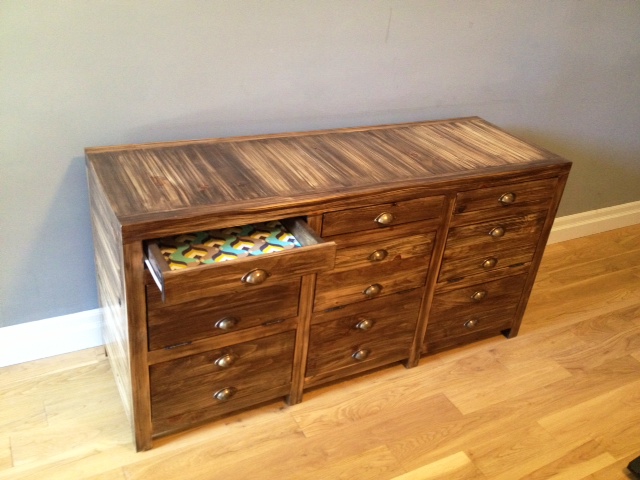
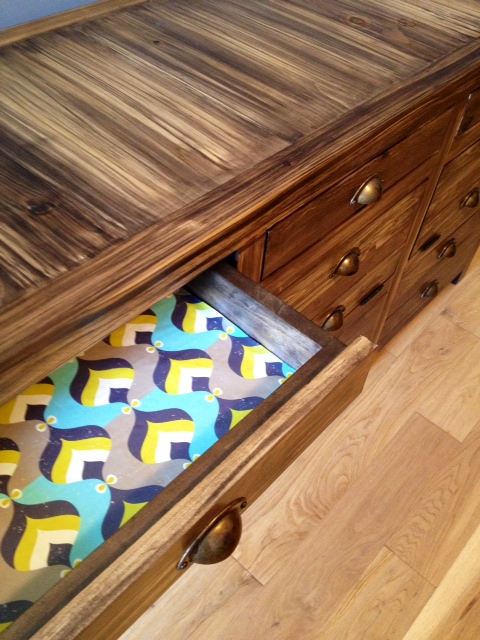
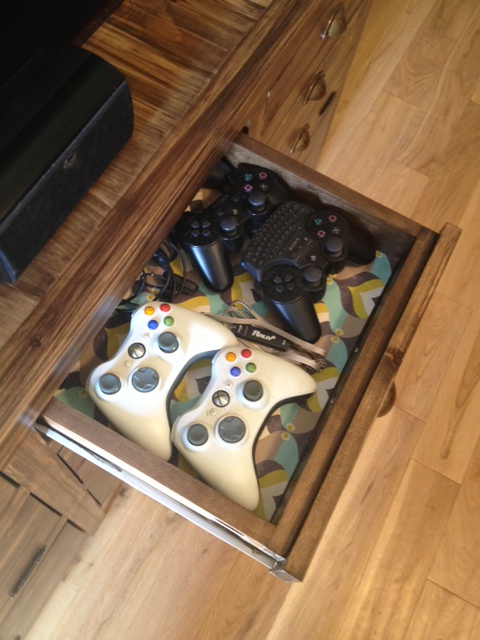
I bet you’re wondering how much use we get out of those skinny little drawers. LOTS, they hold remotes, video game controllers and all sorts of little things that you don’t want out all the time, but would get lost in the big drawers. I am LOVING not having the XBOX and PlayStation controllers hanging out on my end table!
Yay! Controllers and USB keys are happily hidden away.
The drawers are lined, now I can sleep again. (Isn’t everyone kept up at night by the thought of an unsightly drawer bottom. Wait, that’s not normal?)
SOURCE LIST:
Materials:
Wrapping Paper (3 sheets) – TOWN the Store
Elmer’s Spray Adhesive
Not long after we moved in, we built a large planter box out front of the Storefront. It makes it look a bit more homey, and keeps people from peeping into the storefront window. Last fall, we also added a black urn right underneath the mailbox.
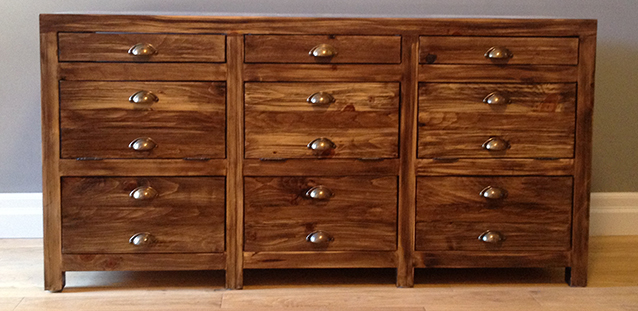
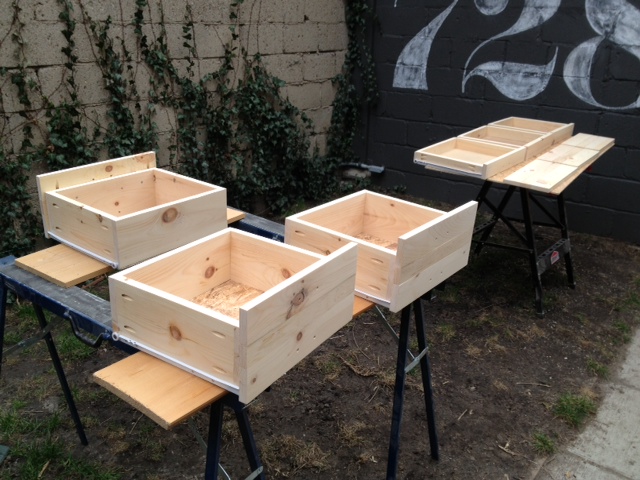
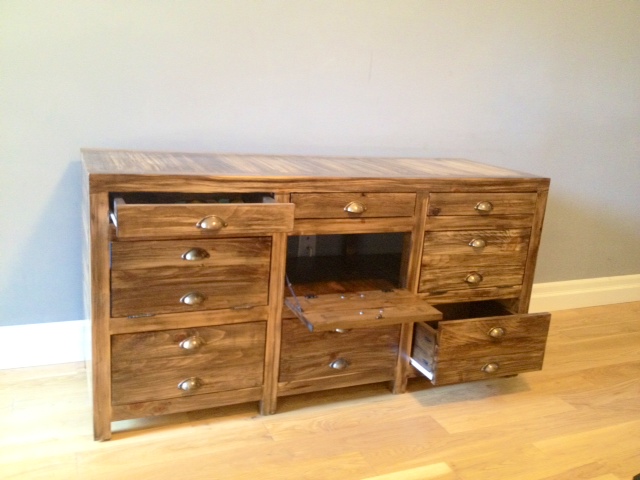
Its been six weekends of hard work, but we finally reached the final stretch of the printmakers media cabinet project.
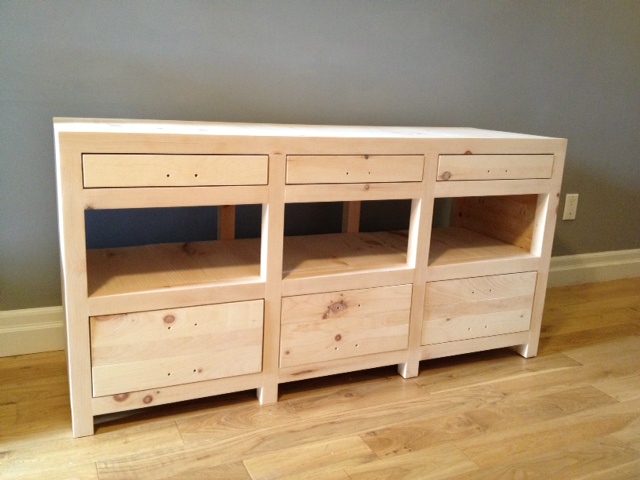
This is where we left off. The cabinet was built and sanded and ready for finishing. If you missed it, check out part one, two, three, four, and five of the project.)
Cabinet built and ready for stain & hardware
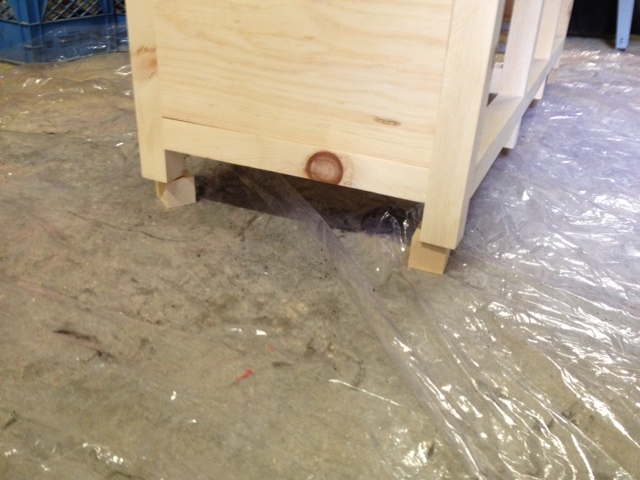
Next up we took all the drawers outside, and set up a staining station, and gave everything a coat of wood conditioner.
The drawers & doors ready for wood conditionerDIY Tip: Put your cabinet on scrap wood to make it easier to stain the bottoms of the legs
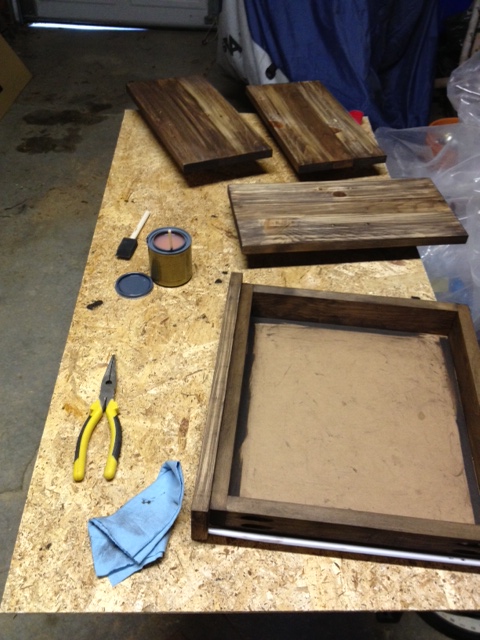
After letting the wood conditioner sit for half an hour, we set out to staining. We had done many a test on stain, and came across a cool technique we wanted to try on the cabinet. It involved wetting the wood, then putting on oil based stain on top of the water, then quickly wiping away. It left an almost zebra like effect. We knew it was going to be a risk, but decided to give it a try none the less. It involved several hours staining, many a swear word, lots of teamwork, and a whole lot of second guessing.
Cabinet stained
We took two days to stain everything, the first day we did the cabinet and all the drawer & door fronts. The next day we stained the interior of the cabinet and the drawer boxes. For the interior, we didn’t bother doing our stain technique, and instead just used the stain traditionally.
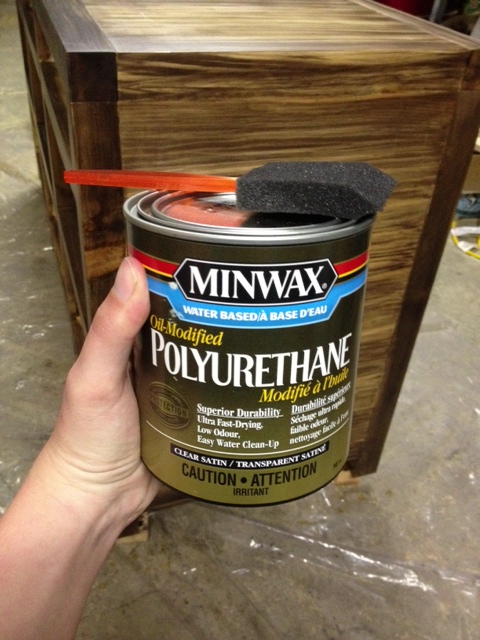
After the stain dried, we applied several coats of polyurethane, sanding with a 320 grit sandpaper in between coats. We put a total of 5 coats on the top of the cabinet, and three everywhere else.
We use Oil-Modified Polyurethane with a foam brushDrawers & Doors mid-poly
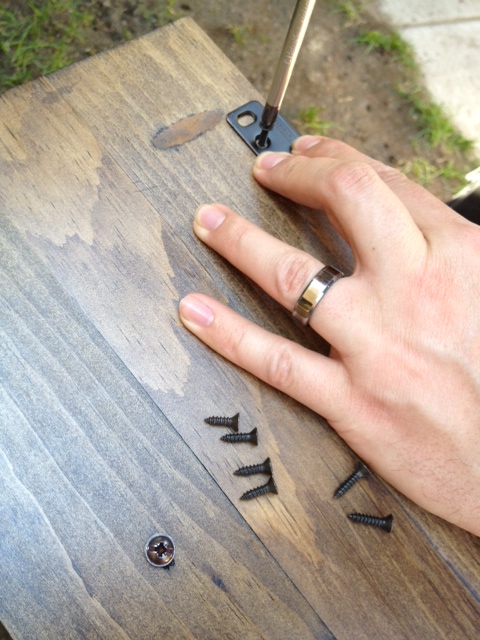
Once the poly had dried, we set to installing hardware. The screws that came with our cup pulls were too short for the double thick drawers, and too long for the single thickness doors. So we headed to the hardware store and picked up longer screws for the drawers, and El Granto cut down the screws with the dremel for the doors.
Pulls attached to door fronts, and ready for hinge installation
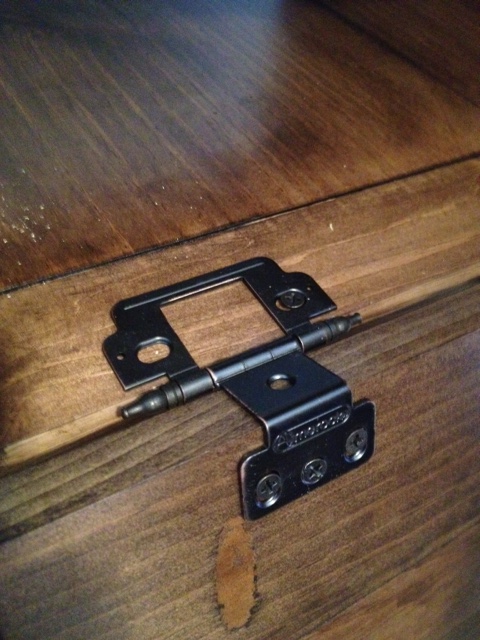
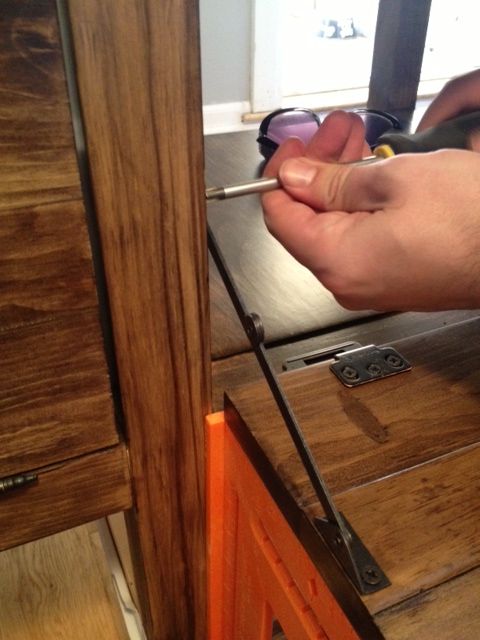
After the handles were installed, we set to installing the hinges, stays and clasps for the doors.
Installing hinges on the doors
This involved a whole load of finikity work, lots of tiny screws, and stubby little screw drivers to fit into the cabinet.
Attaching hinges to the cabinetAttaching claps to keep the doors closed
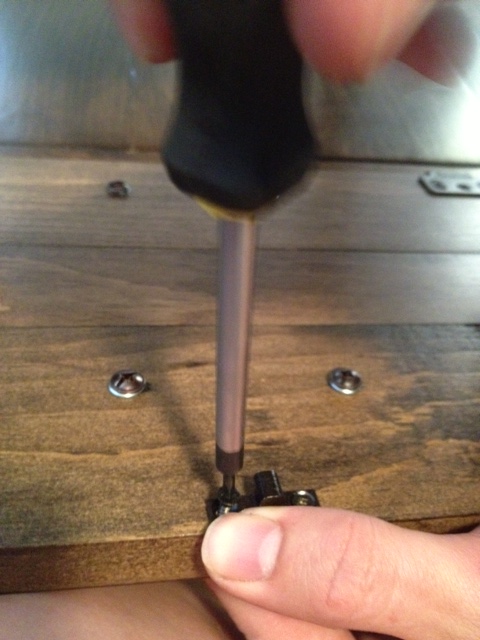
Next up, we needed to add the lid stays to make sure the doors dont open too far. We wanted them to stop at 90 degrees.
Installing lid stays
We used a square to hold the door at 90 degrees and attached the stays with small screws.
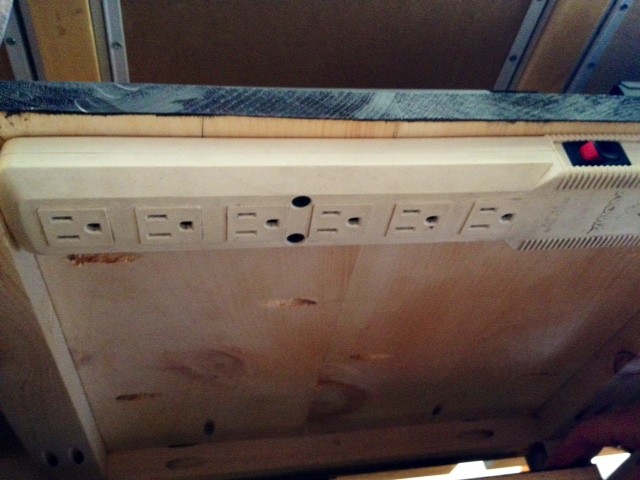
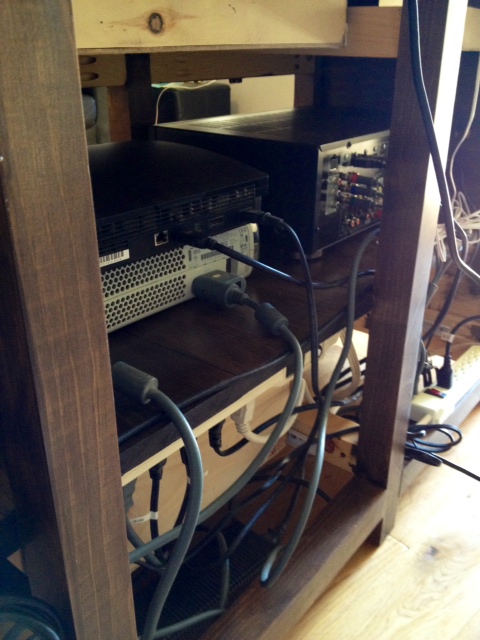
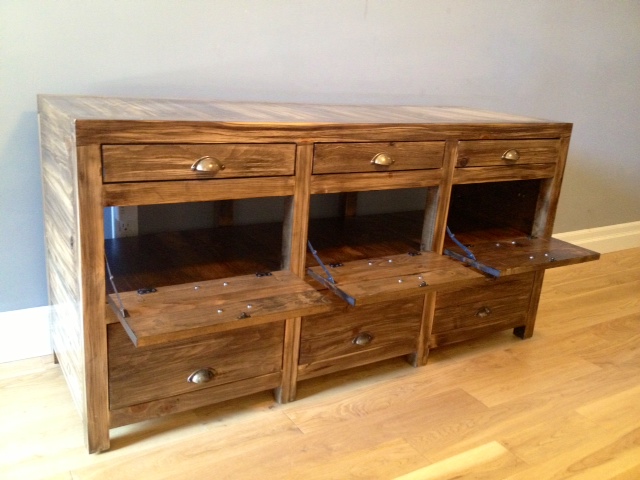
Now we could set to putting all our electronics into the cabinet. To keep things neat, we installed power bars to underneith the back of the shelves. This keeps the cords off the ground, and makes it so that the cabinet can sit flush with the wall.
The view of underneath the shelf in the cabinet showing the power bar.
We routed all the cables and electronics as best we could through the cabinet, and its so much more organized than our old media center!
The electronics all tucked into the cabinet
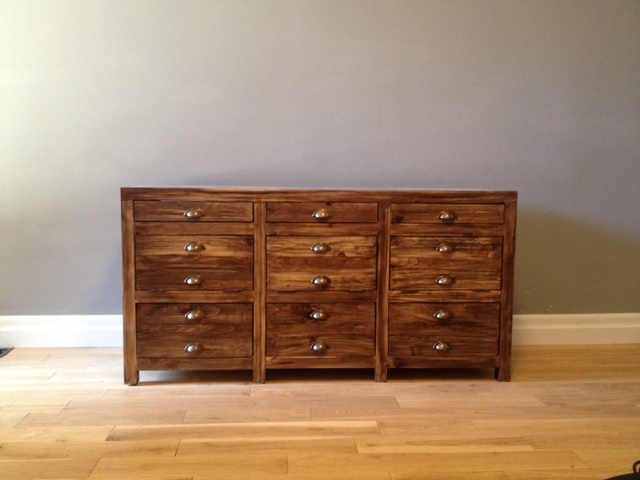
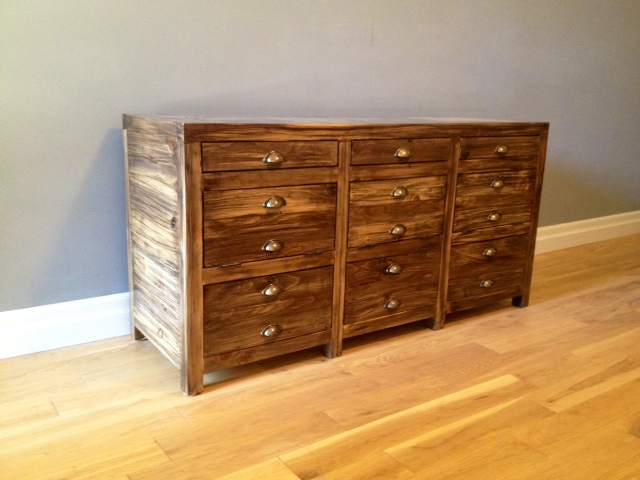
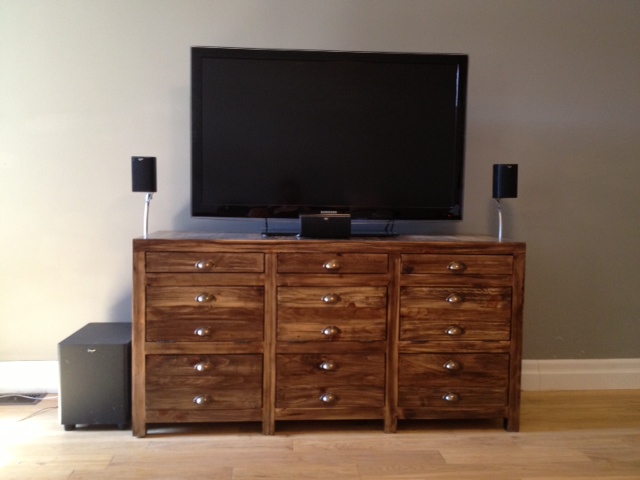
Enough with the technical stuff, are you ready to see what it looks like all finished?
Hardware: ($130)
15 cup pulls – Lee Valley
6 inset hinges – Lee Valley
6 sets drawer slides – Lee Valley
3 lid stays – Lee Valley
3 cabinet clips – Lee Valley
8 1 1/2″ felt furniture pads – Dollarama
Trips to lumber yard -4
Trips to hardware stores -10+
Coats of polyurethane – 5 on the top, 3 everywhere else
Stain samples made before deciding on one – 11
Time involved – 6 weekends, 70-80 hours total
Number of electronics in the cabinet – 11
Number of screw-ups – 3
Number of arguments – 2
Total pieces of wood – 119
Screws – about 300
Injuries – 0!
Swear words – more than I’m proud of
For an urban backyard in downtown Toronto, our yard isn’t bad. We have a detached garage, main and second floor deck, and a 12′ x 26′ stretch of grass and garden.
Everyone has a friend with a truck. He’s the guy you call on moving day, or when you bought a new sofa. Our (awesome) friend with a truck helped us carry home several loads of bricks for our patio earlier in the spring. The guy with the truck must have so many “owe you one’s” accumulated that he could call in a favor a day for a year. (Shout out to Michael!) Continue reading “The Guy with the Tools”