Project Concrete Countertops

I had epic plans for a kitchen makeover this year. You can see my wish list here, and my “timeline” here. HA HA! Why do I make lists?

Well we  have been getting some things done in the kitchen/dining room. The coffee bar got drawers, we made a new dining table and bench, bought a sink, and I have finally made some progress in my plans for a DIY concrete countertops.

Kitchen Pre-Move In
Kitchen Pre-Move In

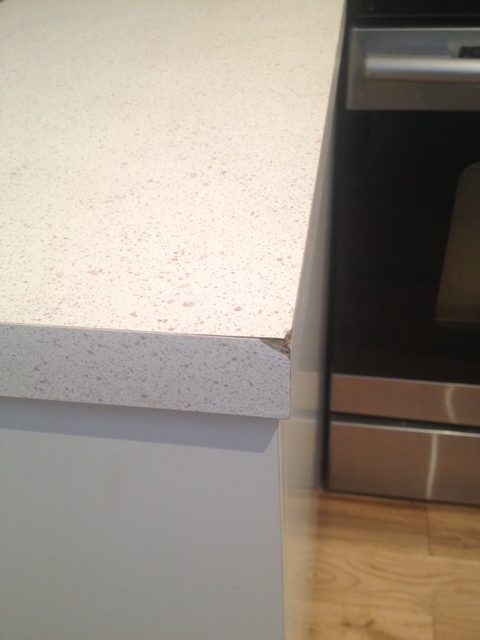
As you can see from the photo above we have laminate counters. They look okay in the pic right? White-ish and nondescript? Yeah except they’re this flecked beige design (bleh), and during the move & renos they got two bashes in them, as well as the laminate started to peel up after I ran the self cleaning cycle on my oven. There’s also a seam that I’m not the biggest fan of.
Countertop
Bashed corner of our peninsula countertop
Dent in corner of counter as well as the big evil seam
Dent in corner of counter as well as the seam

Awesome, right?

So DIY  concrete countertops are high on my want list. Now you may also know that I am a planner. I’m not just gonna head to the hardware store, fill up a rental van with bags of concrete and start making things. I have to research, and plan. Cause if you don’t, projects go astray, money gets wasted, things take way longer than they should, and you may end up with some really heavy junk.

So it was time to research, plan and make some lists.


Project Concrete Countertops TO DO LIST:

We  have started to prep and calculate, and get our proverbial sh$t together, and THIS WEEKEND is the big pour. I am excited and scared all at the same time. My kitchen is about to get a whole lot less cracked and busted, and a whole lot more grown up!

Don’t worry, we will do the whole process from start to finish with you including a planning guide, all the prep and template making, the mold fabrication, mixing and “pouring”, finishing, installing and sealing. I know its a complex project, so I think we’ll break out some video to help you re-create your own project at home.

In the meantime, make sure to check in on our progress on our Facebook and my Instagram, we will be posting some status update shots and outtakes until we have enough time to post everything here in detail.
Countertop Inspiration

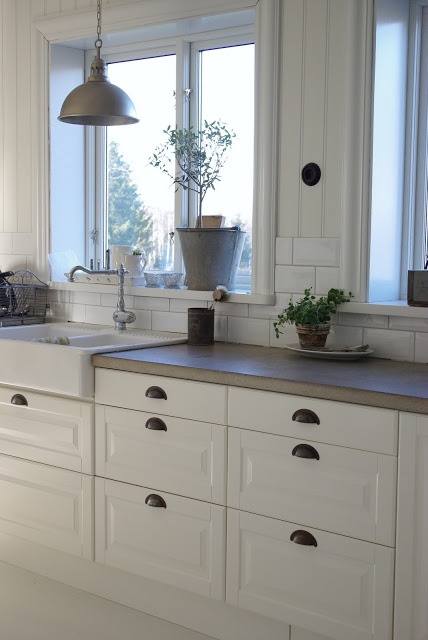
We are in the final stages of planning for our concrete countertop project. When speaking with friends and family about our project a lot of the questions we have been getting is “why concrete?”. Most of them haven’t seen concrete countertops before, and thought we were a bit mad for taking on this project. Others thought the concrete would be really rough and look like a sidewalk. I have been breaking out my iPhone to the skeptics and showing them some examples of concrete countertops, and they have been subsequently blown away. So I thought I would show you all some of my inspiration so you think I’m less cray cray and more awesome.

First up, why did we choose concrete?

  • It goes with our industrial meets traditional asthetic
  • It’s durable, and customizable
  • We can do it ourselves. It’s not like we can mix up some marble in the garage
  • It looks amazingly high end for a reasonable price

Possible cons:

  • If done incorrectly, or the wrong products are used it can crack, break and/or look terrible
  • If not properly sealed & waxed it can be stained (like stone)  by acids such as wine, vinegar and citrus fruit
  • It takes a bit more planning & prep to make molds and some muscle to pour, finish and install

Now, for some beauty shots!


Concrete Countertop Test Run

I really want to build concrete countertops for my kitchen. My laminate counters suck, and the coffee bar is curremtly covered in a $20 wood shelf from Home Depot.

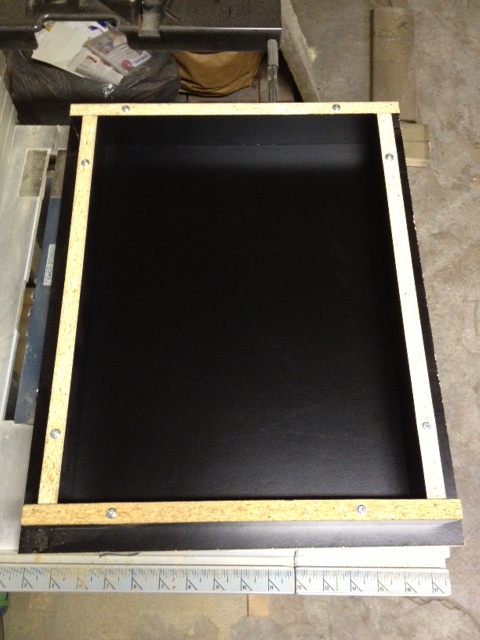
I had a bag of concrete hanging around the garage (don’t you?!) and decided it was high time to put all my researching to the test and pour some concrete. I decided to make a “cutting board” as my test run, and grabbed some spare melamine (I’m not a hoarder, I just have stuff in the garage…collecting dust…that might some day get used.) SO the melamine… I had El Granto rip down a few pieces into 2″ strips and then built a little form with some spare screws.

Building the mold (and making sure it's square
Building the mold (and making sure it’s square)

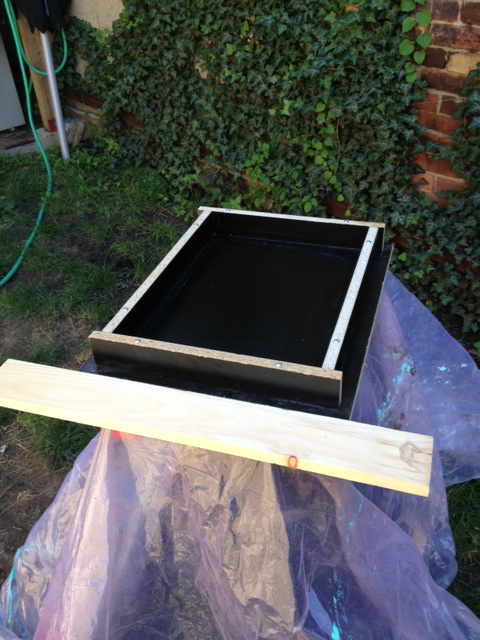
Next up, sealing the cracks in the form with silicone caulking. I conveniently had a new tube of silicone caulking. I inconveniently could not find my caulk gun. Cause it’s an easy thing to lose. You know, giant red tube thingy that looks like a weapon. Yep, missing. Hardware store? Closed. Dollar store? I may be able to find paint brushes, and tie downs, but a caulk gun was not to be had at Dollarama. My neighbours had been outside working on project as well, and we had passed an air compressor over the fence earlier in the day (true story) so I figured I’d ask if maybe they had one. BINGO! Caulk gun. Except theirs was contractor grade and made for big tubes of caulking, and my wee bitty tube of silicone was too small. So now what? I shoved a piece of wood into the bottom of the caulking tube and hoped for the best.

I started caulking, and I got silicone EVERYWHERE. All over me and the mold.

DIY TIP. Tape your mold or you’ll get silicone everywhere. After about 10 minutes I was covered and sticky and I had done the WORST job of caulking anything in my life. I threw in the towel (this was a test after all!) and left it to dry.

Mold Made (with crappy silicone job)
Mold Made (before crappy silicone job)

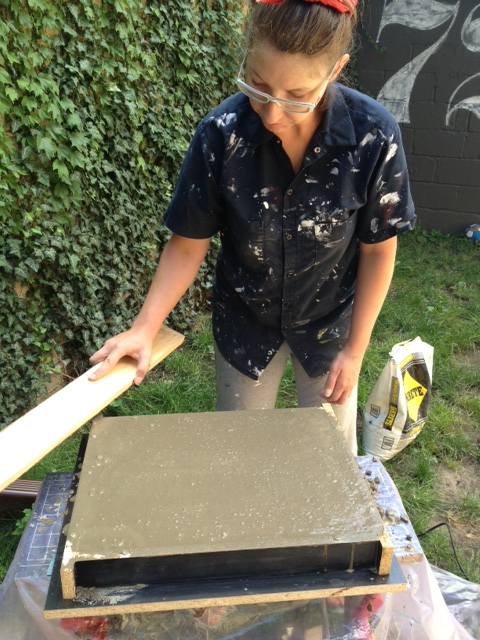
Next day we moved the mold outside on worktable covered in a plastic drop cloth, and I (with my girly muscles, a shovel and a piece of wood) mixed up a half bag of concrete. In hindsight, it could have used a bit more water, and I could have used a trowel (rather than a piece of wood) to get it well into the mold.

Pour area prepped. Drop cloth & screeding board ready
Filling the mold
Filling the mold. Don’t you just love my work outfit? Paint covered work shirt and track pants. I really should buy an attractive set of work clothes.

I then (smartly) took the sandpaper off my palm sander, and covered it in a bag, and vibrated the crap out of the mold.

sander
Sander covered in a bag
Vibrating the mold
Vibrating the mold

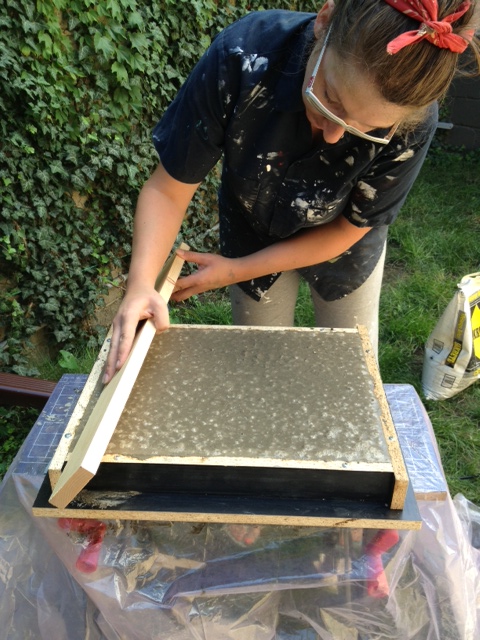
Then we screeded the top (which also didn’t go so well, as it started pulling gravel out of the mold, but again I think my mix was too thick.)

Screeding the mold
Screeding the mold

Then I let it dry, covered with plastic for a day. I didn’t put a wire mesh in it, cause A.) it was a test and B.) I didn’t have any in my garage…

I un-molded, and voila.

Concrete cuttingboard
Concrete just after de-molding
Concrete cuttingboard
It worked!

Things I learned:

  • Concrete is heavy.
  • 2″ is too thick for our countertop. It just looked too big (that’s what she said). In all seriousness, 1 1/2″ is a much more reasonable size, 2″ was just overkill. Like a Hummer H2.
  • My mix needed a bit more water.
  • Counter sink the screws! Or else you can screed it very well.
  • I will not mix up all the countertops in a bucket. Concrete mixer rental is imperative.
  • I needed a better concrete mix than the $4 bag of all purpose. It was too rocky and rough. The top of my cutting board was great, but the sides showed too much aggregate.

Next up, I will be filling the holes, adding some feet to my “cutting board” test driving some concrete sealers and waxes, and then putting it to the test in my kitchen. Wish me luck!

Have you ever played with concrete? Any tips to pass on?