I’ve had dogs in my life for as long as I can remember. Dogs big and small, from Dachshunds to German Shorthaired Pointers, and quite a few dogs of no discernible breed at all. All of those experiences with dogs were very similar.
Most home projects are practical. Fixing something that is broken. Improving something that will make your daily life better. Increasing property value etc.
Then there are projects that are none of the above.
They are the impractical high heels of the home world. Did you need them? No. Are you going to wear them to walk the dog, or get the groceries? Not a chance. But are they absolutely gorgeous, sexy as hell, and so very impractical that they were bought solely out of love? Absolutely.
Our outdoor daybed project is the 6″ hot pink stilettos of home improvement.
…and I LOVE IT.
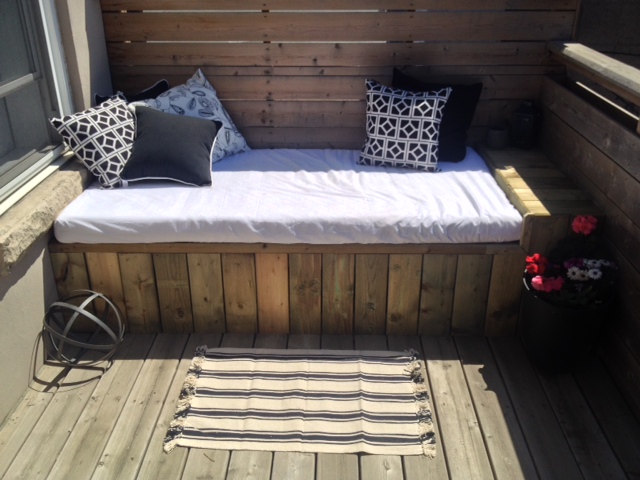
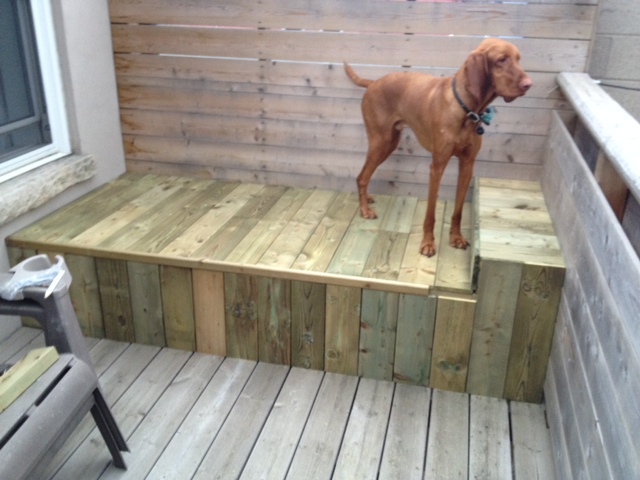
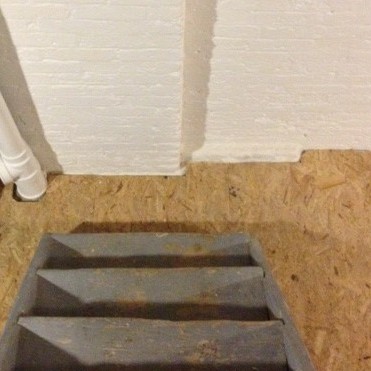
Before:
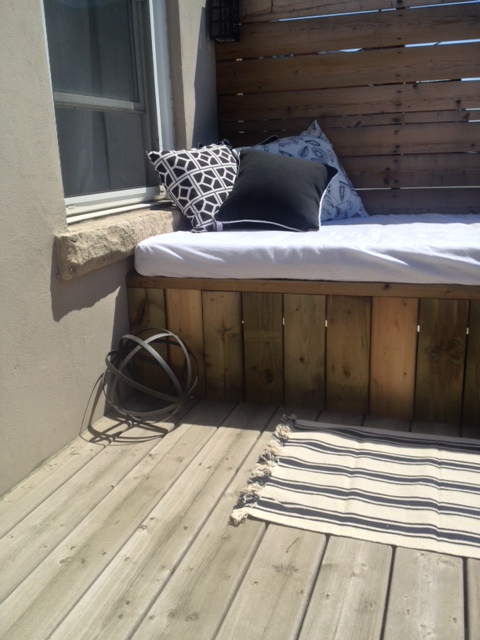
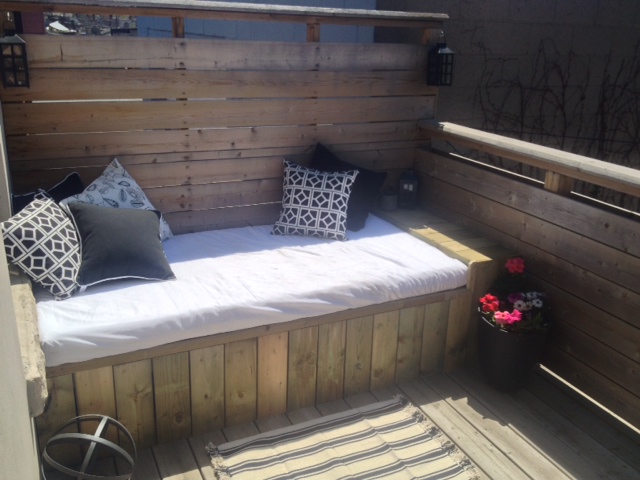
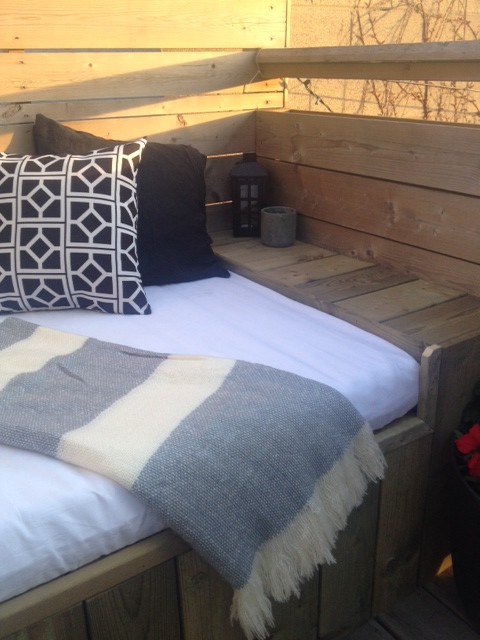
AFTER:
Here is how we did it:
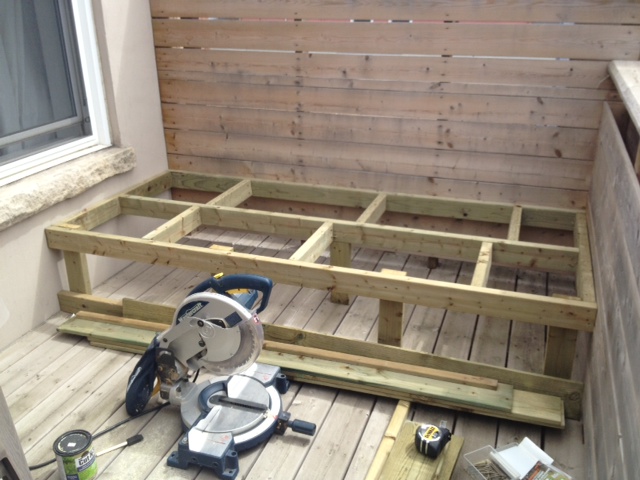
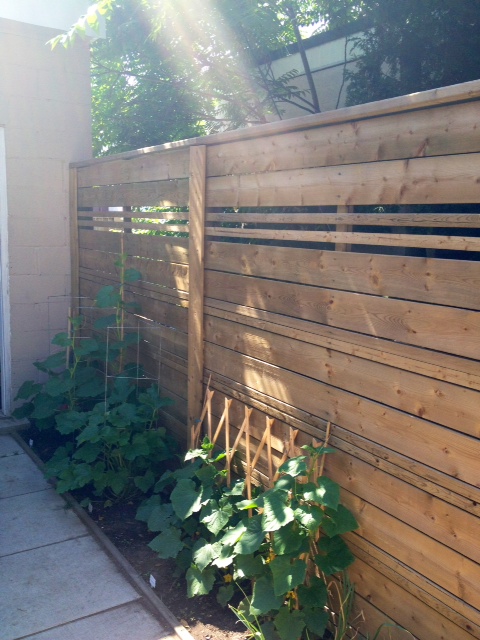
The structure for the daybed was built using pressure treated 2×4’s. The back of the daybed was securely attached to the deck support posts, and the rest of the frame built as a box around it. (similar to how you would build a deck)
It was all assembled with deck screws. It was built to fit a twin size mattress, with a bit of room to spare at one end for a small built-in table.
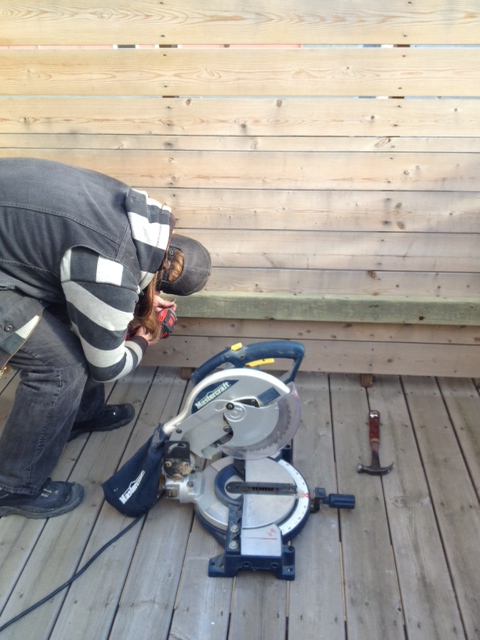
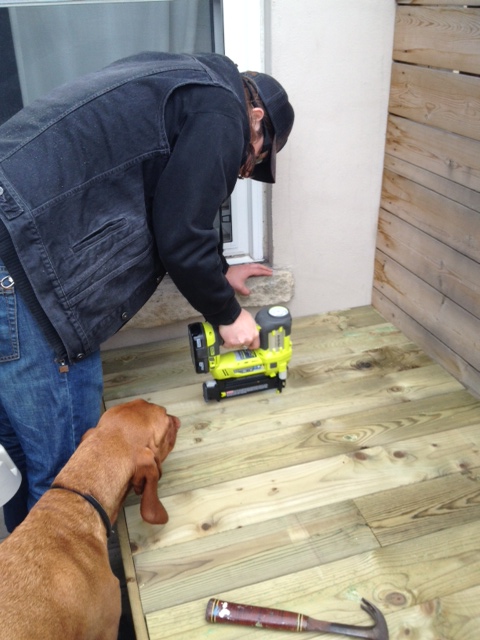
After the frame was built, it was clad with 1×6 fence board. We broke out our new Ryobi cordless brad nailer, and it made quick work of the job.
Even Odin likes new tools
We trimmed the edge where the skirt met the seat of the daybed with a 1×2. This way you would not see any unfinished boards and the edge of the daybed would not be rough against your legs. (Here you an see the trim in progress & Odin helping of course.)
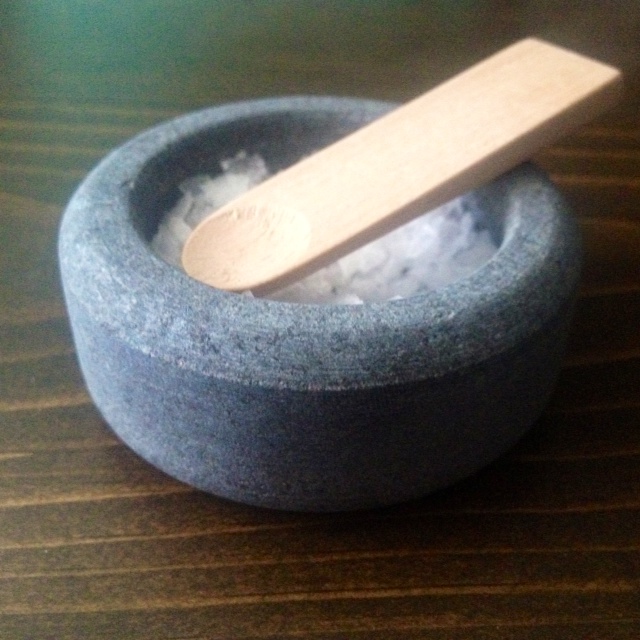
I had lots of trouble finding an economical cushion. So in the end, I headed to Ikea and picked up a twin size 4″ thick foam mattress.
I would love to have a custom cover made for it, but until then an inexpensive twin size fitted sheet works perfectly.
All the linens come in each night, and in the winter, the Ikea mattress can be rolled up for easy storage.
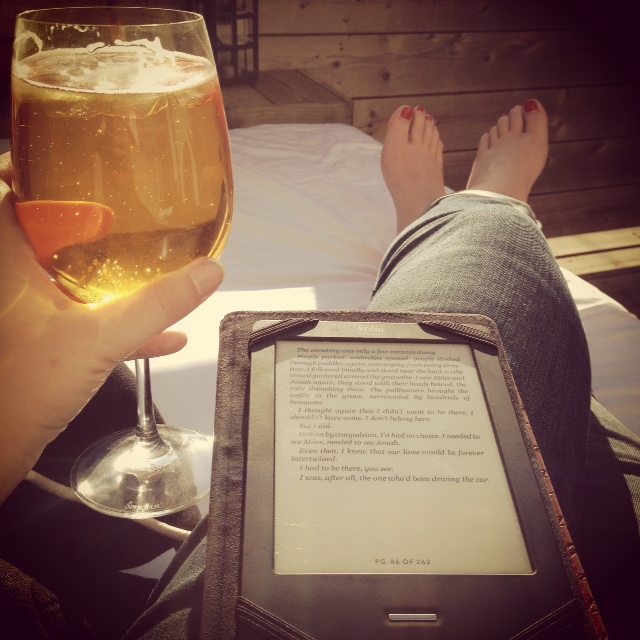
It is incredibly comfortable. Great for lounging or having a nap. It’s my new favorite spot for reading my book with a cold beverage in hand. We are going to get a lot of use out of the daybed this summer!
Do you have an outdoor daybed? Would you try your hand at building one?
SOURCE LIST:
Materialst:
8 – 2×4 8′ pressure treated c/o Home Depot Canada
14 – 1×6 6′ pressure treated fence boards c/o Home Depot Canada
1 – 2×2 8′ pressure treated (cut in half to make a 1×2 as a trim piece) c/o Home Depot Canada
Deck screws
Galvanized brad nails (1 1/2″)Twin size foam mattress
Twin size fitted sheet
Decorative pillows
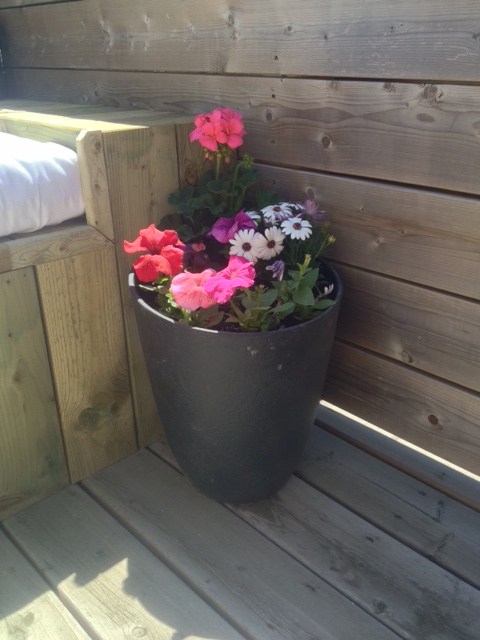
[Plant Pot – Home Depot, Candle holders – Dollarama, Concrete Candle – Loblaws, Mattress – Ikea, Sheet – HomeSense, Pillows – Ikea & HomeSense, Blanket – West Elm]
I’m currently balancing two projects. Finishing the basement when the weather is terrible, and working outside on the daybed when the sun is shining. Oh and shopping when it’s just too miserable to do either.
I made a stab at painting the stairs to the basement a few weeks ago.
The staircase is slightly sketchy looking, held together by magic, physics and luck. The stairs were made with what appears to be the left over rough sawn douglas fir floor joists. They were old, dirty, full of charcter and needed a little tlc.
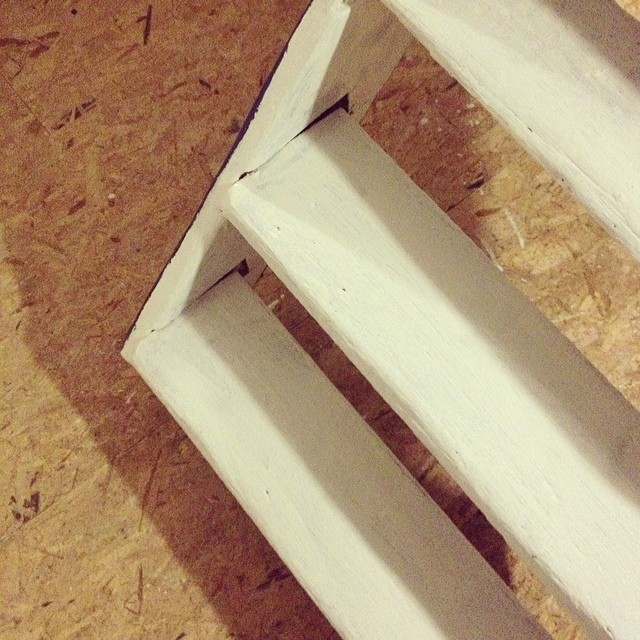
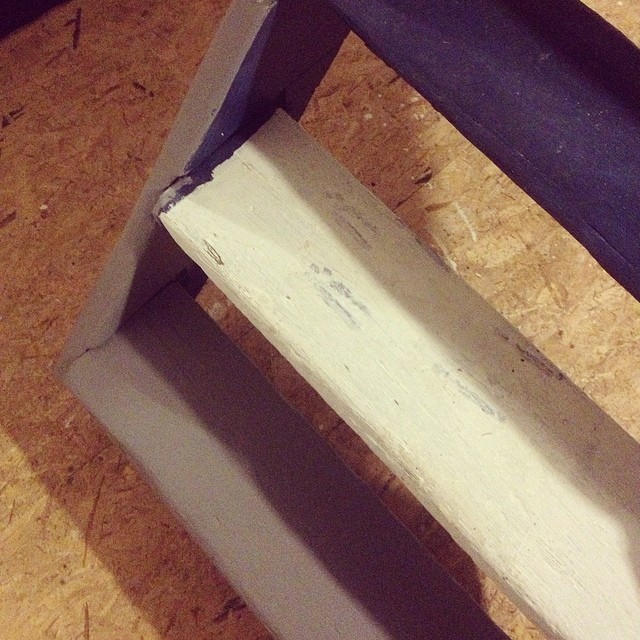
They would never be pristine, but hey, they could be a bit better. I scrubbed them down, gave them a sand, pulled out the errant nails on the stair treads (who puts nails on stair treads?!), and gave the whole staircase 2 coats of BIN primer.
As I put the primer on the last step I realized I had painted myself DOWN the stairs, and had effectively trapped myself in the basement until the primer dried. Have I mentioned lately how awesome I am?
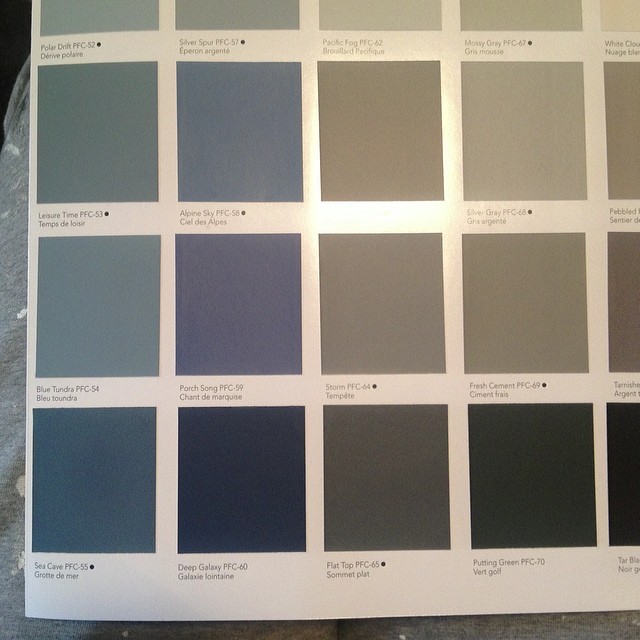
After I watched the paint dry (about as fun as it sounds), it was paint time. I picked up the color chart for Behr flooring paint, and said to myself: “Self, I know you want to pick grey, but maybe you should step outside of your comfort zone and pick something a little different”.
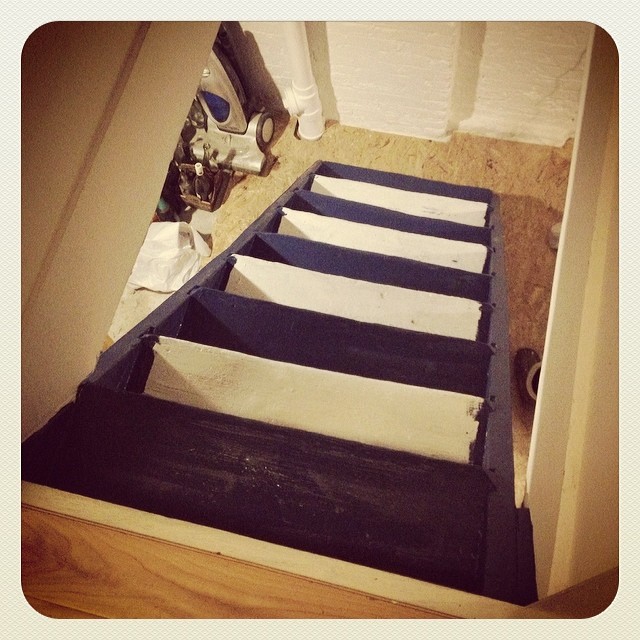
I jumped out of that comfort zone and went with the nice rich navy blue of Deep Galaxy.
With paint in hand, I started to paint the stairs, this time painting every other step so that I could escape and not have to live in the basement indefinitely.
What do you think of my color choice?
Cause I HATE it.
I looked at it for weeks contemplating finishing the blue paint job and seeing if it magically grew on me.
Weeks later…It still sucks. It’s too dark, it makes the steps hard to see, and the color matches nothing in the rest of my plan for the basement.
I bit the bullet, headed back to Home Depot, and picked a new color.
Any guesses?
Yep…grey.
My old friend. My standby. My tried and true companion. My Amy Pond*.
Now. Anyone want to come over and paint my stairs? Cause painting stairs kinda sucks.
* That’s a Dr. Who reference for any non-nerdy (aka non-awesome) people out there.
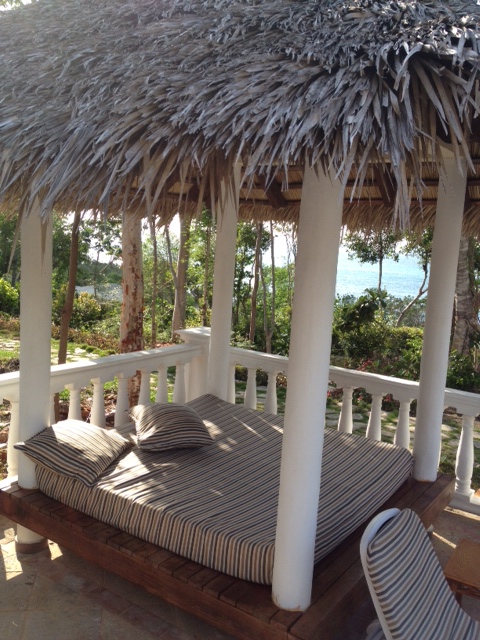
Two years ago today, I was relaxing in a cabana in Cuba at one of the most beautiful resorts I’ve ever seen. We were staying in the Royal Service Suites at the Paradisus Rio De Oro outside Holguin. It was a mini honeymoon for El Granto and I after we had to give up our European honeymoon to fix our house. It was a pretty amazing minimoon, in a beautiful exclusive resort. I could go on and on about the amazing service, poolside butler etc., but one of my favorite things were the Balinese cabana beds by the pool, and the outdoor daybed on our balcony.
These beds put chaise loungers to shame. Huge beds with thick comfy mattresses covered with pillows. Perfect for an afternoon siesta or lounging with a cocktail.
Two years later, and I’m still thinking about those beds.
A few weeks ago Home Depot unexpectedly sent us a gift card in the mail, with no expectations other than that we should give a little love to our home for spring. We could use the card for whatever we wanted. We could add a fresh coat of paint, plant some flowers etc.
So we thought, lets build something fun. Something that is not in the giant to-do list, and that’s nice and indulgent.
You guessed it. We’re building an outdoor daybed on our master deck. It’s not quite a Balinese bed, but it will be the size of a twin mattress, and also have a built in table (or arm rest) to hold a drink or two.
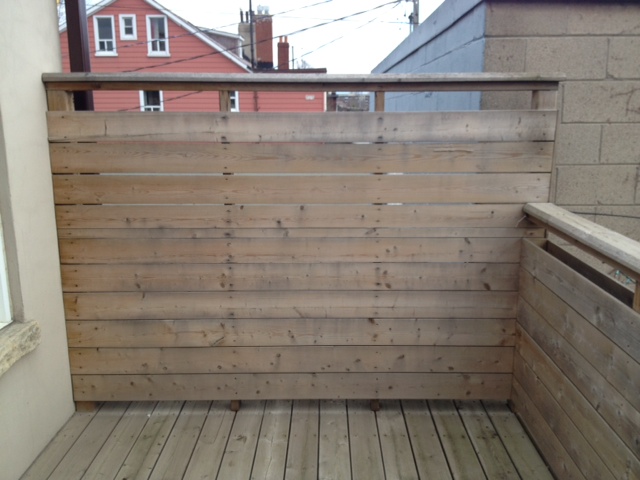
It will be nestled at the end of our deck taking up the full width, using the fence as the back of the daybed.
We will be making it blend into the deck with the same modern aesthetic as the deck and our fence. While it won’t have a thatched roof like our cabana in Cuba, we are going to bring in lots of pillows and accessories to add luxury and break up the hard surfaces.
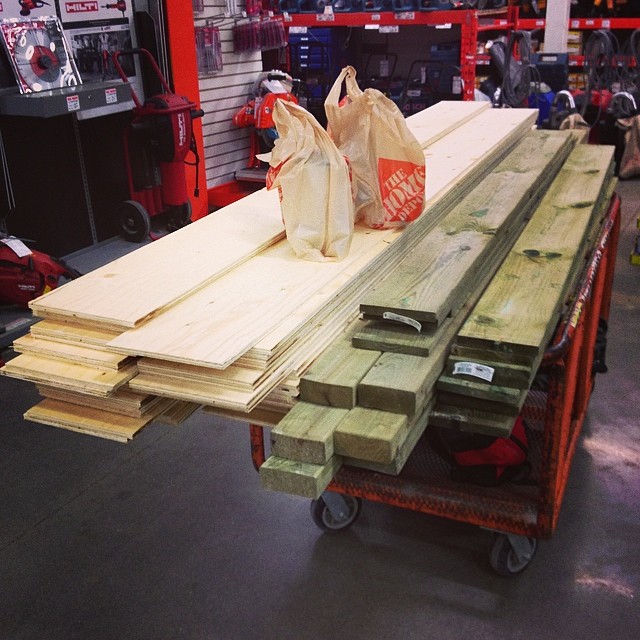
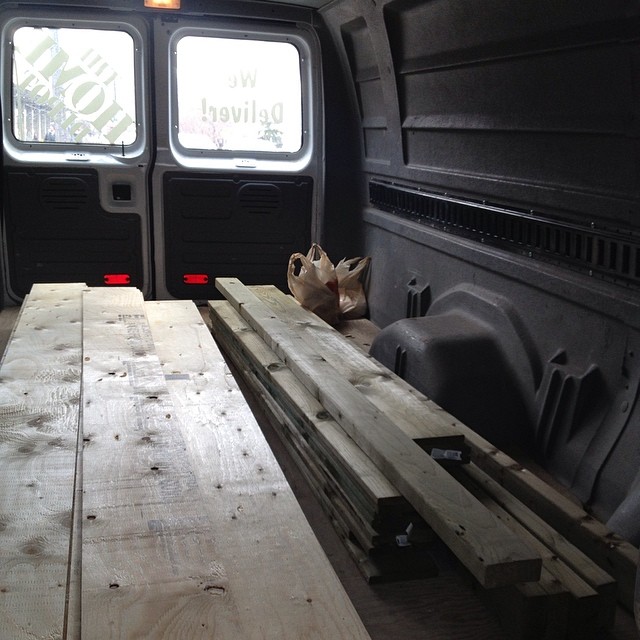
This past weekend we headed to Home Depot and picked up the lumber, as well as some wood for the basement. We rented a van to bring it all home (when you’re renting a van, buy all the big stuff you have planned, to save on van rentals).
We got most of the frame assembled, then realized someone miscalculated the lumber list, and we were short a couple boards. Oops.
A walk back to get more lumber ensued the next day.
I’d love to get more work done on it this week, but our forecast is leaning towards April showers. Progress may have to resume this weekend.
In the interim, I am on the hunt for a cushion the size of a twin mattress. Any ideas? It also needs to be budget friendly. The current forerunner is a foam kids mattress from a certain Swedish retailer, but I would love an actual box cushion with outdoor fabric.
I’m not a big souvenir kinda gal. I don’t bring home t-shirts or shot glasses from vacations. I hate buying things that will go in a drawer and never be seen again.
Today I leave on a big adventure. I haven’t gotten to travel a lot thus far in my life. I didn’t go on exotic or cultural vacations as a kid, I wasn’t born overseas (El Granto was born in South Africa!) or backpack through Europe on my gap year (El Granto moved to Alberta and taught snowboarding!). In fact, I haven’t really been overseas since I was a kid. The farthest I’ve flown since then was Vancouver or Las Vegas.
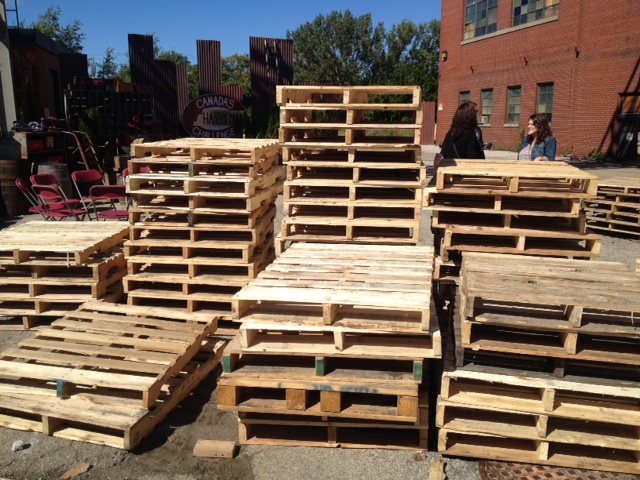
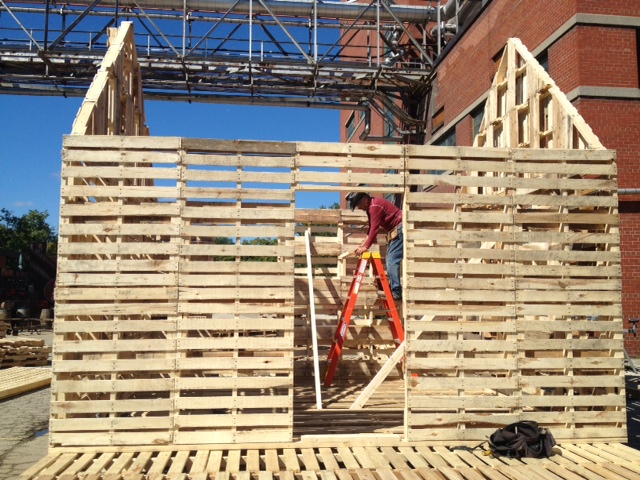
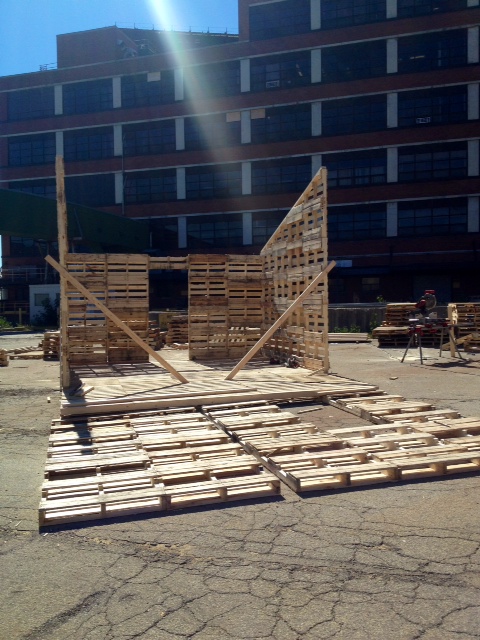
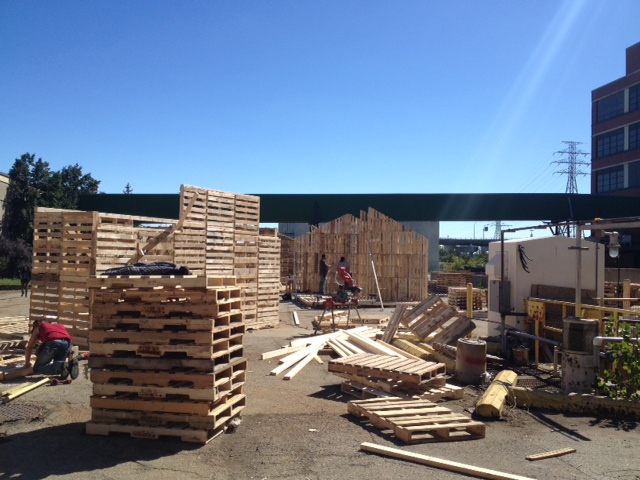
Did you watch the finale of Canada’s Handyman Challenge last week?
If not ,go watch it, then come back here. I’ve got some behind the scenes action of the finale episode.
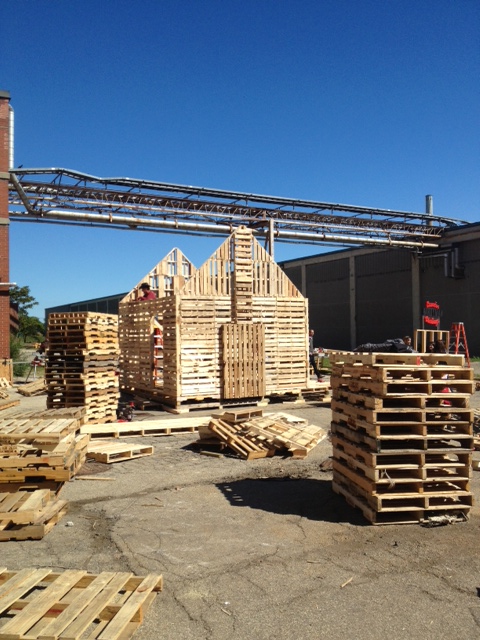
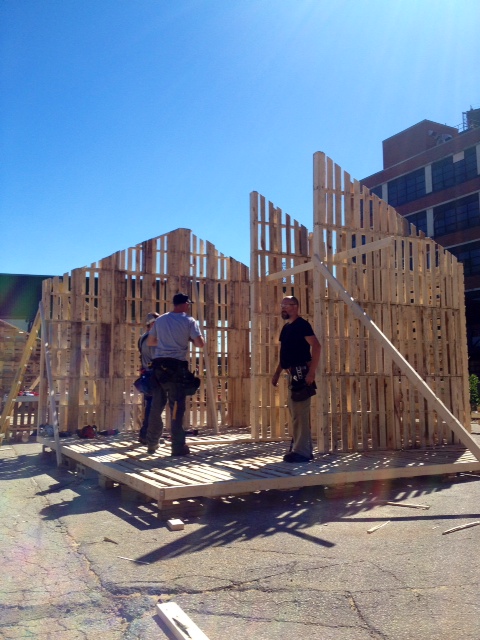
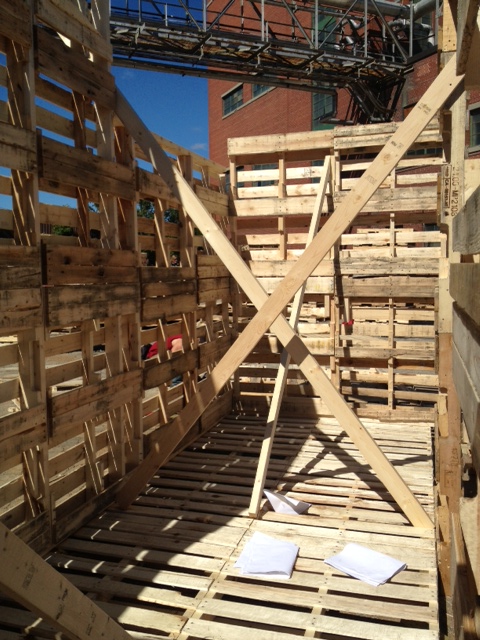
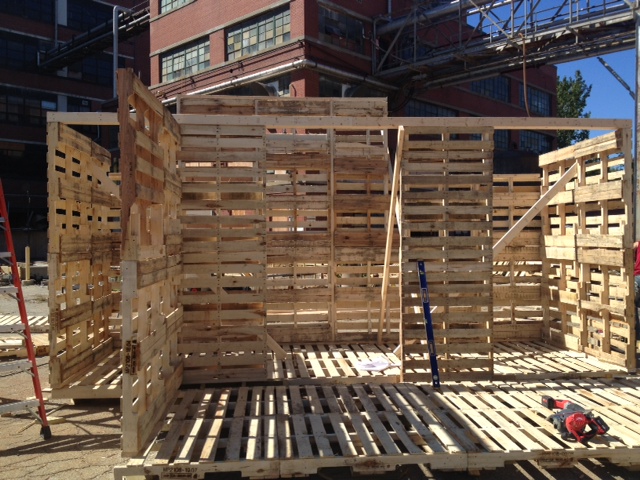
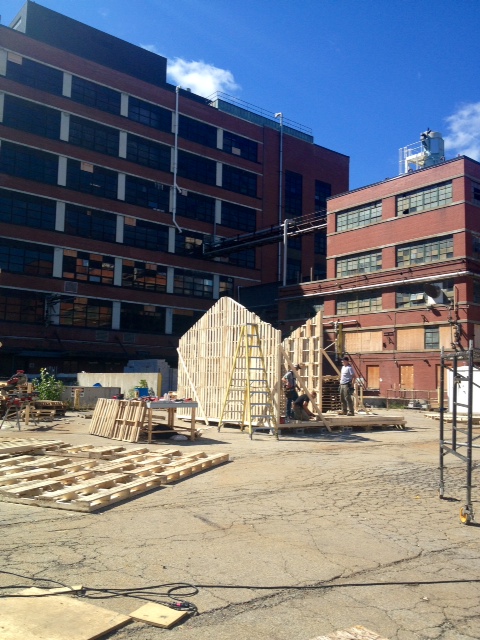
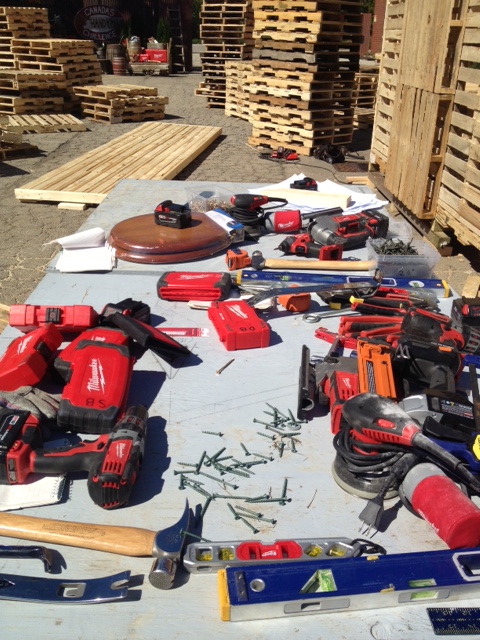
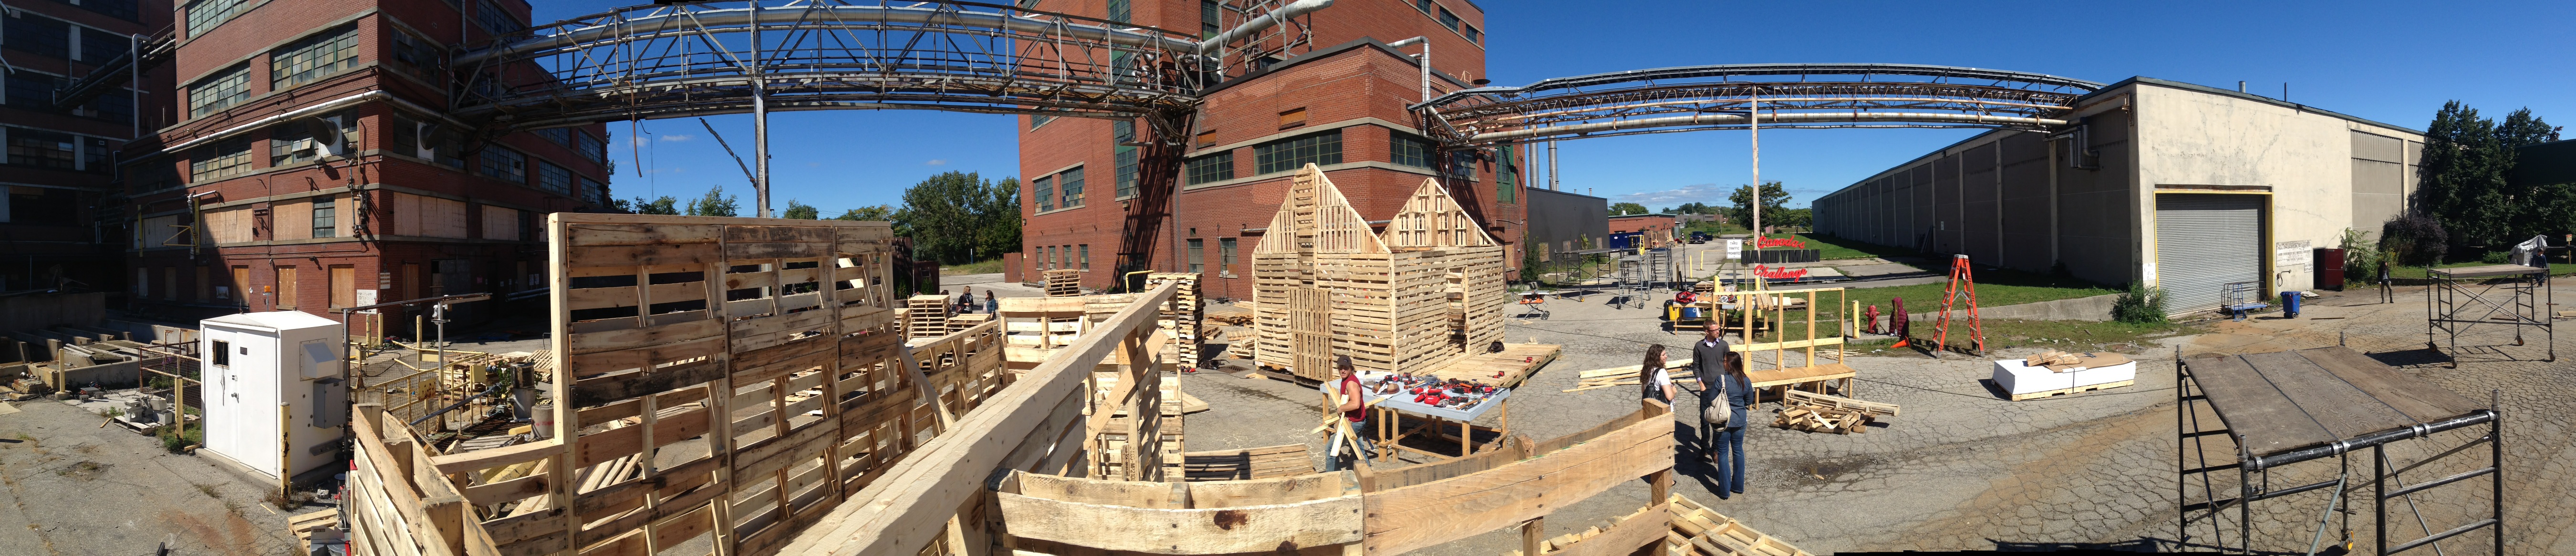
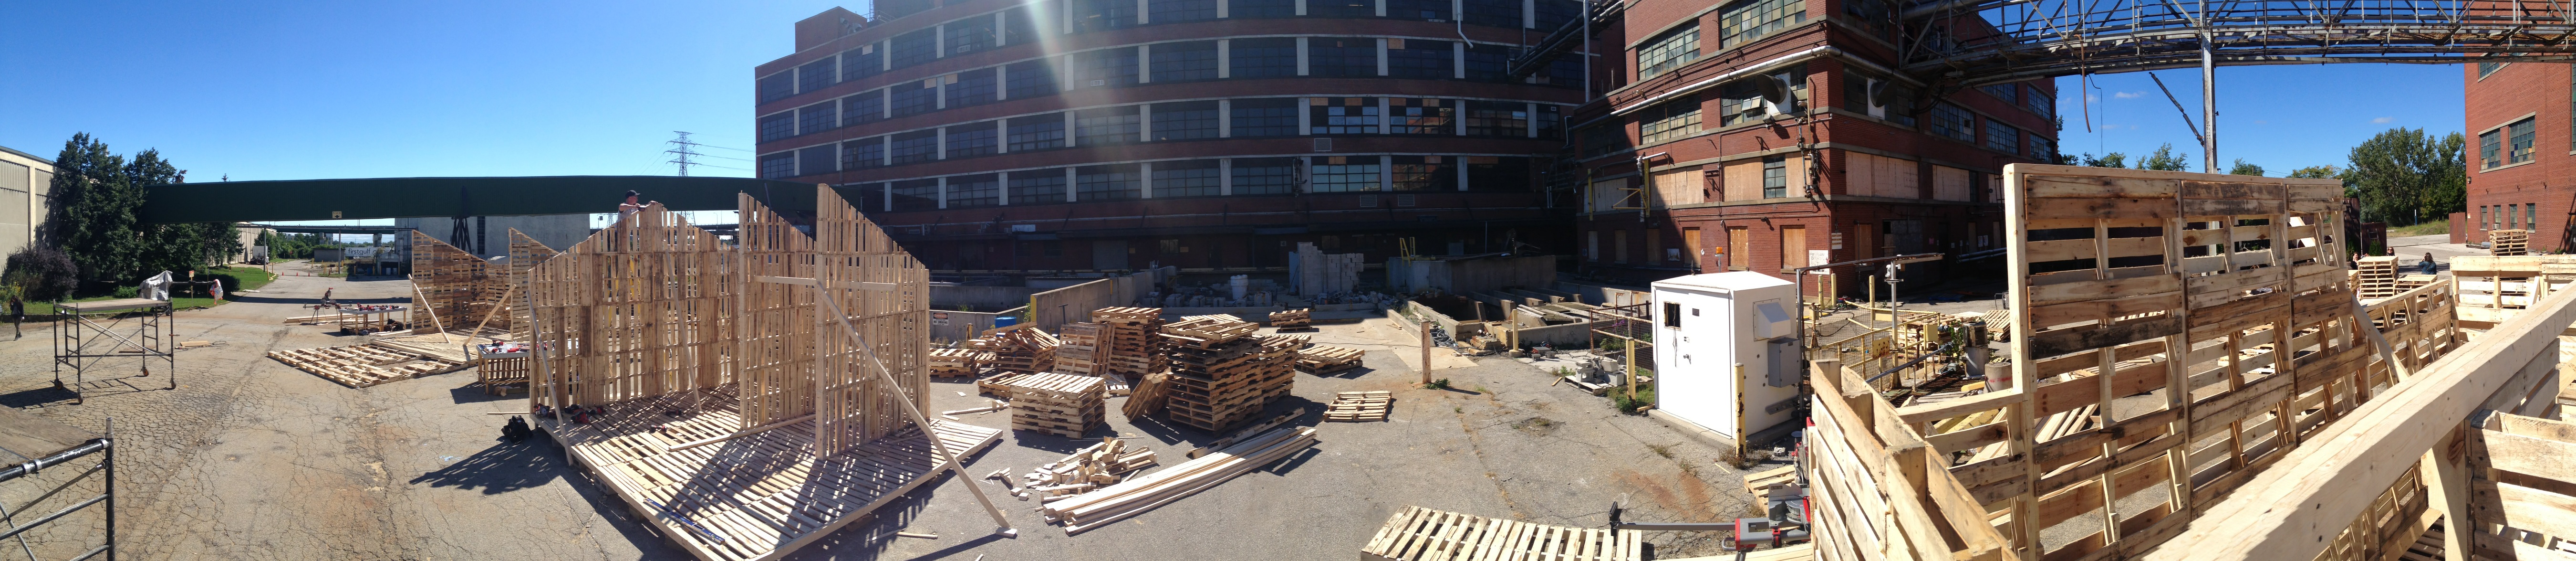
Back in the fall HGTV invited me on set of Canada’s Handyman Challenge. I got to meet and interview the judges (see my post on that here) and I also got to tour the set during the final challenge. I couldn’t post any of my set pictures before, as that would be a bit of a spoiler. However, now that the show has aired I can share my sneak peek of the set.
I got to visit on lunchtime of day one of the finale build. The pallet houses were starting to go up. The set was in an old industrial factory, with red brick industrial buildings as the backdrop. Enjoy!
Click panoramic for larger versionClick panoramic for larger version
The finale projects were awesome. The amount of thought, skill and engineering in them was incredible. I thought this was one of the funnest seasons yet. The projects season wide were creative, and the contestants did a bang up job. There can however be only one winner, and congrats Brent on the win!
What did you think of this season? Which was your favorite project?