Guest Bedroom Hardware

The guest room has one entry door and two closet doors. I have been trying to convince El Granto to let me paint all the door knobs and hinges in the house with Oil Rubbed Bronze Spray paint (like I used on my DIY “Cast Iron” Heat Registers) but it’s been a tough sell. The problem is all our door knobs are almost brand new brushed metal. So they are in fine shape…they’re not super dated, and they look fine…I just want them oil rubbed bronze. But what if I paint a house load of perfectly fine knobs only to have them peel or chip or look like crap? Then it would be death to wife.

So untill I am able to convince El Granto that oil rubbed bronze is the way to go, I will have to satisfy myself with change all the other hardware in the guestroom. For the closet we have two brushed stainless pull handles. They are a strange size, and until I find some oober nice handles, I figured I’d give them a coat of paint of my favourite paint; RustOleum Universal in Oil Rubbed Bronze.

Handles Before
Handles After

Then we added a cast iron coat hook to the back of the door for guest robes or wet towels.  This I think is a necessary in all guestroom, else your guests put sopping wet towels on the floor and/or furniture.

I had just bought some cast iron hooks for the front entry coat rack. They cost around $6 a hook. So when El Granto found this hook at our local dollar store for $1.50 I jumped and got him to buy two.

Doesn’t it look good for a $1.50 hook?

DIY Chalk Paint

I played around with Annie Sloan Chalk Paint for the Backyard Mural and loved it. It is like painting with artist paint.

I built a few bedside tables for our guest room and it struck me that I would love to use chalk paint on them. Problem is, that I am a very impatient person, and when I get an idea in my head, I need to do it NOW. My closest stocklist for Annie Sloan paint is 2 hours away, and I don’t own a car…harrumph.

So I did the next best thing, and started googling. Hoping magically that in the last month a Toronto AS stocklist had opened up…no such luck. But then I found a bunch of recipes for DIY chalk paint.  I am a bit of a disbeliever, but thought I had nothing to loose, so I set out to try to make some chalk paint of my own. I picked up a $3 container of plaster of paris from the hardware store, eyeballed some into an old jar, added the same amount of water as plaster, gave it a stir and then added about 1.5 times as much latex wall paint. I played with the color mixing some turquoise and some blue that I had laying around. I gave it all a stir, then paint it on some scrap wood. IT LOOKED JUST LIKE CHALK PAINT. No, seriously. It went on the same way, covered the same way, and cleaned up the same way. I let it dry overnight thinking I would come back to it spontaneously combusting in the morning, or that it would all peel off or do something terrible. But… It did. just. fine.

Still looking at it rather speculatively, I put on a coat on my newly fabricated bedside tables, and it looked just like chalk paint. Again I waited for the other shoe to drop, only to put on a second coat, and distress it, and wax it and have it behave exactly the same way as the Annie Sloan chalk paint…

So here’s the game changer folks:

DIY CHALK PAINT

  • 1 part plaster of paris

  • 1 part hot water

  • 3 parts paint

Mix plaster & water together until all the plaster is incorporated. Add paint. Stir.

(I put my chalk paint in a mason jar and added a label.)

NOW GO PAINT SOMETHING!

Thanksgiving Menu, Homemade Butter & Cranberry Sauce

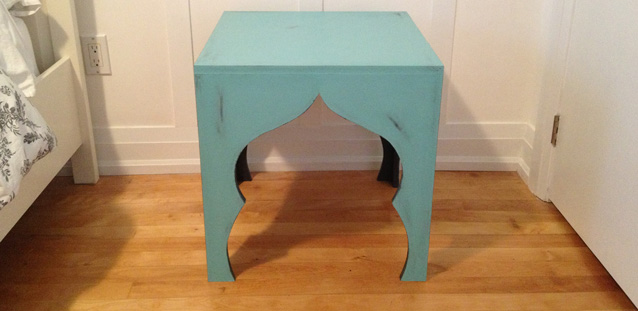
I was going to post today about how to make your own chalk paint, but I forgot to take a photo of my chalk paint, so yeah, that post will have to wait. But dont you worry, I wont leave you empty handed today.

This weekend is Thanksgiving in Canada. I know what you’re thinking: already? Yeah me too, I’m not quite sure where September went, but holy crap its October.

This year we’re having Thanksgiving at our house. Its a small group (6 total) so its not a big affair, but we still like to have all the trimmings! So I thought I’d share with you my Thanksgiving menu and some of my tips and tricks.


Thanksgiving Menu

Appetizer:
Brie and Lingonberry Puff Pastries

Main:
BBQ Roast Turkey
Jamie Oliver’s Bacon Stuffing (although I don’t use sage or celery, I prefer Rosemary)
El Granto’s Mum’s Squash Casserole
Spiral Cut Ham with Maple Glaze
Garlic Butter Green Beans
Balsamic Roasted Potatoes, Carrots, Pearl Onions, Beets, Parsnips and Garlic
Fresh Rolls and Homemade Butter
Fresh Cranberry Sauce
Gravy

Dessert:
El Granto’s Mum’s Pumpkin Pie
Homemade Martha Stewart Vanilla Bean Ice Cream

TURKEY TIPS!

You may have noticed we will be BBQ’ing our turkey. If you have a BBQ with a natural gas line (or have a couple ready propane tanks) I HIGHLY advise you to BBQ your turkey. You cook it in the bbq like you would the oven. In a pan (albeit a cheap disposable one) but in a pan none the less. You get a lovely browned turkey AND your oven is left open for everything else.  The one thing to note about a cooking your turkey on the BBQ is that it does cook a bit quicker. Also make sure you use a meat thermometer, you don’t want that turkey overcooked and dry (yuck!).

Speaking of keeping your turkey moist, don’t stuff the main cavity with bread stuffing. Why? Cause that bread sucks up all the turkeys juices. It also makes the turkey breasts cook slower, making the rest of your turkey overcooked before those thick breasts are done. Instead place some halved lemons and herbs in the cavity, and cook your stuffing in the oven. Put some butter under the skin of the turkey and enjoy the most delicious turkey ever!
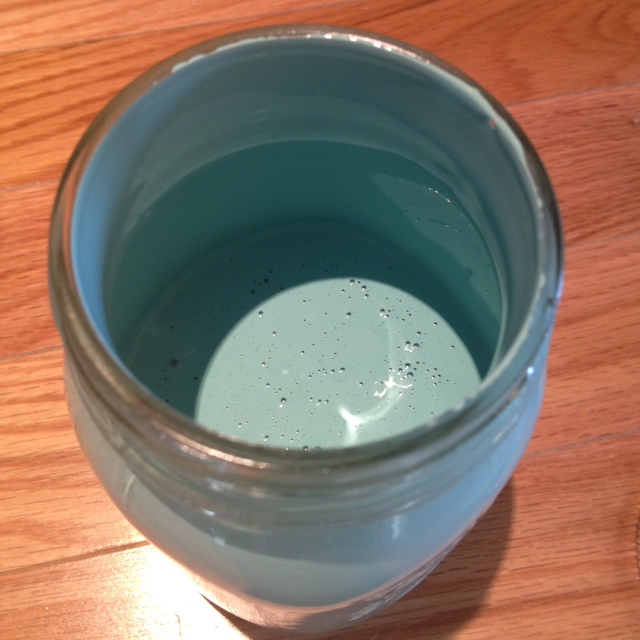

HOMEMADE BUTTER!

Do you want to impress your mother in law? Fresh made butter is your party trick. All you need is some whipping cream and a container than seals air tight and that you can see through (like a jar).

Now I find that a really good whipping cream works best, I like to use Harmony Whipping Cream.  If you wanna make extra fancy butter you also will need some fresh herbs.

So here goes. Put your whipping cream on the counter to come up to room temperature. Leave it there for a couple of hours.

Pour your cream into your airtight container. Make sure you don’t fill the container more than half full. Seal your container and make sure it doesn’t leak.

Now take the container in one hand and gently shake it.  By gently shake, I really mean rock it Continue doing this for 5-10 minutes (it takes longer if your cream is colder). Until magically your cream that was once completely liquid will now start to separate and create a lump of butter in your jar. Keep shaking it for a few minutes so the butter stiffens up a bit more, then pour off the liquid (now buttermilk) and the solid. The solid mass of butter will have some buttermilk left in it, so I find its easiest to pour out the butter onto a plate/bowl getting rid of the buttermilk (although you can save it and use it for another recipe such as corn bread) Mash up your butter with a fork, trying to get rid of all the excess buttermilk. Give it a rinse with water. Once you’re left with only butter, add some salt and mix it up again. This will be your plain butter, but its anything from plain, its light, fluffy and delicious! Now what I like to do is crank it up a notch and make a few herbed butters. I like to mix in a couple herbs and seasonings. Like Rosemary and lemon, chive, roasted garlic or chili lime. Anything you can think of! Now go impress your in-laws with your bbq turkey and your homemade butter.

HOMEMADE CRANBERRY SAUCE!

This is waaaay simpler than you’re thinking. Grab a bag of fresh or frozen cranberries from your grocery store. To a medium sized pot, add a cup of water and a cup of sugar and add your bag of cranberries. Simmer at medium heat for 10-15 minutes until your cranberries have softened and start to break down. You can also add cinnamon, orange zest or any other flavors you like. Another tip is to keep your extra cranberry sauce and serve it over some brie for a yummy snack!

HAPPY THANKSGIVING!


DIY Bedside Tables

I have been scoping around Craigslist and local antique stores for the last couple weeks trying to find some tables to turn into bedside tables for the guest room. We were using two (well worn) Ikea $10 Lack tables that we’ve had since the dawn of time, but they really needed to go. I searched and searched, but couldn’t find anything I loved. I didn’t have the budget to spend a couple hundred on new bedside tables, so I decided to make some. I headed over to The Design Confidential to look at some of their furniture plans. (They have some amazing DIY furniture plans!). I took a look through their end table/bedside table collections and spotted this plan. I instantly saw it and thought I could do a more Moroccan version of it.

The plan calls for the tables to be 18″ high, but that was a bit short for my application. I wanted to make them as tall as possible using one 4×8 sheet of lumber to make two square tables.  So I did some math and figured out that I could (just) get ten 19″ squares out of one sheet, so I headed to my local Home Depot and got a 5/8 sheet of MDF cut down to 19″ squares.

After getting my wood home I drew out a pattern for the table legs on a piece of scrap paper. I only did one side of the pattern (as its easier to just do one side, trace it onto your wood, and then flip it and trace the other side.)

Making the table pattern
Tracing the pattern onto the wood

After I traced my pattern, I cut it out of the MDF using my jig saw, sanded any rough bits, and then used that one as a pattern for the rest of my pieces. (for two tables you need a total of 8 leg/side pieces, whatever you do, don’t cut all 10 of your pieces into the leg pattern, you need tabletops too! duh!)

One table leg cut

Now follow the rest of the Design Confidential’s instructions here. Essentially you have to cut down the width of two of your table legs so that they overlap nicely. Then you stand it all up, and nail it all together. I found that using some masking tape to hold the legs together temporarily helped a lot. I just dont have enough hands to hold everything and nail it all!

Attaching table legs
The Table Assembled

After you’ve assembled everything, if you’re using MDF as your wood, I HIGHLY advise going and getting yourself some spackle. Sand all your edges so everything is nice and pretty, and then take that spackle and rub in into the mdf edges. HUH? MDF edges are rough and not as nice as the flat parts, so if you want everything to look perfect, you need to spackle those edges. Once they’re dry, sand them to a nice smooth finish, then get ready to paint. (yes I know it looks like utter crap before you’ve sanded, but just trust me.)

The rough edges of mdf covered in a thin layer of spackle

I painted the tables (inside and out) with a coat of dark grey Behr Premium Plus Ultra Paint + Primer I had laying around. Now if I hadn’t been using paint+primer, I would have put a coat of stand alone primer on first.

Tables painted a base coat of charcoal gray

After my paint dried, I mixed up a batch of DIY Chalk Paint (come back tomorrow for my DIY on this). I painted 2 coats of chalk paint in robins egg blue on the front and top of the tables. I left the inside of the legs the base colour so you got a bit more contrast with the blue.

Tables painted with two coats of chalk paint (leaving the insides of the legs the base color)

Then I sanded and slightly distressed using sandpaper and a damp cloth (to see more on my distressing chalk paint using a wet cloth check out this post). After I was happy with the distressing and smoothness of the finish, I gave it a coat of furniture wax and polished it.

Table Complete

**UPDATE** Check out this post on how to DIY your own chalk paint

SOURCE LIST:

Materials:
1 – 4×8 sheet of 5/8″ MDF – Home Depot (cut into 19″ squares by HD’s cutting staff)
DAP Spackle: Home Hardware
Behr Premium Plus Ultra paint in Cracked Pepper – Home Depot
Chalk Paint – DIY

Tools Used:
Jig saw, sand paper, compressor & brad nailer, circular saw, paper & pencil, paint brush, wet rag

Difficulty Level (on a scale of 1-5):

Three out of five

Total Cost: $30 (already owned the spackle & paint)

Cutting a Hole in the Wall

I cut a hole in the wall and I liked it. (There really are too many commercials for the Katy Perry DVD on TV right now). Back to the hole. YEP, there’s a hole in my wall, on purpose. Nothing was leaking, there were no fires and nothing had burst. I just wanted a hole.

You see, my upstairs hallway is a dark sad cave (see it with your own eyes here).

Our guestroom however is bombarded with natural light from a lovely big bay window. So I thought I would steal some of the guest room’s natural light, and give it to the hallway…by cutting a hole in the wall. Now now, I’m not gonna leave it as a big gaping hole. It will be turned into a transom. Transom’s are something that an Edwardian home would have had. We do have one operating transom above our front door.

So after cutting a great big ole hole in the wall, I will case it, trim it, paint it, get some custom glass cut, install it, and I will have a pretty transom.

Until then…HOLE