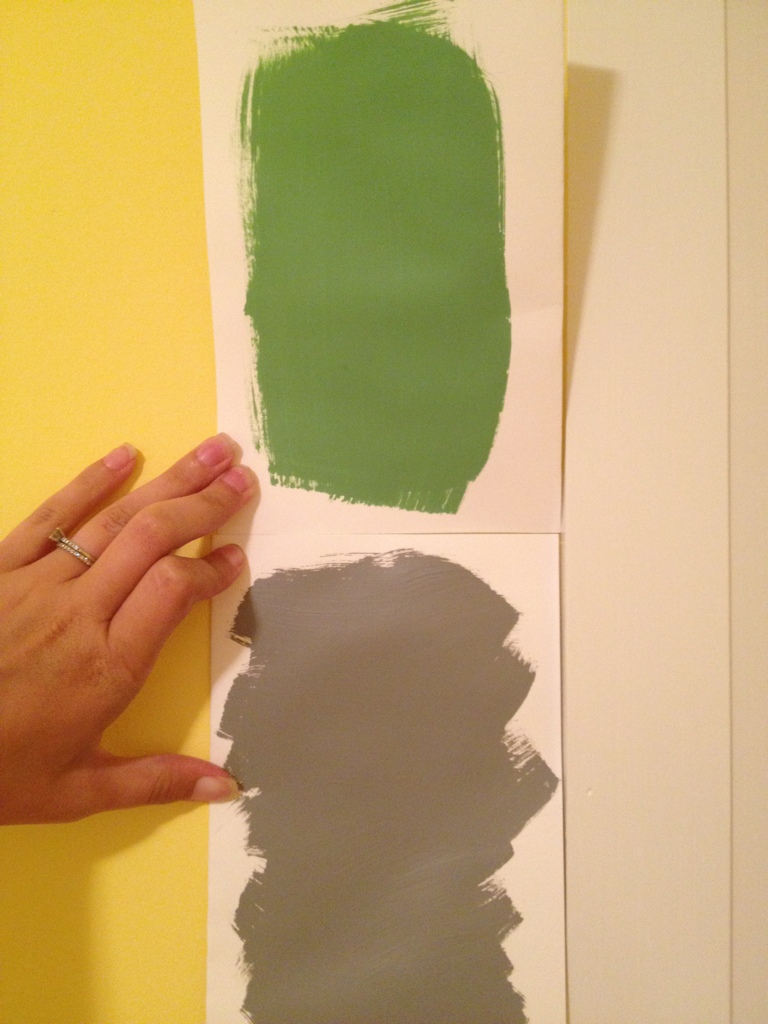
Help! I have three vastly different ideas on paint colour for our guest room. Here’s the down low:
The guest room is getting a facelift with a new wall treatment & plate rail. The wall treatment will be white. Yes boring old white. Don’t worry, this room needs some boring. Currently it’s a whole-hella-lotta-yellow. A hangover’s worst nightmare yellow.
So here’s were I need your help. Above the wall treatment there’s like 2 feet of regular old wall. What colour do I paint it? I can leave my old friend yellow (who will probably look way less acid-trippish when hes confined to 2 feet of space). Or I could go all crazy on it and do green. Last but not least is my old standby; medium grey.
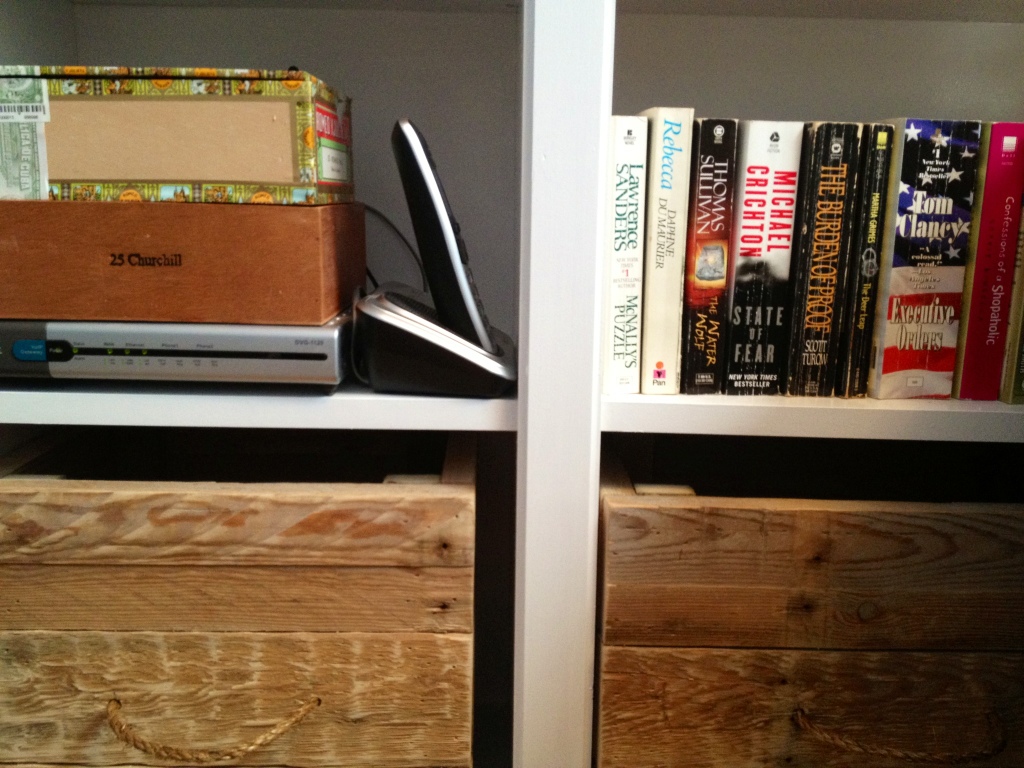
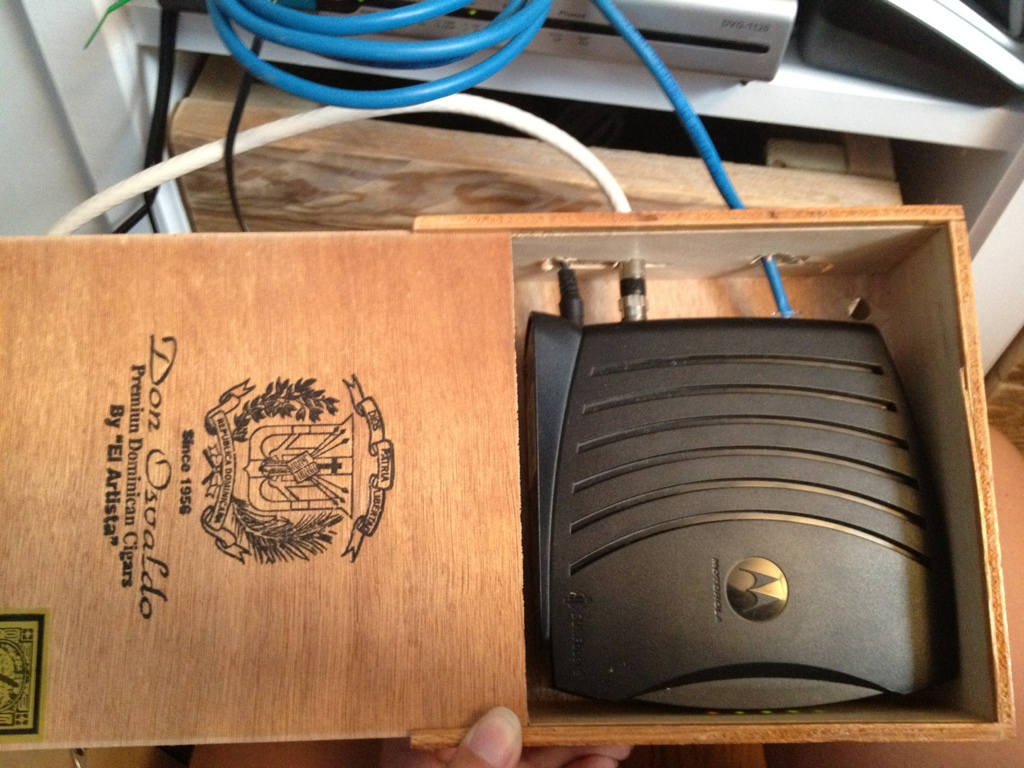
I enjoy having internet, hell without it I wouldn’t be posting this. However I hate all the technology required for it. Wifi cable modem, router, cables, wires…yuck. They are always a tangled mess of blinking lights and ugly plastic. So what do you do about it? Make friends with some cigar smokers (thanks El Granto & Father in-law) & steal some of their pretty cigar boxes.
Drill some holes for cables, antennas and air flow in your cigar boxes. Plunk your tech junk in them and stack em up.
All our tech fit into two boxes other than my stupid VOIP gateway which is giant and stupid, and wouldn’t fit in anything. There… I told it. (until I find a box or old book for the gateway to fit in, he will just sit below the boxes.)
No one would know these unsuspecting boxes on my bookshelf hold all that ugly crap. There may be dirty dishes in the sink and laundry piling up but it makes me sleep a little better at night knowing that my tech junk is neatly tucked away.
For those who follow me on Pinterest, you may have noticed a lot of front hall coat storage solutions being pinned to my “Organization” board lately.
Our front entryway is well…a mess. Our front door opens to a square tiled area with no closet and a blank wall. No place to put your keys, coat, shoes or, well… anything.
Slowly we have introduced a few good things to the front entryway. A Ikea Pax wardrobe for storage, a handcrafted bench from a local artisan and a giant mirror that came with our last apartment. The black sheep of the entryway however is an ugly, broken $15 Ikea RIGG coat rack that we’ve had since college.
Ikea RIGG Coat Rack
In fact, I believe its been broken since college. Held together by duct tape and zip ties (really!) The thing fell down every time you put a winter coat on it, and generally looked like a giant blob of coats taking up a massive amount of space in our entryway. We wanted to change it for a long time…we just never actually did.
So finally we got off our butts and decided to make a wall mounted coat rack to streamline the entryway some. Our lovely reclaimed wood bench was our inspiration. We wanted something that looked like it belonged with our bench. Like a brother from another mother. We picked up a piece of 1x12x10 rough pine (also used in the bath table DIY) from Home Depot. We measured our space, and decided for a 12×33″ wide rack with a 4×36″ mini shelf on top (to hold some art etc.)
Cutting the boards to size
We cut down the pieces of wood, sanded the roughest bits out and got to distressing.
Sanding
We hammered, nailed, sawed, chiseled, and generally beat the crap out of our wood. My favourite part is some rusty nails (that I salvaged from my pallets) that we bashed into the wood, leaving nail heads and in one case the whole nail showing. It really does make it look like its been around 100 years.
Distressed Wood
As we wanted to match the bench, I headed out to pick up the darkest brown stain I could find. I came back with Varathane “Chocolate” and put on a coat. It looked great at first, but as it dried, it was still too light. So I put on a second coat of stain, then followed it up with a coat of Minwax Water Based Oil-Modified Polyurethane.
After 2 coats of Chocolate stain
After it dried, I sanded lightly with a fine sandpaper, then gave it a second coat. Once it was completely dry we attached some nice cast iron coat hooks, and attached it to the wall (into the studs) with some nice 2 1/2″ long black screws.
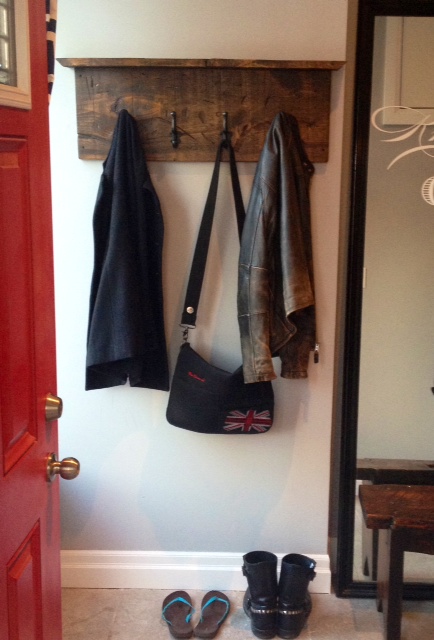
So here is the before and after:
Before: Coat MonsterAfter: YAY!
SOURCE LIST:
Materials:
1×12 wood: Home Depot
Varathane Chocolate Stain: Home Depot
Minwax Water Based Oil-Modified Polyurethane: Home Hardware
Cast Iron Coat Hooks: Home Depot
I was going to have an awesome post for you today about our front entryway, but instead I stayed up way too late last night working on the backyard mural.
I begged and borrowed to get use of a projector, and late last night I traced my design onto the back wall. Hopefully today I can get some paint on it. Until then, here’s a sneak peek.
The storefront was very neutral when we moved in. Walls beige, fixtures neutral. The light fixtures were especially neutral. Builder basic “spaceship” lights in hallways, Ikea nondescript fixtures in washrooms and bedrooms. The sellers obviously wanted to dress the house to sell, and I get that. But I also think they missed the boat a little bit. The house was a 100 year old Edwardian Storefront. It is eclectic. The neighborhood that it’s in, the proximity to downtown and a vibrant arts community, makes me wonder why they didn’t “work” the unique aspect to it. A similar Storefront a few streets over, was renovated fantastically with period charm and character, and sold for over 150k more than we paid. Hey, I’m not complaining! I am fine with adding the detail, it just seems the sellers had their eyes closed to this fact.
Back to the lighting. Obviously changing the lighting in the whole house is e.x.p.e.n.s.i.v.e so we’ve been working it at one room at a time. Recently I have been crushing big time on Schoolhouse Electric’s lighting.
For my hallways I love the Thunderbird 4”
or the the Loyola 4”
For the guestroom I love the Waldorf Pendant
or the Mercer Pendant
For the Dining Room I love two Factory Light No 5’s
For my Master bedroom, I am crushing on Keen Wall Sconces for beside lamps
A girl can dream right?
*Come back next week to see some new DIY hallway lighting!
(nope, I have no affiliation or sponsorship from Schoolhouse Electric & Supply Co, I just like their stuff!)
This weeks libation is courtesy of El Granto. He has a mean love of all things ginger, and on our vacation he could be found sipping these dockside. Enjoy.
Spicy Jamaican Ginger Beer
Ingredients:
Jamaican Ginger Beer
2 oz Jamaican Spiced Rum
Ice
How To:
Place a handful of ice in a pint glass. Add 2oz of Jamaican Spiced Rum to the glass. Top up glass with Jamaican Ginger Beer, stir and enjoy
*Jamaican accent not included. You’re also damn lucky I didn’t name this drink Jamaican Me Crazy.
Our house used to be a store. How cool is that?! We’ve been wanting to pay homage to that somehow when decorating the house. We have been on the hunt for an old grocery store sign for the kitchen (the storefront was originally built as a grocery store) and we want something barbershopy to reflect another one of the former businesses. (so if you come accross an old (cheap)barbers pole, let me know!)
Another aspect of old stores that I really love are ghost signs. Ghost signs are those old faded ads on the sides of buildings often advertising beer, liquor, cigarettes etc. I wish wish wish we had a ghost sign, but sadly we’re too close to our neighbors and have no walls that face the street. Sad face.
There is however a graffiti mural on the side of our garage that faces our neighbors yard. I love the idea of also having a mural on the side of the wall that faces our backyard. I don’t have any graffiti artist friends however and the painter friend I do have is incredibly busy and successful with his fine art career (go check out Martin Wittfooth’s work, it’s amazeballs.)
I also wanted something…well…cool. I didn’t want a sunflower and happy dancing children mural. I wanted something that I’d like to see hanging in my livingroom.
So… Now what? Stencil something? Design a mural on my own? Contact a community outreach program and see if they have any teens who want a canvas? Gah I have no idea. Then it struck me, a ghost sign! A great idea if I may say so myself. So I started researching and pinning.
But…wait…how do I make it look like it’s been there 50 years? I have NO idea. I could not find a faux ghost sign tutorial anywhere and had no idea where to start. It needed to be fairly durable (as it’s outside), but not look perfect and new. I contemplated using Elmer’s wood glue to try to do a crackle effect then sanding the paint. Or painting the mural then pressure washing the whole thing to try to wear off most of the paint. Or doing the design in chalk and then clear coating it, but really I was up a creek and had no idea where to start.
So the project sat for a few months until one day El Granto and I spied a can of dark grey flat exterior Behr Premium Plus Ultra paint in the ‘oops’ shelf at home depot. Usually the oops shelf is full of colors such as baby puke and mustard. However this looked like a pretty warm dark gray and it was priced at $9 (regularly $50+). We tossed it in the cart and decided to give it a try on the garage.
Two days later I was reading Centsatonal Girl and she posted about chalk paint. Hrrm…chalk paint? Could that work for my old worn looking ghost sign? I dunno! So I sent an email to the chalk paint people and my local retailer and awaited their response with baited breath. (No really, I sat there watching the computer like a 14 year old girl waiting for a boy to txt her.)
All I can say thus far… is my Mom is heading out Saturday to pick up a can of chalk paint for me, and I will be putting on a coat of our $9 oops paint on the garage wall this weekend. Wish me luck!
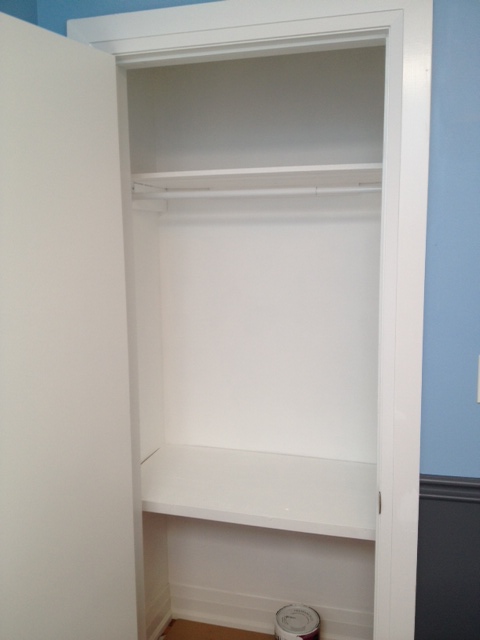
As our office is actually our third bedroom, it conveniently had a closet. A closet was the perfect place to store all the not so pretty office essentials. i.e. paper, cd’s, printer, El Granto’s ugly utilitarian college filing cabinet, as well as some oversize items that take up a lot of space in our own closet (I’m looking at you luggage…) To get the best usage out of our closet, we decided to place the filing cabinet on the floor of the closet and to build a shelf over top of it to house the printer and misc supplies. I mentioned to El Granto that I would like to work on this mini project after work one night and I came home it was magically built! I quickly put a coat of primer on it.
Closet Shelf Primed
Then stood back and said, well now that works so well we need MORE shelves. We decided to put in a shelf and a closet rod so we could hang extra clothes or for if the office is ever turned into a nursery. So we got to work, hung a rod and another shelf.
I then primed it all and gave the whole closet two coats of white paint. It’s not like anyone will be inspecting my office closet, but it just neatened everything up. Now all our crap unattractive items can be safely shut behind doors (and I have a place to quickly shove rogue office items when company is coming over.)
Office Closet Painted
The office is really starting to shape up now! SOURCE LIST:
Materials:
5/8″ Plywood for shelves: Home Depot
2×2’s and 2×4’s for shelf supports: Home Depot
Behr Sealer and Undercoater: Home Depot
Behr Premium Plus Interior Eggshell paint in Pure White: Home Depot
Frog Tape: Canadian Tire
Closet Rod: Home Depot
I loooove baths. Like unhealthy obsession love. Like you may have to call Intervention love. If we had money and space in our backyard I would have a hot tub for sure. A bath is like a hot relaxing hug. When I have had a shitty day, all I ever want to do is take a glass of wine and a book to the bath. When I have baths I drag all sorts of things into the tub with me. My Kobo (e-book reader), beverage, glasses, candles etc. Thats a lot of stuff. About 10 minutes into the bath I start to get all sweaty (cause I have the bath set to boil) and I am always afraid I am going to drop my Kobo in the bath. So about 6 months ago when I pinned this lovely pin to my Pinterest.
I love the whole bathroom, but especially the live edge board acting as a table on the tub. I normally hate bath accessories. I don’t need a wire basket to hold my loofah. I need a wine glass cup holder, and manufacturers don’t seem to be making those… So finally after much procrastination I set out to make myself one.
I loved the thought of using reclaimed wood, or a nice live edge slab like the above photo, but alas I couldn’t source anything easily/locally. So instead I purchased a rough 12″ wide 1″ thick pine board from Home Depot. The rough boards are a good deal. We got a 10′ long one for about $10. We had the guys at HD cut it down to 2 five foot lengths for us, so it would fit in the car. I came home, measured up the width of my bath tub, and cut a board to length. We distressed it a bit, and I took the sander to it smoothing it a bit, but still leaving it fairly rough.