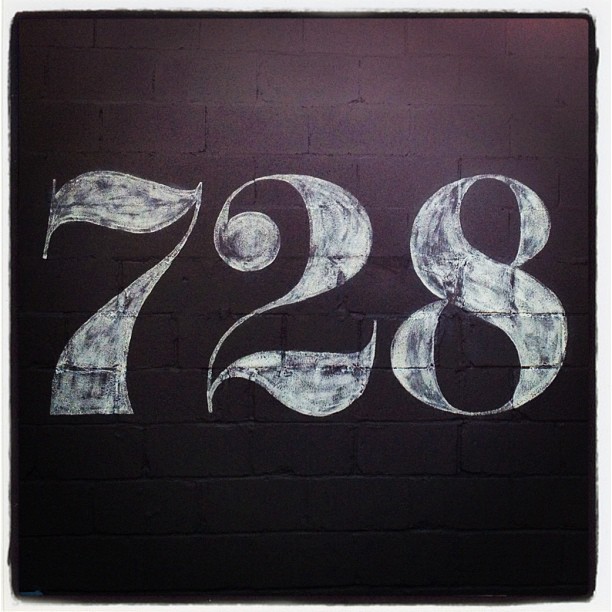
Sorry for the long post, I doubt many of you will ever want to paint a ghost sign of your own, but if I help one person, I will consider my life fulfilled. Yeah sure…
There really is no info on how to do this on the web, and I did it all trial and error. So I am putting my wisdom blubbering nonsense into the world, and maybe somewhere I will inspire a DIY ghost sign.
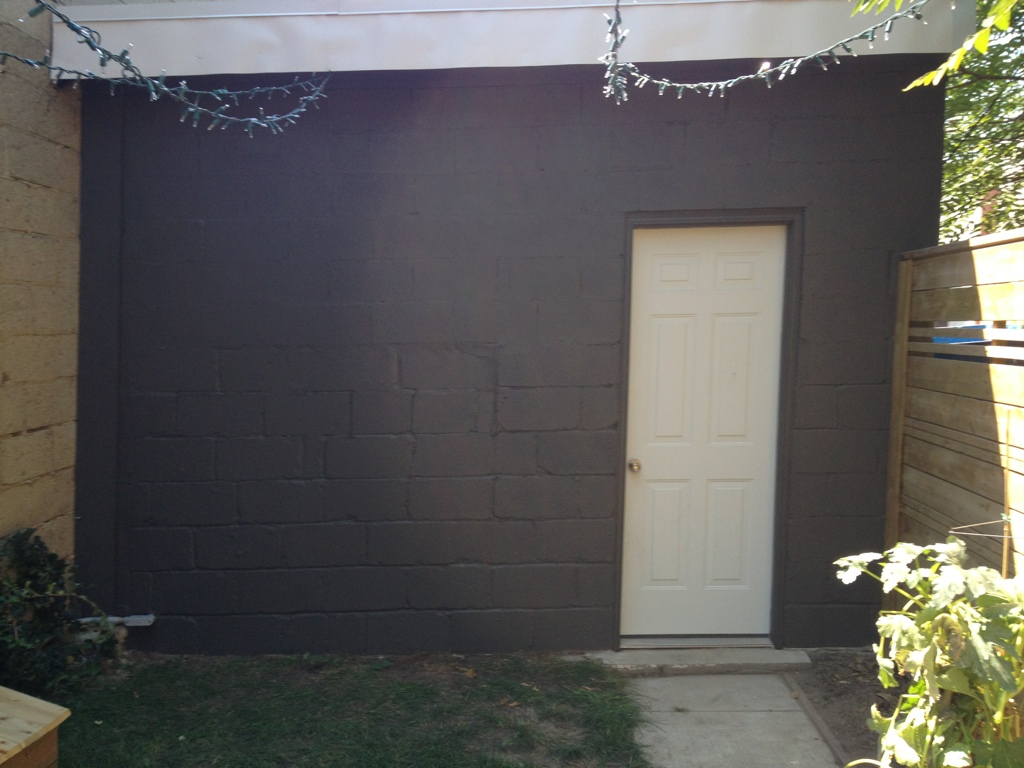
Now lets get this party started. First up, I painted my cinderblock wall with a base color of dark grey exterior flat paint. Ideally I would have had a lovely brick wall, but instead I had an ugly beige cinder block wall, so I gotta deal with the hand I’ve been dealt. If you have a wonderful old brick wall, don’t paint a base color!
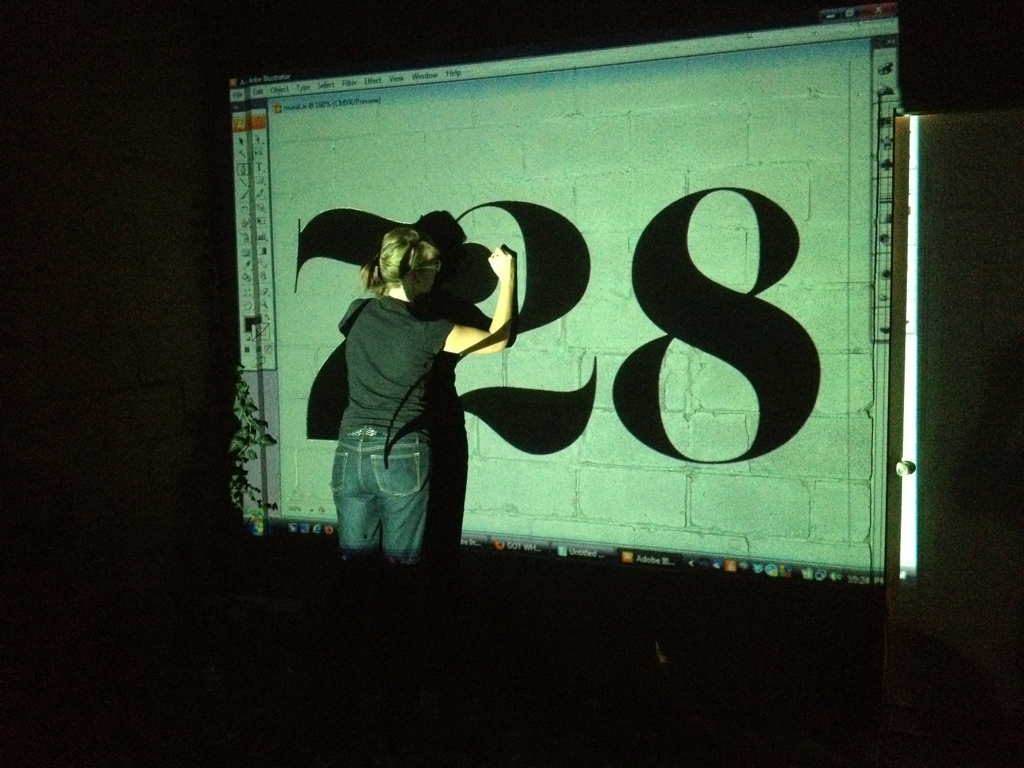
After my base had cured for a week(ish) I set out to project my design onto the wall. I used a digital projector and a design I laid out in Adobe Illustrator. I lucked out with this and was able to borrow a projector. However, if you are unable to. Check Craigslist for Artist Projectors. Like the Artograph Tracer Projector. Even new, it only retails for $100.
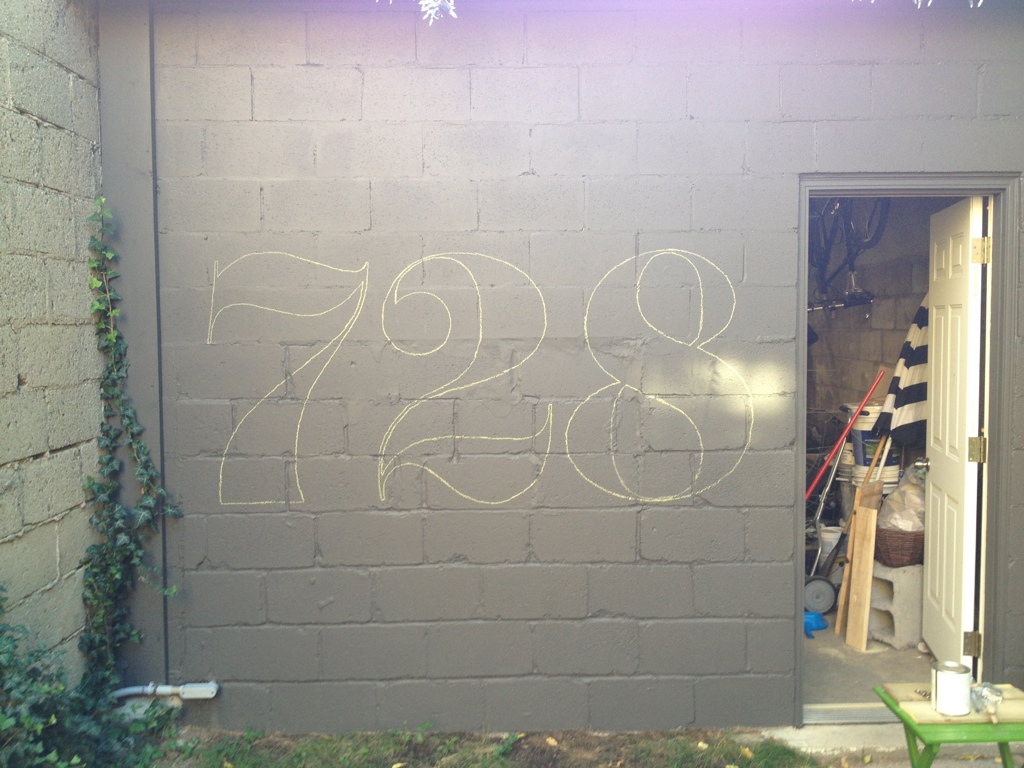
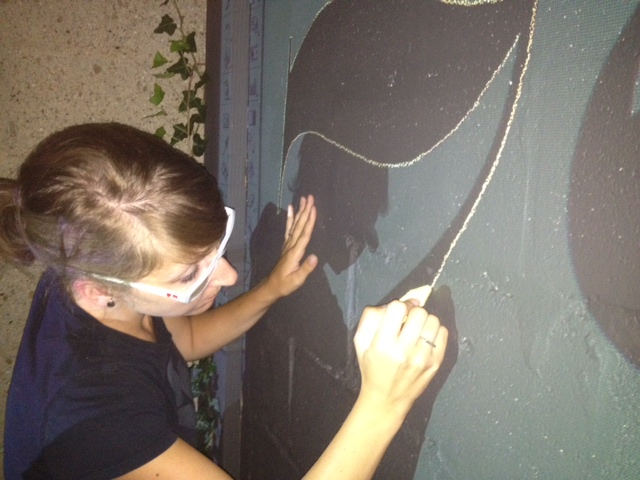
I projected the design onto the wall (at night), centered and leveled it, and got to tracing the outline with chalk. I used Crayola childrens sidewalk chalk in yellow, because that’s what the dollar store had. In hindsight, I would recommend regular white chalk, in the skinnier variety. My chalk came pre “sharpened” on one end, but quickly dulled and I was left with a large blunt blob of chalk to draw crisp lines with… so yeah, get the regular old chalk your school teacher used.
After you draw your outline, go to bed. It’s dark, and you cannot paint. No matter how excited you are to get started.
Then get yourself some Annie Sloan Chalk Paint. I got mine from Canadian distributer Diamonds & Toads in St. Thomas Ontario. If you’re doing a small mural like me, just get a sample pot. That stuff goes a loooooong way. I have a quart, and maybe used a 1/4″ worth of paint from the can. Seriously. Also get yourself an artist paint brush to do the outlining of your design, and a wider brush for filling in. Now, this is NOT chalkboard paint, it’s a variety of paint all it’s own. It’s great for furniture, adheres to most surfaces without any sanding or removing of old material, and is even durable outdoors with no extra finishing. (really). Now if you were putting it on furniture you would probably want to wax or seal it, however its important for outdoor uses NOT to wax. Wax will hold in moisture and wreck your shit. So paint it and leave it alone to age gracefully.
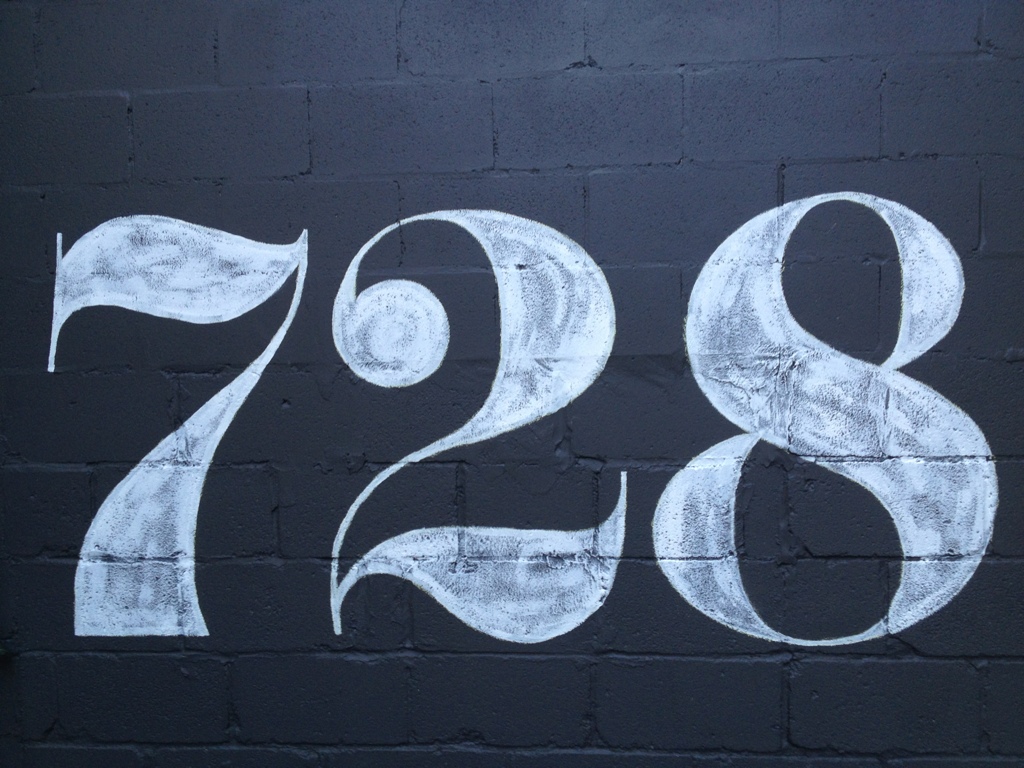
Once you’ve got your supplies, outline and fill in your design with one coat of chalk paint. It wont be even, it wont be perfect, but that doesn’t matter, you’re going to be removing most of the paint anyways. Now this stuff dries fast, so work quick. Try not to leave big ridges or globs of paint, but make a smooth even layer. Chalk paint is weird. It’s more like a really thick watercolour paint than a latex or acrylic. It blends and moves like an artist paint. You can also thin it down with water, or thicken it by leaving the lid open (really). You also don’t have to worry that much about screwing anything up, as its supposed to look old. As I said, it dries fast. So clean your brushes pronto after finishing.
After an hour you can start to distress the paint. It took me about an hour to do my one coat of paint, so as soon as I finished painting I went back to the areas I started first, and got to distressing. If you were painting on wood, you would probably want to try sanding for distressing. However, being on a cement wall, that’s not the best or easiest way to do it. Instead, you can use another technique; a rag and warm water. But wait, I said that chalk paint was durable outdoors, but how can that be if it can be removed with water?! The thing is, when you wipe the dry paint with a wet cloth, the paint doesn’t wash off. However, when you SCRUB the paint with the wet cloth, the paint RUBS off. It doesn’t dilute and smear, it just comes off the areas you scrubbed. Leaving the base colour paint below intact, and not smearing paint into other areas of your mural. Say what?! Really, that’s how it works, I promise. I have no idea why, it just does. So needless to say, that’s perfect for an old looking weathered signs on walls. So start scrubbing! I thought I’d try a cleaning sponge, but it was too. well. spongey. A white clean heavy duty rag worked best. Now the thing is, when you distress chalk paint with water, it’s kinda like working with grout. Huh?! You know how when you are washing away excess grout, your sponge is constantly covered in grout sludge, and you have to repeatedly wash it to get all the film off the tiles? Distressing chalk paint with water is the same way. Your rag will leave excess paint hanging about. So just make sure you have a different clean rag or sponge and are always cleaning up after yourself, or you will have a wishy washy paint sludge over everything.
Now distressing chalk paint with a wet rag isn’t easy per se. It requires massive amounts of scrubbing. And scrubbing and more scrubbing. BUT it rubs off beautifully. It sticks better to rough surfaces, and rubs off easier on smooth ones, making the distressing rather easy. It looks natural because its exactly how paint would naturally fade/age.
So grab an unsuspecting lacky and scrub scrub scrub. Now if you scrubbed off too much, don’t worry you can always layer more paint back on. I did notice that the areas where I had a nice even coat of paint were easier to distress then the more dry brushed thin areas. So I actually wished I had a more solid layer of paint to begin with.
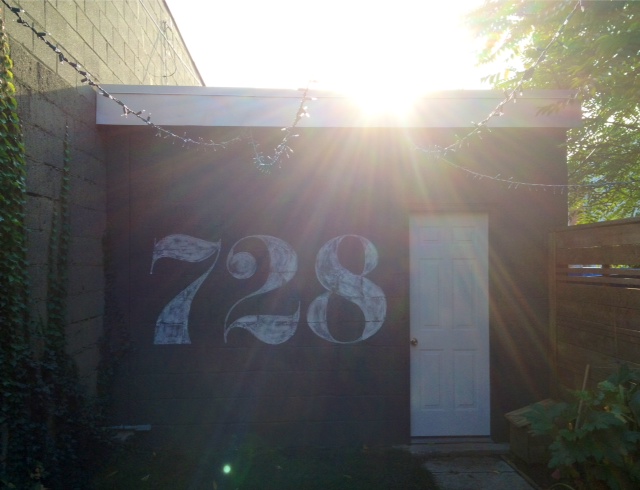
And that’s it. After you finish distressing and cleaning up after yourself, it’s done. No sealer, no nothing. It will be fine out in all weather and will age nicely.
