Drawers

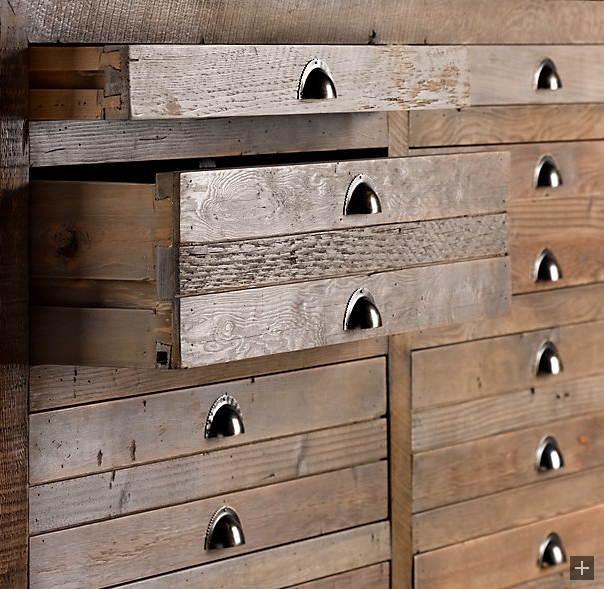
Cabinet drawers, not underpants. Get your head out of the gutter.

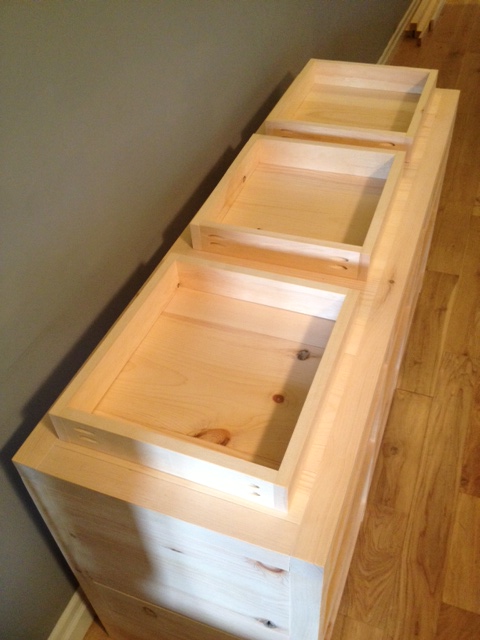
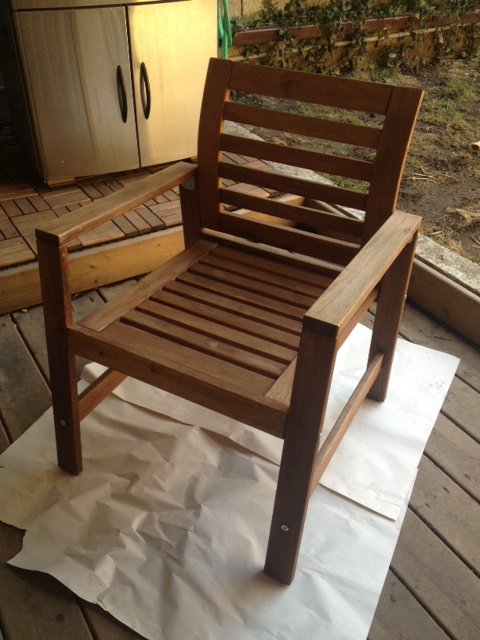
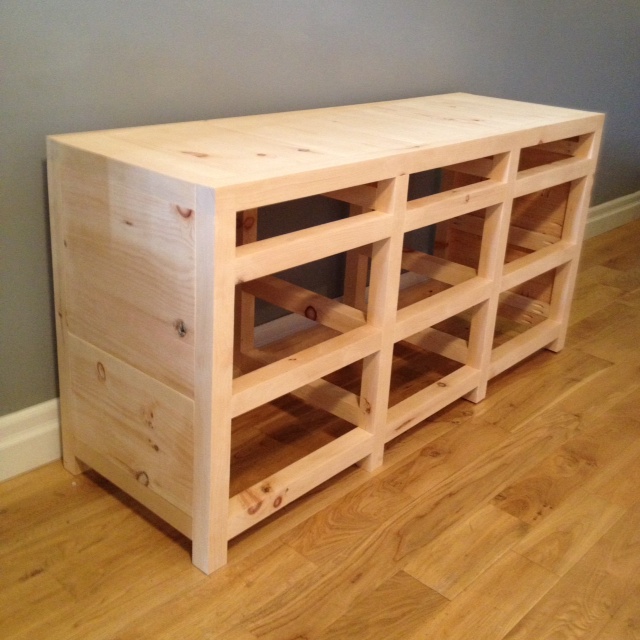
A big part of our Printmakers Media Cabinet project is the 6 storage drawers to hold remotes, and our DVD’s & video games. The cabinet has three shallow drawers at the top (for the remotes), and then three deep drawers at the bottom. Where we last left off was that we had built the small drawers.

Drawer Box. These skinny drawers go at the top of the cabinet to hold small things such as remotes and magazines

Last weekend we cut some hardboard bottoms for the drawers and attached them with brad nails.

drawer bottoms
Attaching drawer bottoms
Completed drawer
Completed drawer

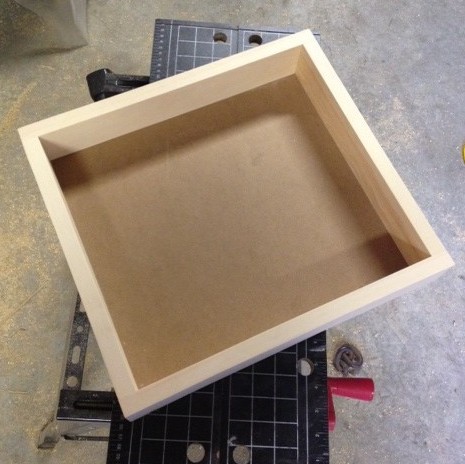
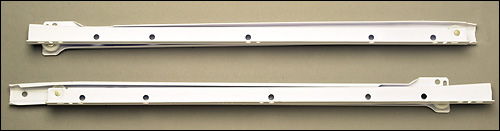
We gave the drawers a final sand, and headed inside to install the drawer slides. At this point in time the whole cabinet build had went very smoothly. No major hiccups, everything was great. Usually every project has it caveat. Its one pain in the ass task, or something liable to go wrong. Well we hit that with the drawers. We had tested the size of the drawers to make sure the drawer slides would fit on either side of the drawer into the hole in the cabinet. What we did NOT take in to account was that we purchased regular old kitchen drawer slides, which require at least 1/2″ in clearance in the height of the drawer to be able to take the drawer in and out. (The drawer slide has two rollers, and to take the drawer in or out you have to lift the drawer roller over the cabinet roller, thus the 1/2″ height clearance requirement. Our drawer boxes were 2 3/4″ tall and our hole in the cabinet is only 3″ high. So when you tried to put the drawer in, the drawer box hit the frame of the cabinet. Oops.

There were three options on what we could do to fix things.

Option A.)
Head back to Lee Valley and return our traditional drawer slides and buy the fully extending expensive slides. The reason we didn’t buy the fancypants full extending slides to begin with was that they were FOUR TIMES THE PRICE of the regular ones. If it was my kitchen and drawers that I would open and close several times a day, I would have went with the expensive ones. However, for a media cabinet that will maybe get used a few times a week, I was not ready to invest $120 in drawer slides when I could have something that worked for $30…. So I wasn’t too keen to this option.

Option B.)
Rebuild the drawer boxes shorter. This would mean essentially tossing out the drawer boxes we had made and making new smaller ones. A decent option, still cheaper than buying new slides, but it meant another trip to the lumber yard and a few hours work.

Option C.)
Cut the drawers down 3/8″ in height. This would involve no cost, but the potential for disaster was huge. (Our biggest worry was hitting a pocket hole screw with the saw blade, ouch.)

While we debated on what to do with the small drawers, we decided to build the large drawers (albeit to a shorter height than the plans said) to make sure that the drawer slides would in fact work. Cause I would be really pissed if I rebuilt the small drawers only to find that it still didnt work.

So we cut, sanded, drilled, clamped and screwed the big drawer boxes, and added drawer bottoms.


Assembling large drawer boxes

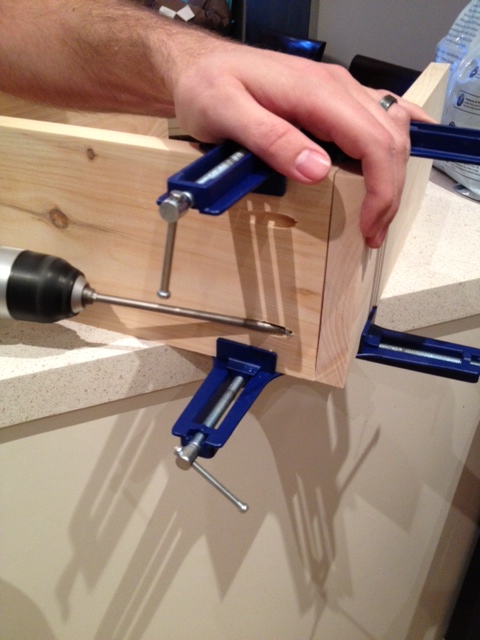
Then we gave a shot at installing the drawer slides. I was a wee bit worried at this point, and even watched a YouTube video on installing drawer slides. (Yep, that happened.) However it was one of those worry for nothing tasks. It was easy as pie to install. We had measured everything properly, the drawer slides fit in perfectly, and after a mere 20 minutes everything was installed correctly and moving without problems.

Bottom Drawers Installed
drawers
Holy crap, they actually work

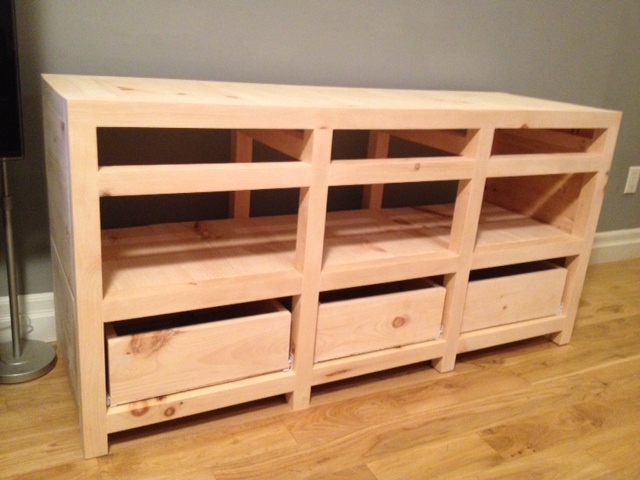
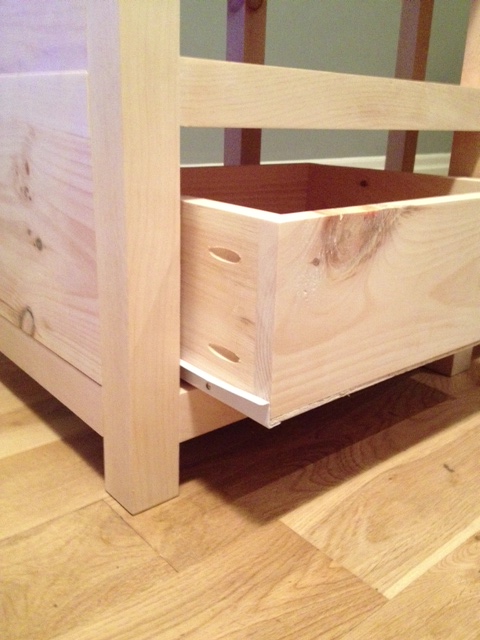
The drawers still need their drawer fronts (which will cover up all the hardware and gaps etc.) But hey, it’s actually starting to look like a cabinet! Yay us!

So I bet you’re wondering what we decided to do with those small (but too tall) drawers?

Cutting the sides
Trimming the height of the drawer boxes.

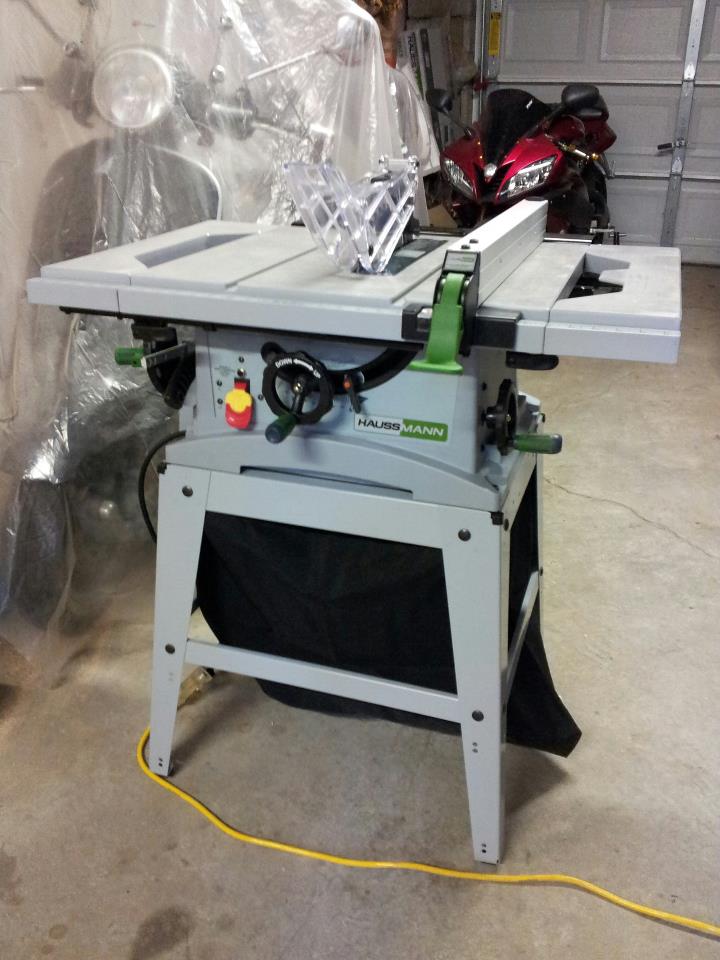
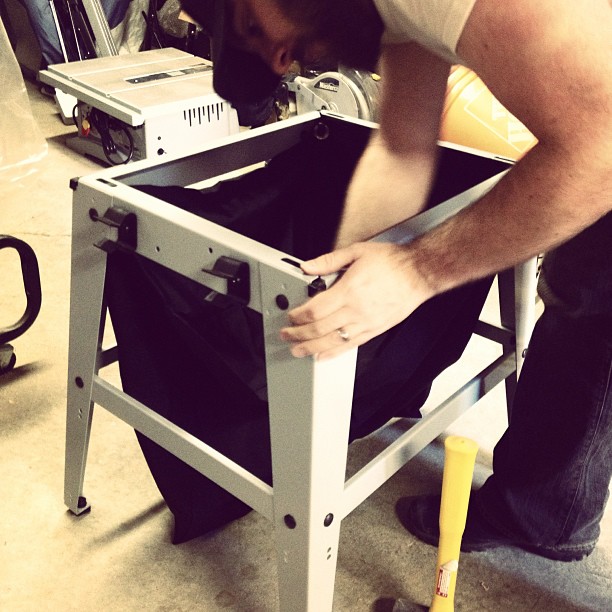
We did just get a new table saw after all…


New Addition to the (tool) Family

There has been one major tool missing from our arsenal of woodworking machinery; the table saw. Thus far we have gotten around not owning a table saw by having things ripped to size at the lumber yard, or doing small ripping with our circular saw. While those options have done us okay, it really would be a lot more convenient/precise to have our own table saw. For example, we’re ready to make the drawer fronts for the media cabinet, and we have to rip down three sizes of lumber to get it all done.

El Granto celebrated a birthday this past week, and received an (awesome) new table saw as a birthday gift from his parents! Yahoo!  Last night he spent a couple hours assembling it with a giant grin on his face. It was like Christmas in our garage.

El Granto Assembling the new Table Saw

Due to the loud nature of the saw, and the late hour in which El Granto finished assembling it, we haven’t tried it out yet. However I expect El Granto will be rushing home from work today to fire it up.

Assembled Table Saw
Assembled Table Saw

Is it weird to be this excited about a saw? I think we need to get out more…

Earth Day

It’s Earth Day today! In honor of Earth Day my office participated in Clean Toronto Together last Friday. We spend 20 minutes cleaning up the public spaces around the office, and what a difference it makes. My lunchtime parkette is no longer habitat for beer bottles and soda cans, and there’s no longer grocery bags trapped in the shrubs and bushes.  Its great to see some progress, but sadly it will be exactly the same next spring.

parkette

I think we all need to pay a bit more respect to the planet we call home, and I am talking every day, not just on earth day. So what can you do to save some energy, and maybe even some money around your home and DIY projects?

Insulate! In older homes there is very little (or sometimes no) insulation in the walls. In the winter you are essentially heating the outside, and in the summer you are air conditioning it. If you are opening up your walls, take the time to install a good quality insulation. Remember the higher the “R” value the more insulating its going to be. Consider spray foam, which also works as a moisture barrier. While you’re at it, take a good look at your house and fill any exterior gaps with caulking.

Smart Thermostats: Use a smart thermostat to optimize your energy usage. We have a Nest, and LOVE it. It has an auto sensing feature that knows if you’ve not been in the house for a while, and will turn the heat down. It will also utilizes the wasted energy from your ac unit. We have seen our energy bills go down, which is good for our pocketbooks and the environment.

A screen shot of my Nest thermostat app on my iPhone.

Energy Efficient Appliances: Appliances can be a big suck of energy. If you have an old “beer” fridge in the garage or an ancient dryer, you may be costing yourself an awful lot to run those appliances. Look at Energy Star models and ensure you recycle your appliances in the proper manner.

Re-purpose when possible: I know everyone loves new things, but if something is in good shape, an it’s just not the style you like, why throw it out? Can you give it a coat of paint, add new hardware or fix a broken piece to make it new again? If not, maybe someone else can. Consider donating to the ReStore, or local thrift shop. If you need the cash, try selling it in Craigslist or Kijiji. One mans junk is another mans treasure. Heck, Rona has created a line of paint made from recycled paint.

We reclaimed several hundred bricks from this dumpster that was headed for landfill

Buy local: This seems simple but it makes a huge difference. Why buy fruits & vegetables that have been trucked here from Mexico when you can buy from a farmer down the street? My city (Toronto) has an excellent array of farmers markets, which we love visiting (especially in the summer and harvest months). Its also great to support local businesses as you’re investing in your community. Also remember to buy only what you’re going to consume. Make a meal plan ahead of time and stick to it. There’s nothing worse than throwing out half the food in your fridge come garbage day.

Grow your own! You can get a lot of return from a small square foot garden or even a few pots on a patio. Grow the items you regularly use, and you’ll get so much enjoyment and use out of them. It really is the best feeling to go pick something from your garden for that nights meal (and it saves you a trip to the grocery store!) If your city allows it, you can go buck wild and get your own chickens like Karen.

A jalapeno pepper from last years vegetable garden

I think we can all do things in a bit more conscientious manner each day.  You dont have to give up your home and live in a yurt, but you can also not be the guy who pours paint down the sewer (Yep, we’ve really seen a guy do that.)

Get your hippie on!

Media Cabinet – Odds & Ends

The Printmakers media cabinet project is coming along (if you’ve missed it, check out part one, two and three)

We checked a few things off the list last weekend. First up, we headed down to Lee  Valley Tools to pick up the hardware. I had pre-scouted online but wanted to go to the showroom to take a look at everything in person. Turns out, we walked out of the store with the exact things I had picked out online! (not that I minded wandering the isles full of awesome tools and hardware at Lee Valley…)

Here’s what we bought:

Inset Hinges
Inset Hinges
Cup Pulls
Cup Pulls
Door Stays
Door Stays

We also picked up standard drawer slides (350mm) and some door latches. The purchase set us back $135 but it was actually considerably less than I was expecting. I will give you a breakdown of all the fees once the cabinet is finished.

On the same day as our hardware adventure, we also trekked out to the lumber yard and picked up the wood for our interior shelves and drawer boxes.

We got to work installing the shelves. They are inset into the frame, so we were trusting our fabrication to have everything go in perfectly. I was expecting disaster, but it went smoother than expected. It was a tight fit, but with some persuasive hammering we were able to get everything in and screwed into the frame using pocket holes. It needs a good sand, but overall we are pleased with how its shaping up.

Media Cabinet with Shelves Installed

We also got started on the drawer boxes. We cut the sides and fronts of the boxes to length, pre-drilled pocket holes, then assembled using our corner clamps and a square to ensure the boxes were perfectly square. (Un-square boxes will cause us a ton of headache when we try to install them.)

Assembling Drawer Boxes
Assembling the Drawer Boxes using corner clamps and a square

The assembly of the drawer boxes went fairly swiftly and smoothly. Now they’re ready for the drawer bottoms and then we can install them (which I am super stoked about!)

The Drawer Boxes ready for drawer bottoms
Drawer Box. These skinny drawers go at the top of the cabinet to hold small things such as remotes and magazines
Drawer Box. These skinny drawers go at the top of the cabinet to hold small things such as remotes

We also spent a good chunk of time trying out more staining options. I am still not in love with anything, but am getting closer.

Stain options
Three stain options using Varathane “Kona” stain. I love the one on the left, but have been unable to reproduce it

I think this is the most indecisive I have been about anything in the house. I have a wildcard option that I am going to try out this week, and I will let you know how it goes (that is if I don’t light the house on fire while trying it.)

Hopefully this weekend we can install some drawers and get some staining done!

Planter Box Facelift?

Our first spring in the Storefront we built a cedar planter box at the front of the house to keep people from using our “front yard” as a sidewalk, and to keep people from peeping into our window. Its worked well, and I love having a mini garden out there to soften up the concrete landscape.

However, this spring our dear old planter is looking a bit, well shabby. The cedar has weathered into a muddy dirty grey colour, and isnt doing much for me. The spring bulbs have started poking out, but after someone stole my evergreen shrubs from the planter last summer, its a bit bleek.

Planter Box
The sad planter

The planter will get a load of new flowers, top dressing and some sort of evergreen plantings, but I am thinking of changing up the planter as well. The cedar has just seen better days.

In fact this is what it looked like brand new:

What the planter looked like when it was first built

A whole lot better than the weathered dirty version I have now, right?

So what can I do to make it look a bit less ghetto? Here’s a couple options I am thinking of:

  • Sand the cedar and staining it with a cedar colored stain, so it looks a bit more like it used to.
  • Painting it dark grey to match the storefront. (although that may be a bit dark)
  • Staining it a darker wood color, something a bit more walnut.
  • Trimming it out to match the shaker style paneling of the house, and painting it a fun color (like lime?)

What do you think? Any other brilliant ideas? I need all I can get, throw them at me!


Outdoor Furniture Maintenance

**My heart is with those affected by the Boston Marathon tragedy. I cannot imagine the sorrow and terror for those involved. **

It’s (almost) spring in Toronto.  I hope.  My backyard still looks like a brown pile of old grass and sticks, but I do have a few budding spring bulbs in the front garden. So last weekend we hauled out the patio heater and the wooden patio furniture, and I declared it spring. I sat on my favorite chair with a cup of coffee and my ebook. I was still wearing winterboots and a vest, but hey I was outside. I was enjoying my coffee when I grazed my arm across the chair to find the wood scratchy and dry.  We have had this furniture for two years, and even though it sits under a covered deck, and gets put inside during the winter, its starting to show its age.

Our backyard furniture (photo from last summer)

Its our fault. We know that we should oil the furniture at least once a year, we just, well, haven’t done it. It’s okay thou, we haven’t destroyed the furniture yet, but its high time we did some maintenance on it. So I broke out the (unopened) container of furniture oil we purchased with the furniture. I placed one of the chairs on some newspaper (so that I didn’t get the tinted oil all over the deck, cause I am bound to spill some) and got to work.

The chair all ready for its oil treatment

I used a soft rag and applied a thin but even coat of oil. I could immediately see the difference as the thirsty wood soaked in that oil.

The slat on the top has been oiled,  whereas the slat at the bottom has not.
The slat on the top has been oiled, whereas the slat at the bottom has not.

Sorry for the terrible photo, it was one of those “grab a quick shot while not spilling oil all over the camera” situations.

Coffee in hand, I oiled away. About 20 minutes later, my coffee was empty (sad face) but one chair was done. It’s a bit of a PITA task (pain in the ass) but it makes such a difference. One chair down, a chair and a bench to go.

After the oil had dried, the chair arms were so smooth El Granto thought that I had sanded the chair.

Pretty freshly oiled chair arm

It’s now ready for a summer full of backyard parties. Now if only the rest of my yard wasn’t full of dead plants, a sunken path, and a patchy brown lawn…

If you’re curious we have the Ikea Applaro armchairs and bench, and we used the Ikea Varda wood treatment oil. We are very happy with our Applaro furniture. It is very solidly built with beautiful Acacia wood. We purchased the furniture at Ikea’s summer midnight madness sale, and scored it for 50% off.

The Quest for Stain

I know exactly what I want, but I cant find it. Isn’t that infuriating?

I heart the look of the reclaimed pine from Restoration Hardware. Its a grey undertoned warm finish that looks old, but not dirty. (I hate how some reclaimed wood looks so dirt ridden that you’d never want to have it in your house.)

Restoration Hardware Antiqued Pine Finish

I want to find a stain that will turn my raw pine media cabinet into a fantastically aged awesomesauce masterpiece (yeah I know I got a bit carried away with my adjectives there). I went on a quest for stain. A quest for stain is not nearly as fun as you’d expect a quest to be. There was no ring and not even one Hobbit.

Left: One coat of "Kristen Mix". Middle: Weathered Oak Right: 2 Coats "Kristen Mix"
Left: One coat of “Kristen Mix”. Middle: Weathered Oak Right: 2 Coats “Kristen Mix”

Here’s the list of contenders:

  • First up, Minwax Classic Grey. Conclusion: Too flat and weirdly unnatural.
  • Next stop, one coat of Classic Grey and one coat of Early American. Conclusion: Too dark, the grey got lost entirely, and it ended up much too red.
  • Thirdly, Minwax Weathered Oak. Conclusion: I had high hopes for this fellow, as the swatch online looked just like the RH finish. Its a new stain, so none of my hardware stores carried it. I had to special order it, and waited with bated breath for my miracle finish. Conclusion: Looks exactly like Classic Grey… it is lacking the warmth I wanted.
  • Fourth try, six parts of Classic Grey mixed with one part of Early American. aka “Kristen Mix” Conclusion: One coat equals the closest result yet, it’s still a bit warm/orangey, but at least has the grey tones I’m looking for. Two coats got muddy and grey again, and lost the bit of contrast one coat had.
Left: One coat Classic Grey  + One coat Early American, Middle: one coat "Kristen Mix", Right: two coats "Kristen Mix"
Left: One coat Classic Grey + One coat Early American, Middle: one coat “Kristen Mix”, Right: two coats “Kristen Mix”

I now need to decide if one coat of “Kristen Mix” is good enough, or if I should continue on my search. I would still like a bit deeper tone in the knots, cracks etc.

The other option I am considering is doing the one coat of my “Kristen Mix” then some Annie Sloan Dark Wax. I think it will give me the darker hue I am looking for, especially in the cracks and crevices. However, Toronto has yet to get a Annie Sloan retailer. Our closet stop is Bracebridge or St. Thomas Ontario. Both of which are a bit far away for a girl without a car.

Anyone used Annie Sloan’s Dark Wax? If so, is it the magical remedy to my stain woes?  How about shoe polish? Yeah, I know it sounds a bit cray cray, but swear I remember Norm using it on an episode of This Old House.

Hardware Shopping

To me, hardware on cabinets is like jewelry. The finishing touch, a hint of sparkle, a bit of shine. Shopping for hardware is like buying the final accessories to go with a fab outfit.

So, I am very excited that we’re at a point where we need some hardware for the Printmakers Media Cabinet project.

The plans call for the following hardware:

  • 3 pair of  inset or concealed hinges
  • 3 cabinet clips (to keep the doors closed)
  • 6 lid stops (3 – right, 3 – left)
  • 3 sets 14” drawer slides
  • 15 – drawer pulls

That’s a lot of hardware… As the cabinet is a faux printmakers cabinet, it looks like it has 15 little drawers (printmakers cabinets used to have tons of shallow drawers to hold metal and wood type and plates). So we need 15 drawer pulls, and traditionally for a printmakers cabinet they should be cup pulls.

If anyone has done a kitchen reno lately, you’ll know that pulls are expensive. From the big box stores, you’re looking to pay between $5-$15 per pull. From a high end hardware shoppe, you can pay in excess of $25 each.  Ouch, that’s not in our budget. As much as I love the hardware from Gingers or Restoration Hardware, I was not about to drop that kind of cash.

So where can you get nice, inexpensive hardware?

There are a ton of cheap online shops. However, Canadians beware. Most of the time the online knobs/pull companies will ship UPS or other courier from the US to Canada. UPS is a carrier that charges brokerage to cross the border. Brokerage SUCKS. It’s an unknown fee that the delivery guy will charge you before he will hand over your package. We have been charged upwards of $40-100 in brokerage on things that didn’t even cost that much. So by the time you’ve paid for the purchase, paid for cross border shipping, and paid for the brokerage, you’ve negated any savings from purchasing online. If you’re going to purchase online, try to buy from a Canadian supplier, or where they ship USPS or FedEx, both of which (normally) have the brokerage covered.

Your other option is purchase locally. Often local business can offer you the same or even better rate than buying online. Check out your local hardware store, and ask if they have a catalog of special order pulls. Also take a look at the special order hardware displays at your local big box stores.

My go-to spot for hardware is Lee Valley Tools. Even if you don’t have a Lee Valley in your town, they have an awesome hardware catalog and online store and they will ship to you.

So here’s what I’ve found from Lee Valley for our cabinet:

Drawer Slides:

Drawer Slides
Drawer Slides

Cup Pulls:

Cup Pulls
Cup Pulls

Hinges:

Hinges
Hinges

Stays:

Stays
Stays

Lee Valley carries everything in stock at their warehouses, and yep, we even have a location in downtown Toronto  (King Street between Bathurst & Spadina). The best part of Lee Valley is their volume discount. Most of their items have a 10+ or even a 25+ volume discount (the price goes down if you buy more than 10 etc.) So for the 15 cup pulls we need, they will only cost us $2.55 each. (excuse me while I do a little crazy Elaine dancing.)

Do you have any go-to hardware stores? Grabbed any great deals lately?

*In case you’re wondering, no one paid me in anyway for my views. I just to pass on my recommendations for places I like to shop.