Here’s our kitchen before we moved in. It’s not bad right? It has new Ikea Adel cabinets, 4 stainless steel Samsung appliances, a laminate countertop and a glass tile backsplash. Continue reading “Kitchen Wish List”
Tag: decor
Outdoor Planters
We made a large planter box for our cement front yard a few years ago. It served two purposes, it gave some greenery to an otherwise paved front yard and secondly it made people aware that it was our property not just a very large sidewalk, and thus in turn got them to stop walking right by my front window. It has worked quite well. We still get the odd person who will take the route up by our window, but generally it gives us much more privacy.
")
In the spring I have bulbs planted and get lovely spring flowers. In the summer I plant bright annuals which last mostly into the fall.
For the holidays (and the rest of the winter) I like to have some fresh greenery and a little bit of rustic winter charm. So this year I hit up a local grocer who sells Christmas trees and greenery. I purchased about 5 bunches of assorted greenery, and my Mom and I set to decorating the planter. We also had some left over garland from another project. We’re not florists, and our only mission was to give it a bit of height and fullness. I also purchased a package of pine cones at my local dollar store, hot glued them to coffee stir sticks, and tucked them in here and there.
We also did a small urn under our mailbox by our front door.
")
So even though we don’t have Christmas lights up (we don’t have any outdoor electrical boxes!) it still looks festive. That combined with a wreath on the front door has our storefront in the holiday spirit.
DIY Holiday – Chrismas Carol Art
I have taken to decorating the little shelf over our front hall coat rack as a would-be mantle. It got decorated for Halloween, Thanksgiving and now its getting a little Christmas cheer. My local dollar store sells 12×16 stretched artist canvases for the low price of $2. They also sell $1 acrylic paint. I figured this was an excellent excuse to make some inexpensive holiday art.

While singing Christmas carols at my desk one day (yep I’m one of those holiday spirit kinda people) I decided that my art project should revolve around Christmas carols. I promptly went home and laid down some type in Illustrator of the lyrics “Faithful friends who are dear to us, gather near to us once more”. Hopefully our visiting friends and family will feel welcome this holiday season!

After I was happy with my type layout and font selection, I cut out the type using my Silhouette SD onto adhesive vinyl. If you don’t have a silhouette, you can pick up alphabet stickers from craft stores, or you can cut your own out of adhesive material. After my stickers were cut, I removed the excess vinyl (called weeding) and transferred my stickers using transfer paper (it’s sticky paper which pulls off the vinyl from their backing, then you place it where you want your stickers and apply using a credit card.)
")
After my stickers were adhered I took a look and loved it just the way it was! I know, lazy me! If you want to do it right, paint around the edges of the stickers with some white acrylic paint. You do this so that if any of the paint bleeds under the stickers, its white like the canvas so it wont be visible. After it dries, coat the whole canvas in 2 coats of black, red or green paint.
After the paint dries, remove your stickers, and reveal the white canvas below. Or be lazy like me and just put stickers on canvas, then go drink some rum laced eggnog instead.
Where was I? Eggnog? Oops. Right. Project…
Then I placed it up on my mini mantle with a small artificial tree, candles, fresh greenery and a ceramic pear.
")
")
SOURCE LIST:
Materials:
12×16 Art Canvas
Adhesive Vinyl
White & Black Acrylic PaintEggnog for extra holiday cheer
Tools Used:
Silhouette SD
Paint Brush
Difficulty Level (on a scale of 1-5):
One out of five
Total Cost: $2 ($4 if you paint it)
Master Bedroom Closet Part 2
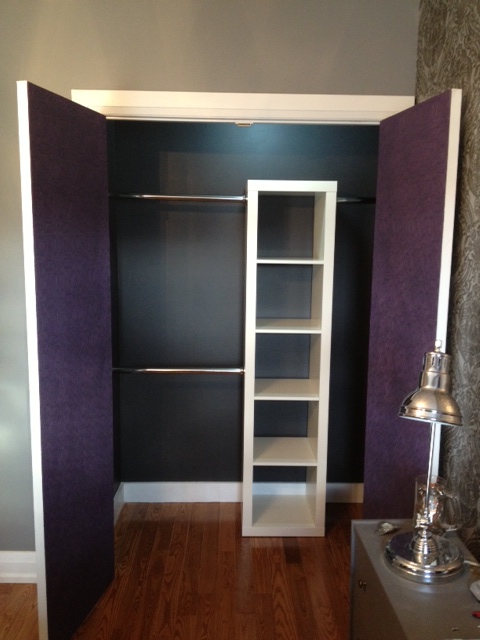
*If you missed the first part of our closet makeover, check it out here* Continue reading “Master Bedroom Closet Part 2”
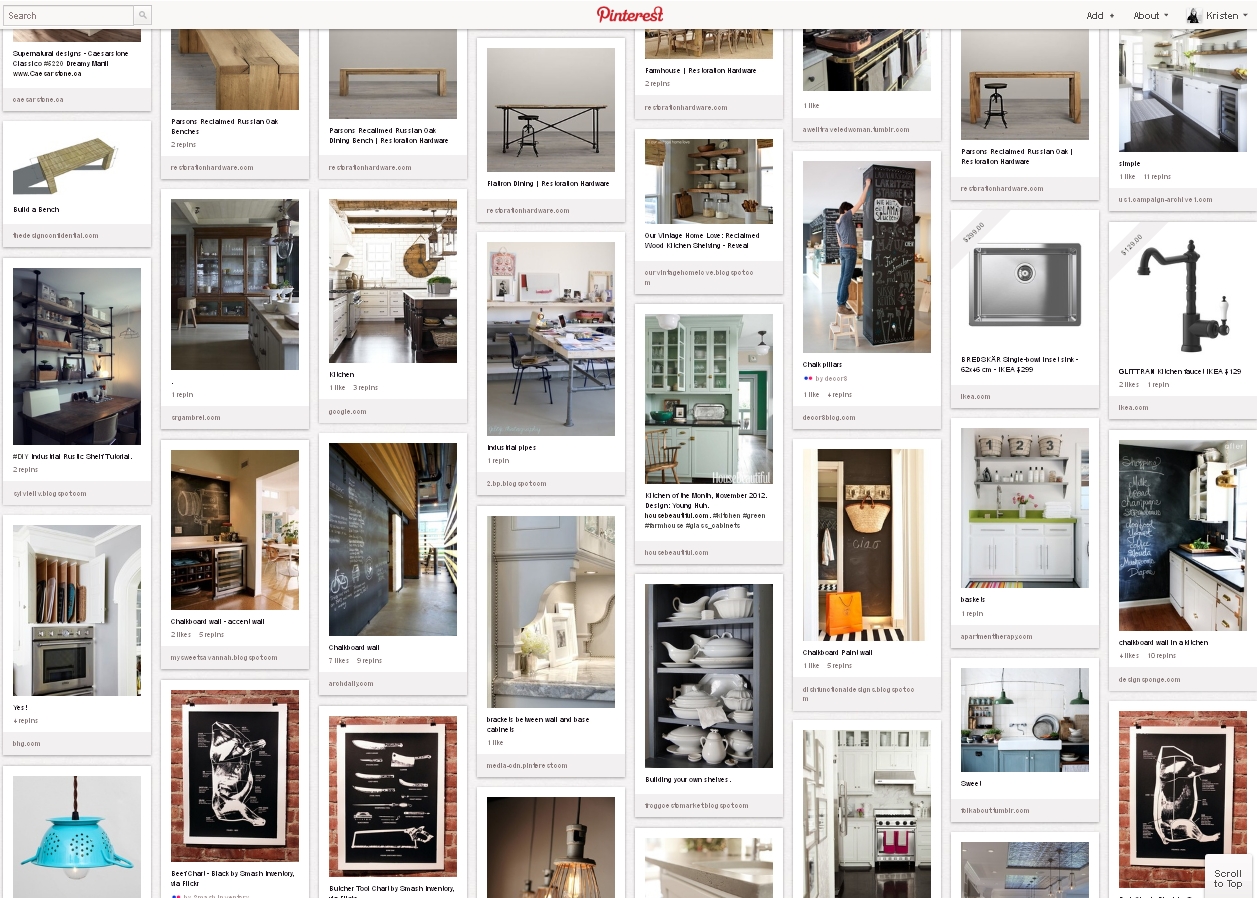
Crushing on Schoolhouse Electric & Supply Co

The storefront was very neutral when we moved in. Walls beige, fixtures neutral. The light fixtures were especially neutral. Builder basic “spaceship” lights in hallways, Ikea nondescript fixtures in washrooms and bedrooms. The sellers obviously wanted to dress the house to sell, and I get that. But I also think they missed the boat a little bit. The house was a 100 year old Edwardian Storefront. It is eclectic. The neighborhood that it’s in, the proximity to downtown and a vibrant arts community, makes me wonder why they didn’t “work” the unique aspect to it. A similar Storefront a few streets over, was renovated fantastically with period charm and character, and sold for over 150k more than we paid. Hey, I’m not complaining! I am fine with adding the detail, it just seems the sellers had their eyes closed to this fact.
Back to the lighting. Obviously changing the lighting in the whole house is e.x.p.e.n.s.i.v.e so we’ve been working it at one room at a time. Recently I have been crushing big time on Schoolhouse Electric’s lighting.
For my hallways I love the Thunderbird 4”
 or the the Loyola 4”

For the guestroom I love the Waldorf Pendant

or the Mercer Pendant

For the Dining Room I love two Factory Light No 5’s

For my Master bedroom, I am crushing on Keen Wall Sconces for beside lamps

A girl can dream right?
*Come back next week to see some new DIY hallway lighting!
(nope, I have no affiliation or sponsorship from Schoolhouse Electric & Supply Co, I just like their stuff!)
Project Powder Room
Our main floor powder room needed some sprucing up, and you guessed it, de-beige-ing. We wanted something dramatic, yet still functional. I will be posting the results of our powder room facelift in the next week, but wanted to give you a sneak peak of our inspiration, and our to do list. Even though it was a small room, there are still a lot of things on that to do list! (and they are still not all finished…)
My Pinterest Bathroom Inspiration Board

TO DO:
- Add Wainscoting and Chair Rail
- Change Lighting
- New Mirror
- Paint
- Hang Art
- Change Towel Rack & Paper Holder
- Add Open Storage for Towels and Toiletries
*UPDATE* Check out this post for a view of the finished powder room
Painting in 30 Seconds
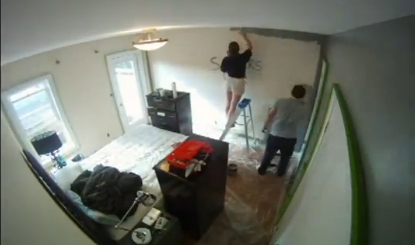
I lured you in with the post name didn’t I?
You figured I had some magic painting technique that would revolutionize your painting and blow your mind?
Sorry, no can do.
But I DO have a really cool video of us painting our master bedroom. Continue reading “Painting in 30 Seconds”