At about 3pm, the sun reaches our back deck in full force. If you happen to be sitting out there at that time, it goes from being a dappled shady retreat to a scorching desert. After getting sick of doing the deck chair shuffle until the sun entirely pushes us inside, we decided to buy some outdoor drapes.
Then we realized outdoor drapes are EXPENSIVE! They are really pricy! Especially for 12 foot long ones that I needed for our deck. I waffled over how to make it happen for weeks at a time, and then threw in the towel. We were not getting outdoor drapes.
Then inspiration struck, I could make some! But UGH, that requires a lot of fabric… and any fabric that is nice and heavy and blocks the light…is also expensive. I wasn’t even considering using outdoor fabric.
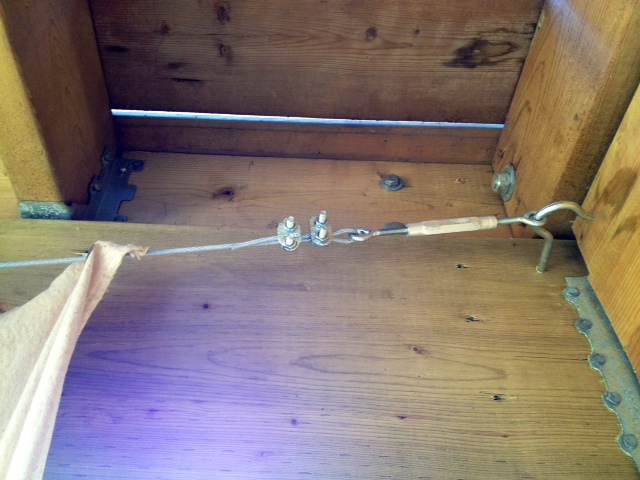
Then it struck me. Drop cloths! People use those things for everything! I could definitely make outdoor curtains with them. So we headed to Home Depot to buy some 12′ long drop cloth panels, and to find some inspiration on how to hang them. Our deck is 12′ wide. Can we use curtain rods? Nope, couldn’t find any that big. Wooden dowels? Still not available that long. Gas line pipe? ALMOST! But it was 10′ long and heavy, so it would consist of using two pipes and probably having to have a bracket in the middle to hold the weight…Then El Granto had a brilliant idea. Aircraft cable! BINGO! The drop cloths were light, and the aircraft cable could be tensioned into our deck with a turnbuckle. It would be perfect! We picked up a 50′ aircraft cable kit, two turnbuckles, two 4×12′ drop cloths, some large cup hooks, and some tarp grommets.
Back at home, El Granto got up on the ladder and secured the cup hooks to the deck, and attached one end of the cable system. We measured out where we wanted the grommets to go on the drape panels (Odin really wanted to help)

Through some trial and error (who doesn’t put instructions on a grommet kit!?) We finally found the best way to put in the grommets. It involved a vice, some rags, a hammer, and a few swear words. (sorry there are no photos, I was too busy using profanities to take any.) After the grommets were in I measured the drapes to hem them and went inside to get out the sewing machine. I managed to find my sewing machine easily enough, but do you think I could find the box with all the thread and notions?! Not a hope. So I grabbed some hemming tape, and ironed the hems in the drapes. I figured if they fell out, I would go buy some thread and sew them back up. Once they were hemmed, we threaded the grommets of the drape panels onto the aircraft cable, attached the cable to the other side and tensioned it with the turnbuckle.
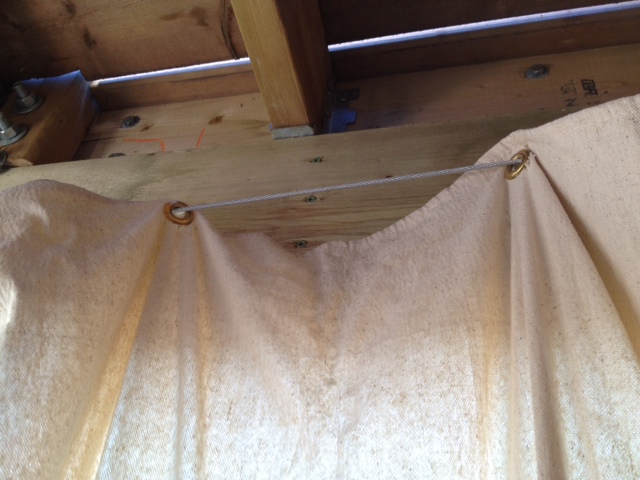
YAY! SHADE! WOOT!
Just one small problem…the space of the cup hook, aircraft cable clamps and turnbuckle means that the drape does not stretch all the way to the side of the deck. One day when we have a bit more patience, we will remove the turnbuckle on the North end of the deck, where the most sun comes in (you really only need one turnbuckle) and it will work and look much nicer.
But enough of my bitching, here are the pics!
Before!

After!
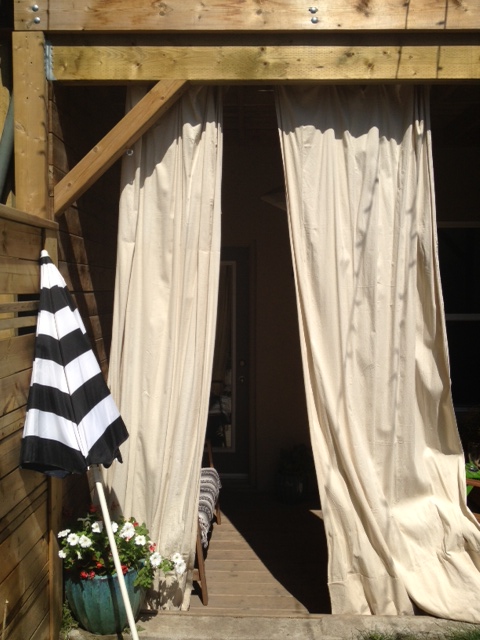
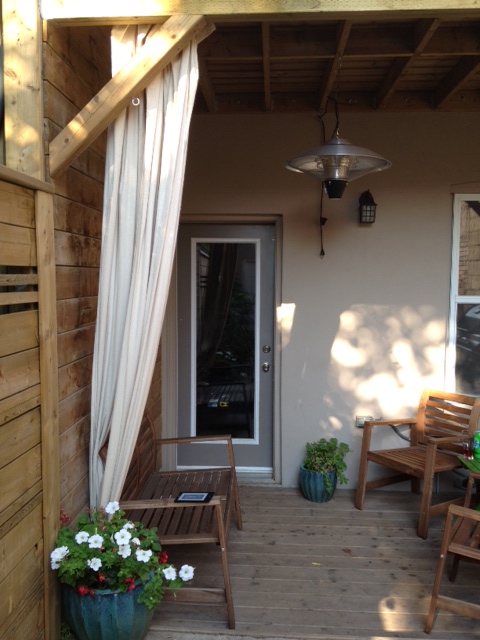
*To answer a few of the questions you may be thinking of:
- Will we leave them out in the winter? We will take them in during the winter, and put them through the wash if necessary
- How have they held up so far? Amazing. Water doesn’t seam to soak into them when it rains, they never stay wet or damp, and show no signs of mold or any other nasties yet.
- Would we change anything? Only adding a tie back/hook for when they are not in use, otherwise its perfect!
- Added Bonus: We have had a sweltering summer, and we have been using the curtains to block some of the sun from hitting the back of the house, and to shade the a/c unit. It has worked wonders.
SOURCE LIST:
Materials:
2x 4×12 Drop Cloths: Home Depot (we only used 2 panels, but could have fit 3 or 4, if your deck gets full sun more panels may be required)
50′ Aircraft Cable Kit: Home Depot
Tarp Grommets: Rona
2 Large Cup Hooks: Home Depot
2 Turnbuckles: Home Depot
Iron-On Hemming Tape: Fabricland
Tools Used:
Ladder, Drill, Measuring Tape, Sewing Machine, Iron, Hammer, Sharpie, Screw Driver, Wire Cutters, Wrench
Difficulty Level (on a scale of 1-5):
Total Cost: $50
