I recently started commuting to the office with a laptop. While having a laptop is fantastic for working remote, the actual commuting with the laptop was a bit of a pain. I was hauling it in a thin nylon sleeve, in a laptop backpack. If you have ever tried to ride a crowded subway with a backpack, you will know that it sucks. You have to remove your backpack (otherwise you hit poor strangers with it). This leaves you holding onto it. If you are a girl like me, you will also be holding onto a purse…and a coffee. This leaves me with one hand carrying a backpack, with my purse tucked under that same arm, and my coffee in the other hand. That leaves me exactly no hands to hold onto the subway pole. A week of this, and I almost tossed hot coffee onto innocent strangers and/or almost fell on my ass at least twice.
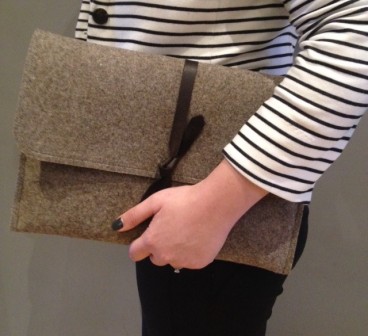
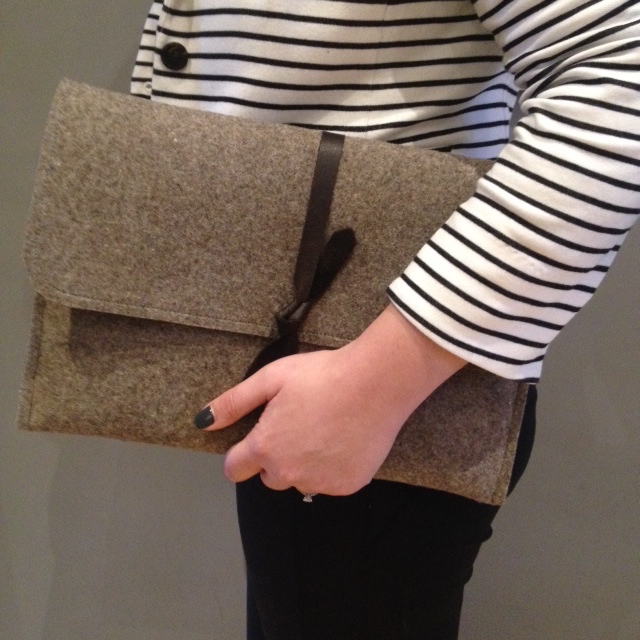
Sick of arriving at the office with coffee on myself, I took matters into my own hands and created a simple felt laptop sleeve.

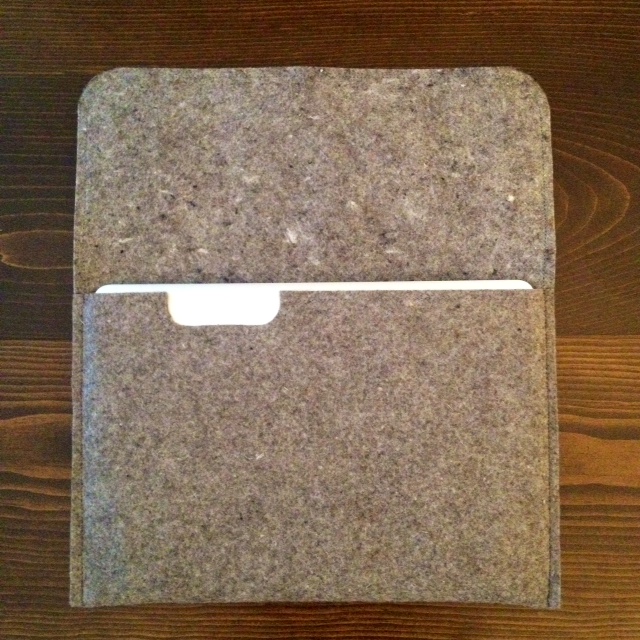
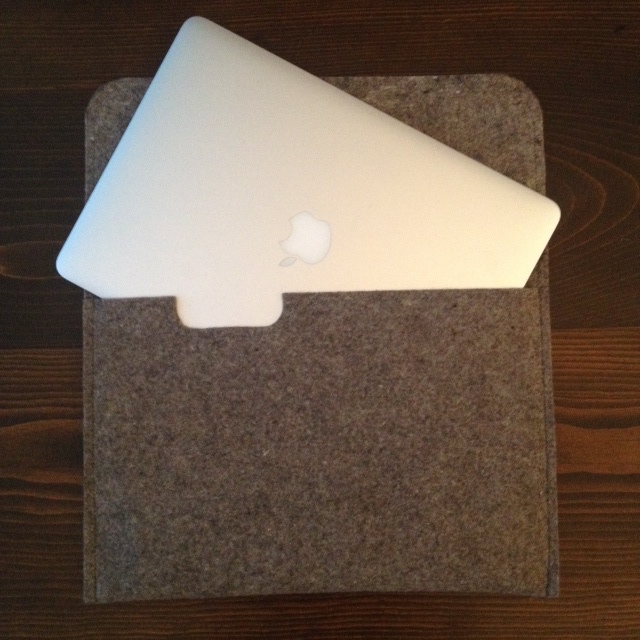
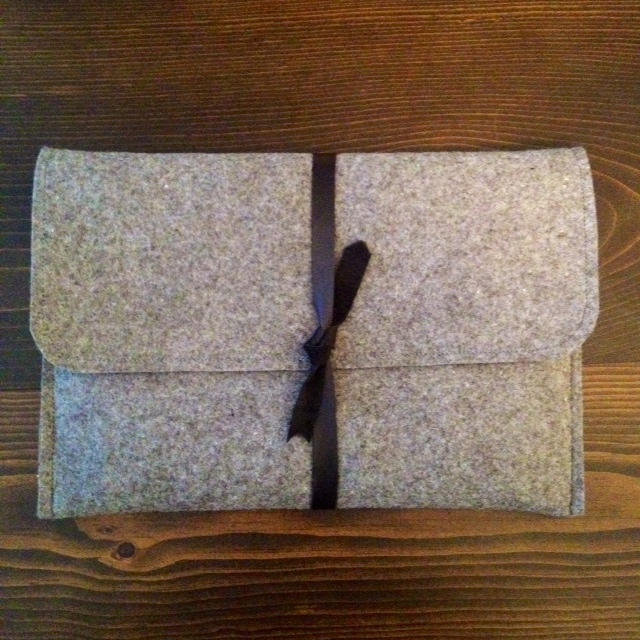
This felt sleeve offers a ton of protection to my MacBook, and allows me to toss it into a large purse for commuting to the office and client meetings. No more laptop bag or backpack!
Here is how I did it:
I have the 13″ MacBook Air. I took a few measurements, and decided a 14″ one piece tri-fold sleeve, with 1/4″ hems on either side. This would allow for easy laptop removal, but still keep my laptop nice and snug. I got some some 3/8″ industrial felt online from The Felt Store. I have never seen thick felt like this in fabric stores, so your best bet is to buy it online and have it shipped. I took a large framing square from my workshop (this may be a woodworking tool, but it is super helpful for sewing, leather crafting etc.) and squared up my piece of felt on two sides. (if you don’t start with a nice square straight piece, you will have a heck of a time marking out your pattern.)
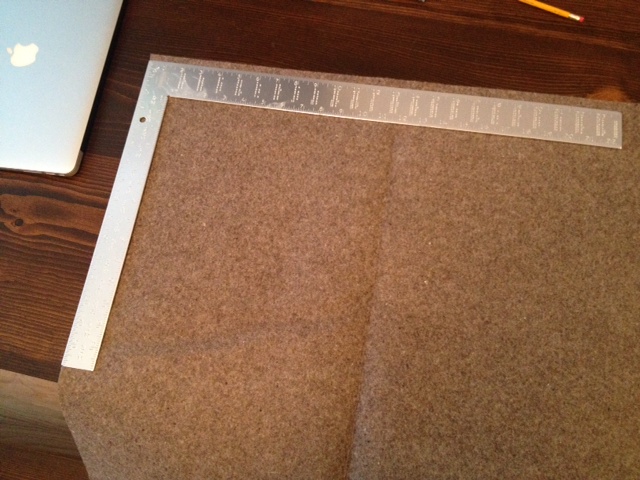
I marked out a 14″ x 25″ rectangle on the felt using my square and a fine tipped felt marker. Using my big sharp sewing sheers, I used long smooth cuts, and cut out my piece of felt.

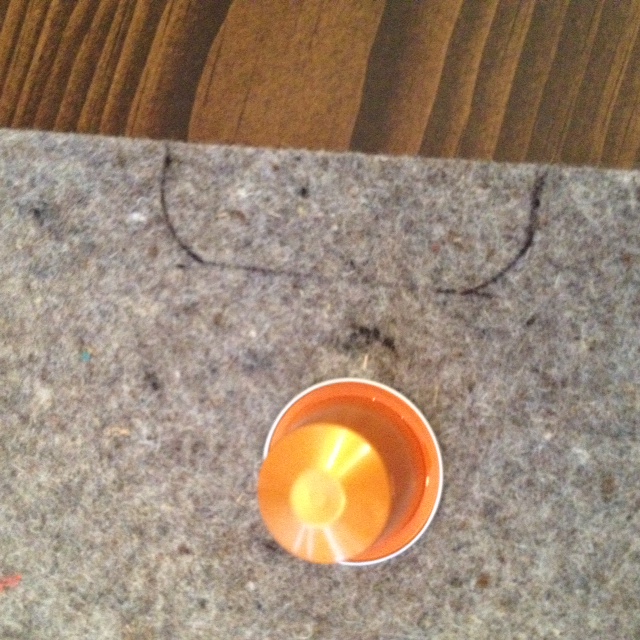
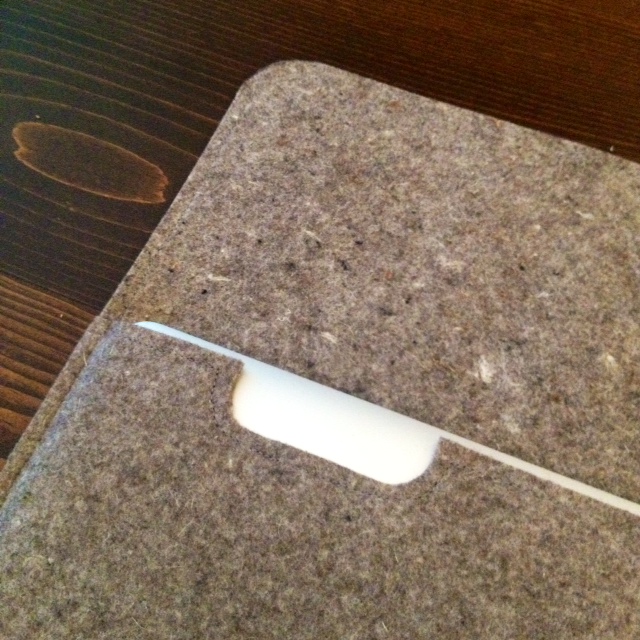
I wanted to add in a little hand hold for easy laptop removal. I marked a 3″ wide and 1″ deep notch into one end of the felt (on one of the short sides). I offset it to one side. Rather than having square corners for the notch, I used a small circle object (a pod from my Nespresso machine!) to trace a rounded corner. Using the sharp scissors again, I cut out the notch.
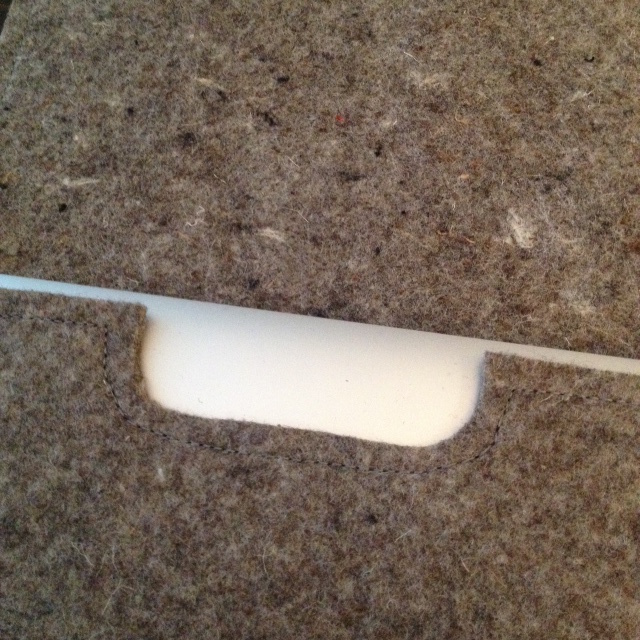
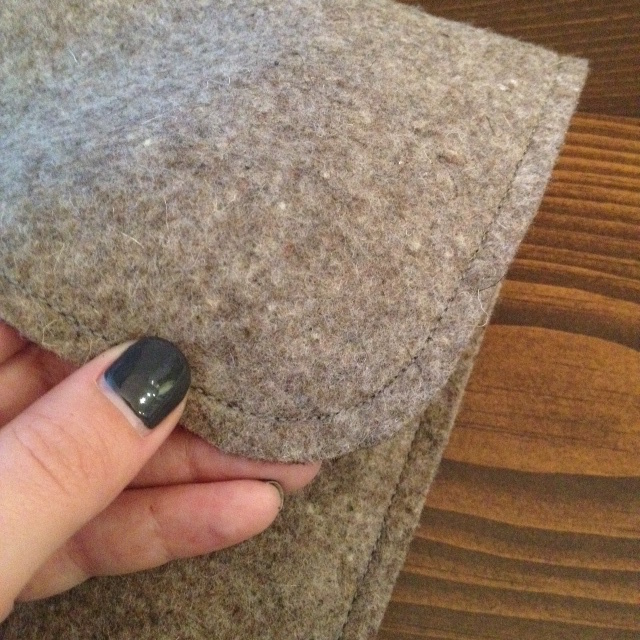
Using a larger round object (this time a drinking glass) I rounded the corners on the other short side of the felt, which will be the top flap.
I top stitched around the short side with the notch. Using my sewing foot as a guide, I top stitched 1/4″ in with grey upholstery thread, making sure to lift my foot at the 90 degree corners, and going slowly around the curves. I then continued to top stitch around the entire piece.
Next, I folded the notched end up 9″, and using binder clips, holding the folded end to the rest of the felt so it makes a pocket. I topstitched with the same 1/4″ seam down the side of the folded pocket, moving the binder clips as needed.
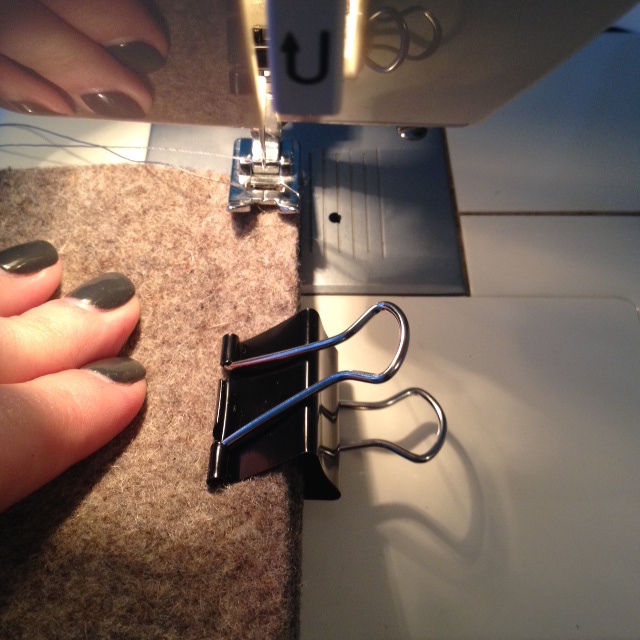
I did the same for the other side, and the felt sleeve is now complete!
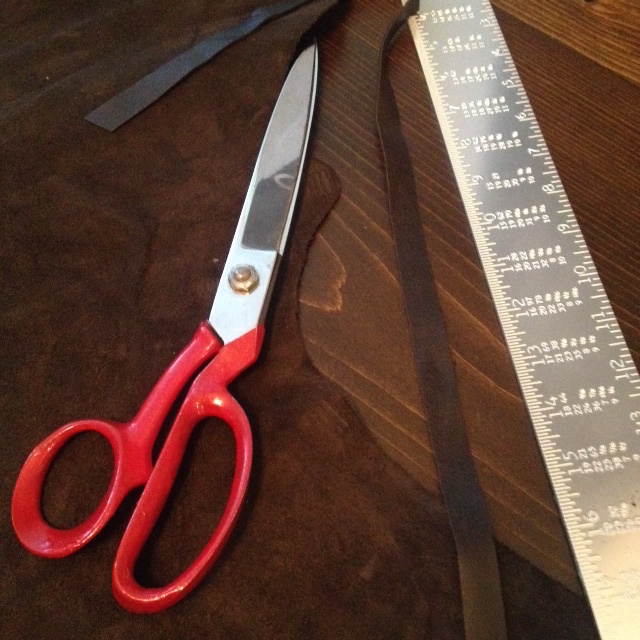
For closure, you could install a few buttons, snaps or buckles. I oped for a simple strip of leather tied in a knot. I purchased some scrap leather, and cut a strip roughly 1/2″ wide by 26″ long.
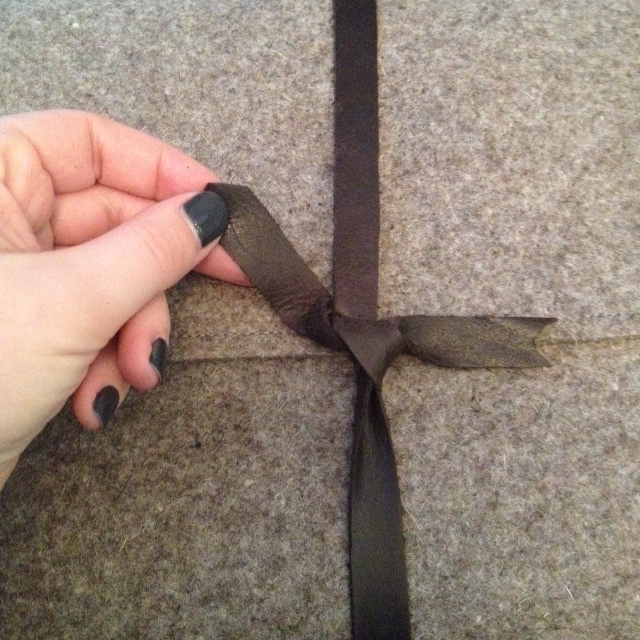
I cut the ends to a point on one end, and an inverse point at the other, and tied it around the sleeve.
Not too shabby for a half hours work. What do you think?
SOURCE INFO:
Materials:
Industrial felt – 3/8″ thick – The Felt Store www.thefeltstore.com
Scrap leather – Designer Fabrics
Cut List: (for 13″ Apple MacBook Air)
14″ x 25″ piece of 3/8″ thick felt1/2″ x 26″ piece of leather
Tools:
Scissors
Measuring Tape
Square
Marker
Round objects (thread spool, cup etc.)
Thread
Difficulty Level (on a scale of 1-5):
Total Cost: $25
Disclosure: The Felt Store sent me a sample of their felt, with no obligation or compensation to post about it. As always, all opinions, typos and overuses of the word “awesome” are my own.