***Happy Canada Day to all my Canadian Readers!***
When woodworking, the cutting, gluing and screwing is only half the job. The finishing is just as important (if not more so). It’s also where you can make or break the project.
Yesterday we were working on a project in the garage and a visiting neighbor asked about our finishing techniques. If he was interested, I thought some of you may be as well.
So here it is, Kristen’s (not so expert) wood finishing techniques.
STEP 1. Sand, sand and then SAND SOME MORE!
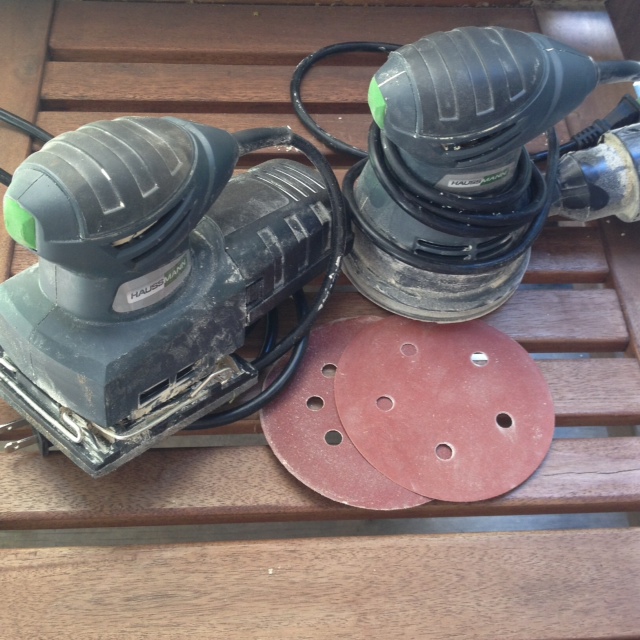
Sanding is a tedious but incredibly important step. If your wood is quite rough or has a finish that needs to be removed, I like to start with an 80 grit sandpaper, any wood that’s in good shape, I start with a 100 grit. We have both palm sanders and an orbital sander. I find the orbital does a quicker job (and its easier to change the sanding pads),and it is my preferred sander. Set up a work table in a well ventilated area and/or wear a breathing mask. Inhaling saw dust isn’t fun. It will leave your nose stuffy and your eyes scratchy. Some woods are poisonous too so make sure you know what you’re working with and it’s toxicity.
Start sanding your surface evenly with the grain, ensuring you do not press down on your sander (or it will cut scratches and grooves into your wood, which will show when you stain.) Sand with your first grit of sandpaper until your whole surface is evenly sanded, and you have removed any major imperfections. Then step up to your next grit (80, 100, 150, 220) until you reach 220 grit. If your sandpaper gets clogged, or looses some of its roughness, switch it up for a new piece. I like to sand everything up to 220 grit. It is worth the effort to have a perfectly smooth surface. Once you’ve sanded your whole project with 220 take a good look and make sure there aren’t any scratches or little swirly marks from your sander. If there are, make sure do go back and sand them before moving on. Do you have any end grain visible on your project? If so, I recommend sanding that to 320 grit. End grain sucks in stain like crazy, so sanding it to a higher grit will make it soak in less stain.
When you’re done sanding, rid your project of saw dust with a clean dry rag.
STEP 2. Staining
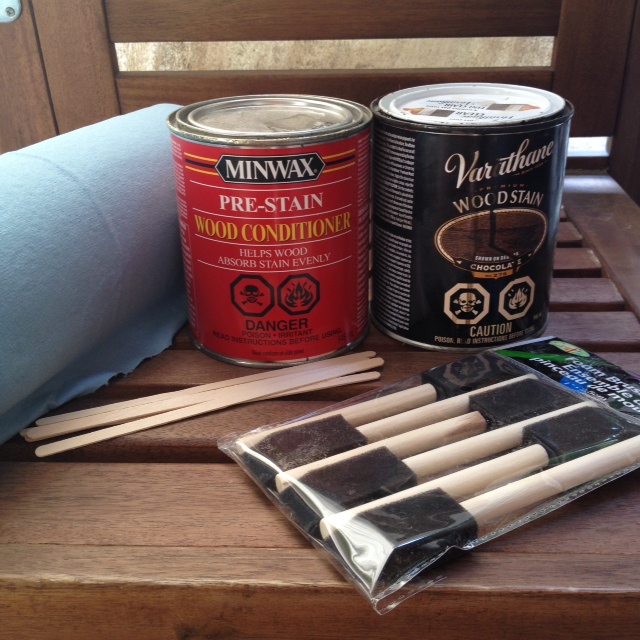
Now that you’ve spent a bucket of time sanding, you really want your stain to look nice, right? That’s why I always use wood conditioner on softwoods (pine, fir, cedar, spruce etc.) What is wood conditioner? It is like primer for wood, it penetrates the wood and preps it for stain. Essentially it makes it a bit harder for the stain to soak in to the wood. If you don’t wood condition the soft wood can absorb a lot of stain, quick, and become blotchy. Wood conditioner ensures it goes on nice and evenly.
So after your wood is sanded, apply an even coat of wood conditioner with a brush. I like to use foam brushes from the dollar store. They work great, are inexpensive, and you don’t have to worry about washing them. Wood conditioner is very runny, and you don’t need a lot, just get your wood wet. You will notice your wood darken a bit, that’s fine, just make sure you get even coverage. You also don’t need to pour it on, just one even coat. After you’re done let it soak in for a half an hour and all your wood conditioner should be soaked in. If it isn’t, wipe any excess off with a clean rag.
Now its time to stain. Give your stain a good stir with a stir stick (again I get a bag at the dollar store). There is usually a bunch of stain sludge at the bottom of the jar, make sure to give it a good stir. Apply your stain evenly with a foam brush. You don’t need a lot, just make sure you get even coverage, with a little pooling on the surface. Cover your whole project evenly. Let it sit 5-10 minutes, and then remove with a clean rag. I like to use Shop Rag (the blue (expensive) heavy duty paper towel at the hardware store). I also like to wear latex gloves when working with dark stain. You want to wipe the wood with the grain, removing any excess stain. You will need to swap out your dirty rags with clean ones and keep going over your work until all the excess stain is removed and everything is even and pretty.
Leave your stain to dry for a day, then come back and give it a second coat. Really, don’t argue with me. One coat always looks okay, but two coats always looks BETTER. It doesn’t drastically change the stain color, but it does richen it. Makes the darks darker, and brings out more contrast. Just believe me, and do that second coat! You’ll thank me later.
STEP 3. Protect it!
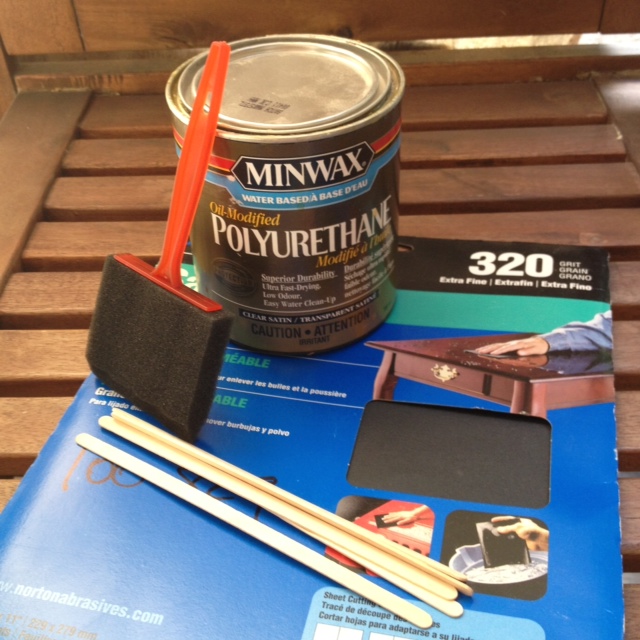
There are lots of different finishes for woodworking, and I could write a ginormous post on all the options. However for the sake of your sanity, I will cover one technique here; Polyurethane. My favorite poly at the moment is Minwax Oil Modified polyurethane. It acts like an oil based, but cleans up like a water based and has a re-coat time of 2 hours. Woot woot. Now that you’re project is all stained pretty like, make sure its free from dust, dirt and debris, and that you have a good place to poly it that is nice and clean, and not too hot or too cold. I actually like to poly in my diningroom as strange as it may sound, but its free of dust and is climate controlled.
Now that your surface is prepped, gently stir your poly. DO NOT SHAKE IT. Bubbles are your enemy, and you need to do everything to keep them away from your project. So stir, not shake. Once your poly is mixed up, use a clean foam brush (the larger the better, but make sure it fits into your can.) Apply the poly in a light even coat with the grain. Work quickly, but gently as to not make bubbles. Once you have laid on your poly, leave it be. Don’t go back over it, it starts to level out and dry almost instantly, and back brushing it even a few minutes later can muck it up. So put it on and leave it alone. Don’t even look at it. Also be careful with the poly you will see drips, so don’t load up your brush too much. I like to get the first half inch of the brush wet, that’s it. Thin coat, light touch, no drops, no bubbles, and leave it be. Got it?
Once the whole thing is evenly covered. Walk away and leave it for two hours. Don’t watch it dry and freak out that its drying unevenly. Just leave, get a coffee, and come back.
Two hours later and you’re ready for your second coat. You run your hand over the surface and freak out because its all rough again! What about all your work sanding?! DOESN’T IT KNOW HOW MUCH TIME I SPENT SANDING?! Don’t worry, this is normal. Polying raises the grain of the wood. It will only take a few minutes to fix. Grab a piece of extra fine sandpaper. I like 320. GENTLY sand the surface by hand, making sure not to sand all the way through your poly (just barely touch the surface). It will start to turn a bit white, and make white dust, don’t worry that’s normal. When your whole surface is nice and smooth again, and you’ve sanded off any of the bubbles or drip marks, it’s time for a second coat. Grab a new piece of Shop Towel, and get it damp (not soaked, just damp) and wipe your whole surface, removing any of the sanding dust. You may need to get a second rag to give it another once over. Once its clean again, give it another light coat of poly. Let it dry, and then repeat the sanding (although this time it will be much less to sand) and follow up with a third coat of poly. Three coats is usually enough, but I like to give a couple extra to tabletops and other high traffic surfaces. After your last coat, let it dry for at least 24 hours before using.
You should have a perfectly smooth, professionally finished project that looks and feels amazing. Now pat yourself on the back, and have a drink. You deserve it.