Wedding Week – Invitations

Just like the Save the Dates, we wanted to Letterpress our Invitation Suite. We decided to go all out for the invites, and do double envelopes, double thick cardstock, a double sided invitation with a blind deboss on the back, two enclosures as well as our friend the wax seal.

This time we smartened up, and had all our paper custom cut from letterpresspaper.com . We had it shipped to family in the US (to avoid the crazy UPS brokerage fees) and my Dad drove over and picked it up for us. We designed our invites in Illustrator and had the plates made at Boxcar Press.

I wanted to use blind impression somehow for the invitation suite, and decided to do a pattern debossed on the back of the double thick invites. My L Letterpress is incredibly good at doing blind impressions, so we pre-blind printed the backs of the invites, before heading to Snap & Tumble‘s studio to print with ink.

Where printing the Save the Date‘s took a few hours, printing the invite suite took two FULL days. We then cut out envelope liners using our Silhouette SD. This was a godsend. We could NOT have cut that many liners (and maintained our sanity) without it. We used some wrapping paper with stamps of the Queen on it (a nod to El Granto’s British heritage). We didn’t have enough to do all the invites with that paper, so we mixed it up with some pretty black wrapping paper for the rest of the liners.

We also designed a belly band to keep the invite suite together. We had a local print shop cut 1″ strips of our letterpress paper, and we blind debossed the same pattern onto them as on the back of the invites. We scored them, wrapped them around the invite suite and secured with a glue dot. The whole thing was then stuffed into the lined and addressed inner envelopes, and then into the outer envelopes. They were wax sealed, stamped and mailed. (Envelopes were addressed by printing each one individually on our Epson Inkjet printer using Illustrator for the typesetting.)

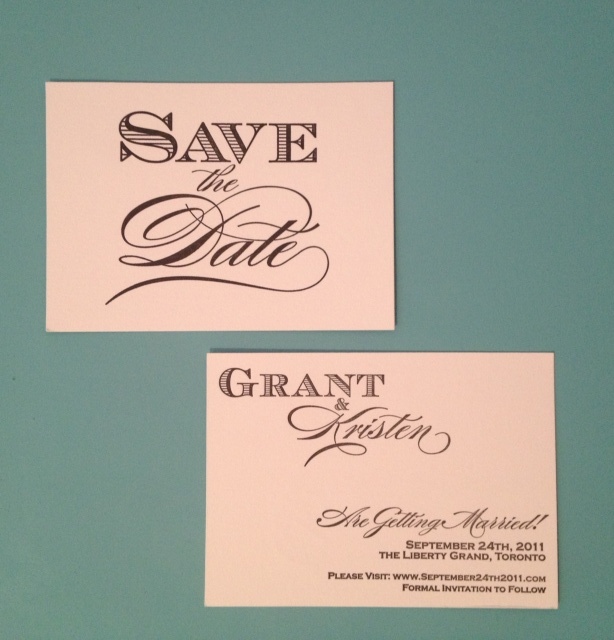
We were very pleased with our DIY effort, although it was a LOT of work. By far the most time consuming part of the wedding planning!

The Invitation Pieces
The Envelopes

Source Info:

Paper: Crane Lettra 220lbs for invites (A7), 110lbs for rsvp & info cards (4 bar)
Envelopes: Crane Lettra (A7 inner & outer, pointed for invites, and 4 bar pointed for rsvp) – letterpresspaper.com
Letterpress Plates: KF95 Photopolymer Plates – Boxcar Press
Wax: Glue Gun wax in black & “S” seal stamp – www.letterseals.com
Fonts: Ecuyer Dax & Burgues Script
Letterpress Printing: PIY (Print it Yourself) time at Snap & Tumble

Wedding Week – Save the Dates

El Granto & I knew we wanted nice wedding invitations. We had dreams of 5 piece letterpress, lined envelopes, cotton paper and luxury. Then we priced those out. EEEP!

So we started to do some research. In the middle of doing research The Wedding Co. announced that there would be letterpress workshops available at the Spring Wedding Show at the Drake Hotel. We jumped, and booked a workshop with Tanya @ Snap & Tumble.  One hour with Tanya and her press, and we were hooked. The heavy cotton paper, the crisp text, the tactile feeling of the deep impression.  Love at first sight! Check out some pics of our workshop.

So now we knew we wanted to letterpress our invites, and I immersed myself in learning about letterpress. At first I thought I would print at home using an L Letterpress kit that I picked up at a local craft store. After spending an entire afternoon trying to print, I knew that the L Letterpress plates were terrible as was the provided roller, and that under no circumstances could I ever be persuaded to print an entire invitation suite on this thing. It had one saving grace, it did do blind impressions very well. (more on that later)

So I started to hunt for a tabletop letterpress, but all I could find were wildly priced, or required tons of work. I visited Don Black’s shop, and lusted over many a machine, but none were in the budget. Finally I contacted Tanya and asked if there was any way she would let us fools come to her studio and rent PIY (print it yourself) time on her press. She agreed! YAY!

El Granto & I then designed our save the dates (2 different versions) as well as our envelopes. Our first version was a double sided with “Save the Date ” on one side, and the info on the other. El Granto also wanted to make a more gorilla marketing version for his advertising/web friends. For that version we simply put the wedding webside address in the middle of a blank card. Hopefully the recipients of that Save the Date would know enough to visit the website! We had custom polymer plates made at Boxcar Press in New York  and went to Coast Paper’s Cash & Carry store in Vaughn (now called Spicers) to purchase paper. We bought our envelopes online at LetterPressPaper.com (and paid a hefty brokerage fee with UPS.) We purchased a large paper cutter from Costco, and proceeded to cut all the paper down to size. This was a big mistake. We should have had the paper custom cut. It took so much time, and the paper wasn’t perfect.

We ordered a wax seal and black sealing wax online from letterseals.com and purchased Lotka paper to use as envelope liners from The Paper Place  in Toronto.

We rolled up to Tanya’s studio with all that in hand, and printed away!

The save the dates all laid out after printing

At home we printed the mailing info on to each and every envelope using Illustrator and a ink jet printer. We cut, stuffed and glued (handcut) liners into the envelopes, stuffed the Save the Dates, sealed with a wax seal, stamped and then almost got the entire project shut down by the guy at the post office. He said that the wax seals were too big, and that we had to put oversize postage on all the save the dates. It wasn’t even double or triple the postage, it was over $3 an envelope. El Granto got into a war of wills with the post office guy and decided to mail them as is anyways. It was a good call on El Granto’s part as not a single envelope was returned!

It was a labor intensive task, but so worth it.

Next up the Invitations!