This is a very exciting day! The Summer 2015 edition of Merry Mag is out! Head over to MerryMag.com to check it out in all its glory! From handmade decor, DIYs and everything you could possibly need to entertain this summer. You won’t want to miss out!

In this edition, we have the great honor of being a part of Merry for the first time! Here is a deeper look at a project that Home Depot and Storefront Life created just for Merry Mag!
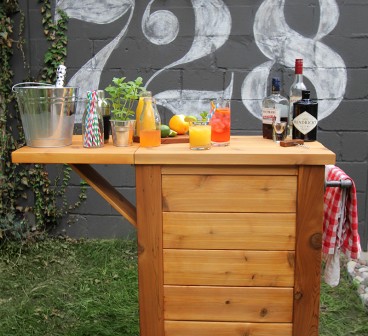
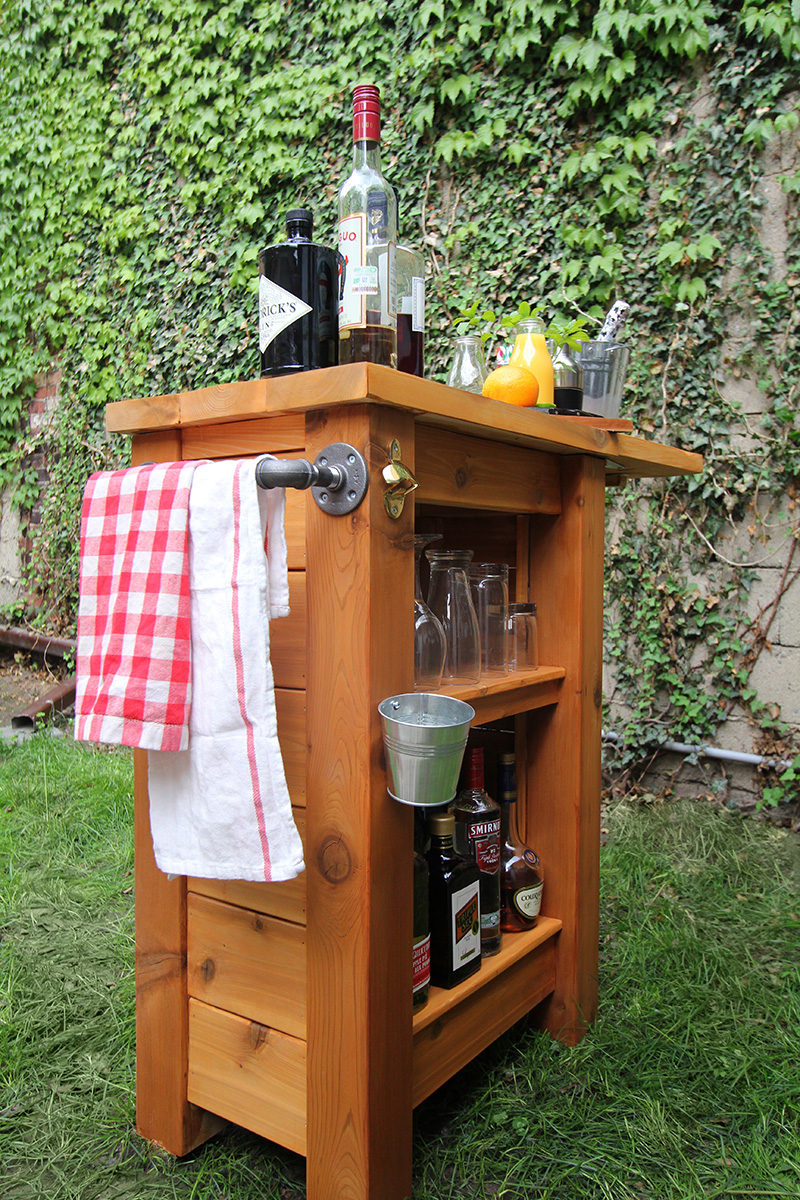
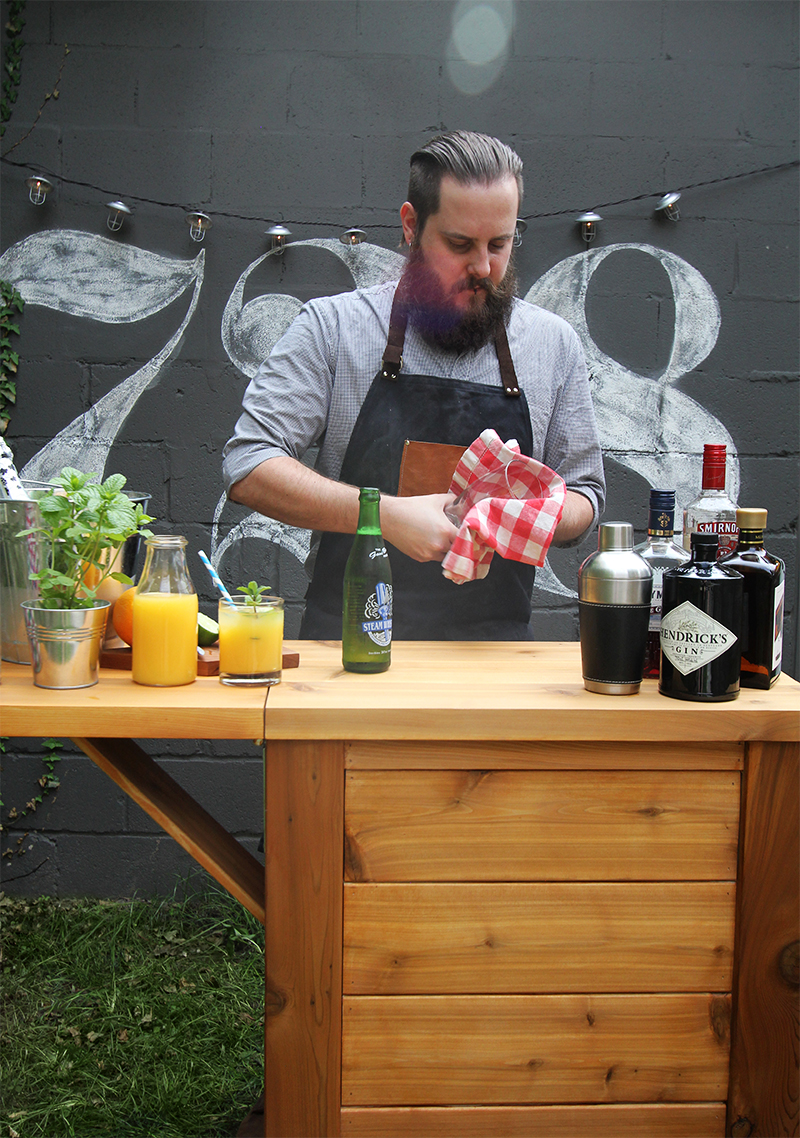
Summer is a season that never lasts long enough. To take advantage of every single summer entertaining moment, we worked with Home Depot to craft a backyard bar built for showing your friends a good time.
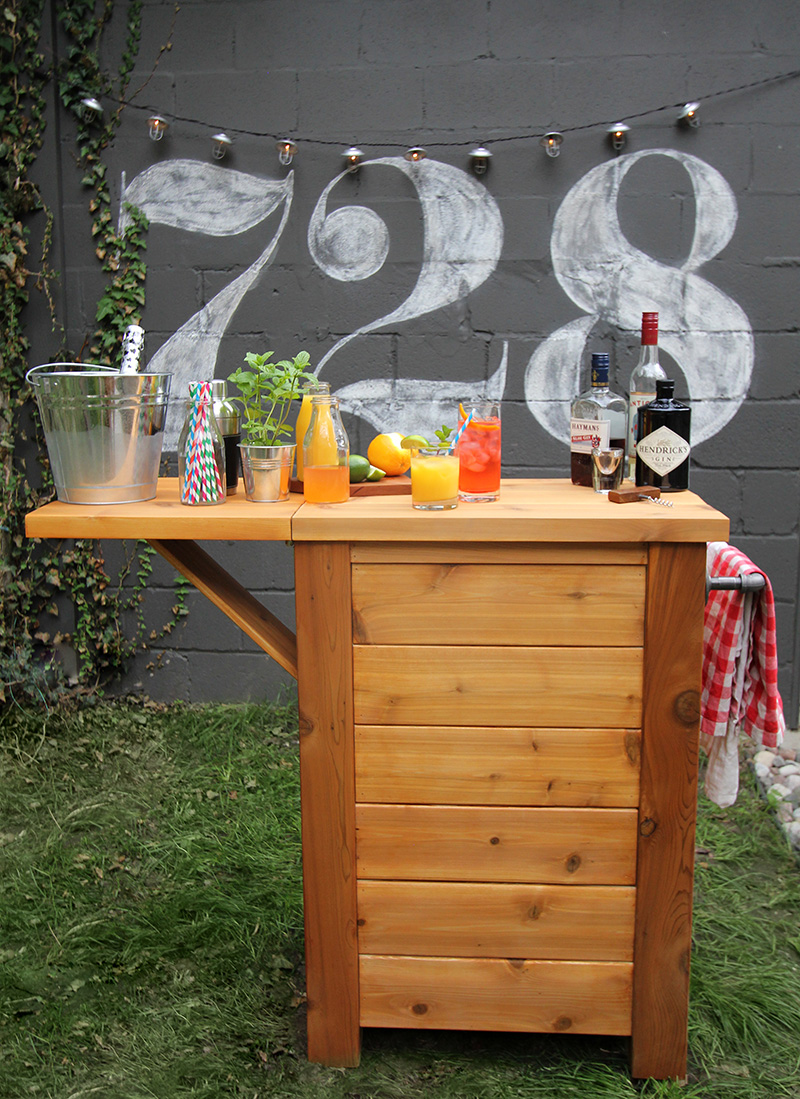
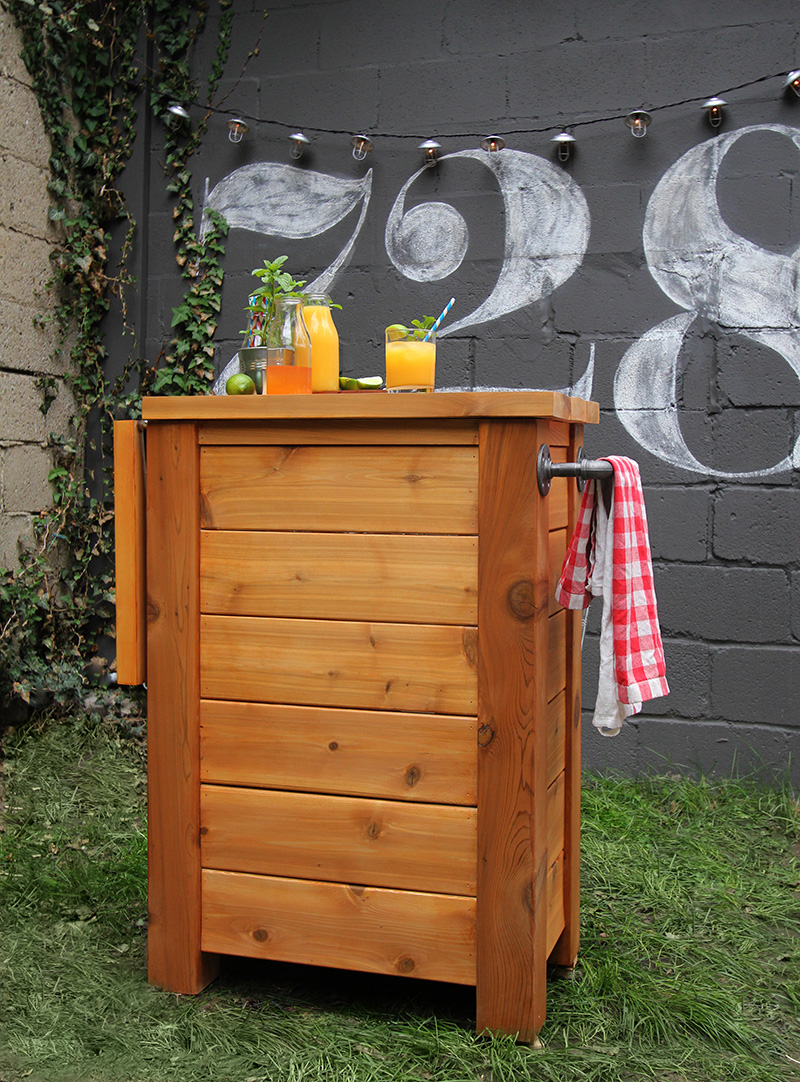
This multitasking bar has a drop leaf top to save on space, and doubles as a prep or serving cart for BBQ’s. When the sun goes down, the cocktails come out and the party gets started. When done, the bar can fold back up and move out of the way, ready to spring back into action when needed next (so…like next weekend, right?!).
How to:
All the supplies can be purchased at your local Home Depot. All of the lumber is standard outdoor cedar and can be found in the deck and fence lumber area of Home Depot. Unsure what lumber to use for our project, Ray from our local store directed us away from the albeit tempting new brown pressure treated lumber towards the exquisite cedar. Cedar is naturally repellant to both rot and insects. Not to mention it’s gorgeous and smells like you just stepped out from a Scandinavian spa.
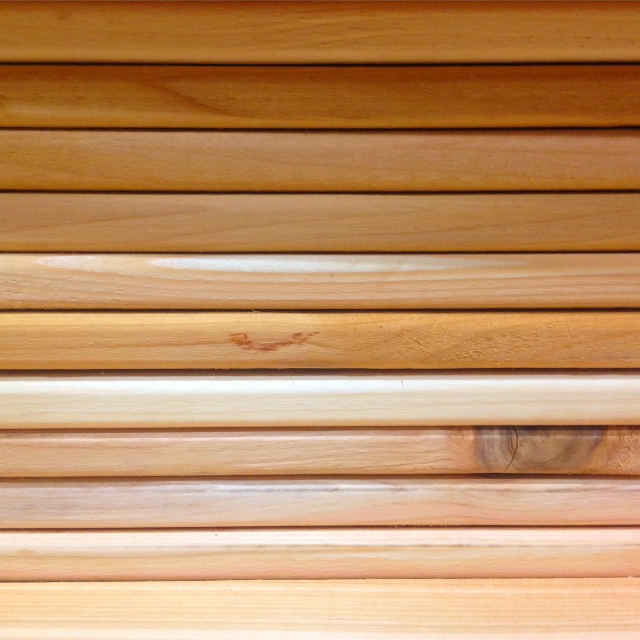
Ray pointed out some beautiful cedar 4×4’s perfect for the legs, and cedar 2×6’s which are normally used as deck supports, would instead make a nice thick bar top.

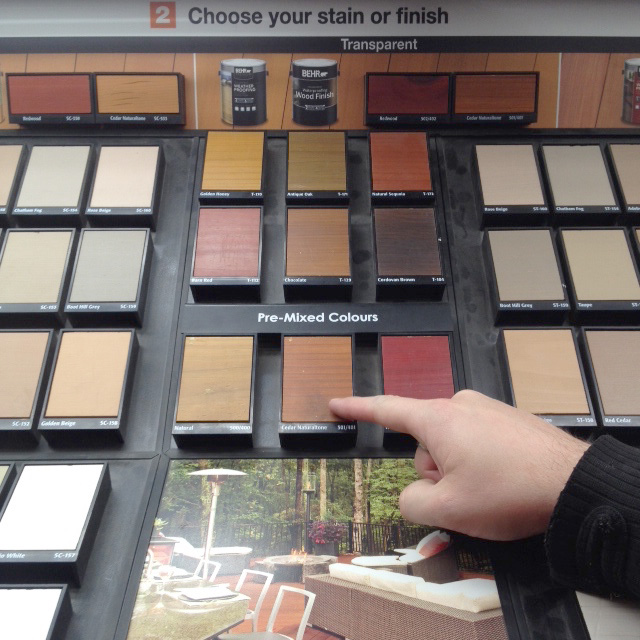
With lumber in hand we made our way to the paint department to get some help on stain. The kind rep steered us towards a Behr semi-transparent stain to enhance and protect the cedars natural beauty.
With all of our supplies ready to go, we built the bar in two weekend afternoons.
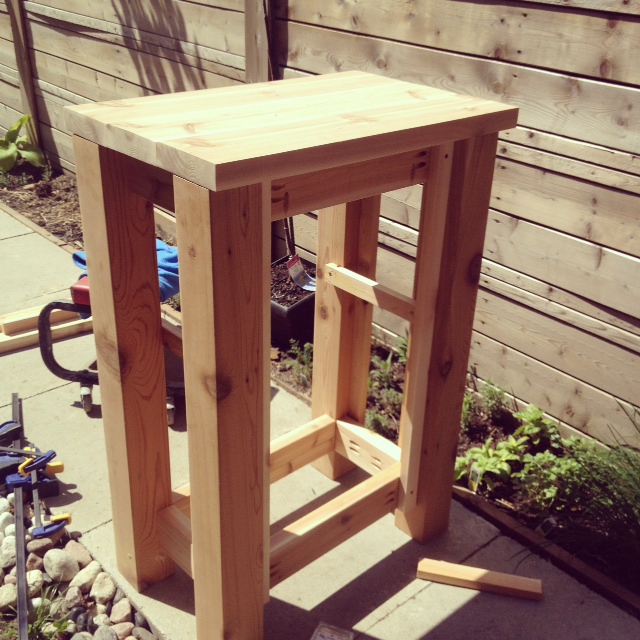
First off, we cut all our lumber (see cut list below). After that it was a quick assembly using pocket holes and outdoor Kreg screws. The 4×4 legs were attached together with a frame of 2×4’s. They are inset back from the front of the legs so that the cladding can be inset showing off those sexy cedar 4×4 legs!
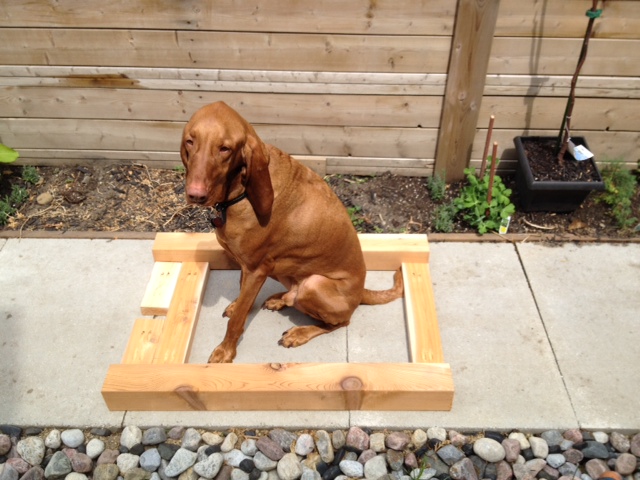
Odin as always is a huge help in the assembly process, and manages quality control.
After the frame was done, the top was kreg’ed together and attached to the frame. If you are building this at home, be sure to make one side of the counter sit flush with your legs. This allows you to attach the drop leaf with hinges later.
With the top attached, the front and sides can be clad, and interior shelving can be built. Then comes the addition of the drop leaf. With a few gate hinges and screws, it was looking good!

For the drop leaf support, a simple support stick was made and stays in place with cleats on the underside of the drop leaf and the side of the bar. The whole bar was sanded and treated with two coats of Behr Semi-Transparent Weatherproofing Wood Stain.
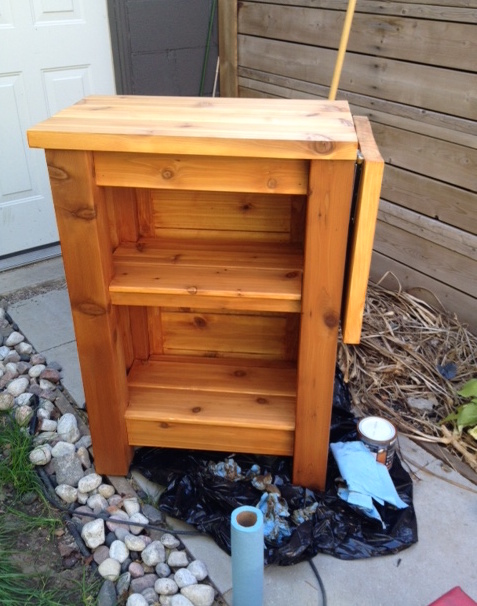
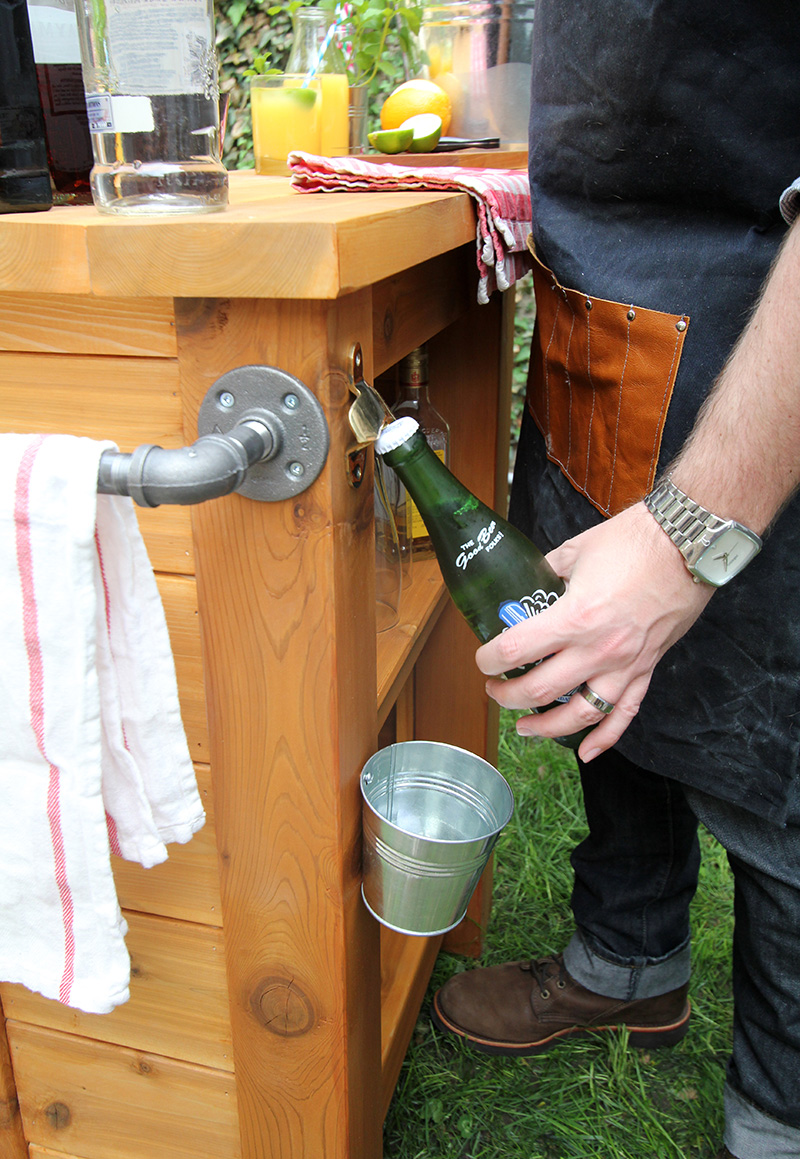
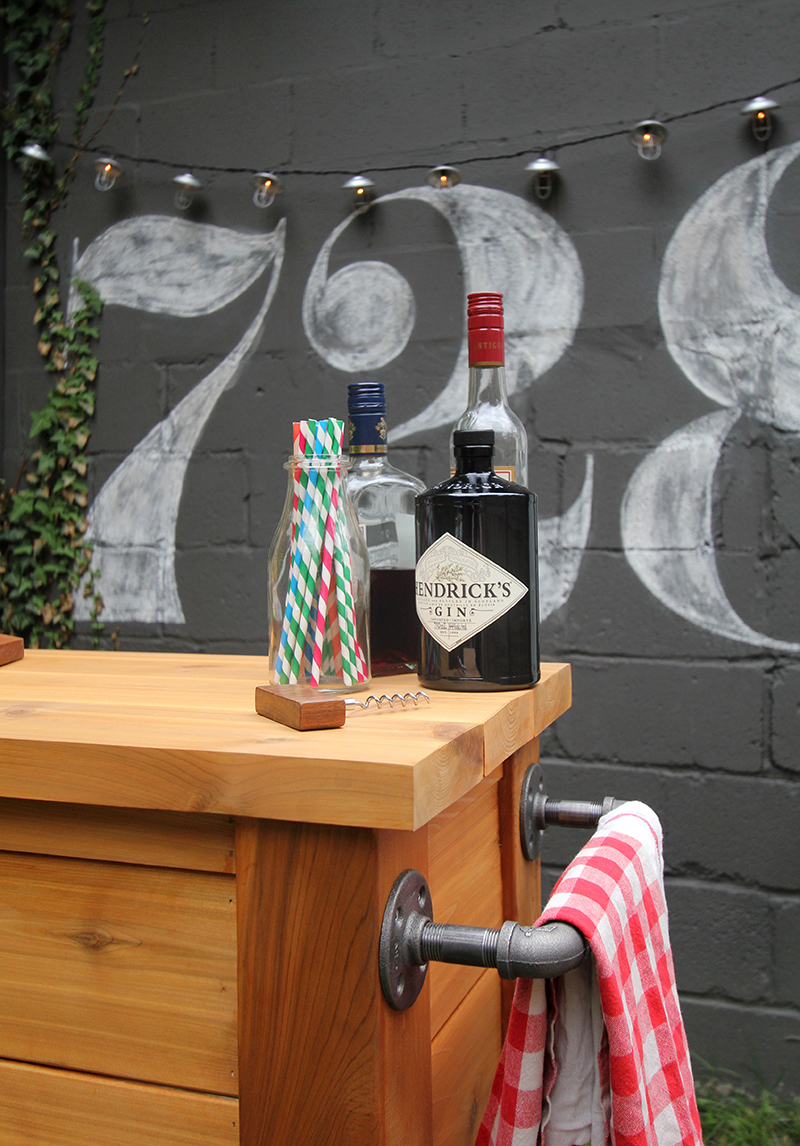
Now all that was left were installing the finishing touches! Every bar needs a bottle opener for popping open beers. To catch the caps a flower pot was installed below the opener. Some gas pipe was attached as a handle. The handle doubles to hold BBQ tools, tea towels and still works as a handle when moving the bar.
Add in a handsome bearded bartender and you’ve got yourself a paaaartay!
What do you think? Should you hustle out, buy the supplies and make your own outdoor bar? I think so!
Make sure to go check out the bar, our herb centierpiece as well as a ton of other awesome goodies in Merry Mag!!

SOURCE LIST:
Tools:
Miter Saw – Milwaukee 12″ sliding compound
Tape Measure
Kreg Jig
Sander – Milwaukee 5″ orbital
Drill
Buy List:
1 – 4×4 @ 8′ (legs)
2 – 2×6 @ 8′ (top)
2 – 2×4 @ 8′ (frame)
4 – 1×2 @ 8′ (cladding nailing edges, shelf supports & cleats)
6 – 6′ Cedar fence boards (cladding)
Sand paper (various grits)
2 – gate hinges (galvanized)
3″ Outdoor Kreg Screws
2 – 1/2″ pipe floor flanges
2 – 1/2″ 90 degree elbows
2 – 1/2″ x 2″ pipe nipples
2 – 1/2″ x 5″ pipe nipples
1 – 1/2″ male to male connector
2 – Wheels. Optional (not shown)
Behr semi-transparent outdoor wood finish in cedar.
Cut List:
4 – 4×4 @ 36″ (Legs)
4 – 2×4 @ 18″ (Front frame stretchers)
4 – 2×4 @ 8″ (Side frame stretchers)
3 – 2×6 @ 26″ (Tabletop)
3 – 2×6 @ 16″ (Drop Leaf Tabletop)
1 – 1×6 @ 17″ (Drop Leaf Support)
Cladding, shelves and trim cuts to be determined from how you would like it to look and function. For horizontal cladding, add nailing edges with 1×2’s to the 2×4 frames. For the shelf you can make two or three shelves depending on what you would like to store.
Difficulty Level (on a scale of 1-5):
Total Time: One Weekend
Total Cost: $200
Disclosure: Home Depot provided the materials with this project in conjunction with Merry Mag, however all brilliant bar plans, opinions and handsome bartenders are our own.
If you buy
1 4X4 at 8ft
and you cut
4-4×4 at 36″ each
That equals 144 inches or 12 feet needed.
DO you have complete plans?
Probably not the post I should be reading coming up to Christmas when it’s cold outside, but i saw on pinterest and couldn’t resist. What a great project, here’s looking forward to summer!
How did you do the drop leaf shelf?
This is definitely something I would consider making if I had a little more experience with building things. I may have to get some help on this one!
How do you do the drop leaf support??? Can you post plans pretty please!
Looks great, great looking wall art too!
I love this so much! You did an amazing job.
Your project made it to Apartment Therapy!
Awesome! Thanks for the headsup!! 🙂
How cool!
Um, so when are you inviting me over for cocktails?? This looks amazing!