If you follow us over on the new fangled thing called facebook you may have noticed a photo El Granto uploaded the other day of a busted rocking chair that followed him home.
This poor chair had a broken arm, a busted spindle, was scratched, dog chewed, and appeared to have been thrown against a wall. Poor chair, what did it ever do to anyone? I have now named him Rocky, as A.) he’s a rocking chair and B.) he can clearly take a punch and still put up a fight.
Even with his injuries Rocky had great lines. It was a modern Danish rocking chair that was pretty and comfortable. We have still been on the hunt for a reading chair for the office, and this fit the bill perfectly.
El Granto dragged it two blocks home and camped it out in the garage. Once the weekend rolled around we set to giving Rocky a once over and making a plan of attack.

The missing arm: That was going to be fairly easy. Rocky still had one intact arm, and all we needed to do was use that working arm as a template for the missing one.
The busted spindle: Also pretty simple, it needed to be popped back in and glued.
The scratches and dog chew marks: Nothing some wood fill & sandpaper couldn’t fix.
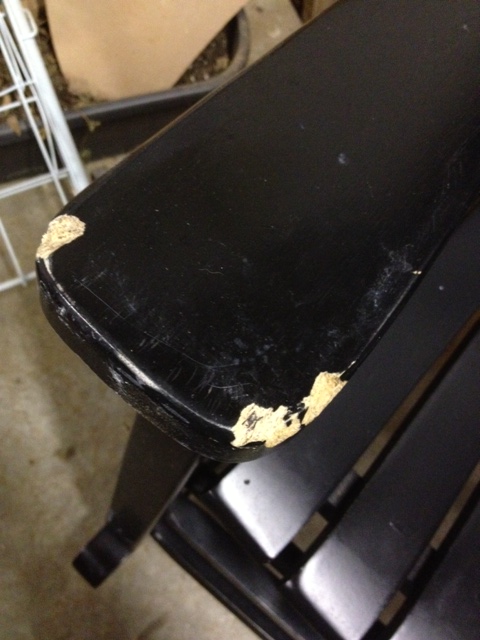
After we fix all that, all Rocky needs will be a new coat of paint.
So headed to the lumber store and picked up some new wood for Rocky’s missing arm. When we got home, we took of his still existing arm (held in by two screws which were hidden behind wooden pigs) and traced it onto to the new wood using the old arm as a template.
Then we cut it out with a jig saw.
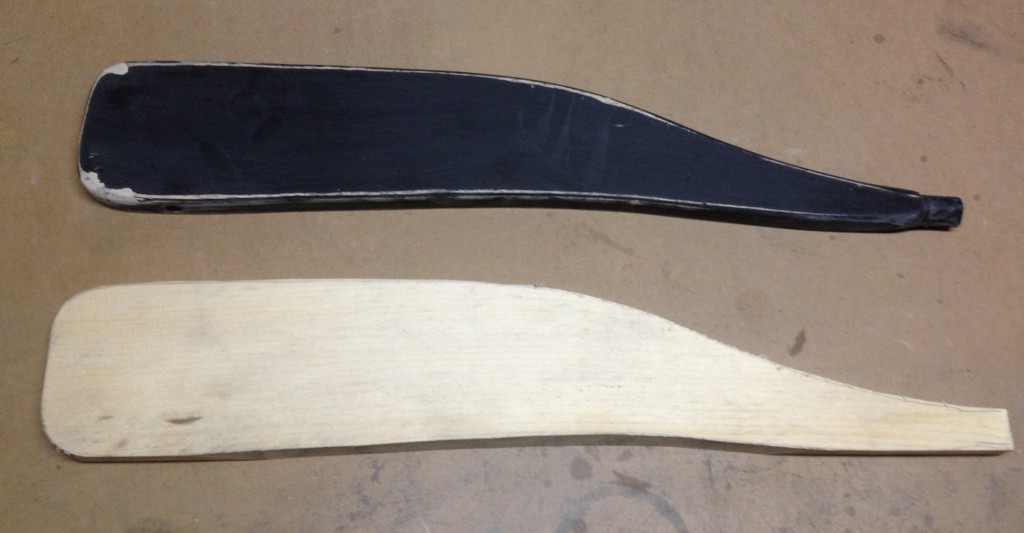
After that we set to sanding it smooth, and rounding the tops of the arm.
We now needed to whittle down the spindle end that fits into a hole in the back of the rocking chair. El Granto used a sharp knife which made quick work of it.
For where the front of the arm met the base of the chair, it was supposed to sit on a large 1 1/4″ dowel. However that dowel needed a corresponding 1 1/4″ hole drilled into the bottom of the arm. That’s gonna be a problem. We don’t have a drill bit that big. Hrm…what to do? Use a hole saw? Nope… the hole saw uses a drill bit in the middle to start the cut and keep the hole saw centered, and this would leave a nasty hole in our arm. We decided instead to cut off the large dowel, and use two smaller dowels instead.
We sawed off the dowel with a hand saw, then drilled two 1/4″ holes for our new dowels. We used dowel centering pins. You put them in your drilled holes and then press your wood down on top of them. They mark exactly where you need to drill the holes on the other piece of wood.
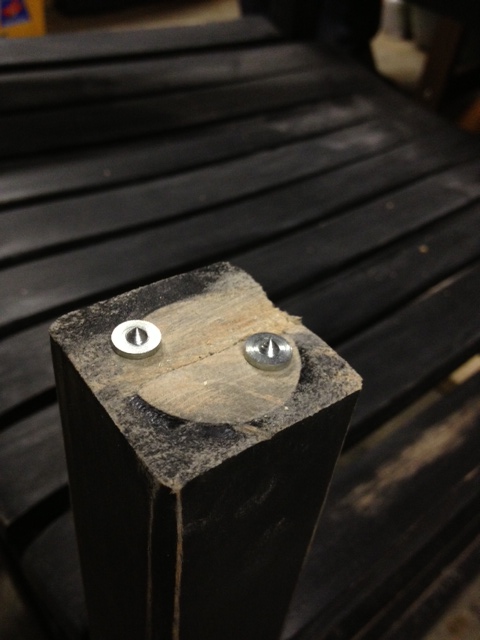
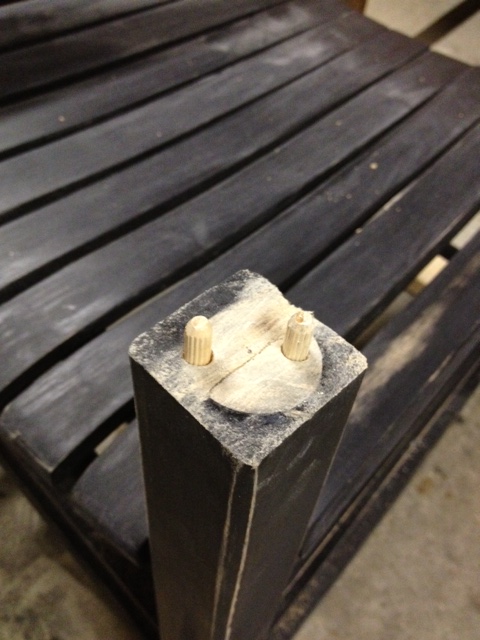
The we drilled the holes into the arm, then placed the dowels in with glue, and BAM done. (Using dowels are much easier than you would think. So when you have an application where a screw or nail isn’t the best route, consider dowels! They’re also really strong!)
We then screwed the arm in from the back of the chair, and placed a wooden pig into the hole. A few light taps of the mallet and it was flush and perfect.
For the broken spindle, we cut off the splintered bit, popped it back into its hole with some glue, and gave it a few taps to seat it in place.
We filled the dog chew marks and scratches with wood filler, let it dry overnight and sanded it smooth.
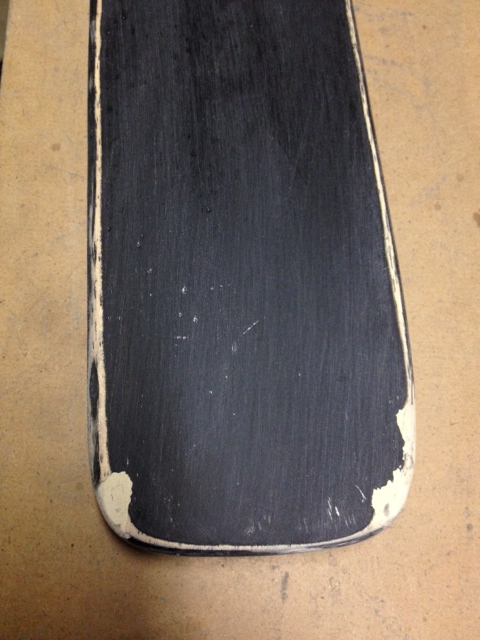
The we gave a coat of BIN primer to the raw wood, and let it dry.
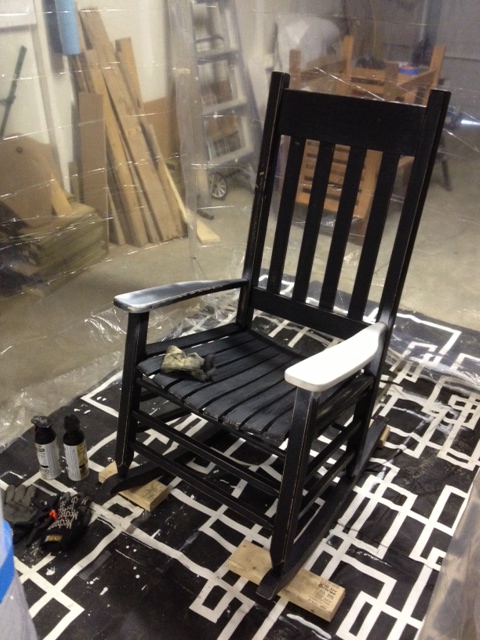
Next came painting. We sanded down all the paint on the chair and wiped it with a tack cloth to remove all stray dust. We built a mini spray booth in the garage (more on that in a future post). Gave the chair 3 light coats of my fave paint Rustoleum Universal in Gloss Black.
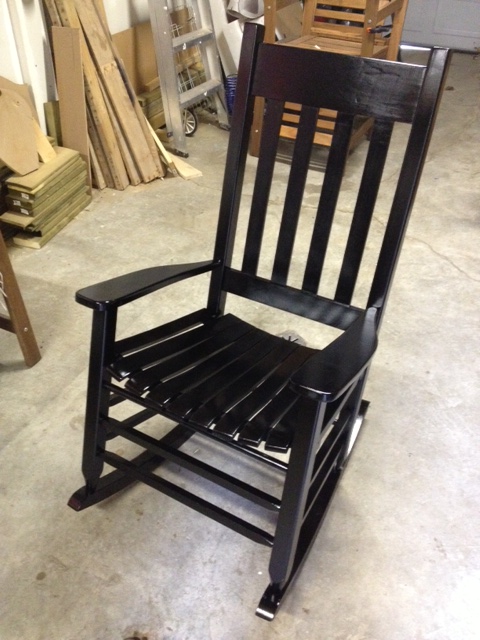
Here he is in his shiny glory sat in his new home in the office. Cant you just picture cozying up with him, a blanket an a good book?
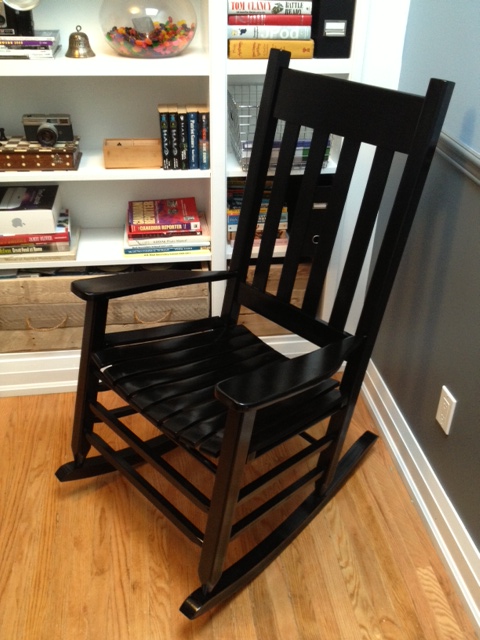
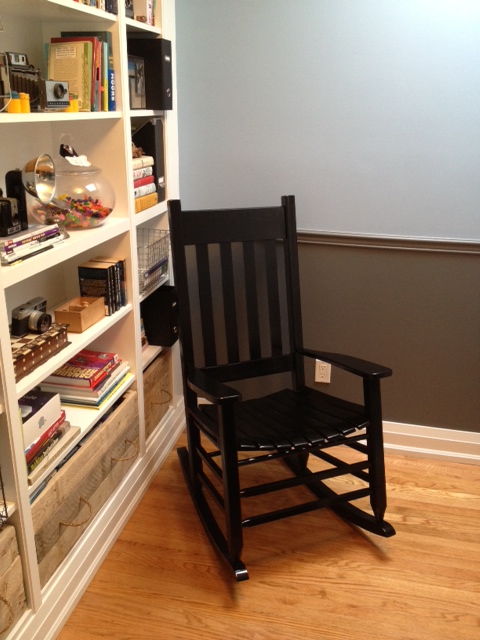
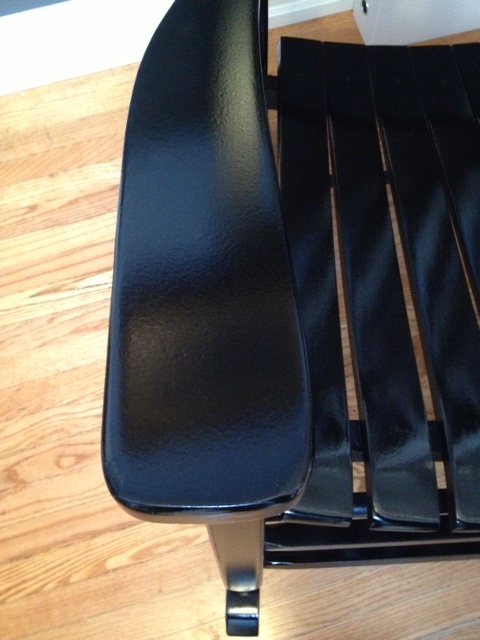
Oh, and I bet you’re wondering how the chew mark repairs turned out? Can you see any marks? Exactly! I love you wood filler!
Whats left to do to the office? Hang some art, get a rug, a reading lamp, an ottoman and a side table for holding cups of coffee while reading in Rocky. I will finish this room one day; I promise.
SOURCE LIST:
Materials:
1x5x4 Piece of Pine – Home Depot
Wood Filler – Home Depot
Wood pigs – Home Depot
BIN Primer – Canadian Tire
Rustoleum Universal in Gloss Black – Home Depot
1/4″ Wooden Dowels – Rona
Wood Glue – Home Depot
Tools Used:
Jig Saw
Sandpaper
Pencil
Drill
Dowel Centering Pins
Difficulty Level (on a scale of 1-5):
Total Cost: $25 ($20 in paint, $5 in new wood)

Excellent job,but yes,I can still see the marks.