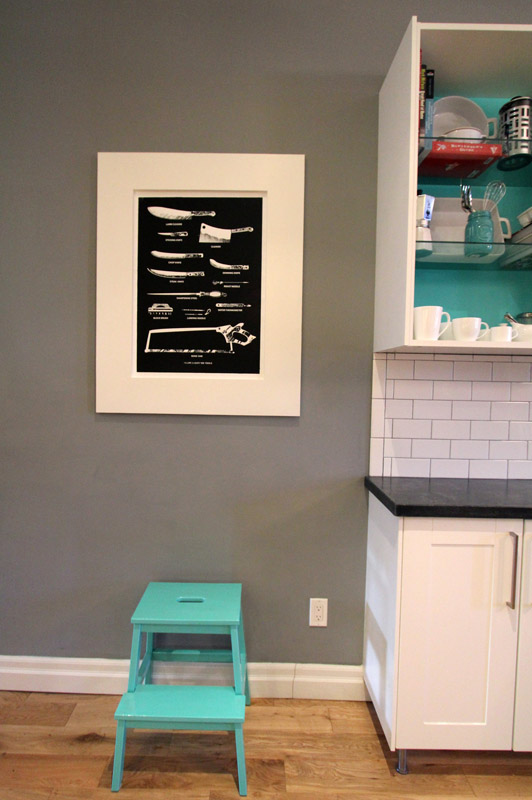
You may remember on my kitchen wish list a few months ago, I was crushing hard on the butcher series of prints from a local shop Smash Gallery.
Month: November 2013
Concrete Countertops – The Reveal
Thanks guys for sticking with us through five yes FIVE posts on concrete countertops. The thing is, this project was BIG. Even with five posts I have probably bored you all to death with my insistence on telling you exactly how we did everything. The thing is, I want you guys to make your own counters too! You CAN do it! Real concrete, solid surface, with professional looking results. So thanks for sticking with me, cause I think it was totally worth it. Wanna see what all our hard work actually looks like?
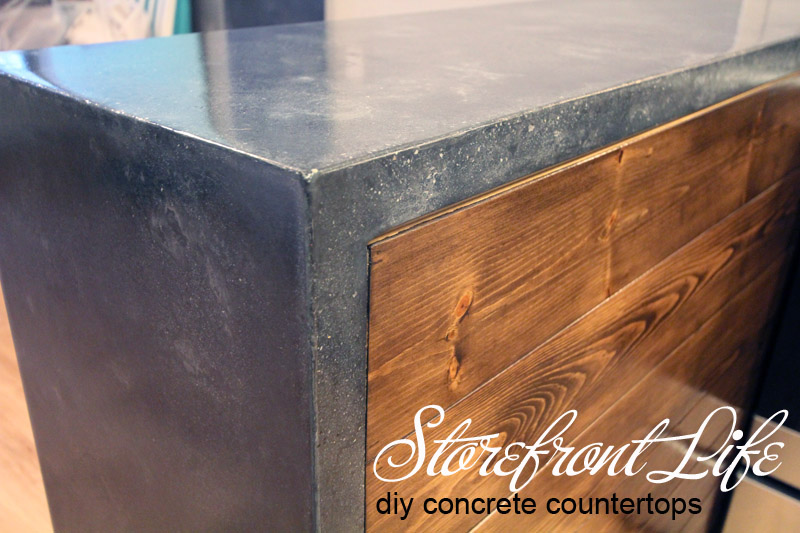
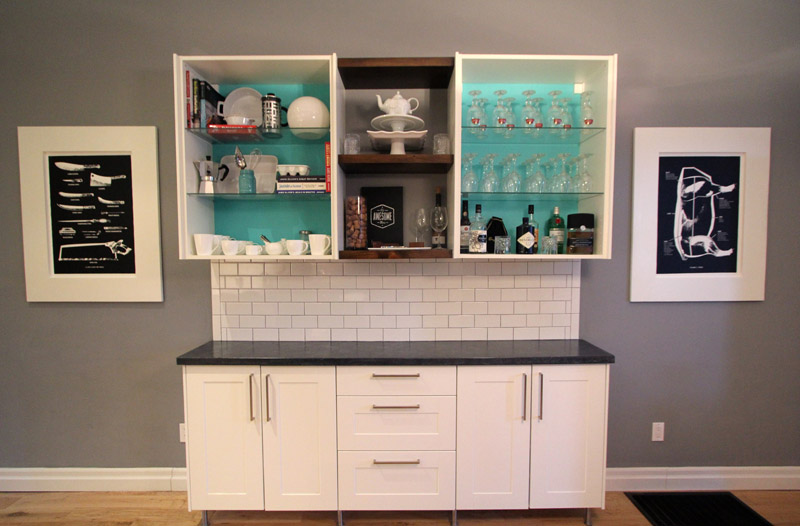
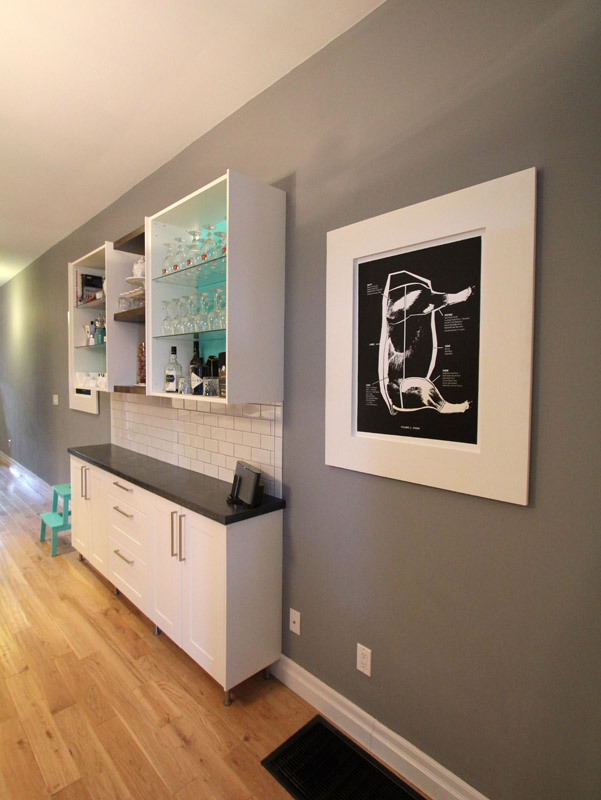
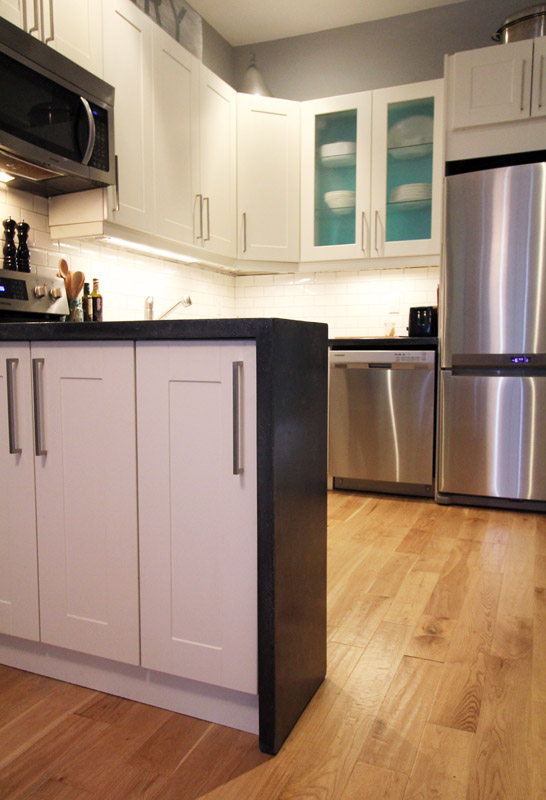
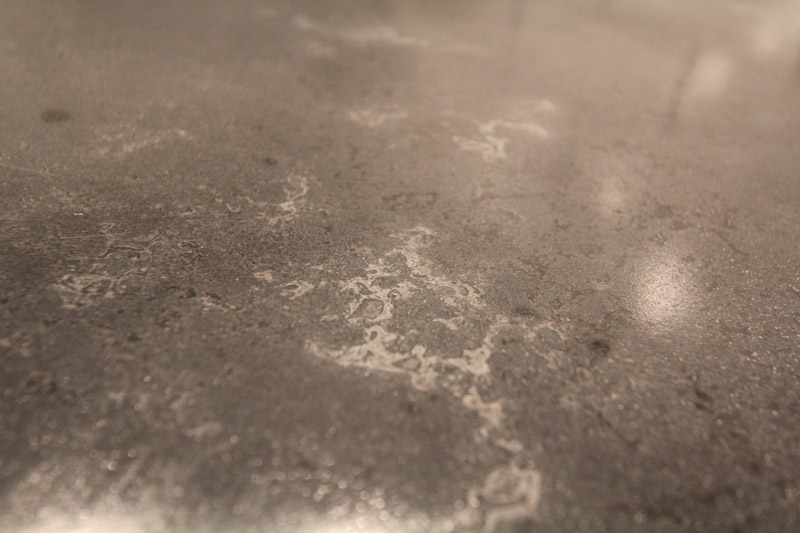
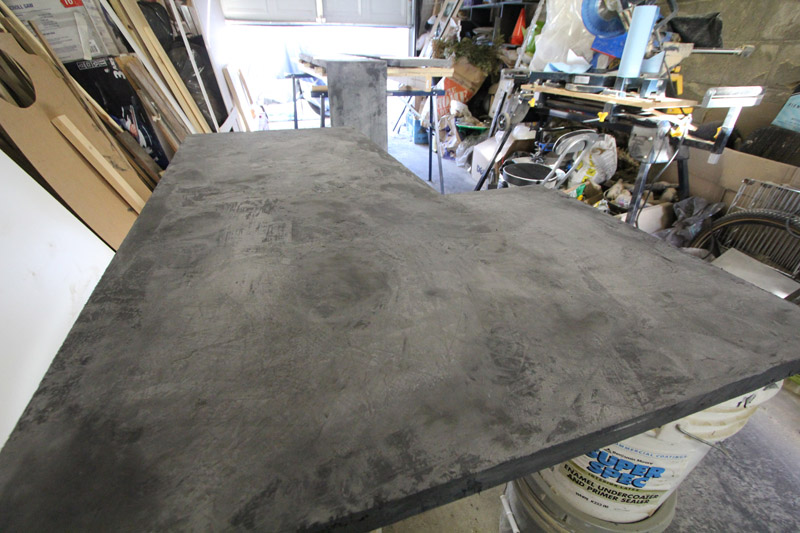
The counters were done in four pieces, including the single piece waterfall, which is by far my favorite piece! The color we used is “coal” but the color of the concrete can look very different at different times of the day. From a medium gray when the light is hitting it to a deep charcoal in the shadows. The color has so much texture and movement. I just love it! We paired the white cabinets with a pop of bright teal, and black and white accents.
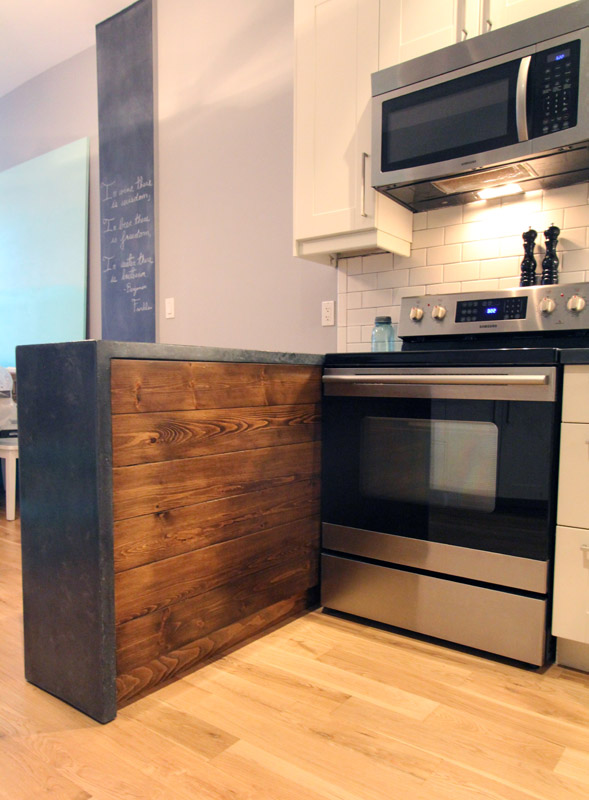
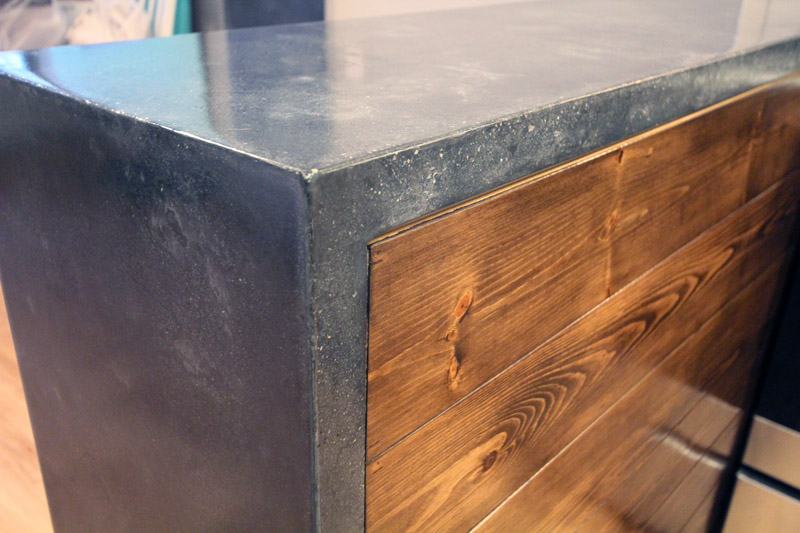
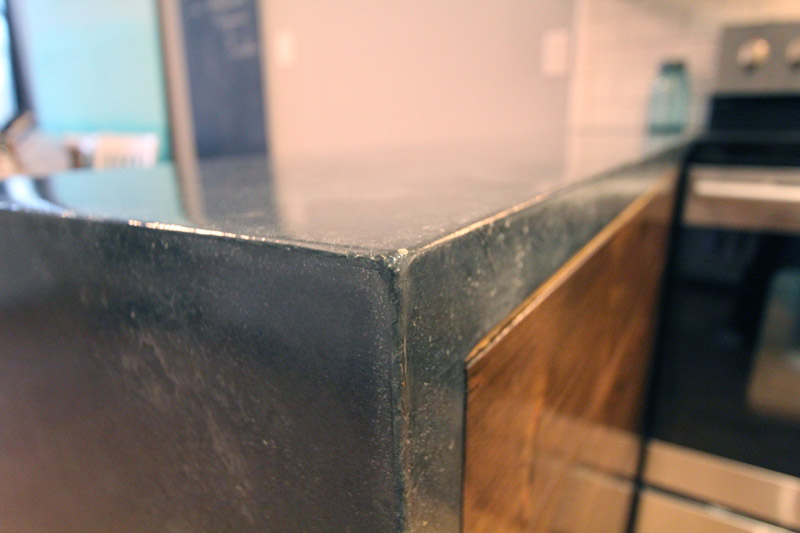
For the back of the peninsula we opted to add a pop of wood. The kitchen already had a lot of white, so adding wood really ties it into the dining room with its wood table & bench. It also matches the floating shelves on the coffee bar.

The waterfall is just sexy! I love how seamless it is. I would never have dreamed that we could do it in one piece. It is simply a work of art.
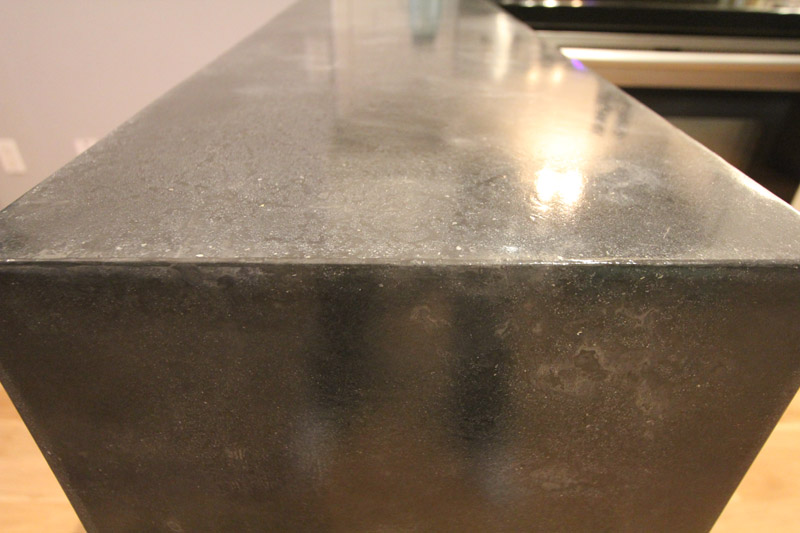
Speaking of the color varying. Here is one of my favorite spots with a lot of texture. This was produced by adding a slightly lighter color slurry for the middle slurry coat. I heart.
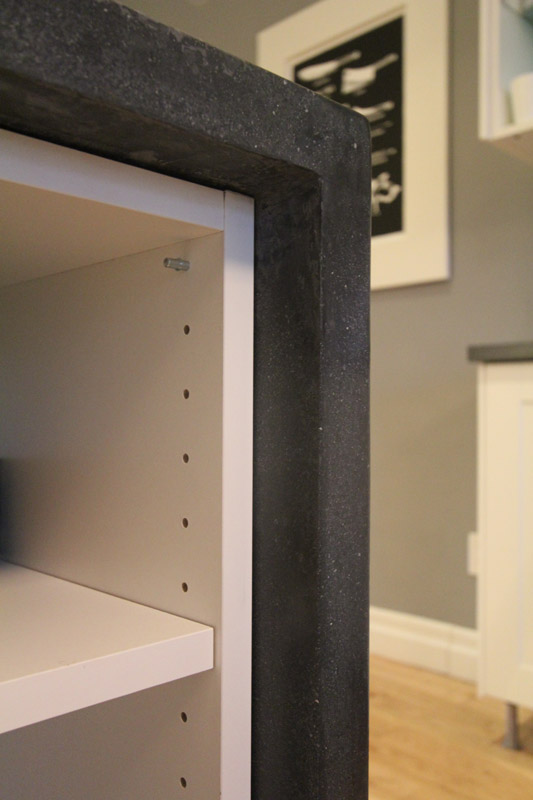
The front of the peninsula has cupboards, and when you open them you can see more of the exposed waterfall.
![]()
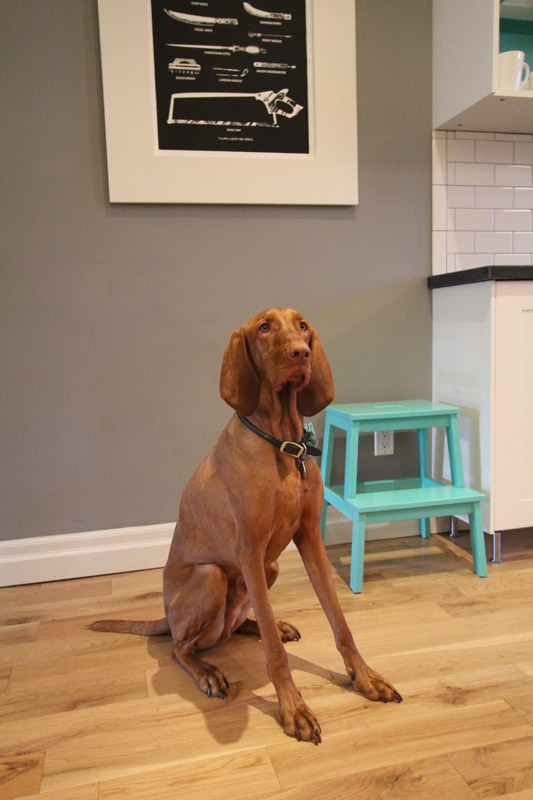
Sorry, had to throw one of Odin in. I can’t have my camera out and not take a photo (or ten) of him.
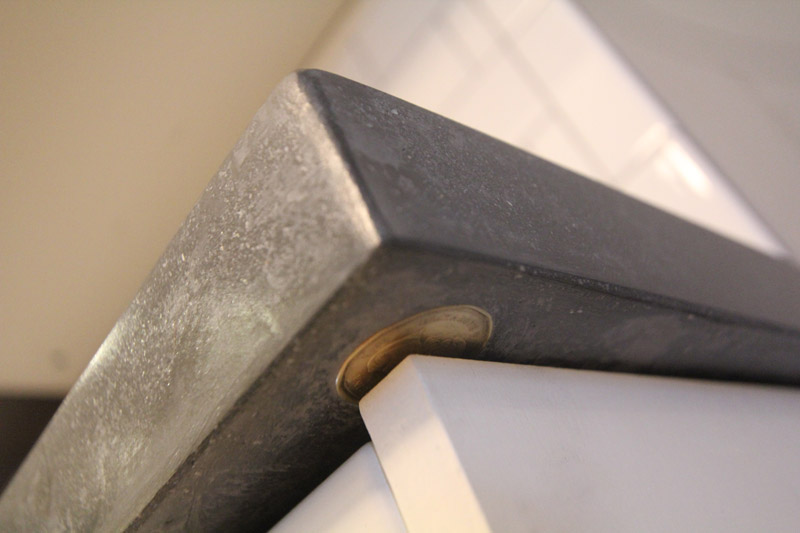
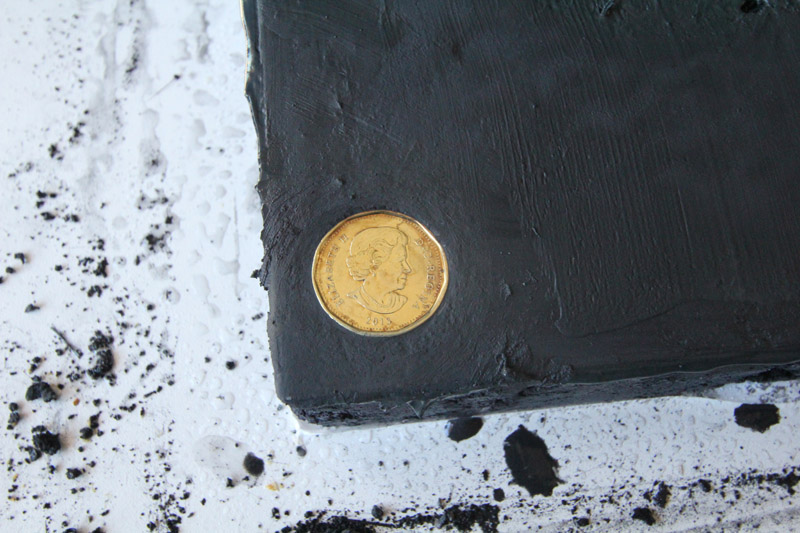
Do you remember when we hid a 2013 Loonie? Here’s the Queen peeking out from under the coffee bar counter.
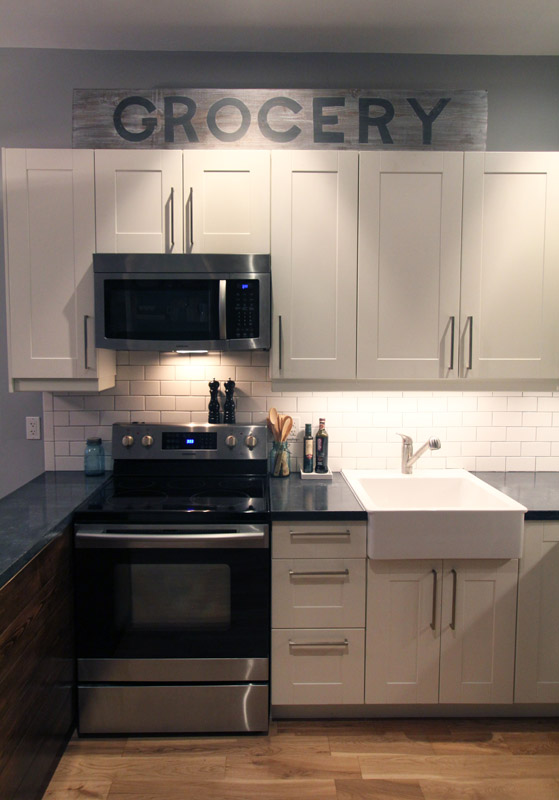
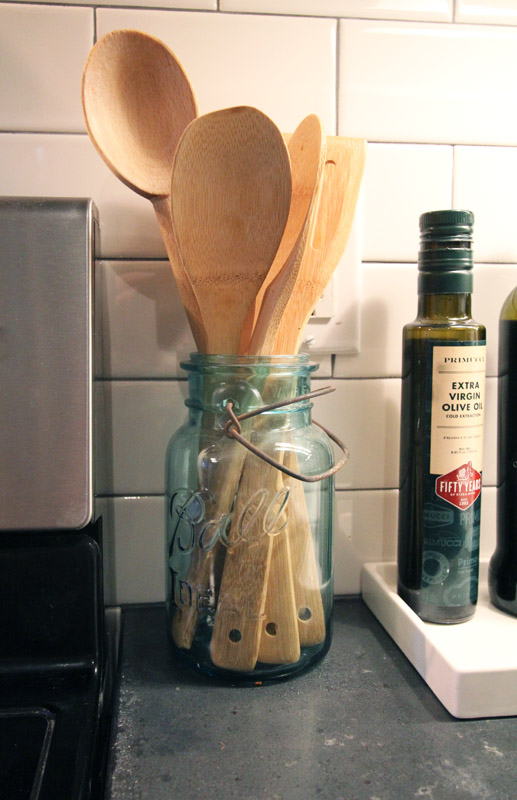
Now for a few of the other kitchen details. El Granto picked me up a couple vintage Bell jars one day at The Junction Flea. I love this one which holds my wooden spoons beside the stove. We also use a small ceramic tray to keep oil and vinegar off the counter (it would stain the tops).
I am still very happy with the wood shelves we added to the coffee bar. Now with the wood clad peninsula, it really pulls the coffee bar into the kitchen.
The inside counter was one piece I worried about a lot, but in the end its imperfectly perfect.
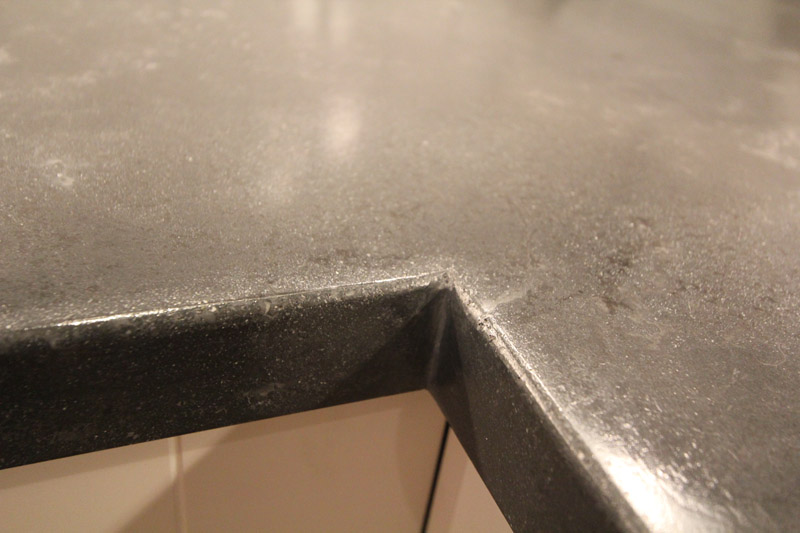
Okay, one more pic of the waterfall! We slightly rounded the counter edges. Littles and dogs wont poke their eyes out, and it makes me swear less when I bump into the counters.
So what do you think?! We’re super happy with them. They turned out better than we ever could have imagined!
I will be back later in the week with a few more kitchen items. Such as the source list, a few more project how to’s, as well as how we installed and sealed the counters. But for now, I am going to go and makeout with my counters. Wha? Uh. I mean stare at them lovingly, and maybe touch them a little. So smooth… and sexy…
This project is part of Project Concrete Countertops. Make sure you check out the rest of the series starting with Concrete Countertops – The Mix, The Templates, The Forms, The Pour, Fill & Sand,The Reveal and Finishing Touches.
*We were gifted some (awesome) Buddy Rhodes Concrete Products, but all opinions are our own!
P.S. We’re participating with Creating with the Stars this year! Make sure to check out East Coast Creative and vote for us!
Fill & Sand & Sand & Sand – Project Concrete Countertops
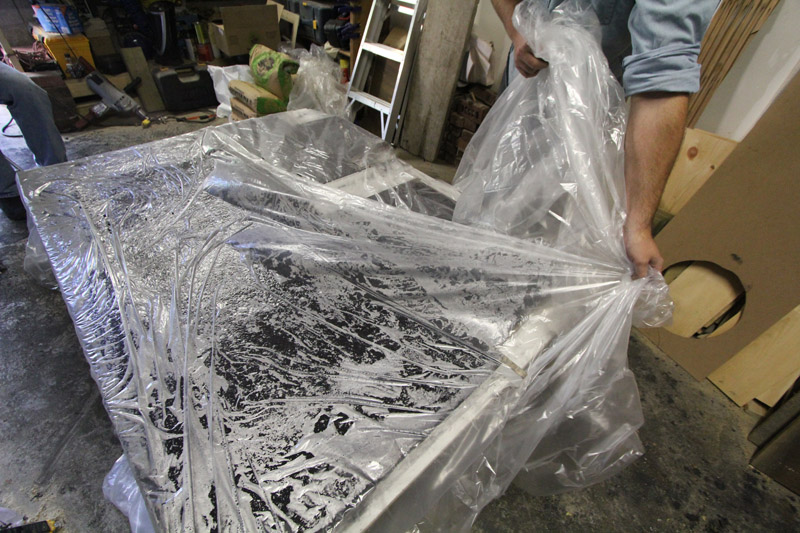
We’re getting so close in finishing our concrete countertop project! I am so very very excited to show you the reveal, (next week!) but before the reveal we still have some work to do! When we left off we had “poured” the concrete into our forms, and left it covered, moist and warm.
Now it’s time to unmold the forms and see what we’re working with! We removed the blankets and plastic to reveal a nice moist concrete.
We then got started pulling away the forms. Using gentle pressure, and ensuring we were not prying against the (still pretty soft) concrete, we removed the form sides.
You will note a shiny gold object in the bottom of the coffee bar. We inserted a 2013 loonie into the form under one of the edges. I hope that if someone ever takes the coffee bar apart, or renos the kitchen in the future they will find the coin and know when we built it! It also never hurts to have the queen hanging out in your kitchen. She classes up the joint.
Before we could flip everything over and see what we were workin’ with (remember we poured our counters upside down) we needed to do a bit of house keeping.
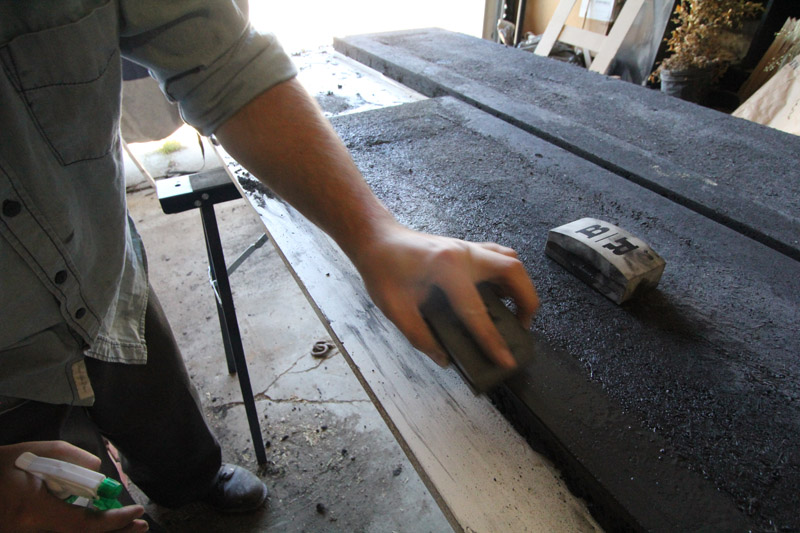
Our concrete mentor Jeremy made a very good point about how we interact with objects. When you go to touch and admire a countertop or a table, what so you do? You kind of grab the edge, placing your thumb on top and four fingers around the edge, touching the underside. If the underside of your table or counter is rough, everybody’s gonna know that you were a lazy sod who skimped on the finishing. Do you want to be the lazy sod? Exactly. So let’s sand the bottom edges of four counters so our friends don’t judge us.
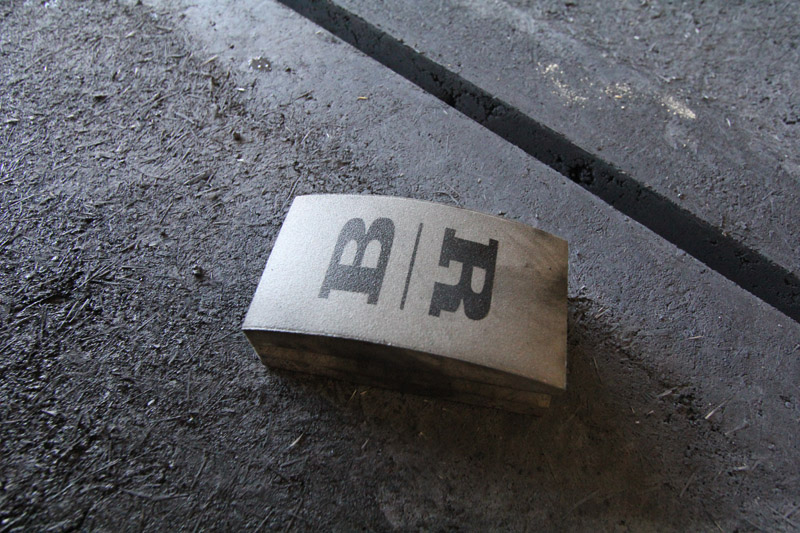
Using buddy Rhodes hand sanding pads, we wet sanded the bottom edges and used a chisel to remove any errant blobs of concrete. A few minutes work, that we will certainly appreciate later!
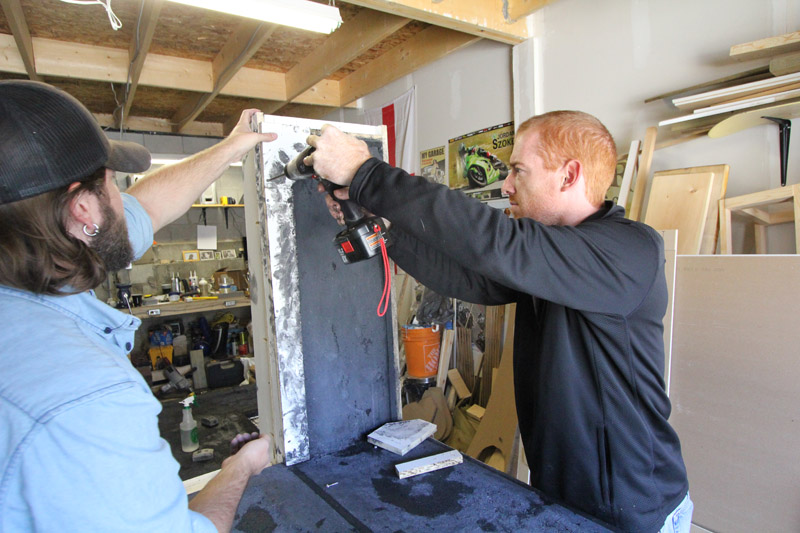
After an excruciating 20 minutes (I want to see my counters!) we were able to flip the countertops over.
I really love that shot, as it is the first moment El Granto saw our waterfall countertop. I think this is the exact moment he realized how freaking awesome these counters were going to look!
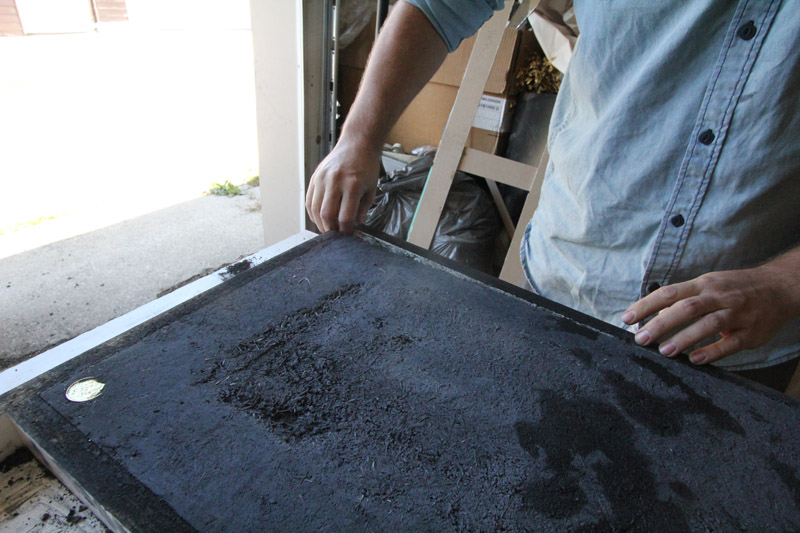
Remember from our last post how we hand packed the concrete in, and purposefully left voids? This is what the result looked like:

I think it looks amazing (and I will definitely have to do some sort of project soon that looks like that) but obviously for countertops, we need to make them smooth.
To do that, we mix up a slurry of bone paste (really fine concrete) and pigment and push it into the voids. It’s actually a lot like grouting tiles.
You can take this opportunity to add some colour, but in our case we wanted to stick with the same dark grey to keep with an industrial concrete look.
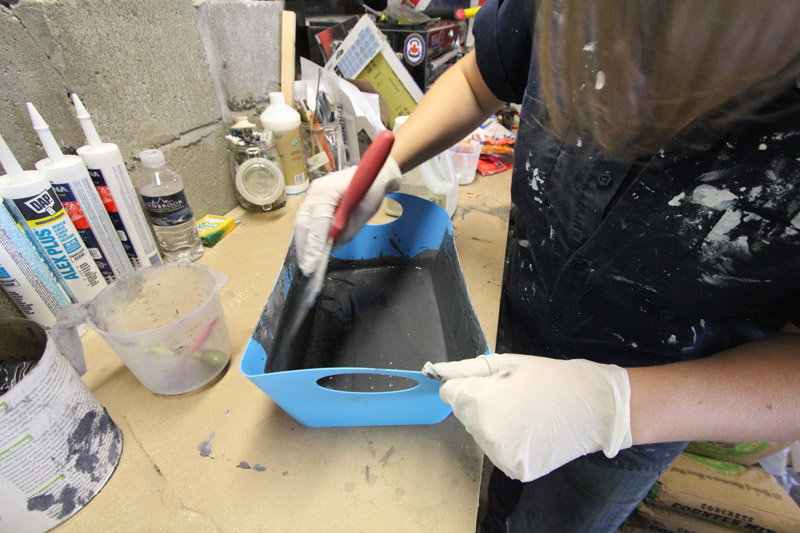
We mixed up a batch of slurry. (Two parts bone paste, one part acrylic additive & your color.)
Using a drywall mud knife & tray mix the slurry very well. Pressing out any clumps of pigment by pushing the knife against the tray. Now you will note that I’m not using a drywall mud tray. That’s because I forgot to buy one, and used some plastic bucket from the dollar store. Get a mud tray! We used a 5″ knife and it worked well.
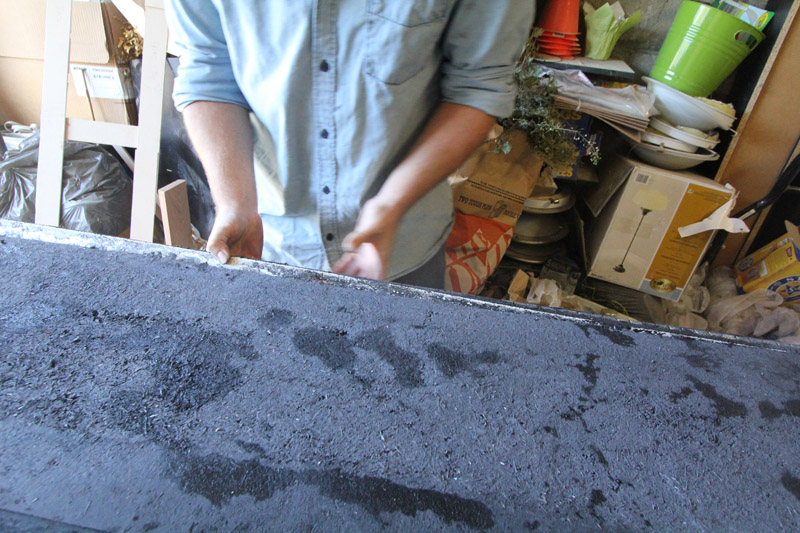
Once your slurry is mixed, start pushing it into the holes in your counter. Using a combination of your putty knife and a grout float. The grout float worked very well and shoving that slurry into the holes. You will need to do three coats of slurry, so don’t try to fill the voids entirely. They will get filled, don’t you worry. Thin coats are better, just give it a pass, scrape off any excess and let it dry.
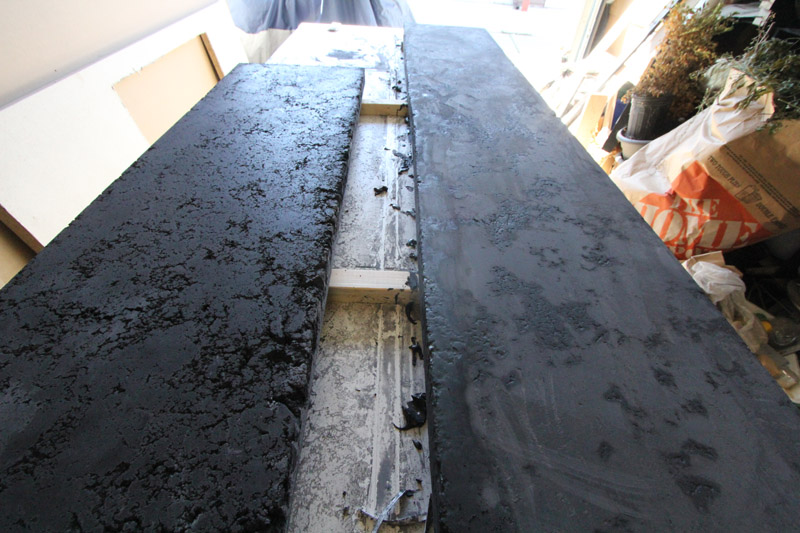
After our first coat was dry, we mixed up a slightly lighter version of our color, and did a second (light) coat with that. Our third coat was back to our original darker color. This will result in a bit of a lighter highlight in our cracks and crevices, giving a lot of texture to the concrete.
After three coats of slurry were applied, we left it to dry overnight (and ate some shawarmas.) Hey, hard work deserves delicious shawarmas, and maybe a samosa or two for good measure.
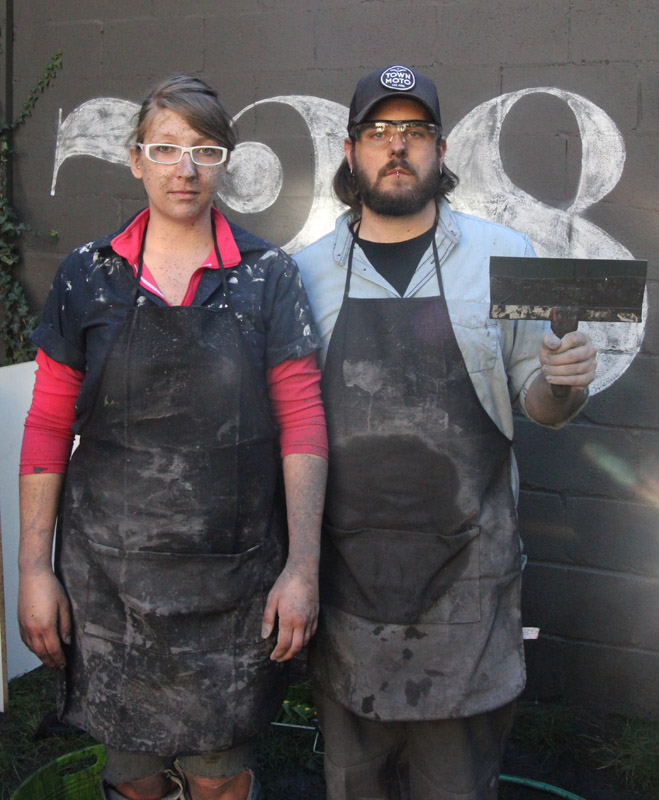
The next day we set to wet sanding everything. We covered the garage in plastic, donned aprons (and in Jeremy’s case, a drop cloth toga, cause we forgot to get him an apron, oops) and got to work. Ideally you would have a wet sander/polisher for this step, but we didn’t, so we used inexpensive orbital sanders and wet sanded away with the Buddy Rhodes diamond orbital sanding pads. We used the hand pads for the edges and areas that were hard to get to with the orbital.
It was a messy mess day, and we didn’t take many photos. However we did make a super awesome time lapse video for you of all our slurring & sanding fun. Here’s two days hard work in two minutes of video.
Next week check back for the reveal! SO EXCITED!
This project is part of Project Concrete Countertops. Make sure you check out the rest of the series starting with Concrete Countertops – The Mix, The Templates, The Forms, The Pour, Fill & Sand,The Reveal and Finishing Touches.
*We were gifted some (awesome) Buddy Rhodes Concrete Products, but all opinions are our own!
Storefront For Sale
We’re selling the Storefront and moving to Paris! Not. Well unless the unchecked lottery ticket in my purse pays out.
Nah, we are not selling our house. We’re still madly in love with it, and have many more plans and projects to finish yet. However if you are looking for a storefront conversion of your own, one just came up for sale in the neighborhood. Since we moved into our house, I have become a little obsessed with other converted storefronts. Its the same way when you own a unique model car or motorcycle, every other person who owns similar make or model is a friend. You wave at each other on the street and there’s just this untold bond. Or again, maybe that’s just me.
If you’d like to join the Storefront club (by the way, it’s awesome, and full of super cool attractive people.) There is a recently completed modern storefront conversion for sale in our hood.
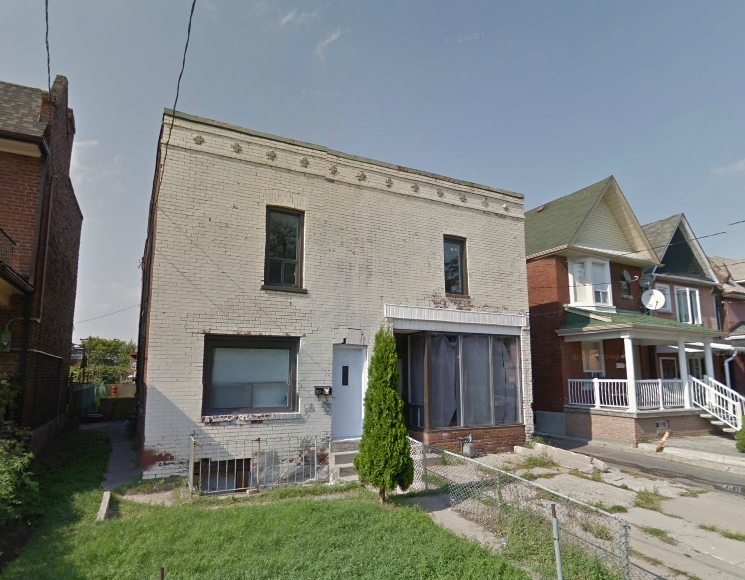
I have been following the renos of these two semidetached storefronts. They happen to be located on our evening dog walking route, so we have seen them go from structurally questionable uninhabited structures to pretty awesome modern conversions.
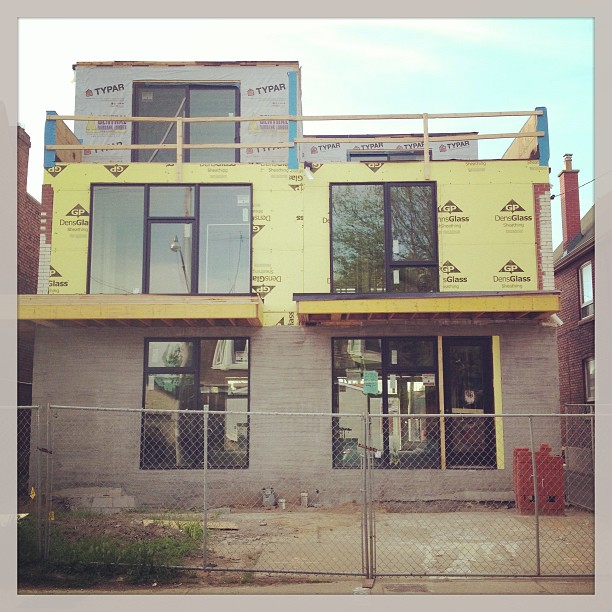
Here’s an image from my post on Storefront Conversions showing midway progress on the two storefronts.
In the last few weeks the finishing details really have been coming together. Last week when walking past I noticed a for sale sign on one of them, and of course I just had to check it out. In the name of Storefront love, not just being a nosy neighbour.
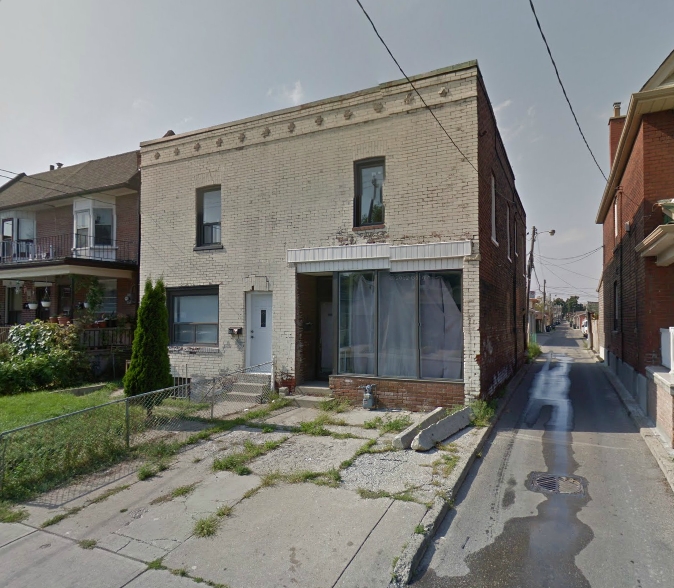
So kids, if you’ve got $895,000 in the bank and would like to live in a converted storefront in my neighbourhood, this place may be for you.
(photos from MLS listing)
Specs: 3 story semidetached, 3 bedroom, 4 bath, 1920 square foot. Lot size 16.67×92 feet. (Its the house on the right in these photos)
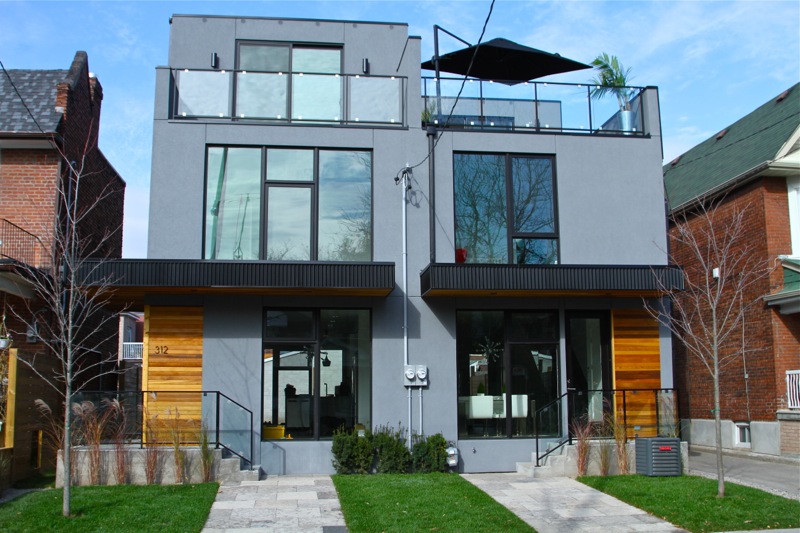
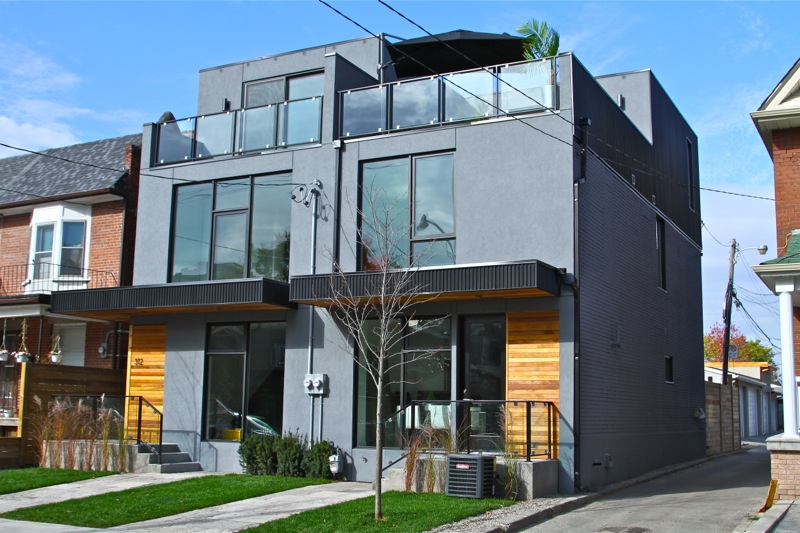
I like the use of black windows and a mix of materials. The pop of cedar is a nice touch.
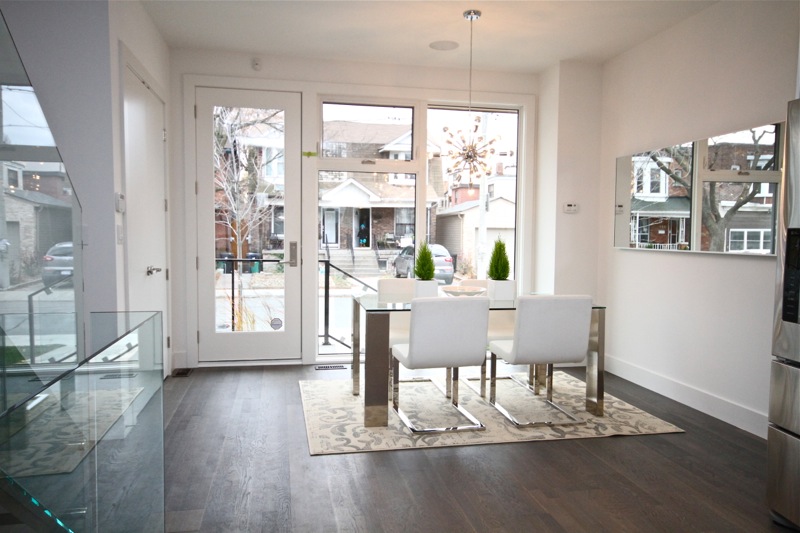
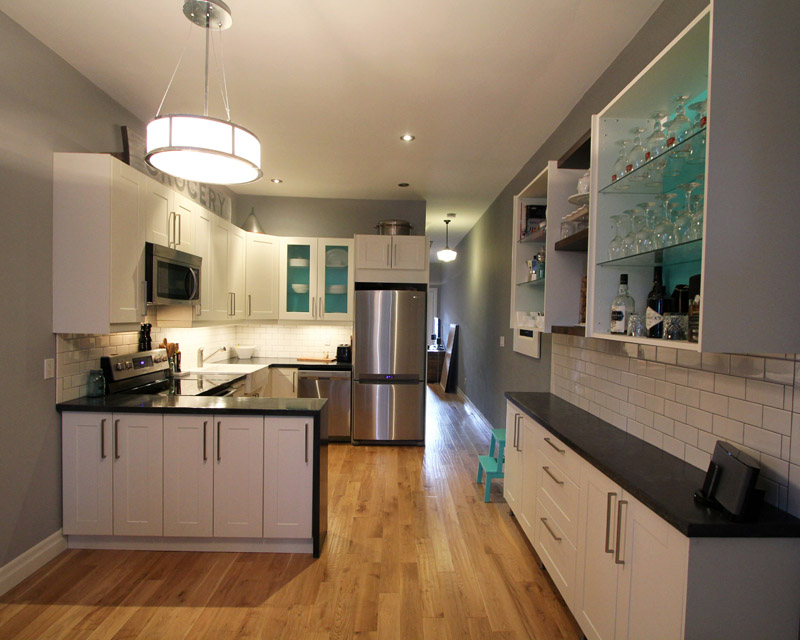
The open concept house opens into the diningroom.
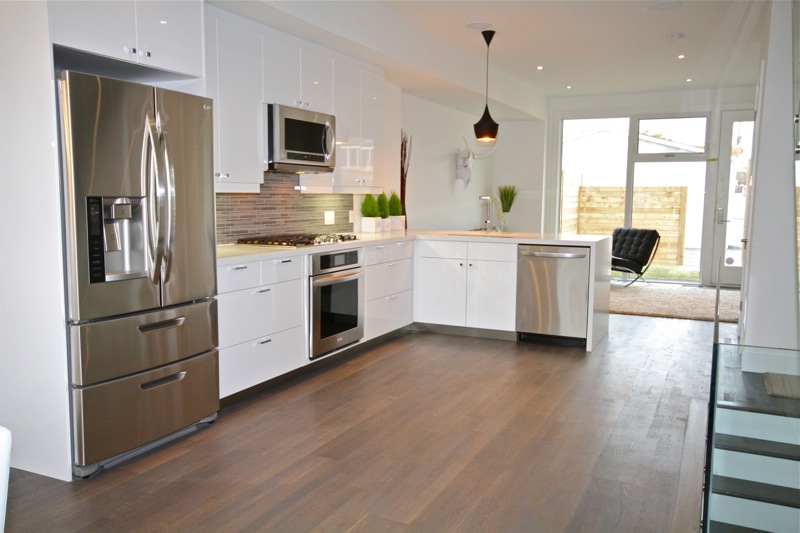
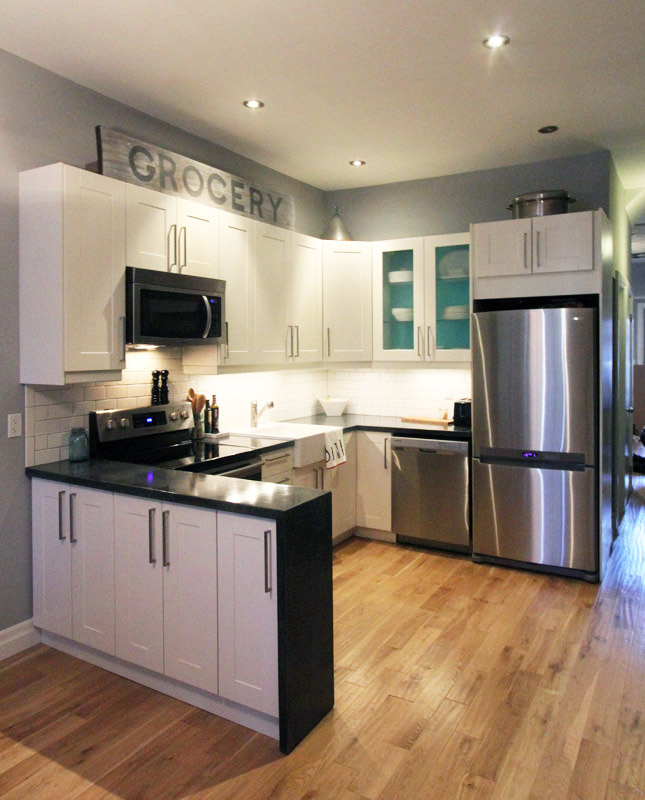
Then heads into the open plan kitchen with high gloss white cabinets. A staircase leading upstairs is on the right.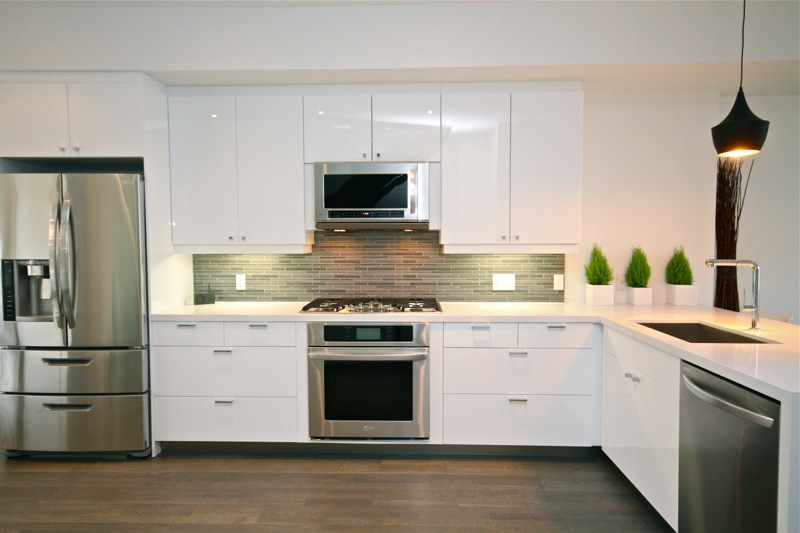
The large kitchen features high end appliances. I believe the cabinets are Ikea.

The glass wall & staircase keep with the open plan.
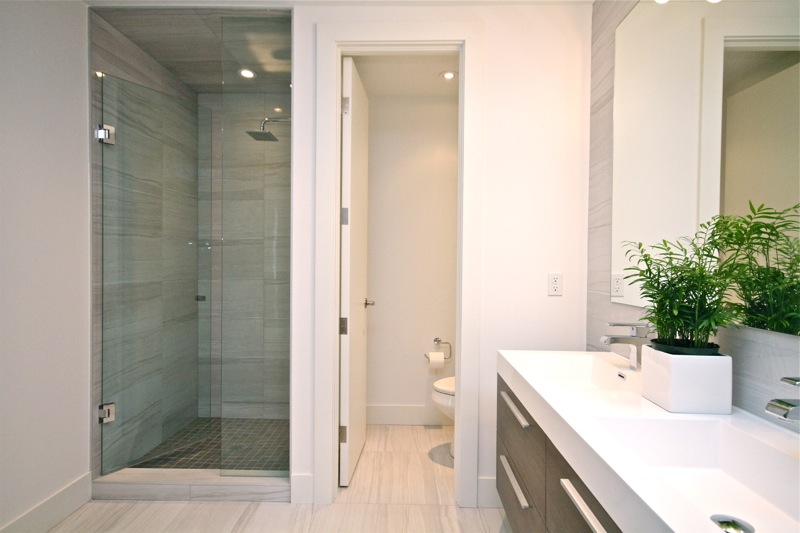
The bathroom finishes are all sleek and modern.
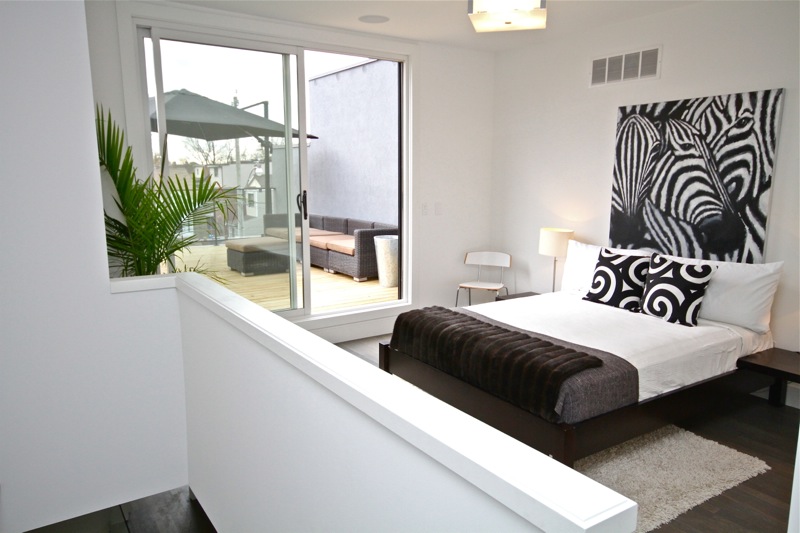
The master is located all by itself on the third floor. Complete with ensuite bathroom and master rooftop deck.

I’m going to take a page out of Old Town Home’s book and weigh the pros and cons of our house and this one.
STOREFRONT VS. STOREFRONT
Pro’s: With the third floor addition, this house has about 400 square feet of space more than our house. I love the addition of the third floor master & deck (I am lusting after a rooftop deck big time). We have a private master deck, but its not half as big. I love that they kept a lot of windows, and the place is light and bright. It is also 4 feet wider than our place, so it seems a lot bigger. They waterproofed & finished the basement. This is something that would never happen with our place, so it gets me a bit jealous. They also managed to cram 4 bathrooms into the house. With our 1.5 bath, this has me super envious. Not to mention a master en-suite. Want.
Con’s: No garage. This one would be a deal breaker. Motorcycles don’t really fit in basements very well. Not to mention an ever growing list of wood working tools. The backyard is also a bit small. As you may have noticed, I am also a bit of a traditionalist. Although I do like a modern home, I cant help but wish they’d kept a few of the older features. Mainly the brick. They painted the exposed brick on the sides, but stuccoed the front and back. Me no like stucco. There was also a nice brick detail pattern that was removed. The kitchen is a bit of an odd layout. It is a huge kitchen, but seems fairly empty with cabinets along one side. The living area is small in comparison, and I feel like they could have used a better kitchen layout, and given some of the space to the living room. Although that roof top deck is awesome, it’s also the main outdoor entertaining spot. So guests will have to traipse through your master bedroom to get to the deck. If you are bbqing out there, it also means getting your food & dishware up two flights of stairs and through your bedroom.
Conclusion: It’s a great house. Perfect for a young couple. Would we sell our place and make the move? I would consider it if it had a garage! But alas, without a garage we are staying put in our beloved storefront.
What do you think? Is this storefront conversion up your alley?
(I am in no way affiliated with the owners or agent of this property, I am just a nosy neighbour!)
Making your zapper zap through walls
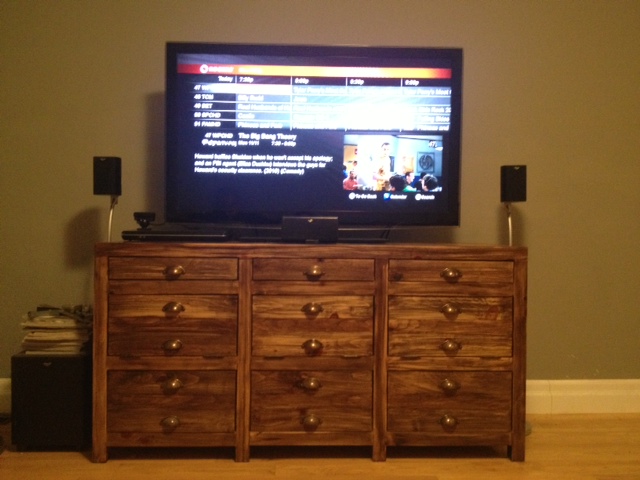
You may know of our Printmakers media cabinet build. We love our cabinet. But there was one major design flaw (well not so much a flaw, more of a drawback). If we wanted to watch TV or control the volume on anything in the cabinet we needed to have at least one door open so that the remotes could reach the components.
I looked around for a solution and couldn’t come up with much. Until one day I was listening to a podcast and off topic one host started talking about an IR repeater and how he put all his components in to a closet. DING!
I headed over to Amazon and promptly purchased the Cables To Go Impact Acoustics 40430 Infrared (IR) Remote Control Repeater Kit. Long name. Tiny thing. Great product.
An IR repeater takes the infrared signal from your remote and “blasts” it out out of little stick on modules. It’s super simple to hook up and took no time at all to get working.
Step 1:
Position the IR receiver:
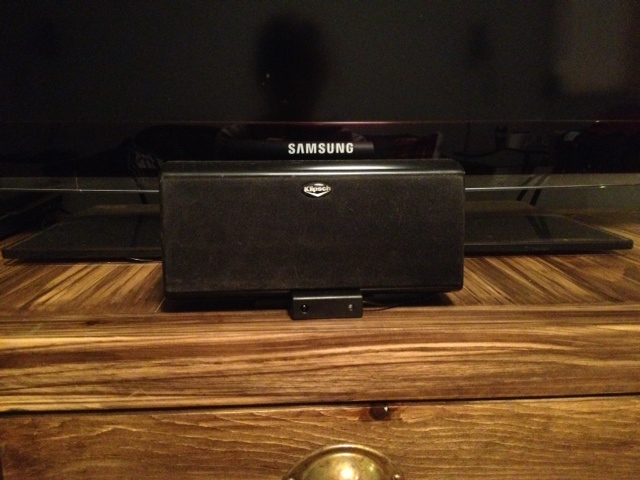
I chose just under the center speaker. Even with our bluetooth remote out of habit we always point it at the TV. This can sometimes be a problem when your components are a foot below the tv. This takes all the guesswork out of changing channels.
Step 2:
Plug the IR receiver in to the base unit.
Step 3:
Plug your IR Blasters in to the base unit (while you’re at it plug in the power cable too).

Step 4:
Position your base unit somewhere hidden. Mine is actually sitting right on top of our audio visual receiver.
Step 5:
Position your IR blasters over the IR sensors on your equipment.

You can figure out where your IR sensors are by shining a flashlight on to the front of your components at a 45 degree angle. You’ll see a circle under the translucent plastic (usually about the size of a nickel). Peel off the sticky back of the blaster and stick it on.
The kit I purchased came with two double blaster cables. We only have two IR controlled components in our cabinet so I only needed to use one cable.
The IR repeater will now take any signal it gets and blast it out to all the components and you can leave your cabinet doors closed!
Two unforeseen advantages came along with installing the IR repeater too! One, the dog is no longer tall enough to get in the way of the remote signals and two, there’s a little blue LED on the IR receiver so you know 100% when you’re sending a signal.
I’m 100% so happy happy happy that this little guy came in to our entertainment world. No more unsightly audio visual components hanging out in open doors. No more dog smashing in to them while playing and no more getting up (after forgetting they’re closed) to open the door when you’ve finally sat down after a long day at work! That last bit happened WAY too often.
In Remembrance

Today I wear a poppy in remembrance of the men and women who showed courage and sacrifice in times of war, conflict and peace.
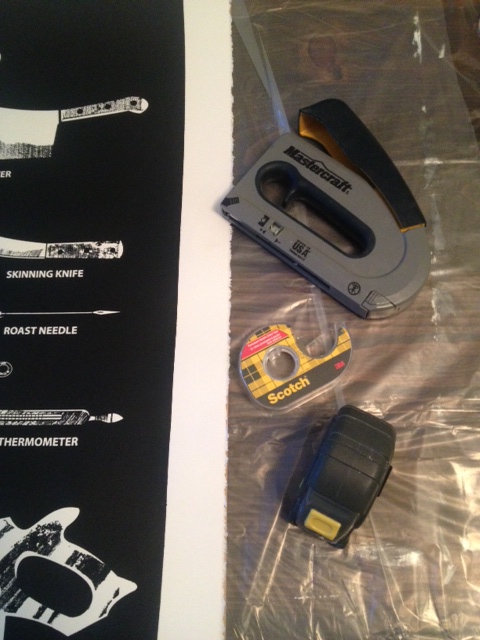
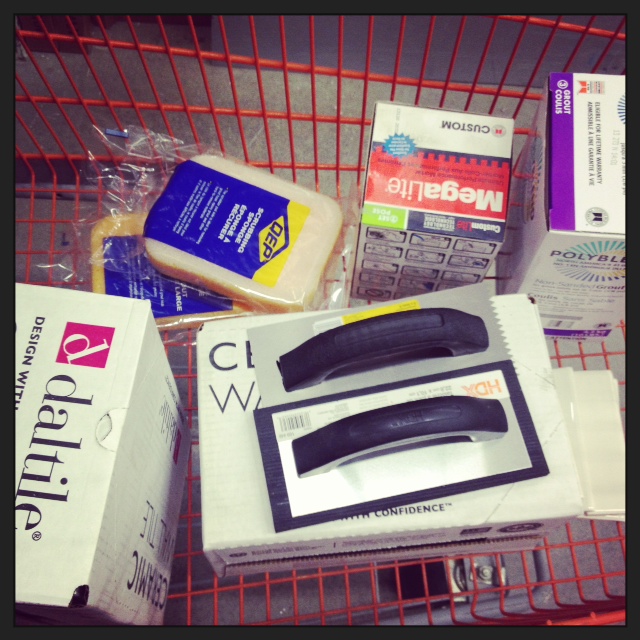
Tile Update
Thanks for all your opinions and help on subway tile last week!
If you follow us on Instagram, you will have seen a little flurry of progress.
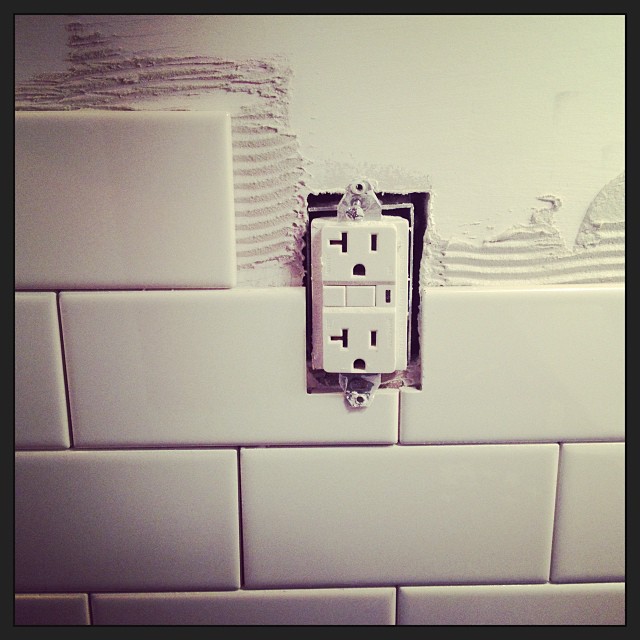
We weighted all our options, and decided to stick with our gut instinct and do a brick (or running bond) layout. I think what swayed our decision the most was that we would only have 18″ of tile total, and three inches of that would be covered by our under counter lighting molding. So 15″ wasn’t a lot of room to do a busy patterned backslash.
As for grout, we also decided to stick to a pretty traditional choice an go with gray. We picked out “Delorean Gray” and got it home only to look at it under our (bright!) under counter lighting, and decide it was too light.
Back to the store I went, and came back with Pewter gray. After mixing up a batch we both sighed with relief at how much we liked the color.
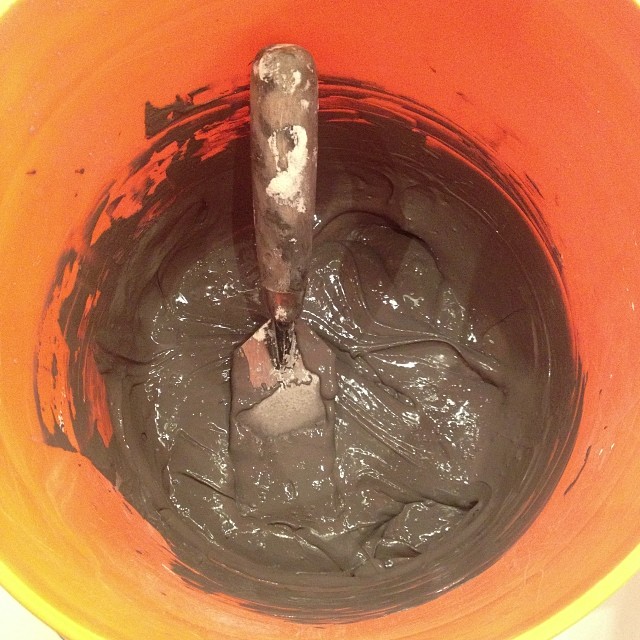
It looked good in the bucket, but how about on the walls?
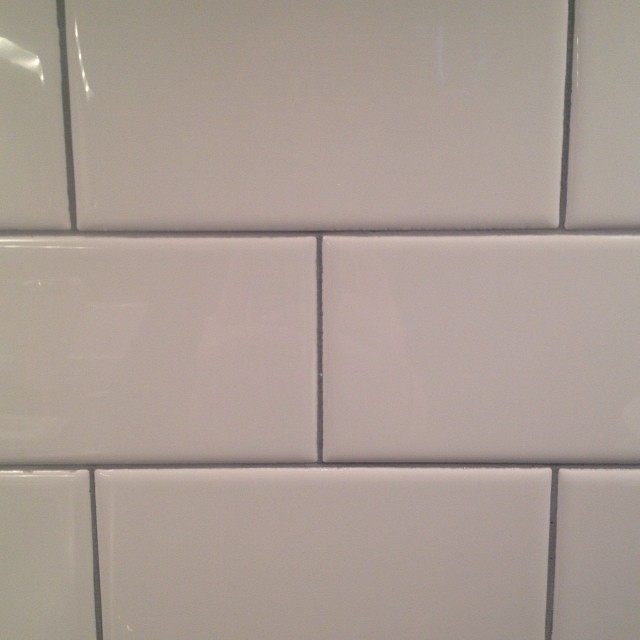
We are still working away on the backsplash. The main part of the kitchen is tiled and grouted, but the coffee bar is still naked. Hopefully we can make some more progress on it this weekend!
What are you working on this weekend? Any tiling projects planned?
DIY Concrete Countertops – THE “POUR”
The title of this post lies. Such a dirty little liar.
The concrete product we are using; Buddy Rhodes Craftsman Mix and the way were mixing it: “Buddy’s hand pressed technique” is not poured at all. However “DIY Concrete Countertops – The Day We Made Mud Pies” doesn’t have the same ring to it, or credibility.
All joking aside, I want you guys to take me seriously now, because things are about to go down. It’s getting hot in here, and someone may have let the dogs out (oops!).
It’s time to make the countertops!
Like really truly put stuff in molds!
If you’re new (hi!), and haven’t yet read my previous posts on this project, well then get to it! You’ve got a lot to catch up on before this sh%t goes down!
First we picked out our mix, then we demo’d the kitchen, then made countertop templates, and finally made the forms. You up to speed? Awesome.
Let’s get messy!
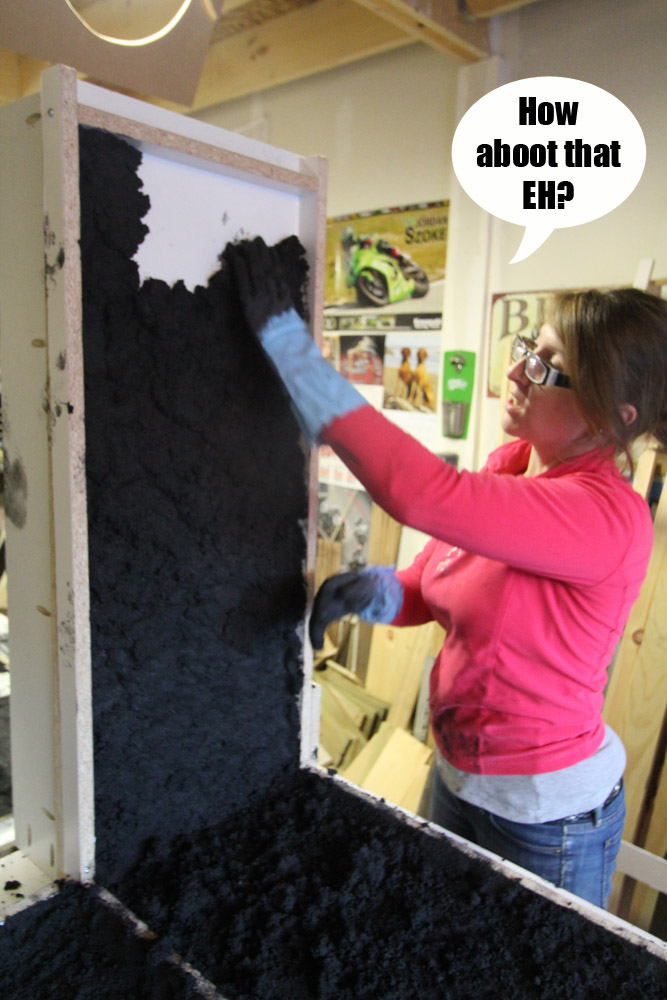
Jeremy from Buddy Rhodes flew into Toronto, all the way from the Southern US to help us Canucks “pour”. You will note a continuing theme throughout our time with Jeremy. He was convinced all Canadians said nothing but “aboot” and “eh”. While El Granto & I had a good laugh every time he said “y’all”. While I tried very very hard not to let an “Eh!” drop. They regrettably slipped out, and I will never ever live it down.
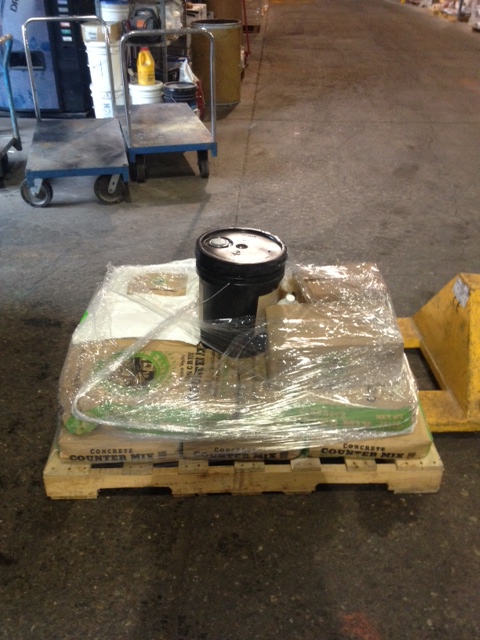
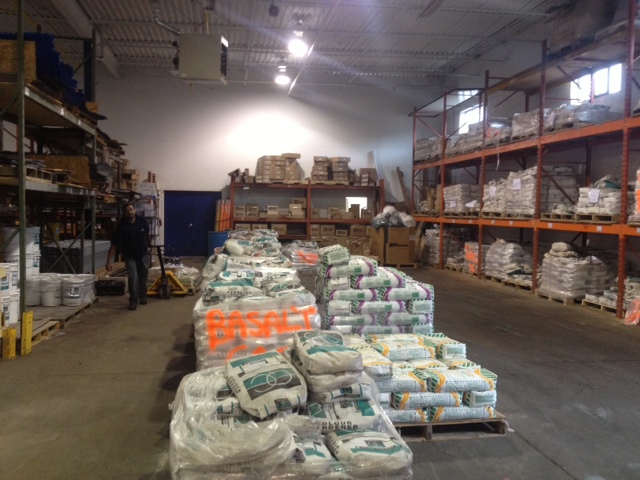
While Jeremy was making his way to Canada, EL Granto’s Mum and I headed to Form & Build in Mississauga to pick up our supplies. After much humorous banter with the Form & Build guys (including them playing a trick on the new kids, telling us the SUV wouldn’t hold the weight of everything!) we had all our supplies loaded and ready to go. (Thanks Form & Build warehouse guys, that stuff is HEAVY!)

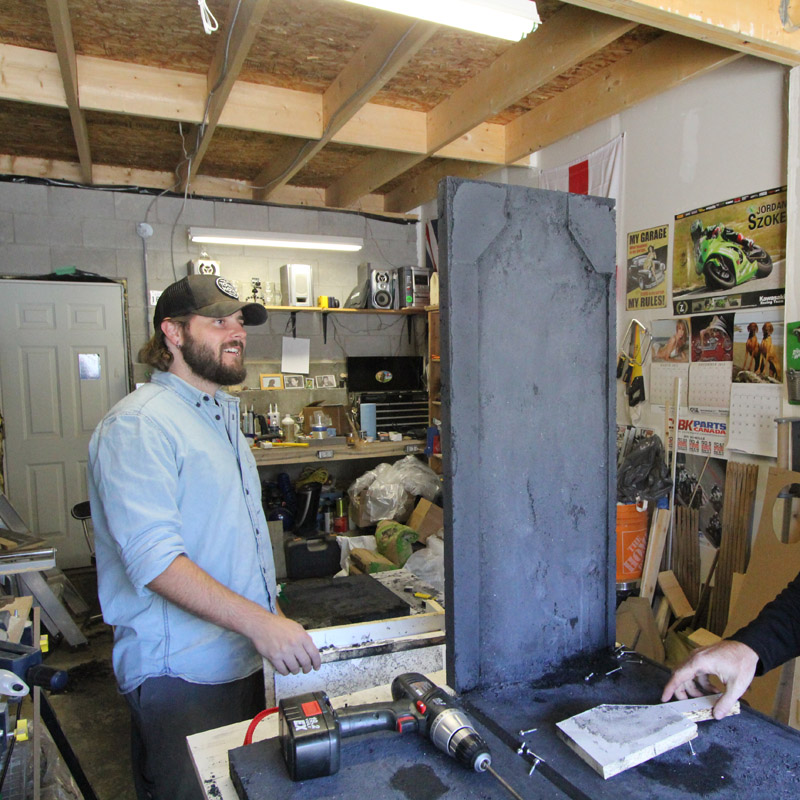
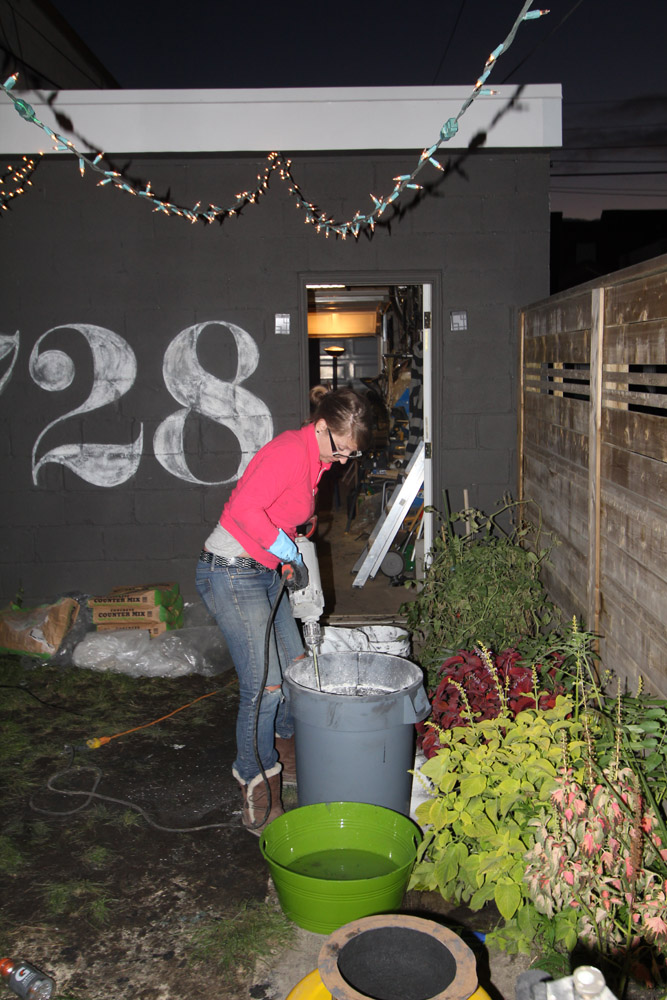
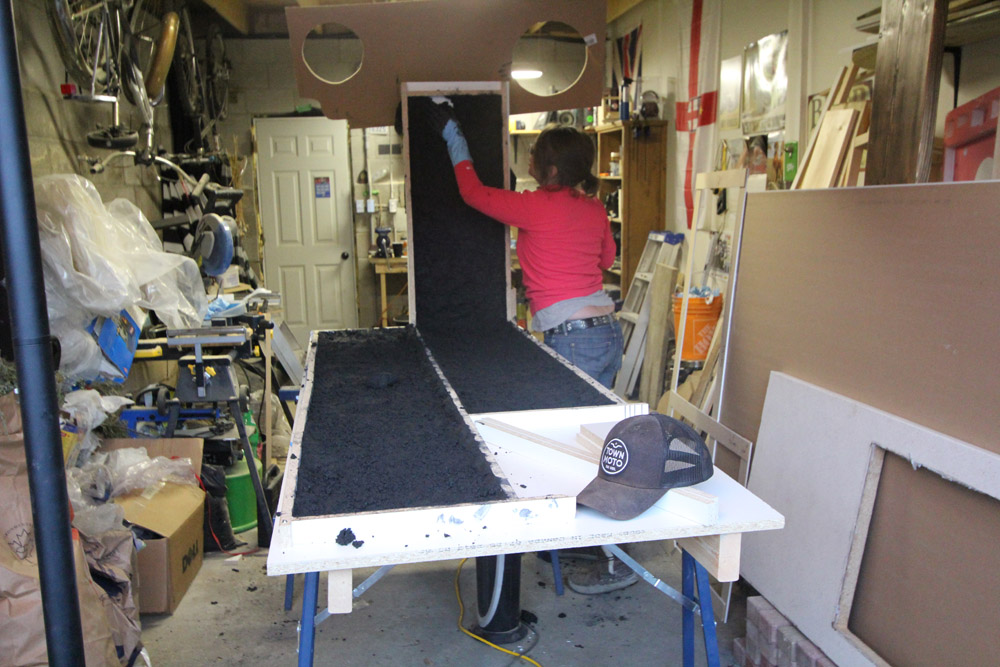
Back at the Storefront we laid out our previously built forms on perfectly flat sturdy surfaces (you CAN put them on the ground, but it’s much much easier if you’re working at waist height and our garage floor is anything but flat). We used saw horses for one of the forms, and we made a work surface out of 5 gallon buckets and some 2×4’s for the other.

This was all happening in our 240 square foot garage. (Which is full of tools eh!) This is urban DIYing at its finest! You gotta make do with what you’ve got.
Once we had everything ready to go, we started mixing. Jeremy had previously suggested we get a mortar mixer like this:
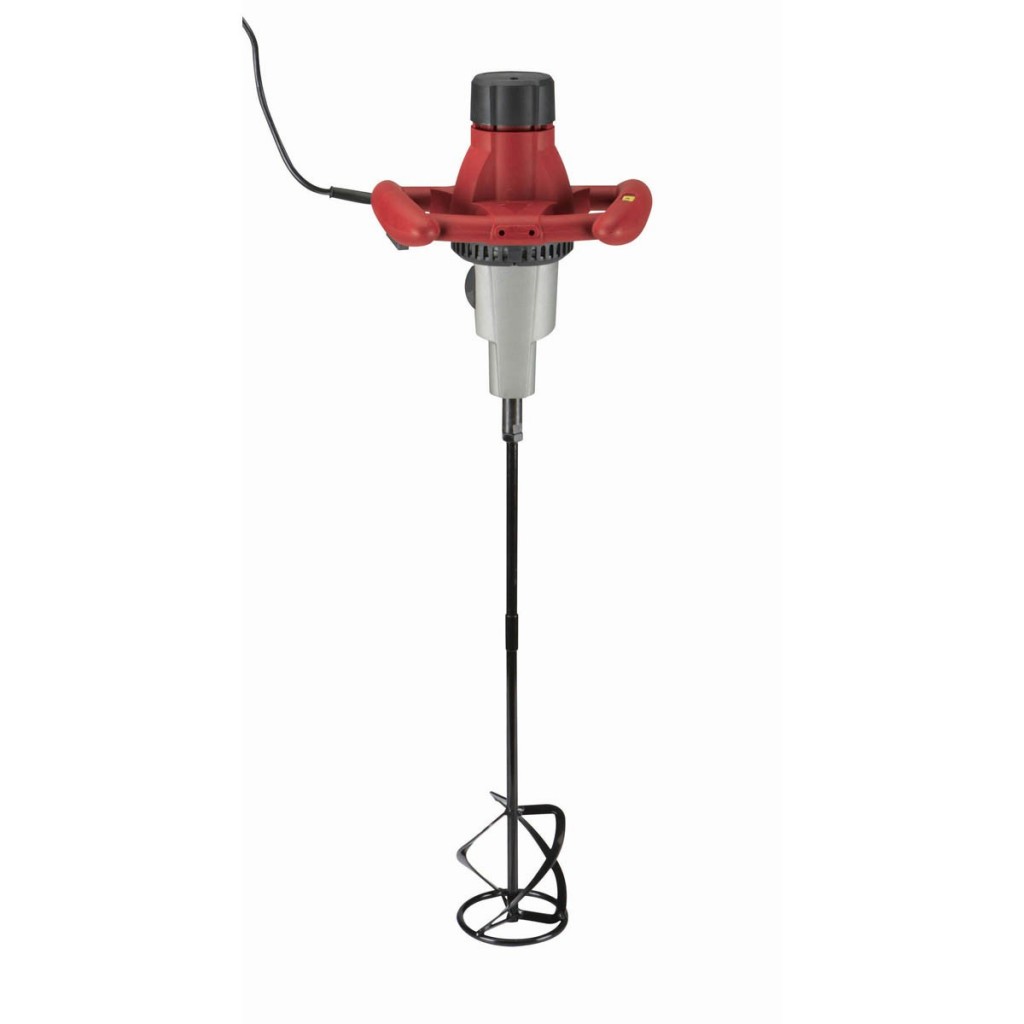
They are readily available in the US but apparently in Canada they are hard to find. Home Depot carries one for sale online only, but unfortunately we didn’t have enough time for the shipping before Jeremy got into town. I called every tool rental place in the city, and alas no one rented them.
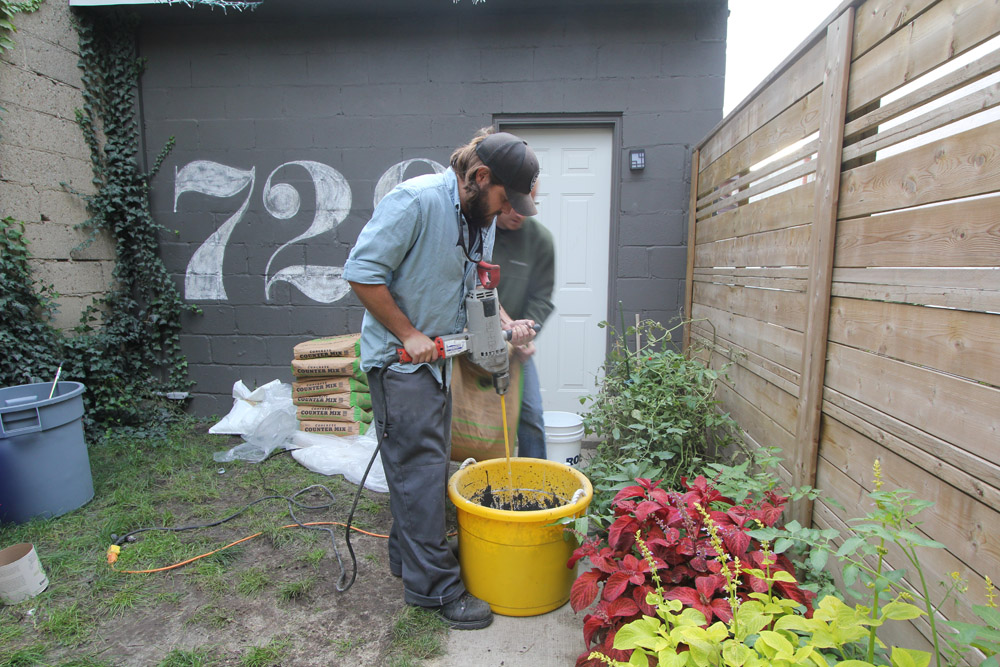
We settled for a rental mixing drill, and this thing was a beast. It was HEAVY, unwieldy, mixed too much air into the mix, and took forever to mix. Not ideal, but in the end it did get the job done. We all struggled with it, ended up cutting our mixing paddle shorter, and took turns. Next time, I am buying the right tool for the job! If you are thinking of doing this project, get a mortar mixer!!
We were mixing the Buddy Rhodes Craftsman Mix according to Buddy’s hand pressed recipe. This mix is not your normal concrete. It’s more the consistency of cookie dough, and truthfully mixing it is just like making cookie dough!
“Pouring” this mixture is a two stage process, you put a first coat of hand pressed craftsman mix in to your forms about a half inch thick, then you fill in the form with a backer coat of fiber reinforced craftsman mix. Use the Buddy Rhodes project calculator to determine how much of each product you will need.
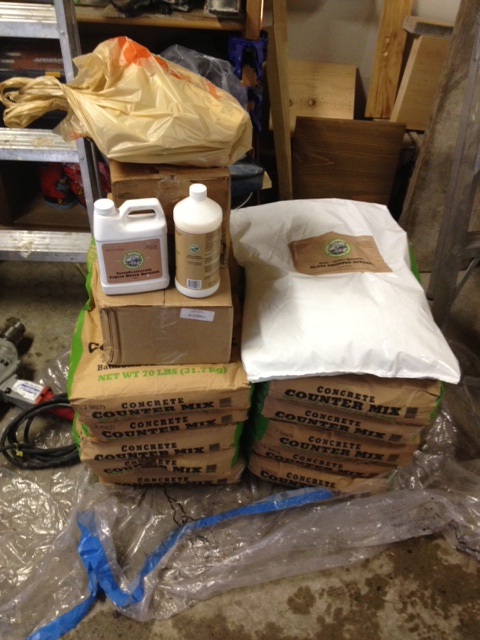
Here are the quantities we used for Stage One:
- 2 bags Buddy Rhodes Craftsman Mix
- 8 quarts water
- 2 quarts polymer
- 1 can pigment (coal in our case)
- Water reducer to get the consistency we are after (only a little, about a cap full)
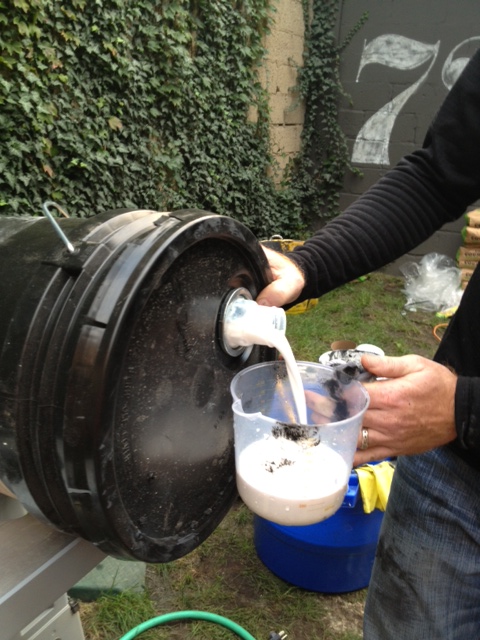
DIY TIP: Ever poured something out of a 5 gallon pail? Sucks right? It’s heavy and hard to control and slops all over the place! Here’s a tip, place the pail on its side on a work surface. Start with the spout facing up, and remove lid. Place your container below the spout, and slowly roll the pail. It will start gently pouring out of the spout into your container, and you wont spill anything! When you’re done, roll the pail back and put the lid back on. No heavy lifting and spilling required!
Just like baking, we mixed all the liquids together first, and added in the pigment to get it evenly dispersed.
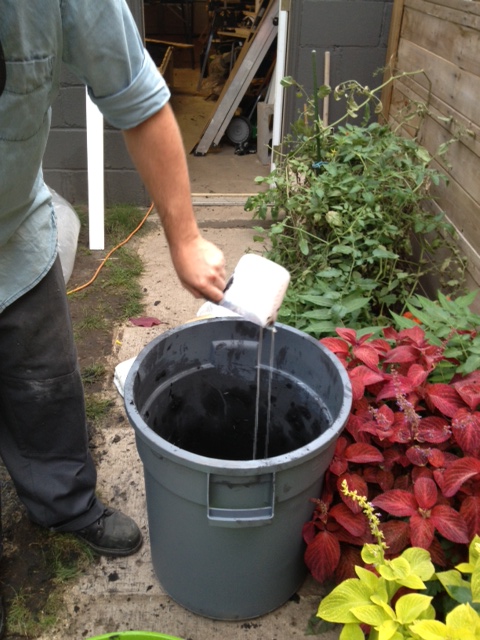
Then we slowly added one bag of craftsman mix. If you’re doing this project, wear a dust mask, you do not wanna breathe in that dust!
Lifting the mixer up and down, and round and round helped everything mix more evenly.
Everything is ready once the mixture reaches cookie dough consistency. It’s like play-dough for big kids who want new kitchens!
Now it’s time for the fun!
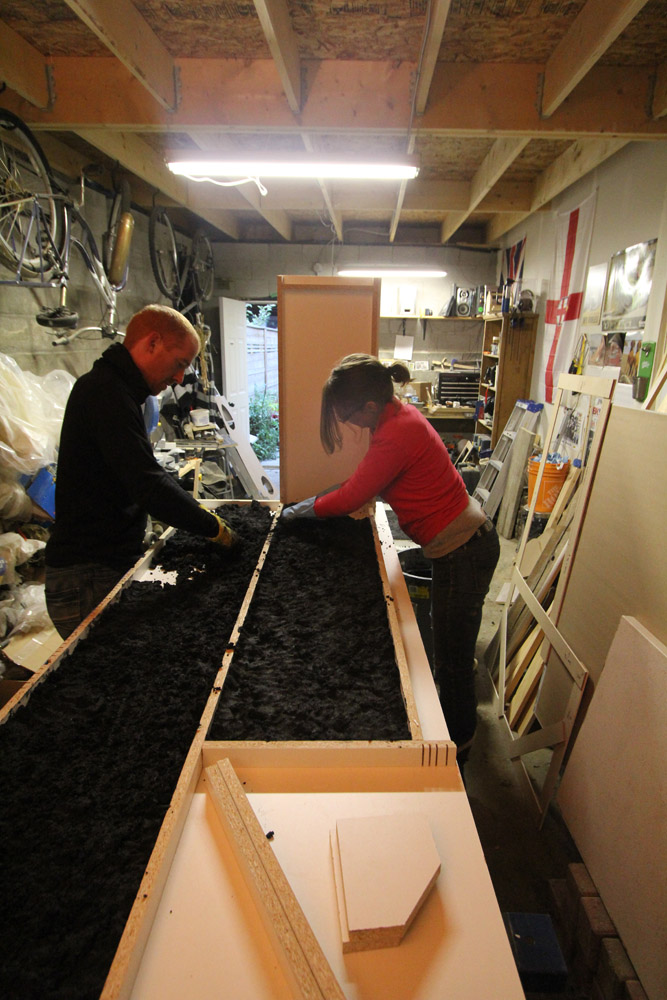
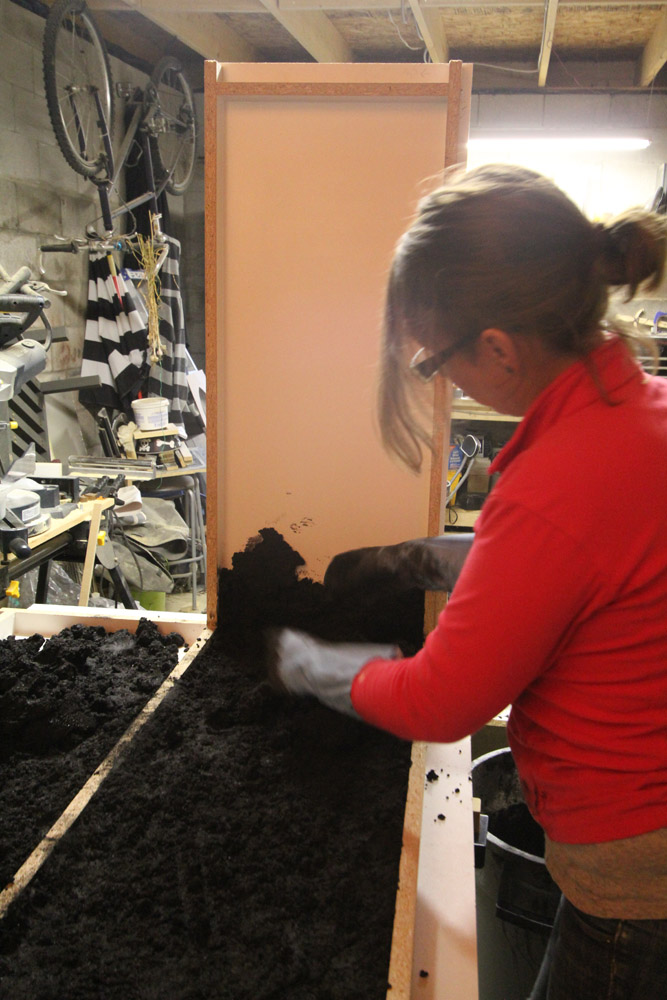
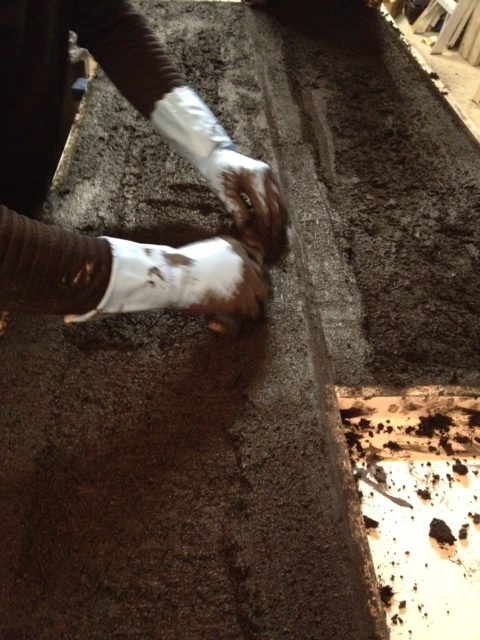
We donned gloves, and took handfuls of the mix and packed it (gently) into the forms. With this technique we actually want to leave some voids, so that the concrete will have a more organic look to it. If you pack it too hard you’ll squish out all the air and have no voids to fill later. We want voids because we will fill the voids with a bone paste colored slurry, which will give some character and depth to the finish. So this task meant that we were to do a bit of a crappy job in order to make it awesome.
We made handfulls of what I lovingly called mud pies, and placed them in the forms, making sure we got up the sides and all along the flat parts about 1/2″ thick.
When we got to the waterfall countertop form, we did the flat part first, then started up the vertical. As the mix is nice and thick, it stuck to the form no problem.
Up and up the form we went.
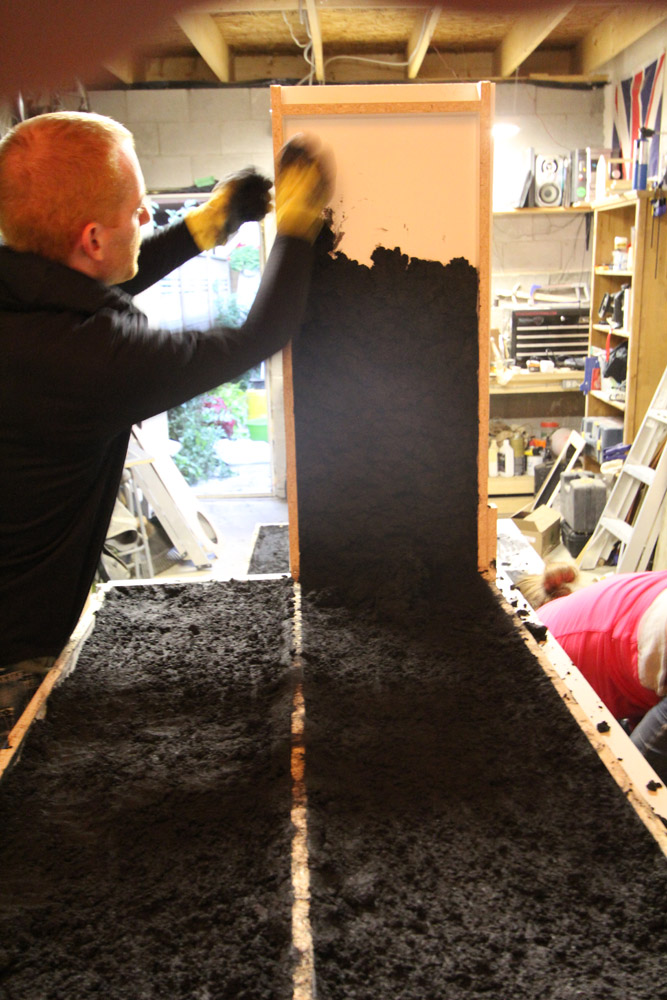
After the forms had their 1/2″ of Stage One mix, we gently raked everything with our fingers making sure things were pretty well evenly dispersed and there weren’t any huge voids. Next up is Stage Two, the reinforced backer.
Here are the quantities for Stage Two – The Backer:
- 2 bags Buddy Rhodes Craftsman Mix
- 8 quarts water
- 2 quarts polymer
- 1 can pigment (coal in our case)
- Water reducer to get the consistency we are after (a little bit more than Stage One)
- 2 1/2 lbs of glass fibers
Stage Two gets mixed exactly the same way as stage one, except the glass fibers are added (and mixed in gently) right at the very end. It’s important not to break all the fibers or they wont do their job. You don’t want lazy slacking fibers.
After the backer was all mixed up, we added it to the molds, filling it up entirely near the edges, and leaving it a bit less full in the middle of the forms (you don’t need to fill them all the way up in the middle, its just wasting concrete!). You want the forms completely full where they are going to touch the front and the back of your cabinets (so that everything lies nice and flat). You also want it to ensure your overhang is completely full.
We then used a small piece of wood to screed the parts of the countertop that will touch the cabinets & the overhangs making everything nice and flat.
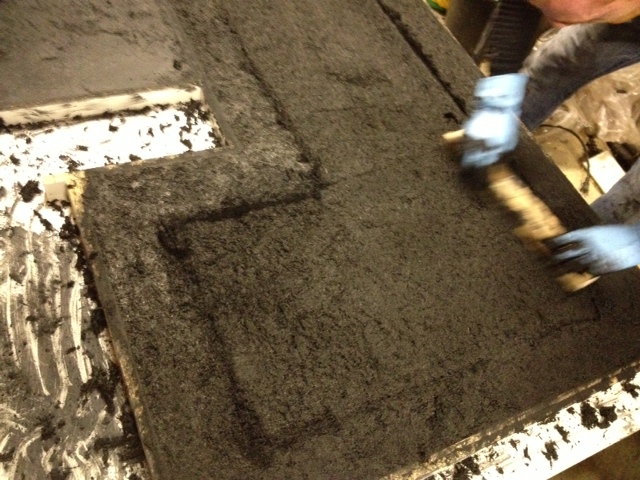
On our waterfall, we made some smaller pieces to act as the backs of the mold where our toe kicks and overhangs were. This will ensure we get a nice pretty back side of our counter (as it will be visible.)

Once we were done, we covered our counters with plastic sheeting, then blankets to keep them warm. Heat is important to the curing process (in his shop Jeremy puts industrial heating blankets on his forms while they cure to keep them as hot as possible), and as it was fall in Canada, it was even more important to keep everything warm. We put all the concrete to bed with blankets and left the heat on high in the garage overnight.
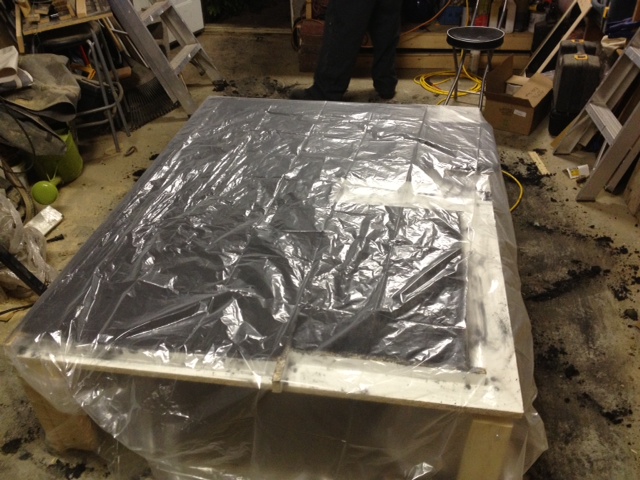
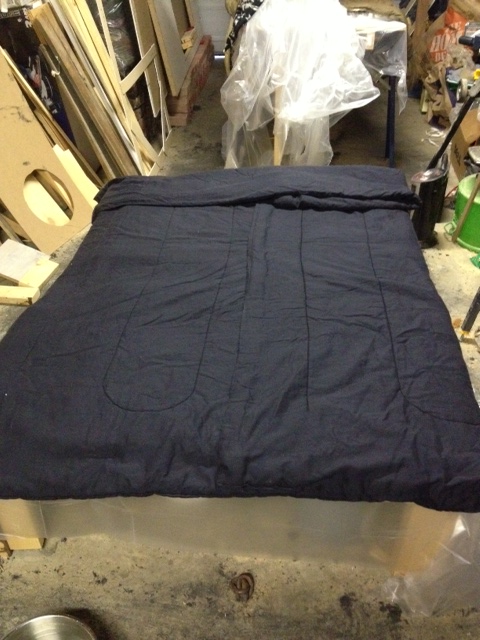
We occasionally went out and wet down the concrete with warm water and a cloth, then recovered. If you are doing this yourself, I would recommend doing your pour one weekend, then keep your concrete damp and warm for a week (this will ensure the strongest concrete possible), and unmold the next weekend. We were on a tighter timeline, and unmolded the next day.
It was a hard days work, but we actually made countertops! Next step is to unmold everything, make a bone paste colored slurry to fill any voids, and then sand. We’re getting closer!!
***UPDATE – Check out the next stage in the project here ***
This project is part of Project Concrete Countertops. Make sure you check out the rest of the series starting with Concrete Countertops – The Mix, The Templates, The Forms, The Pour, Fill & Sand,The Reveal and Finishing Touches.
*We were gifted some (awesome) Buddy Rhodes Concrete Products, but all opinions are our own!
DIY Cutting Board Oil/Wax
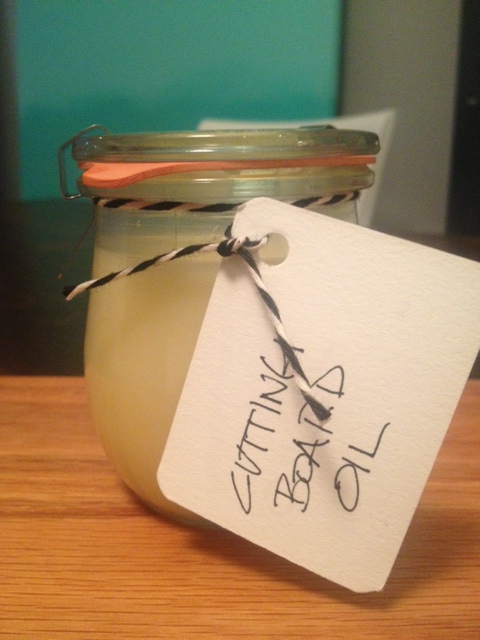
Last week we shared how to make DIY cutting boards. In that post we hinted that you could make your own cutting board oil/wax to protect your project even better than with mineral oil alone. Continue reading “DIY Cutting Board Oil/Wax”