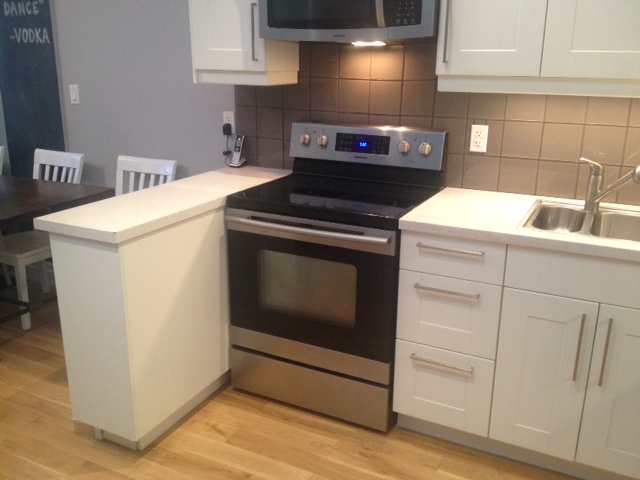
Our “U” shaped kitchen was a bit short on one end. Our peninsula oddly only came out 4 feet from the wall, and perpetually looked a bit “off”. He was just too short, too stumpy, and because of such he wasn’t that much use*. He wasn’t really a good prep space, nor did he have enough room to use as a service area for the dining room.
Lil fellaStubby PeninsulaThe Peninsula
When preping for new countertops, we knew that we wanted to make Mr. Peninsula a bit bigger for function and to balance the space better. However as our house is tiny (12 feet wide!) we didn’t have a ton of room to play with, without risking/impeding the traffic flow through the main floor.
The peninsula was actually an area of great debate in our house. We agreed on the countertop finish, colour, the coffee bar, the shelving and dining table choice, but we had trouble coming to a happy place with our peninsula. Ideally we would have ripped out all the skinny cabinets and put in full depth cabinets with a wine/beer fridge. BUT we just didn’t have the room (if we wanted to keep a dining table that seats 6-8). I wanted to add some more open shelving or potentially a wine bottle holder, El Granto thought that would look dated and tacky (after some thought I believe he was right about that). In the end, we decided to add a 12″ matching Ikea Adel cabinet, and seamlessly make the peninsula a foot longer. Not a huge gain, but that 12″ made the peninsula come out to the same length as the dishwasher side of the kitchen, and it will add some more prep and serving space.
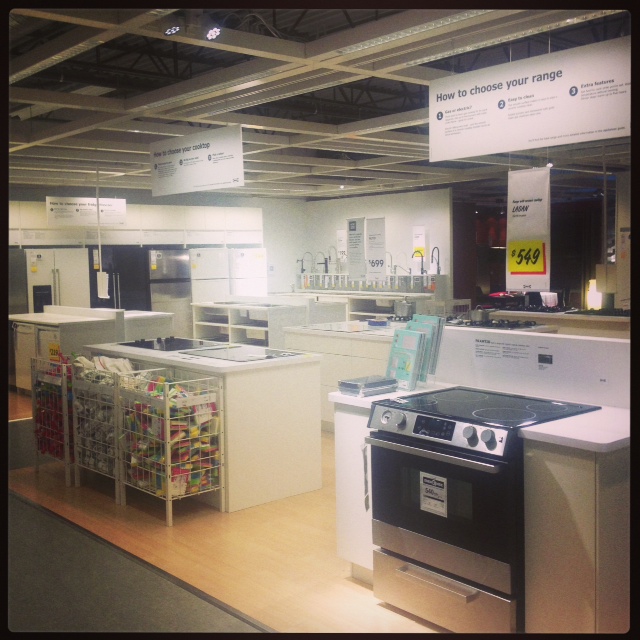
So off to Ikea I went, for the second Saturday in a row (sink pick-up the week before), and braved the kitchen department yet again. This time I saved El Granto the trip because he enjoys Ikea about as much as I like perusing the video game isle at Best Buy.
The Ikea Kitchen Department. Come in with a happy marriage, and leave on non speaking terms.
This jaunt to Ikea didn’t go as smoothly as my last, and my round trip took almost 4 hours (including subway and shuttle bus). Ouch. The only saving grace was my froyo treat as I wanted at the full service pick-up.
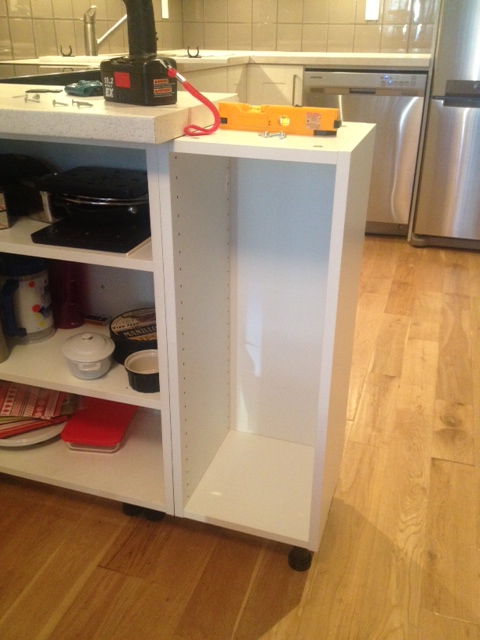
After getting home El Granto quickly assembled the cabinet while I removed the toe kicks and cover panel on the existing peninsula. In short order we had the new cabinet installed, and we leveled the whole peninsula, as apparently the previous owners couldn’t grasp the concept of Ikea’s easy level legs, and the whole thing was about as level as the Tower of Pisa. As a side note I think they may not had a grasp on the concept of level at all.
New Cabinet
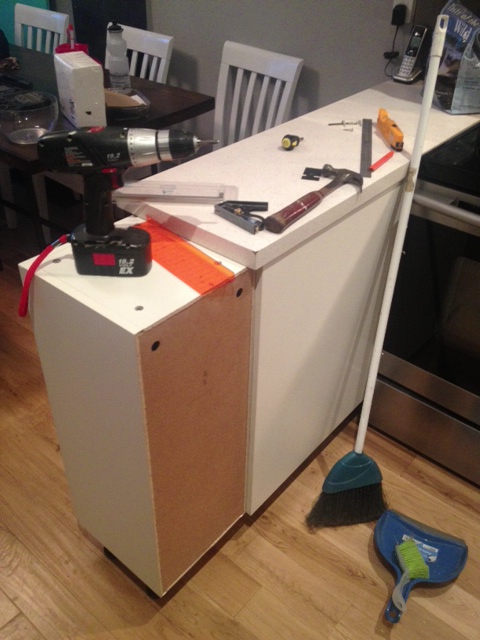
This was the first step in our prepping for Project Concrete Countertops and it was only the start of demo to come.
Progress?
We were left without toe kicks, an uncovered back of a cabinet, no end cover panel, and a countertop that was now 12″ too short. The chaos was minimal and contained, wait till you see how long this lasted!
*If you have a dirty mind, and thought that this post was at all dirty sounding, then that just proves that you don’t read carefully enough. PENINSULA’s people. Get your head out of the gutter.
When planning for concrete countertops, the biggest thing we needed to decide on was the concrete mix.
Not all mixes are created equal, and for a countertop you need a high strength mix. Why? So your countertop doesn’t crack and fall to pieces. Simple enough.
Will the big box store mixes work? Maybe. But it’s a crap shoot. There are a LOT of variables that could send you into a tough place. First up, the big box store mixes aren’t meant for countertops (well except for the Quikrete countertop mix but more on that later).
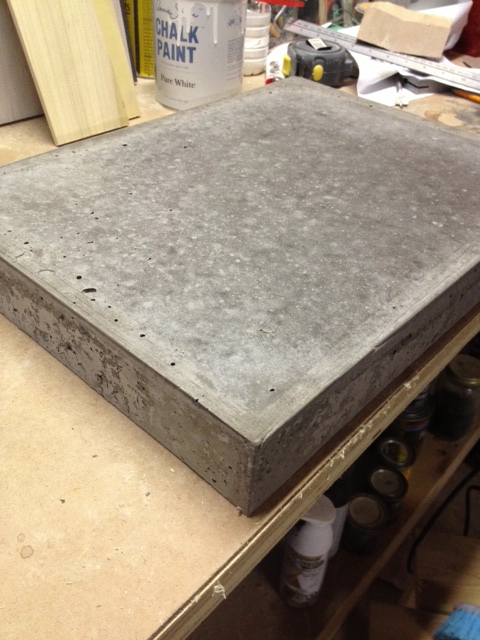
A few weeks ago I made a test piece knowing that I wasn’t using the right mix, but I just wanted to TRY, see if my mold would work, see if the whole scenario was even plausible. Turns out it is, but I had a lot of room to improve.
Concrete Test
So my test piece came out full of holes, and with a lot of aggregate visible on the sides, a blotchy colour, gouges from my caulking job it and it was HEAVY. It turns out that little test piece was a behemoth. Not only did it change my mind about doing 2″ thick surfaces (gonna stick with 1 1/2″) but it also had me looking at alternatives to traditional concrete mixes.
So I started calling concrete countertop mix manufacturers, and checking my local hardware stores. Not only was there only one mix option at the big box stores, but there were no sealing and finishing products to complete the project, nor where there any direction on how best to build the molds, pour, sand & finish. I am not really one for experimenting on 2000 lbs of concrete. I want a product that I can do myself, have confidence in, and get professional results.
That’s when fate interjected, and I received a comment on my countertop test project from Buddy Rhodes Concrete Products suggesting I check out their product line. After a quick look around their site, and a few YouTube videos later, I had to know more.
Buddy Rhodes has flipped concrete on it’s head. It’s hard to explain, but his product & hand pressed technique isn’t poured like traditional concrete. It’s a thicker product that’s more the consistency of clay, that you don’t pour into a mold, you pick up handfuls of it, and pack it into the mold. Really. Then you don’t vibrate it, or worry about bubbles, and screeding, or even filling the entire mold to the brim.
It’s reinforced not with clunky (and heavy) re-bar or chicken wire, but with glass fibers. It doesn’t require a concrete mixer or 45 of your closest friends to pour, in fact you could do it in a couple weekends with a friend or two. But get this, its JUST as strong (if not stronger) and it’s way easier (and lighter). You can replicate finishes, and get professional results, every single time. Its incredibly DIY friendly and versatile.
They made concrete doable, and replicable, and almost idiot proof. Not only that, but their process makes concrete able to go vertical! Their product can be worked up a vertical surface. So my dream for a waterfall counter wasn’t going to be a feat of engineering and a two piece project. I could build a waterfall countertop in ONE PIECE. Mind blown.
I emailed the person at Buddy Rhodes who had commented on my post, and said I needed to know more! Where can I get this, will it work for my project?! They may have been shocked at my exuberance, or just too nice to say no to a crazy lady, but one of their artisan concrete experts Jeremy emailed me back in a few short hours asking about my project. A few emails later, and we were having a video conference call where Jeremy was convincing me we could pour my whole kitchen in four pieces when I had planned on doing it in 6, and not only that, but anything else I could dream up was essentially plausible.
Jeremy talked us through how their product differs from the big box bagged mix which was my only other option at this point. He pointed out the analogy of baking. You want to bake some bread. Do you just start out throwing things into a bowl and hope for the best, or do you use a tried and true recipe and high quality ingredients?
First off let’s get to know concrete a little more. There’s essentially two parts. Aggregate and cement. Think of a slab of concrete as a slice of raisin bread (gluten free of course). The cement is the bread and the aggregate is the raisins. Together they make toasted buttery goodness… Wait. I think I might be hungry… The bag mixes are short on cement. So they’re like a fruitcake. Lots of aggregate and not a lot holding it together. They are short on cement because it is the most expensive component it is also the reason for the strengths that concrete exhibits. But, it is also the glue that holds everything together, our mix is like proper raisin bread. Lots of cement and not too much aggregate.
The prebagged concrete countertop mix available at your local hardware store is essentially the same mix used in your backyard to set a post, mixed with more cement and less aggregate. Will it make you a concrete countertop? Probably. Will it be the perfect counter you were dreaming of? Umm..maybe. There are a lot of variables that could set things in a tail spin. It may be concrete, but it may not be the best option, especially for a DIY’er. Other possible pitfalls are that you can only make solid surfaces, its a very heavy and unwieldy product, and it has a long cure time. If poured or cured improperly it can crack, be brittle, has a limited color range, and is a mess to pour. It will also require some heavy duty forms, a lot of heavy mixing, some favors called into your buddies, and a lot of headache and hoping and you still haven’t figured out how to seal or protect it either.
I was a bit freaked out, as I’m sure you might be too right about now. Why would I risk a bunch of cash in materials, truck rentals, concrete mixer rentals and forms to possibly have a very large heap of junk that I would actually need to pay someone to take away if this didn’t go right?
So big box mix was out of the running, and Buddy Rhodes mix was the clear best choice.
Jeremy worked with us suggesting the best technique for us to use, how to build our molds, and make it as simple as possible to get a kick ass product. We were over the moon excited, and a lot more confident. I think some of my excitement rubbed off on Jeremy, as he surprised us with saying he might come to Canada to see us do our project. (That and for the maple syrup and poutine of course.)
Now, I assure you I warned this Southerner that fall in Canada isn’t quite the paradise he’s used to. But he booked a ticket, and gave us three weeks to get all our prep done, so he could see us “pour” when he got here. Talk about a deadline. But we did not want to fail our new concrete hero!
So we started measuring, and prepping, and calculating everything we needed and started checking things off our to-do list.
Next up, I will give you a detailed list of absolutely everything you need to buy, rent, procure, beg or borrow to make your project go (relatively) smoothly, and get a great result!
We are busy working away on Project Concrete Countertops for the next few days, but I wanted to give you a look at the Kitchen Before and where we wanted to head with our simple changes.
I had epic plans for a kitchen makeover this year. You can see my wish list here, and my “timeline” here. HA HA! Why do I make lists?
Well we have been getting some things done in the kitchen/dining room. The coffee bar got drawers, we made a new dining table and bench, bought a sink, and I have finally made some progress in my plans for a DIY concrete countertops.
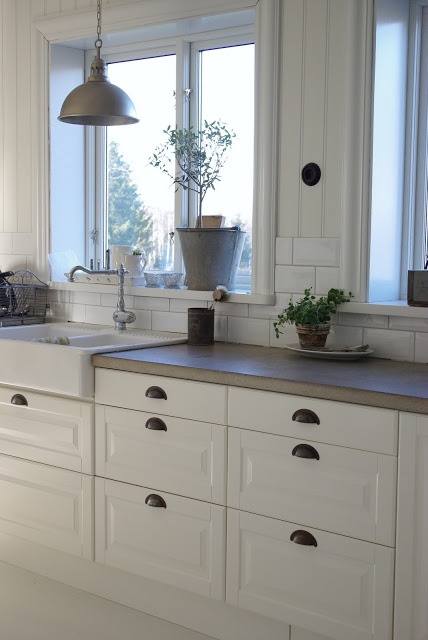
Kitchen Pre-Move In
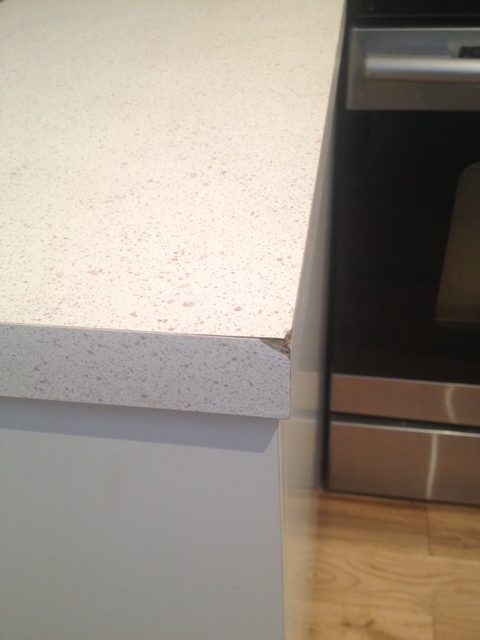
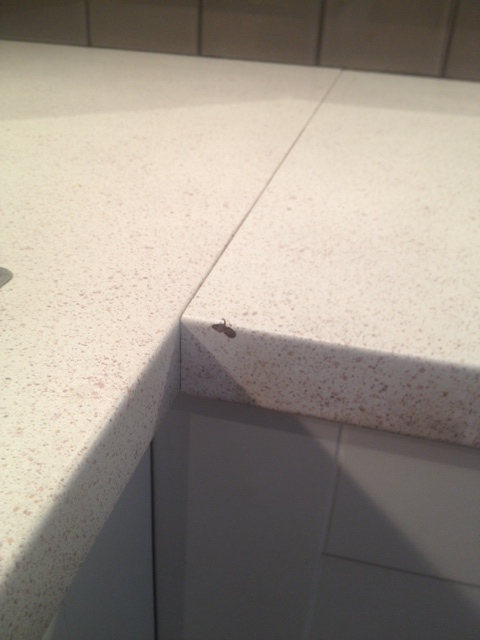
As you can see from the photo above we have laminate counters. They look okay in the pic right? White-ish and nondescript? Yeah except they’re this flecked beige design (bleh), and during the move & renos they got two bashes in them, as well as the laminate started to peel up after I ran the self cleaning cycle on my oven. There’s also a seam that I’m not the biggest fan of.
Bashed corner of our peninsula countertopDent in corner of counter as well as the seam
Awesome, right?
So DIY concrete countertops are high on my want list. Now you may also know that I am a planner. I’m not just gonna head to the hardware store, fill up a rental van with bags of concrete and start making things. I have to research, and plan. Cause if you don’t, projects go astray, money gets wasted, things take way longer than they should, and you may end up with some really heavy junk.
So it was time to research, plan and make some lists.
Project Concrete Countertops TO DO LIST:
Research concrete countertop mixes, techniques, colors and sealers
We have started to prep and calculate, and get our proverbial sh$t together, and THIS WEEKEND is the big pour. I am excited and scared all at the same time. My kitchen is about to get a whole lot less cracked and busted, and a whole lot more grown up!
Don’t worry, we will do the whole process from start to finish with you including a planning guide, all the prep and template making, the mold fabrication, mixing and “pouring”, finishing, installing and sealing. I know its a complex project, so I think we’ll break out some video to help you re-create your own project at home.
In the meantime, make sure to check in on our progress on our Facebook and my Instagram, we will be posting some status update shots and outtakes until we have enough time to post everything here in detail.
I’m not a short girl. My Danish heritage has afforded a rather large frame of 5’10” however I am still completely unable to reach the top cabinet in our kitchen without standing on something. We have tall ceilings, and 39″ upper cabinets and those things are tall! For two years I have dragged over a kitchen chair, or straight up hopped up on the countertop to reach that top shelf.
I know what you’re thinking, why on earth have I not bought a kitchen step stool yet? You know those things MEANT for standing on to reach a cupboard?! Well, I just never thought about it when I was someplace that sold step stools.
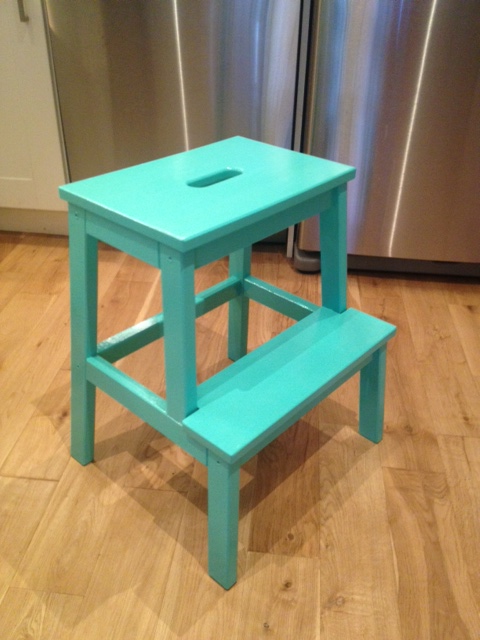
That was until last week, when I was stuck at the Ikea kichen lineup, and noticed their basic Bekvam step stools situated behind the counter. For a whopping $16.99 I decided then and there that I would cure my inability to reach the top shelf! I wrote down the isle and bin number and when I (finally) reached the warehouse I added the stool to my cart, and was on my way to being able to reach whatever I wanted, whenever I wanted it. (It’s the small things people.)
I brought home my new prize, named him Sultan* and assembled it.
Sultan the Stool
Hrm, its okay, but its a bit boring right?
So I got out the cabinet paint, and gave Sultan a couple coats of Thai Teal, then a couple coats of poly.
Teal Sultan
Isn’t he more handsome now?
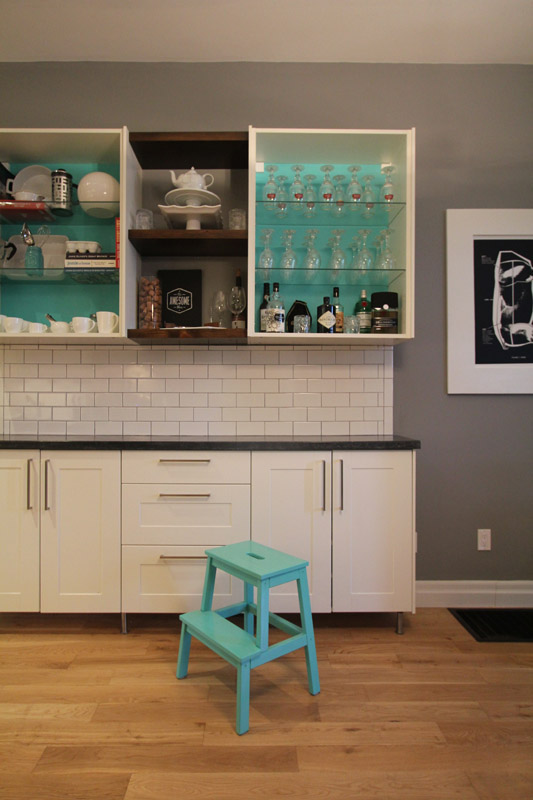
Stool & Cabinet
He matches the cabinet backs, so he fits right in. For now I have made beside the coffee bar his new home, where he can quickly be accessed to reach a cookbook or a casserole dish.
Completed Stool
Not bad for a $17 stool and a bit of sample paint, eh?
* For those of you who don’t get the Sultan reference, clearly you didn’t watch enough Beauty and the Beast in your childhood. Sultan is the pet pooch who was turned into a foot stool. Now I am off to watch Beauty and the Beast, and maybe a bit of Aladdin…
Thanks everyone for your help in the great sink debate of 2013. We finally made up our minds, and headed out to Ikea to pick up our sink this past weekend. Or should I say we coerced a good friend to drive us to Ikea using Swedish meatballs as a bribe.
I have to say he should have been rewarded with more than meatballs, as braving Ikea on a Saturday is torture. As we shuffled past strollers, overflowing carts and bright blue bags, parents dragging children, and domestic arguments over duvets we managed to weave our way to the kitchen department and put our name on a list for help. While Ikea is essentialy self serve, that stops at the kitchen department. Each and every kitchen item from bases to doors, appliances to sinks needs to be ordered through an Ikea associate. They type in your item, and print you out an order form, that you take to the cash register and scan. You pay for your items, then head to (another line) to pick up your items from the warehouse. So for our single sink, we had to wait in the same line as the people ordering a whole kitchen. Surprisingly, it wasnt that bad. For a month the sink had been sold out at all GTA Ikea’s (Etobicoke, North York and Vaughan) and only (far away) Burlington had a few. In a twist of good fate, Etibicoke got 4 in on Friday, and we hustled to make one of them our sink. We got our precious order form, and waited through the lineups to finally procure our sink.
SINK!
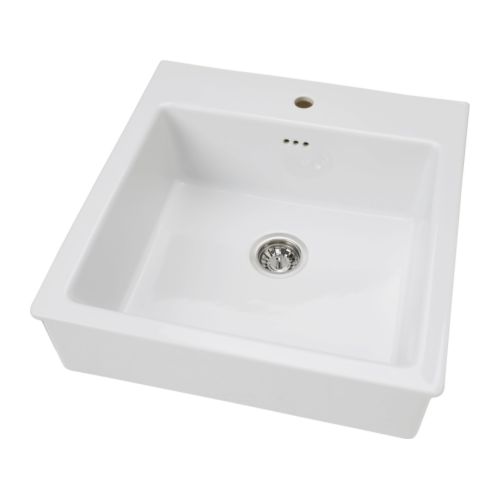
So which sink did we choose? Did we go for the farmhouse sink or the square stainless?
Drumroll please….
FARMHOUSE BABY!
Ikea Domsjo Farmhouse Sink
We ended up going with the farmhouse as we thought it would be the most appropriate in our home. We have strayed towards the traditional in our decor, with our moldings, styling and trim work. So we felt the more modern sink may be a smidge out of place. We heard some great comments from you wonderful readers, and the things that pushed us over the edge were that we did in fact already have a whole lotta stainless going on with our appliances, and the nice contrast that the sink would give with our (soon to be) dark grey counters. Your complete love of the farmhouse also made us feel a lot more comfortable with our decision.
We loaded the (very large) sink into the (small) hatchback of Chris’ car, and headed home. Now the sink is currently hanging out in the dining room, waiting install after our new counters are built!
An Ikea Domsjo sink will fit in the back of a Mazda 3
Speaking of counters, we’re hoping to get started work on them next weekend. We are super excited to get started, but a bit nervous as well. This project involves some kitchen demo, plumbing, and a lotta planning before we can even start.
I will speak a bit more next week about our planning and prep work, then expect quite a few posts as we work through the process from start to finish.
Saturday evening we were sitting in the dining room painting things and chit chatting when El Granto decided to go upstairs and grab something. He found the light “burnt out” to our master bedroom then proceeded to find the upstairs hall, bathroom, staircase and livingroom lights out as well. Our cable and tv were out, as were our office electronics and wifi. Strangely the dining room and fridge and stove were not affected, but our kitchen lights were toast as well.
Front half of the house had power, back half: not so much
Our first thought was to check the electrical panel, so down we headed to the basement. No breakers were tripped, but we still turned each one off and on again, as well as turning the main supply off and on again. Still nothing. There didn’t seem to be any issues with the panel, it wasn’t sparking, arcing or on fire, so we were a bit perplexed. We feared a major electrical problem and a costly repair bill. Not to mention this was 8pm on a Saturday night. While El Granto went to check with our neighbors (to see if they had any power problems, and where he kindly got an invite to join them watching Despicable Me.) I called our power authority in hopes that there was a crazy power outage that would somehow only affect half our house.
Surprisingly someone picked up the phone at Toronto Hydro and didn’t think I was a complete nutter. He asked me a few questions, the classic IT question of “have you tried turning it off and then on again” and we went through the steps we had taken. I was expecting him to tell me to call an electrician, but instead he said they’d send someone out in a few hours.
Gearing up for a large bill from the laughing hydro guys, I agreed and El Granto set to procuring extension cords and making us a cozy movie night.
At around 11pm a knock came to the door and we opened it to find two men in big orange reflective jumpsuits and hard hats. They were kind and polite (although poor Odon was freaked right out by these reflective guests and had to spend the remainder of their visit in his crate). They asked to come in and check the panel, where they found no problems.
They then headed outside where parked in front of our house was a giant hydro truck complete with ladders and booms and tons of flashing lights blocking traffic. They got out their big ladders and started scaling our house. Within minutes they had found the culprit. The line coming in from the street is aluminum and our house is wired with copper. Over time these foes can decide they don’t want to play nice anymore and create a short. What we didn’t know is that we have three separate lines going into our house, and one of them shorted, thus leaving only half the house in the dark. They quickly chopped off the angry wire, replaced it, and we had power again! We knew this as all our fire alarms started going off in unison. Our saviors in orange jumpsuits packed up their ladders and tools and left with hearty waves off to save the next house stranded in the dark.
Super Amazing Hydro Guy fixing the power
Exhausted after our exciting evening, we proceeded to go inside, shut off all the lights and go to bed. But at least I didn’t have to navigate the 3am bathroom break in the dark.
So if your house (strangely) loses half it’s power. After checking the possible causes, call in your power company, cause it might be a problem with your power line! Who knew?!
We are in the final stages of planning for our concrete countertop project. When speaking with friends and family about our project a lot of the questions we have been getting is “why concrete?”. Most of them haven’t seen concrete countertops before, and thought we were a bit mad for taking on this project. Others thought the concrete would be really rough and look like a sidewalk. I have been breaking out my iPhone to the skeptics and showing them some examples of concrete countertops, and they have been subsequently blown away. So I thought I would show you all some of my inspiration so you think I’m less cray cray and more awesome.
First up, why did we choose concrete?
It goes with our industrial meets traditional asthetic
It’s durable, and customizable
We can do it ourselves. It’s not like we can mix up some marble in the garage
It looks amazingly high end for a reasonable price
Possible cons:
If done incorrectly, or the wrong products are used it can crack, break and/or look terrible
If not properly sealed & waxed it can be stained (like stone) by acids such as wine, vinegar and citrus fruit
It takes a bit more planning & prep to make molds and some muscle to pour, finish and install