I feel like I haven’t accomplished a darn thing in the last few weeks. I have been working, albeit slowly. Summer finally kicked in, and we’ve been sweltering the last week. When it comes to working in a blisteringly hot garage with no windows, or sitting on the deck with a daiquiri….well you can guess which one wins out.
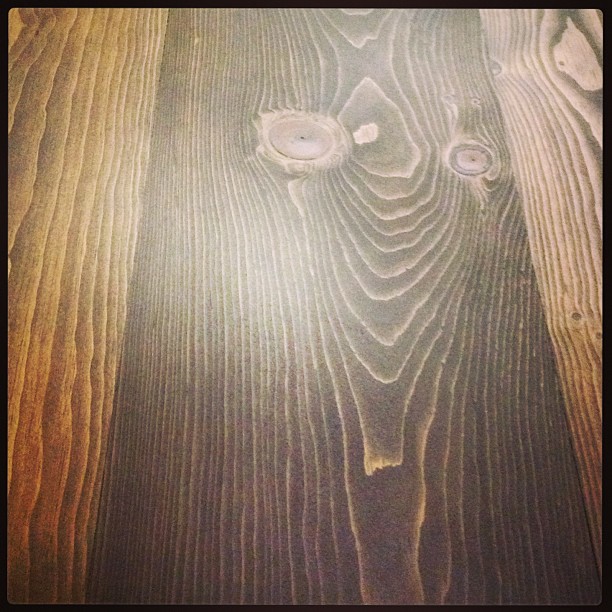
The projects we have been working on are slow and steady, but hard to show progress until they’re done. It’s one of those, put a coat of stain on, let it dry for a day, put another coat on, let it dry for another day, then a coat of poly, dry for a day, sand, another coat, repeat. Before I know it a week has went past and I really don’t have much to show for my work.
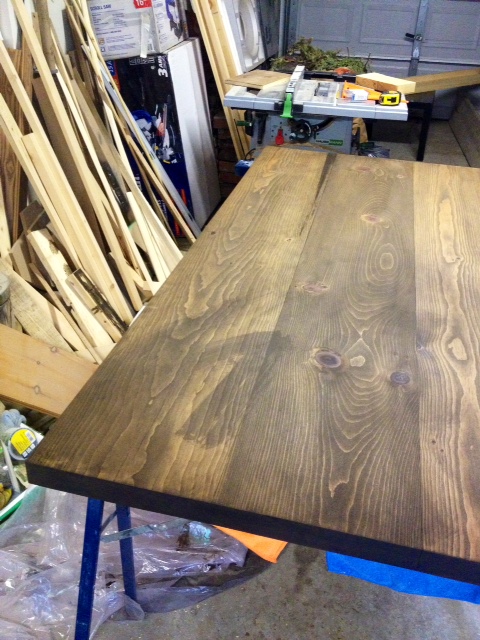
Stain FINALLY done…
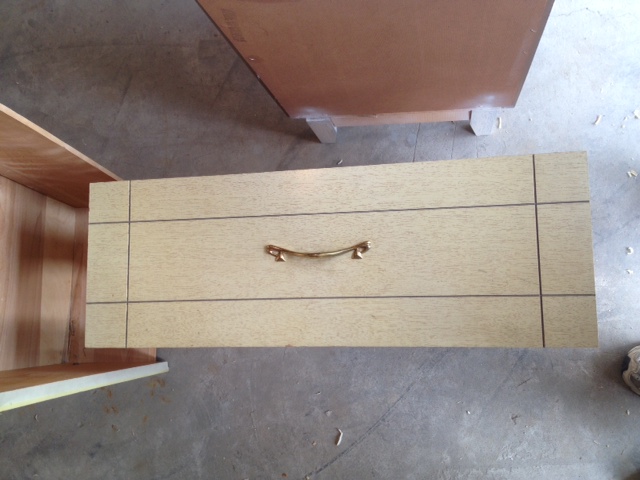
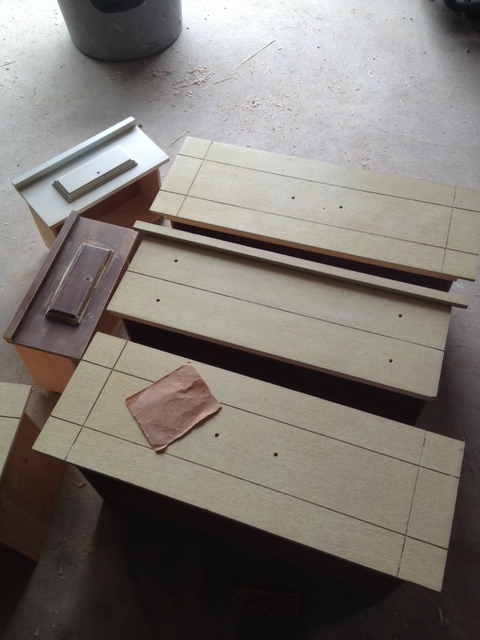
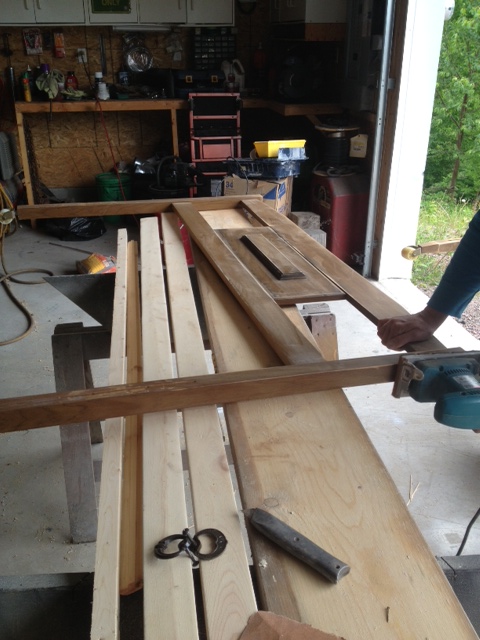
The other project we’re working on has come to a standstill as it requires more wood (aka a 8km walk to the lumber yard, in the sweltering heat for ONE BOARD.) Then it needs to be glued, and drilled, and glued again. Here’s a little sneak peek.
Gluin’ and Drillin’…
I feel like I want some instant gratification. Like I may have to paint something, just to show some progress!
What about you, got any projects halfway done? Are you a serial half–task-do’er?
When we were looking to buy our first home, we looked at a LOT of houses. From scouring the MLS daily to Open Houses on weekends and weeknight showings. We saw our fair share of homes; over 100 to be exact.
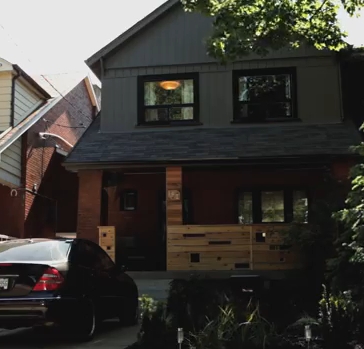
During that time we witnessed various marketing initiatives from the estate agents selling those homes. We saw everything from MLS listings without a single picture, to websites created just to sell one house. We had bags full of sell sheets, flyers, magnets, flashlights, pens etc. I thought I had seen pretty much every real estate marketing technique around. Until I stumbled upon this You Tube video from a local agent.
Instead of a sell sheet, this agent decided to sell the lifestyle. He showcases how someone would use the home, and while doing it, he manages to tell you all the cool stuff about the house without saying a word. You see the neighborhood, public transportation, parks, quiet street, parking, spacious entry, gorgeous bathroom, walk in closet, (strange) wine cellar above the bedroom, a chefs kitchen with pot filler, gas range, big fridge & farmhouse sink. Then it shows the technology the home has, with baseboard vac, a/c and a nest home thermostat. Finishing off with nice comfortable dining room perfect for a lovely dinner, and an outdoor deck.
I personally think the agent did a great job with this video. It appeals to young couples looking for something with a new build feel, with some charm. If I was in the market (and had $869k to drop on a house) I would definitely go for a showing.
What do you think? Seen any other real estate videos?
Oh, and while we’re on the topic of real estate. Congrats to Wendy at Old Town Home for making the leap, quitting her job and becoming a real estate agent in Old Town Alexandria. I am envious of her following her passion!
*Just to clarify this is not my real estate agent, I don’t even know him! Just found the video online and thought it was great.
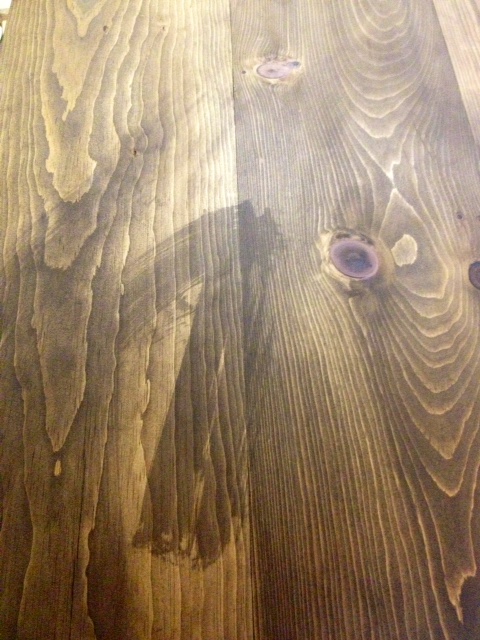
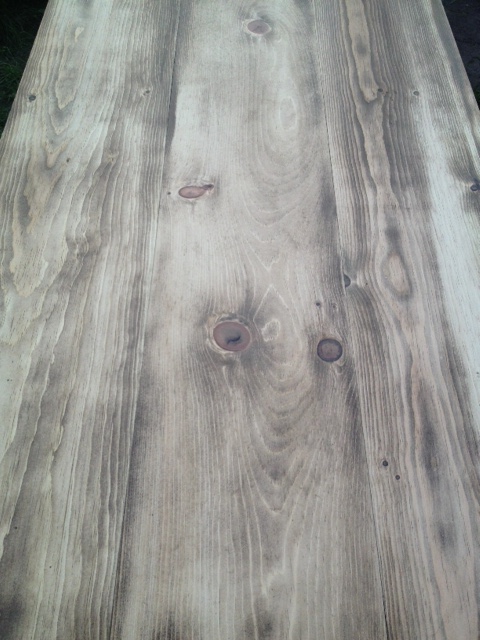
Making a mistake sucks. I usually try to research the heck out of a task, and measure twice cut once et al. However sometimes you just screw the pooch, no matter what prep you did. Some mistakes are easier to fix than others. Removing stain off a table top is not one of them. If you remember last week I screwed up staining some costly wood. This is what my disaster looked like. In the words of Sheldon Cooper; Bazinga.
This is what happens when you wipe your wood with a dirty rag before staining…
We subsequently spent the last week trying to correct my mistake. Out came the 80 grit sandpaper and two orbital sanders and El Granto and I got to work. We sanded and sanded, then sanded some more.
About half of the stain sanded off
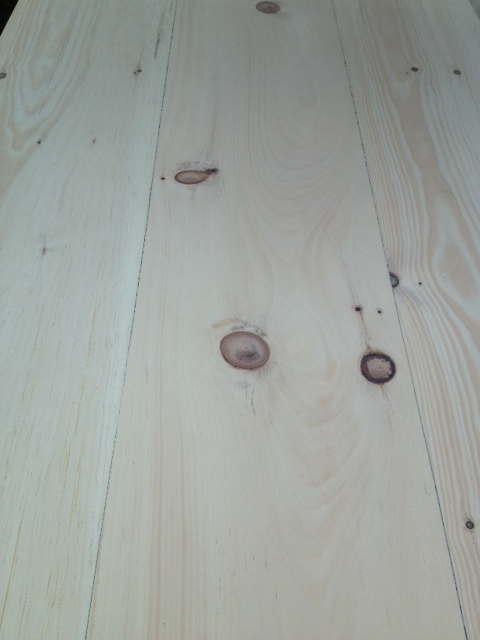
The stain finally removed, we switched to 100 grit, then 150, then finally 220 until our wood was back in ready to stain condition.
All the stain sanded off, ready to be stained again
Time to try this again. This time I used our sawdust broom (aka a $2 hand broom from Ikea) to remove any dust. Next came a coat of wood conditioner. (If you’re staining softwood such as pine, this step really helps you get an even finish.) Let the wood conditioner soak in for a half hour. Now it’s staining time. Apply a nice even coat of stain, I usually let it soak in for about 10 mins, then take it off with a CLEAN rag. I like to wear latex gloves for this step, as it makes me look way less like a mechanic when I have to go to work the next day.
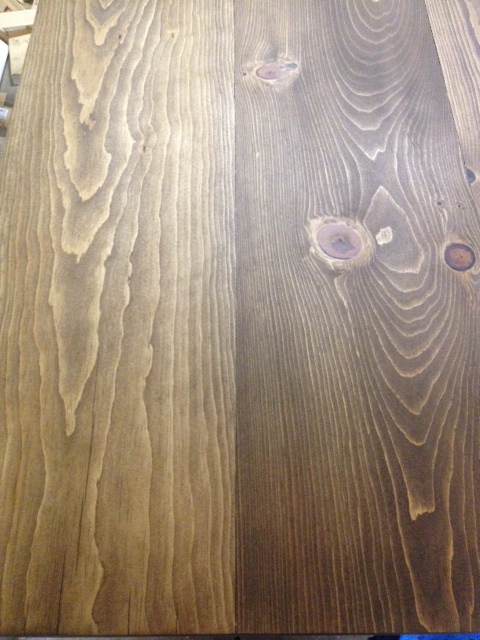
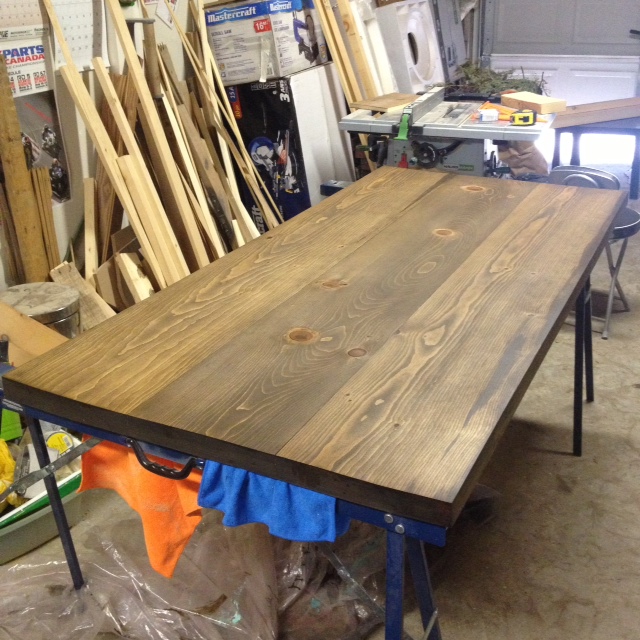
Here’s what our project was looking like after my second attempt at staining it.
Staining Take Two
Now here’s a little before and after.
BeforeAfter
All told, it took about 6 hours of sanding & refinishing to fix my mistake, and about $10 worth of sandpaper disks. Had I not been working with $100 worth of lumber I probably would have declared it firewood and started again.
It certainly feels good to have the project back on track, even if we did loose a week fixing my mistake. Hopefully I can get some more staining & polyurethaning done during the week, and knock this off before our summer vacation.
Wondering what my project IS? Not telling, you’ll see it soon enough. Muh ha ha.
YAY! It’s officially the first day of summer, and surprisingly the sun has poked its head out today to celebrate. We’ve been having an unusually cool & wet June, so I really hope summer has actually decided to come out and play! Continue reading “Summertime”
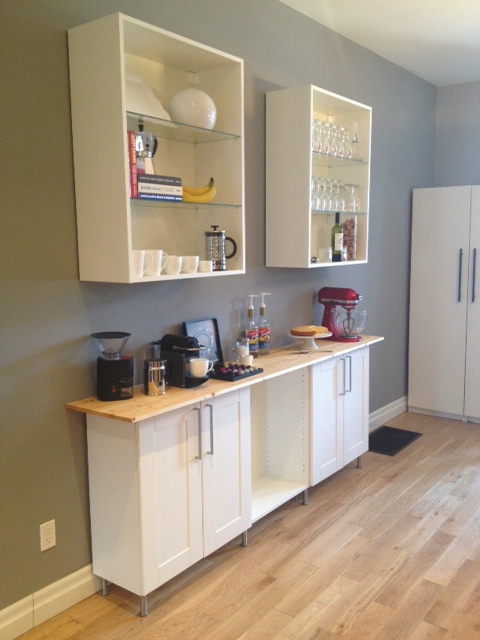
You may remember we started the kitchen coffee bar project waaaay back at Christmas time. We knew that the project would be done in stages. Simply because it would cost too darn much to do it all at once! However, we have been a bit lazy on the coffee bar front, and last we left it, this is how it looked.
Coffee Bar
The base & upper cabinets were installed, there were doors on the bottom cabinets, and a temporary countertop.
Still nagging on the to do list:
Make & install cover panels
Make floating shelves for between the upper cabinets
Buy & install glass doors for the upper cabinets
Buy & install drawer unit for middle lower cabinet
Run electrical outlets for counter top appliances
Install backsplash
DIY concrete countertop
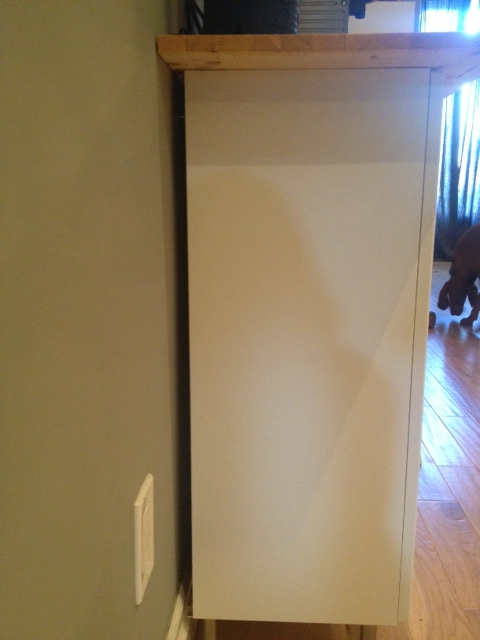
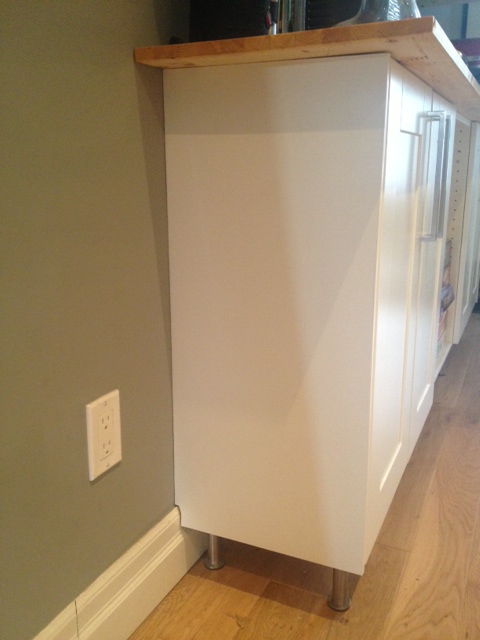
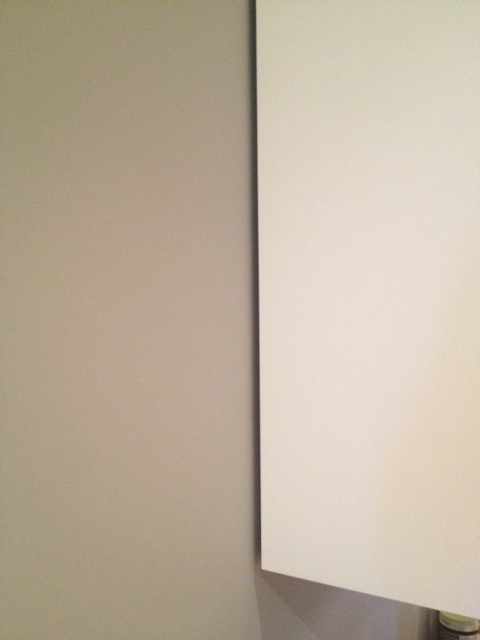
Time to get off my butt and knock a few things off the list. The one nagging thing were the cover panels. You see Ikea cabinets are meant to have cover panels on the sides of your cabinets that match your doors. They also cover up the gap between the cabinet and your wall. Ikea’s installation system involves a metal rail that is attached to the wall, and the cabinets themselves hang off the rail. Because of this, the cabinets actually stick out from the wall about 3/8″. Ikea sells pre-cut cover panels to neatly cover everything up, and make your cabinets look pro.
Look at that GAP!
Problem is, our old house has very crooked walls & floors, and due to that + our baseboards, the base cabinets of the coffee bar stuck out farther from the wall than they normally would. This meant that the pre-cut Ikea cover panels were too small. Sad face.
We had two options:
Option One: Buy larger Ikea cover panels, and cut them down to size. This would be a bit of a pain, and expensive. Cost $250
Which option do you think we went for? You guessed it; the cheaper one. We headed to Home Depot, got 1/2″ mdf cut to the rough size we needed, and stopped at Benjamin Moore retailer West Toronto Paint & Wallpaper, and got a quart of Benjamin Moore Regal Select paint mixed in Paper Mache (pearl finish).
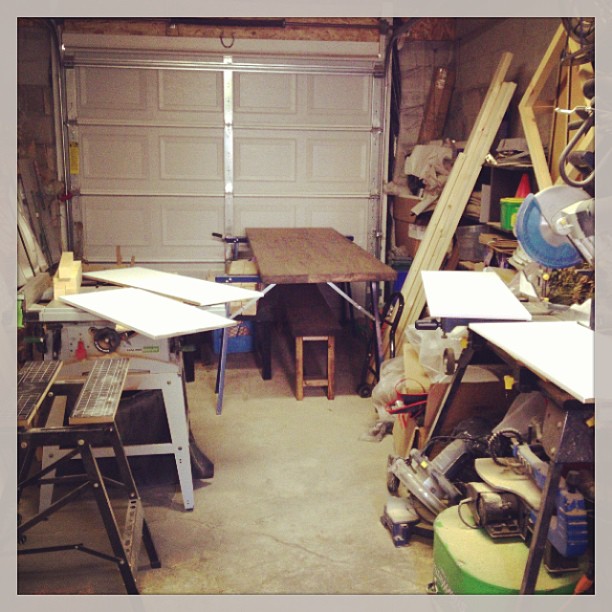
At home, we scribed the panels to fit the crooked walls & baseboards, and cut with a combination of the table saw, circular saw and jig saw to get the correct sizes we needed.
Next up, I applied a thin coat of spackle to the mdf edges (mdf edges are rough, and I find spackle is the best way to get a super smooth finish. Apply a thin coat, let try, and sand smooth.) After the spackle was sanded, a coat of primer was applied.
When dry, a light sand removed any roughness. Next up, four coats of paint, and we were ready to install.
We used 1″ screws through the cabinet shelf holes, and in a few minutes all the panels were up.
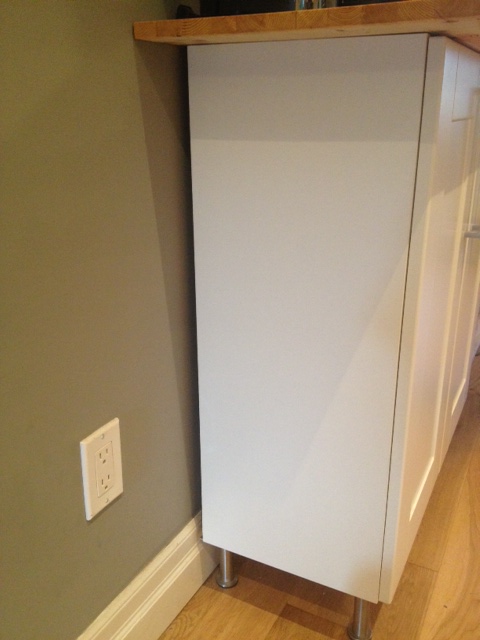
Here’s some before and afters:
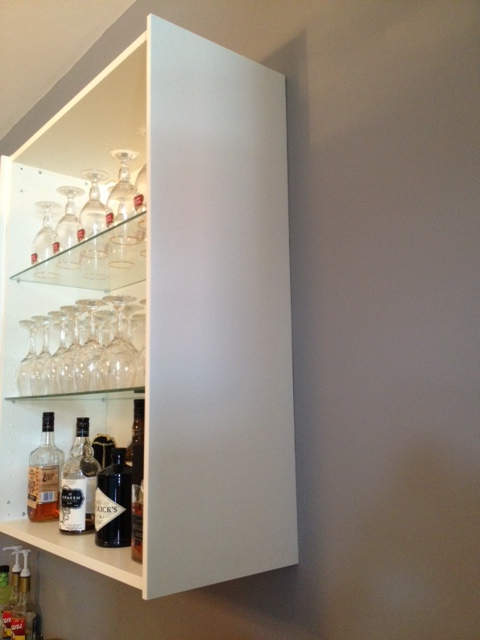
Bottom Cabinet BeforeBottom Cabinet After (still needs a smidge of caulk at the baseboard)Upper Cabinet BeforeUpper Cabinet AfterHere’s the other upper cabinet with the cover panel
The upper cabinets look a bit silly right now, as the panels stick out 5/8″ farther than the cabinets. That’s because when the doors are installed the panels will come out right to the edge of the door, making for a perfect fit.
A lot of the time the finishing touches on a job get put to the back burner, they are usually a lot of work, with little reward, but it is worth it to go the extra mile, and get it done! Now…for the rest of the items on that list!
Coffee Bar
SOURCE LIST:
Materials:
2 – 4×4 1/2″ MDF Handy Panels – Home Depot
Benjamin Moore Regal Select paint mixed in Paper Mache (Pearl) – West Toronto Paint & Paper
Saturday a load of lumber was purchased from the lumber yard, and trip was made to the hardware store for supplies. Sunday was spent cutting, gluing, screwing, sanding and culminated with applying the first coat of stain on our current project. I let the stain soak in, then wiped it off.
This is what I saw:
UGH! Whats that?!
(Insert four letter expletive here)
What happened? No idea. Very clearly something was wiped on the wood that has left this mark. Best guess was that I used a rag to wipe off the wood before staining. I am guessing that there was something on the rag, that left residue on the wood, and mucked up my stain.
Obviously this can’t stay this way. So what’s next? Spend another several hours sanding and hopefully remove the swipe mark. Then re-stain and cross my fingers.
The moral of this story? It’s not always easy, things go wrong, we screw up, make mistakes. We’re human. I just happened to do it on $100 worth of 2″ thick, kiln dried lumber.
Thats gonna be a whole lot of sanding…
What’s the biggest DIY screw up you’ve made? Wreck any projects lately? Were you able to fix it, or did you need to start over?
Last weekend I had big plans of finishing a couple projects in the dining room. I was going to accomplish sooooo much. It was totally gonna happen.
Then I got an email from my Mom asking if I wanted to head up to the cottage and give her a hand with a few things. I could DIY at home OR I could DIY at the cottage? Needless to say, the dog & I were packed and ready to go that evening. El Granto & I had some prior commitments in the city, and we both couldn’t bail on them, so El Granto stayed in the city while Odin and I headed north.
A few years ago, my parents purchased what was literally a shack, on a beautiful waterside property in Northern Ontario. Since then, they have built a huge addition, turning it from a 400 square foot room to an over 1500 square foot cottage with a huge loft, a bunkie, and a great big garage. The work is almost finished, but there’s still a few things on the To Do List. One of those things is furniture. The house is going from a 1 bedroom to a 2 bed + loft, so more furniture was needed!
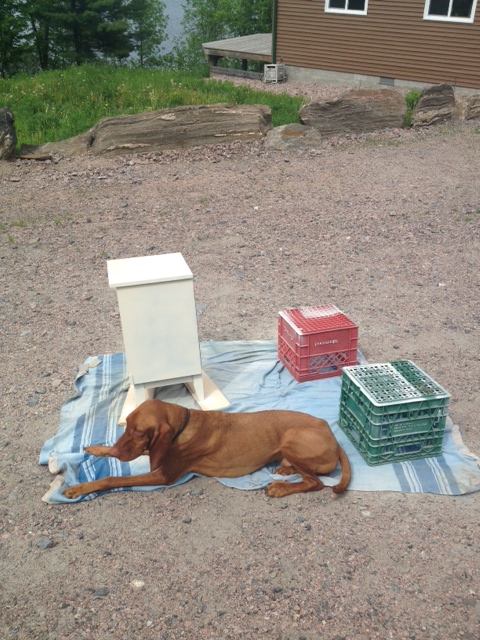
Mom and I headed up with a truck and trailer full of two sofas, a mattress & box spring, a headboard & foot board, two night stands and a dresser. We managed to not only get it up north, but down the ravine into their property, get the truck and trailer turned around, disconnected the trailer, and unloaded all the furniture. Yay girly muscles!
My Mom was gifted the bedroom set, which was awesome, but it needed some TLC. It was 50’s laminate in all its glory (they put laminate OVER solid wood!)
50’s dresser!
Mom & spent an afternoon sanding, cleaning, and spray painting away.
Sanding & Painting drawersSanding & cleaning headboardOdin didn’t understand that the drop cloths were for the furniture to be painted on, not for him to lay on…
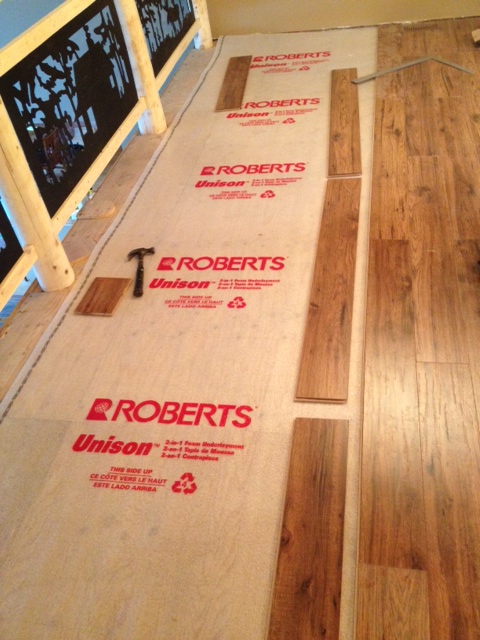
We then headed up to the loft and worked on laying some laminate flooring. Turns out, laminate is super easy to lay! Once you have a solid flat surface, you lay down some underlayment, and the flooring just clicks together! The hardest part is carrying the boxes of flooring up to the loft, and working on your knees clicking it together. You can also see a sneek peek of the super cool railings my parents made. My Mom drew cottagey silhouettes onto sheet metal, they then cut it out using a plasma cutter. (Aren’t they creative!)
Installing laminate flooring
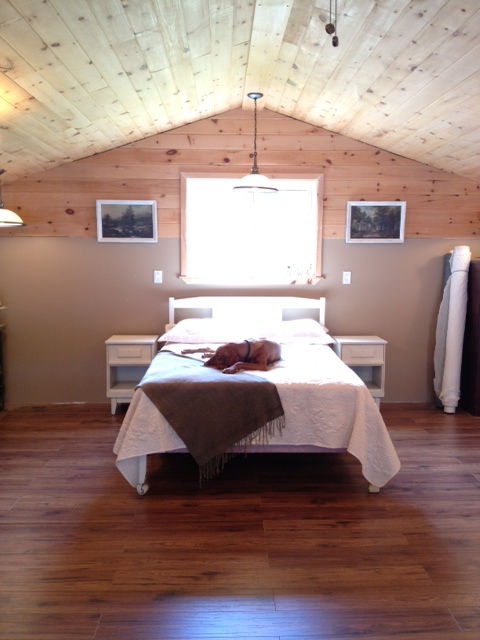
All our hard work paid off though, as this is what the loft was looking like when we were done.
The Cottage Loft Bedroom
The room still needs some trim work, and the furniture needs hardware. Some lamps, drapery and accessories and this will the perfect cottage space. (Oh and that’s bolts of fabric on the right, my mom has an industrial sewing machine in the loft and likes to knock out upholstery projects in her spare time!)
We re-used our old dining chairs when we made our DIY iron & wood dining table. As you can see below, it’s not ideal. The chairs don’t “match” the table, yet they’re not different enough to pair well with the table. Why didn’t we get new chairs? Chairs are expensive! I wanted pretty metal Navy chairs, or metal Tolix chairs. Then I remembered one of those chairs is more than our grocery budget for a whole month…eeep
Dining Room & Kitchen
Chair vs. Food. I choose food.
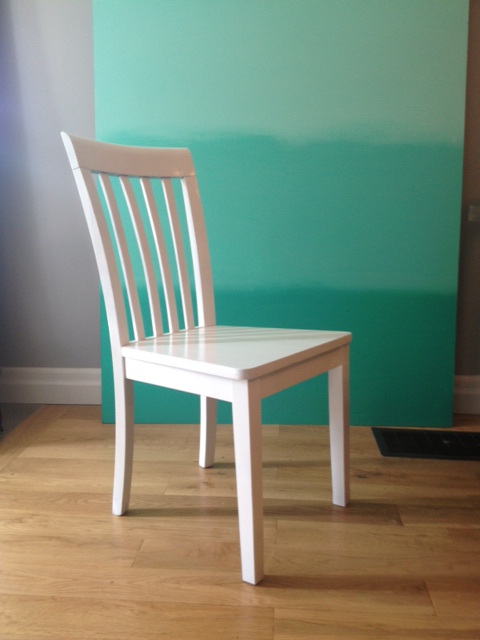
However those chairs were still driving me nuts. They have lived with us since we moved to Toronto 7 years ago. They’re well built, but they lived through our late 20’s, a lot of fun and a few exuberant parties. They are scratched, and are finished with that really dark espresso stain color that might as well be painted on. You cant even tell that there is real wood hiding under it. Combined with the dark dining table in our otherwise bright kitchen/dining room, it was making a bit of black hole.
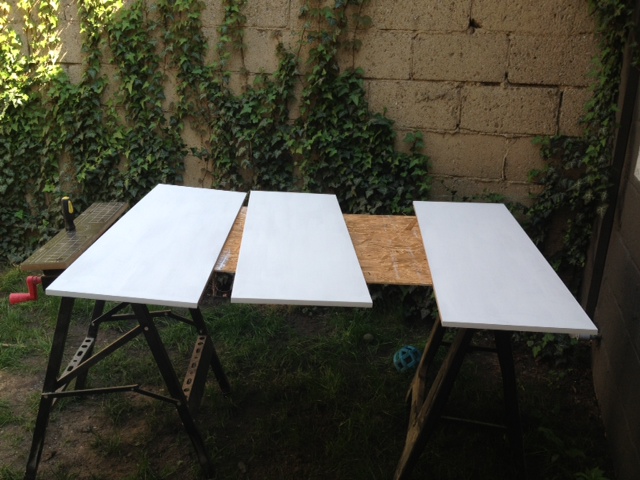
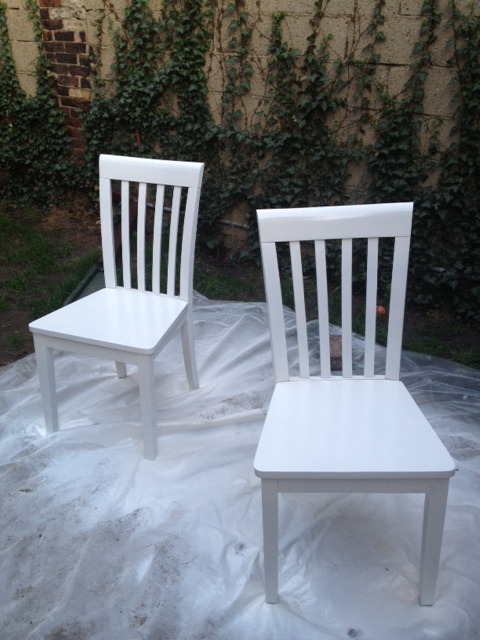
I set up my DIY spray booth in the garage. Gave a light sand, and a good cleaning to the chairs, then gave them several coats of RustOleum Universal in gloss white.
DIY TIPS! When spray painting, the prep is the most important step! Ensure your surface is very clean. Use a degreasing cleaner such as TSP to remove any oil or wax from the surface. If your surface is very shiny and slippery, always rough it up a bit with some sandpaper, to ensure good adhesion. Spray painting is all about light coats. Give your piece several light coats using a sweeping motion about an arms length away from your surface. To avoid drips and runs, don’t spray too close. For surfaces that are going to see a lot of wear, put on an extra coat. Make sure you re-coat within an hour, or after 48 hours to avoid the paint cracking or not adhering properly. Go out and paint something!
Chairs BeforeChair in the paint boothNewly painted chairs dryingChair After
That’s just a sneak peek of the changes to the dining room. We have another couple projects in the works, so a full reveal in a few weeks!
Now for my super special awesome paint news!
I had the chance to meet the folks from RustOleum last week at the Home Depot DIY 101 day, and they let a super big secret drop. RustOleum is coming out with SEVEN new colors of Universal paints in Home Depot stores this week. Yep, 7! They look amazing, and I cant wait to try them all out. Check your local Home Depot Canada store in the coming weeks for these new colors:
RustOleum Universal Flat Metallic:
Chestnut
Burnished Amber
Soft Iron
Antique Nickel
RustOleum Universal Hammered Metallic:
Chestnut
Burnished Amber
Antique Pewter.
These paint finishes look amazing! Very Restoration Hardware-ish. Perfect for refinishing dated hardware, light fixtures, furniture and anything else you can think of. I cant wait to try them out!
Have you spray painted anything lately? Ever used RustOleum Universal paint?
I have a friend with a smoker. Every week he regales me with tales of delicious slow cooked smoked meat. Ribs, and pulled pork, chicken wings and sausages. My mouth waters and I cry a little inside, as I dont even own a charcoal grill, much less a smoker.
Now, dont get me wrong. We love our natural gas Napoleon grill. It’s a workhorse of a beast that happily cooks everything from steaks to Thanksgiving turkey. But I wanted more! I wanted smokey, barkey goodness! I wanted a backyard that smelled like a caveman firepit! I wanted a smoker.
Let’s think things through first though. Where would I PUT a smoker? How often would I drag it out, fire it up and patiently stoke it’s fire for hours? The answer is; not very often. Not that I’m lazy, but that’s a lot of work! So I set to finding a way to make Mr. Napoleon somehow smokey.
Napoleon makes smoker boxes for their bbq’s. (Which I may look into in the future.) For our first attempt at smoking however, my tools were some wood chips, water, and some tin foil.
I got some delicious smelling Jack Daniels wood chips, as well a bag of plain maple chips, a pork loin, some of my favorite spices, and set to work.
Jack Daniels Wood Chips
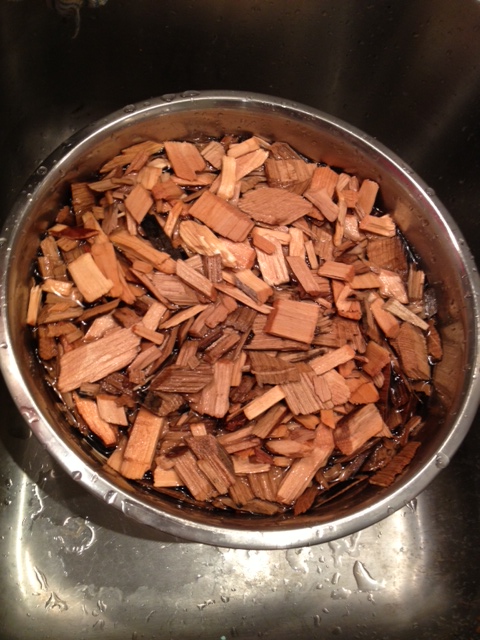
First up, we put a bunch of wood chips in a bowl of water, and let them soak for half an hour.
Wood Chips soaking in a bowl of water
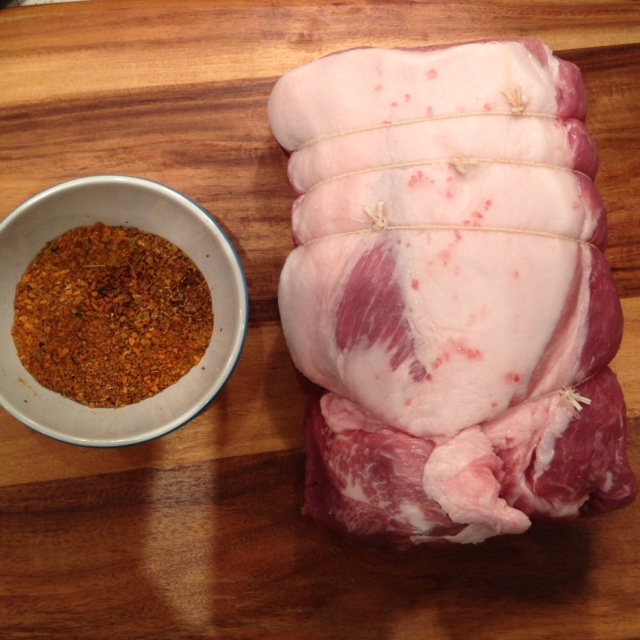
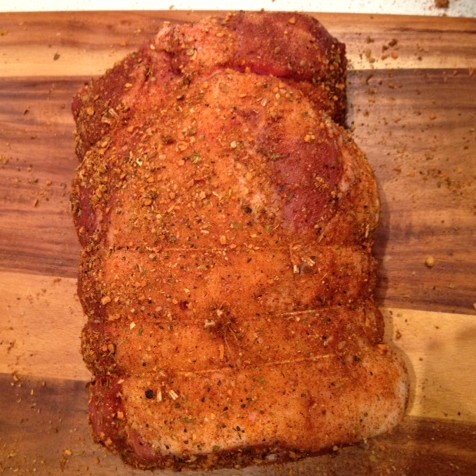
I mixed a concoction of dried spices with everything from garlic and sugar to chiplote and cayenne. I dried the pork with a paper towel then rubbed it all over with the spice rub. We fired up the bbq and let it get nice and hot.
Spice rub + pork loinPork with spice rub
Next it was time to make the smoke packets. I have seen several different versions, so I decided to make a traditional rectangular packet with a few holes poked into it, and one shaped like a cone, with it open at the top to let the smoke out (really just putting a pile of wood chips on some tin foil and then folding the tinfoil up around the sides into a chimney at the top.)
* Somehow in the excitement of smoking, neither El Granto or I got a photo. OOPS! Sorry 🙁
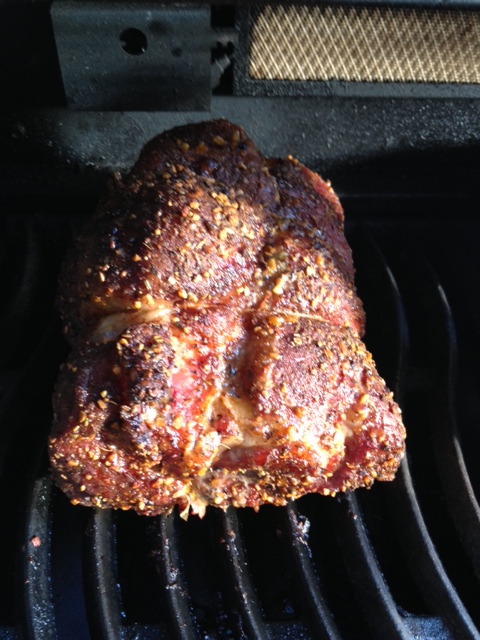
Next we placed the pork in the bbq on one side, and the smoke packets in the middle. We turned the burner under the pork off completely, and turned the burner under the smoke packets down to medium low (all other burners in the bbq off). This made the bbq drop to about 300 degrees.
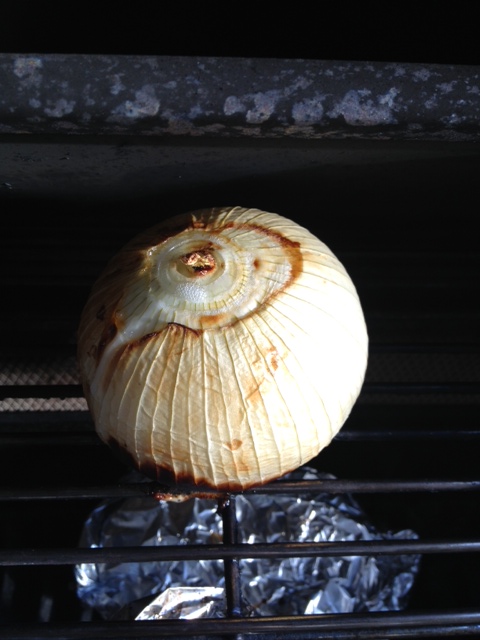
We closed the lid, and let it do its thing. Within an hour the backyard was smelling like delicious roasting meat and whiskey smoke goodness. We tried not to check on it too often (you loose the smoke!). After about 2 1/2 hours we swapped the smoke packets. When we put in the second batch of smoke packets, we also added a vidalia onion into the bbq to let it smoke with the meat, and with one hour of cooking left we added in a tin foil packet filled with new potatoes, garlic, fresh rosemary, olive oil & butter.
Pork on the BBQOnion Smoking
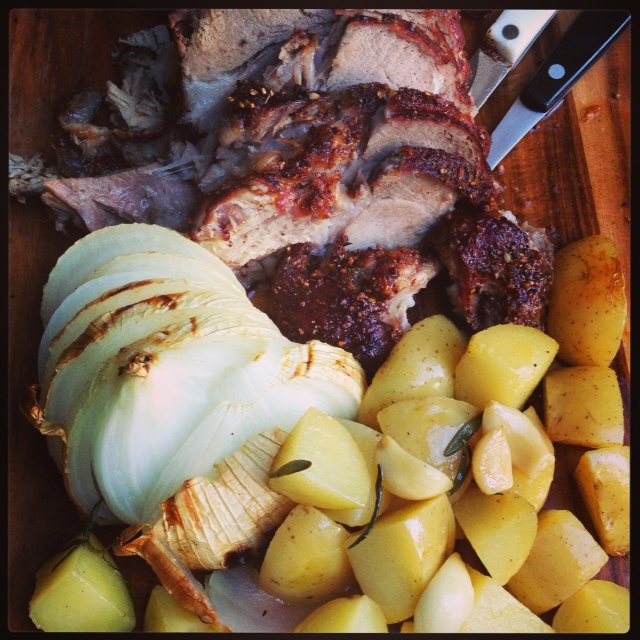
Mmmmmm. Now things were smelling amazing, and it was torture to wait for everything to finish cooking. After one more hour, we pulled the pork off to let it rest, then carved everything up and dug in.
Mmmm BBQ
The verdict? An outstanding success! The meat smoked for five hours total. The bbq kept a steady temperature of about 300 degrees the whole time. The cone shaped smoke packets worked best, and we had a wonderfully smokey (but not overpowering or campfirey) taste. The rub which I was worried would be too overpowering, ended up mellow and wonderful. The barque was delish, and the fat cap on the roast was like butter. The smoked onion was juicy and wonderful, and the roast potatoes went beautifully with a chive sour creme.
Now I want to smoke everything. Whats on the menu this weekend? I’m thinking smoked beef tacos! Or chicken wings, or brisket, or sausages. I might just make it all…