Wedding Week – Anniversary Celebrations

We were hoping to celebrate our one year anniversary on a picnic at the Toronto Islands. We both took the day off work and bought all the fixings for a lovely picnic date.  We had the blanket and everything ready to go when we looked at the forecast. High of 14 degrees. UGH. Out on the island with the wind blowing off the lake it would feel like 10 degrees cooler. Definitely not sunny picnic at the beach weather. So we scrapped the picnic and headed downtown. We grabbed coffees and did some window shopping, strolled around some of our favorite places downtown. We went for lunch at Bannock, and shared an amazing duck poutine pizza.

OMG it was delish!

We did some more shopping, and then headed home to spend some time with the pup. After the sun went down, we closed the curtains on the deck, turned on the deck heater, broke out our picnic fixings, blankets and some good bubbly, and headed out to the back deck for our picnic. With music playing, great food and drink we enjoyed a lovely backyard picnic. It also included dessert of our frozen top tier of our wedding cake.  For all the brides-to-be out there; frozen for a year wedding cake tastes like it’s been, well, frozen for a year. Do yourself a favor, buy a small new cake (or a couple cupcakes) from your wedding cake baker. Then you can try a bit of your year old cake, then enjoy actual desert of fresh baked cake!

(It wasn’t that bad… the cake tasted pretty good, but the icing and fondant tasted like rocks.)

Wedding Week – Invitations

Just like the Save the Dates, we wanted to Letterpress our Invitation Suite. We decided to go all out for the invites, and do double envelopes, double thick cardstock, a double sided invitation with a blind deboss on the back, two enclosures as well as our friend the wax seal.

This time we smartened up, and had all our paper custom cut from letterpresspaper.com . We had it shipped to family in the US (to avoid the crazy UPS brokerage fees) and my Dad drove over and picked it up for us. We designed our invites in Illustrator and had the plates made at Boxcar Press.

I wanted to use blind impression somehow for the invitation suite, and decided to do a pattern debossed on the back of the double thick invites. My L Letterpress is incredibly good at doing blind impressions, so we pre-blind printed the backs of the invites, before heading to Snap & Tumble‘s studio to print with ink.

Where printing the Save the Date‘s took a few hours, printing the invite suite took two FULL days. We then cut out envelope liners using our Silhouette SD. This was a godsend. We could NOT have cut that many liners (and maintained our sanity) without it. We used some wrapping paper with stamps of the Queen on it (a nod to El Granto’s British heritage). We didn’t have enough to do all the invites with that paper, so we mixed it up with some pretty black wrapping paper for the rest of the liners.

We also designed a belly band to keep the invite suite together. We had a local print shop cut 1″ strips of our letterpress paper, and we blind debossed the same pattern onto them as on the back of the invites. We scored them, wrapped them around the invite suite and secured with a glue dot. The whole thing was then stuffed into the lined and addressed inner envelopes, and then into the outer envelopes. They were wax sealed, stamped and mailed. (Envelopes were addressed by printing each one individually on our Epson Inkjet printer using Illustrator for the typesetting.)

We were very pleased with our DIY effort, although it was a LOT of work. By far the most time consuming part of the wedding planning!

The Invitation Pieces
The Envelopes

Source Info:

Paper: Crane Lettra 220lbs for invites (A7), 110lbs for rsvp & info cards (4 bar)
Envelopes: Crane Lettra (A7 inner & outer, pointed for invites, and 4 bar pointed for rsvp) – letterpresspaper.com
Letterpress Plates: KF95 Photopolymer Plates – Boxcar Press
Wax: Glue Gun wax in black & “S” seal stamp – www.letterseals.com
Fonts: Ecuyer Dax & Burgues Script
Letterpress Printing: PIY (Print it Yourself) time at Snap & Tumble

Wedding Week – All the little things

There are a lot of big things in a wedding, the ceremony the family photos, the speeches and the dinner, but here here are some of the little wedding details. The things in the background, but not necessarily the stars of the show. The little things!

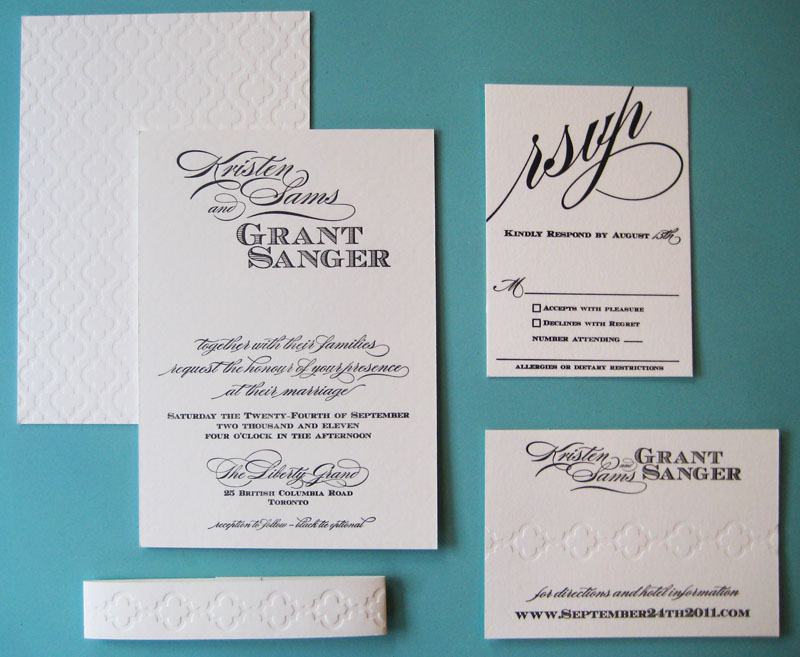
Menu’s – I wanted to do a round menu, but the cutting was going to be a ridiculous feat. Instead, we opted to print a square menu, double sided. One side contained the meal info, and the other had the bar menu. It was printed on semi-gloss cardstock. The corners were painstakingly rounded by the lovely El Granto.

Programs – We weren’t having a church wedding, so we just needed a simple program that explained the who’s who. It was again printed double sided, and corners rounded.

Dancing Shoes – I’m sad that I don’t have any pictures of this! We made a basket full of Dancing Shoes for the ladies that were in the women’s washrooms. The flip flops were tied with ribbon and contained a tag with their appropriate size. A sign donned the bag urging people to dance irresponsibly.

Custom Handkerchiefs for the Moms & Dads – We used our Silhouette SD to cut out text onto iron on vinyl. We custom made a hanky for all the parents with meaningful words. For instance, El Granto’s favorite book as a kid was “Love you Forever”. For El Granto’s Mum, Grant cut out this verse from the book “As long as I’m living my Mommy you’ll be. ” This garnered many tears from El Granto’s Mum, as well as any mother she showed it to. I even made one for El Granto that said “I want to grow old with you” from the Wedding Singer. It was our chance to be sappy.

Custom Wedding Arch – This was my Dad’s DIY contribution to the wedding. He built a wooden arch that could be assembled and disassembled in place in a matter of minutes. He even wired in an operating chandelier for over our heads during the ceremony. It was complete with billowy curtains and ribbons. He did an amazing job, and it was great to get married under such a lovely handmade gift. After the wedding, we hung the chandelier in our bedroom, so every night we sleep under the same light we got married under.

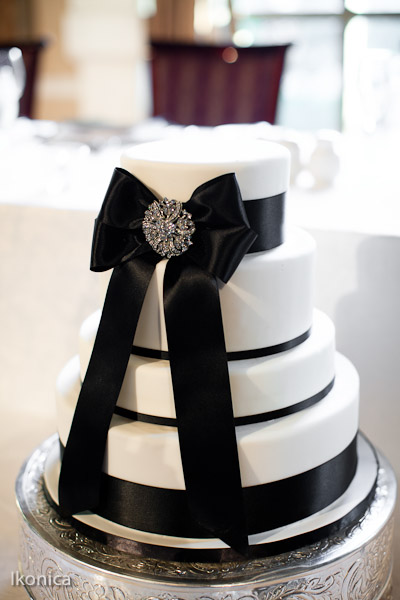
Wedding Dress Sash – This one was my Mom’s special project. I wanted a black sash to go with my black accessories, but black sashes were expensive and I didnt love any of the ones we found. My Mom sourced the same ribbon that was going on our cake, from Mokuba in Toronto. She steamed and pressed it, made the ends perfect points, and stayed the ends with a nail polish pen and oodles of patience.

The Socks: El Granto wanted some awesome socks for the boys, so all the guy’s (Dad’s included) had special socks. Here’s El Granto and his groomsmen showing them off.

The Harpist – We had a harpist for the ceremony and I have to say it was one of the most beautiful parts of the wedding. We spent an afternoon with him picking the songs for the whole ceremony, and now every time I hear a harp I think of the wedding!

The Rings: El Granto has an engraved tungsten carbide ring, and I have a diamond infinity band that matches my engagement ring. I love our rings!

The Candy Buffet: I don’t have pics of the candy buffet before it got eaten! Truth is, it wasn’t supposed to be put out until after dinner, but oops, it was unveiled before the cocktail reception. El Granto & I never even actually saw it! A ton of work went into it, and El Granto’s mum ran around the whole city buying tens of pounds of candy. Here are some pics of the aftermath!

My Shoes: My Mom & Dad gave me the gift that every girl wants, a pair of red soled Louboutins! I love these shoes, and I managed to wear them for 6, yes, SIX hours before trading them in for flip flops. LOVE

The Dress: I went to every dress store in the city and ended up with a custom made silk doupouani mermaid gown from Beckers Bridal. So happy I went with silk over a synthetic. It was unseasonably hot the day of the wedding, but I kept cool in my dress. And yes, I danced my butt off in it!

El Granto’s Cufflinks: El Granto may have cut his hair and trimmed his beard for the wedding, but he kept in his piercings, and he rocked a pair of skull and crossbones cufflinks.

The Flowers: I wanted a simple bouquet of white flowers, and our florist knocked it out of the park with a beautiful carnation bouquet (who knew carnations could be so pretty?!)

The Seating Chart: We used an Ikea frame and a custom poster for our seating chart. I made one typo; my new married name. Oops!

There were also a few things we didn’t get photos of, such as the signature cocktails, the custom cigars and matchboxes and the bathroom toiletries, the gift table and card birdcage. We tried to do as many little DIY’s as we could to make the day special.

Wedding Week – Save the Dates

El Granto & I knew we wanted nice wedding invitations. We had dreams of 5 piece letterpress, lined envelopes, cotton paper and luxury. Then we priced those out. EEEP!

So we started to do some research. In the middle of doing research The Wedding Co. announced that there would be letterpress workshops available at the Spring Wedding Show at the Drake Hotel. We jumped, and booked a workshop with Tanya @ Snap & Tumble.  One hour with Tanya and her press, and we were hooked. The heavy cotton paper, the crisp text, the tactile feeling of the deep impression.  Love at first sight! Check out some pics of our workshop.

So now we knew we wanted to letterpress our invites, and I immersed myself in learning about letterpress. At first I thought I would print at home using an L Letterpress kit that I picked up at a local craft store. After spending an entire afternoon trying to print, I knew that the L Letterpress plates were terrible as was the provided roller, and that under no circumstances could I ever be persuaded to print an entire invitation suite on this thing. It had one saving grace, it did do blind impressions very well. (more on that later)

So I started to hunt for a tabletop letterpress, but all I could find were wildly priced, or required tons of work. I visited Don Black’s shop, and lusted over many a machine, but none were in the budget. Finally I contacted Tanya and asked if there was any way she would let us fools come to her studio and rent PIY (print it yourself) time on her press. She agreed! YAY!

El Granto & I then designed our save the dates (2 different versions) as well as our envelopes. Our first version was a double sided with “Save the Date ” on one side, and the info on the other. El Granto also wanted to make a more gorilla marketing version for his advertising/web friends. For that version we simply put the wedding webside address in the middle of a blank card. Hopefully the recipients of that Save the Date would know enough to visit the website! We had custom polymer plates made at Boxcar Press in New York  and went to Coast Paper’s Cash & Carry store in Vaughn (now called Spicers) to purchase paper. We bought our envelopes online at LetterPressPaper.com (and paid a hefty brokerage fee with UPS.) We purchased a large paper cutter from Costco, and proceeded to cut all the paper down to size. This was a big mistake. We should have had the paper custom cut. It took so much time, and the paper wasn’t perfect.

We ordered a wax seal and black sealing wax online from letterseals.com and purchased Lotka paper to use as envelope liners from The Paper Place  in Toronto.

We rolled up to Tanya’s studio with all that in hand, and printed away!

The save the dates all laid out after printing

At home we printed the mailing info on to each and every envelope using Illustrator and a ink jet printer. We cut, stuffed and glued (handcut) liners into the envelopes, stuffed the Save the Dates, sealed with a wax seal, stamped and then almost got the entire project shut down by the guy at the post office. He said that the wax seals were too big, and that we had to put oversize postage on all the save the dates. It wasn’t even double or triple the postage, it was over $3 an envelope. El Granto got into a war of wills with the post office guy and decided to mail them as is anyways. It was a good call on El Granto’s part as not a single envelope was returned!

It was a labor intensive task, but so worth it.

Next up the Invitations!

Wedding Week – Going to the Chapel

Today El Granto & I are celebrating our first anniversary! I cannot believe its already been a whole year! To celebrate this week will be wedding city over here at Storefront Life. All this weeks posts will be wedding related. First up, recap photos. Continue reading “Wedding Week – Going to the Chapel”

S#%t my Dog Does Part I

My dog can’t actually speak, but I’d say his actions speak louder than words. When he wants something he will hit it with his paw (if he wants food he hits his bowl, he hits the door when he wants to go outside and smacks you in the face when he thinks you’ve had enough sleep on a Saturday morning). There’s nothing quite like a dog slapping you out of a dead sleep. If he could talk I think he would be saying “get your lazy ass outta bed and play fetch with me”.

My dog does a lot of weird stuff. I thought I’d share with the world, so they too could see what a bizarre vizsla he is. So here goes, a (semi) regular post entitled S#%t my Dog Does!

As a puppy he wanted to sit on the sofa arm
Fully grown, he still thinks he should sit on sofa arms
He loves hanging out in the bathtub
He photo bombs
and he thinks people are for sitting ON

He also believes rakes and brooms are the spawn of Satan, and that they should die. (This is him as a puppy, but he still does this to this day.)

Does your dog like to do weird things? Does he hang out in strange places?

DIY Custom Mailbox

We currently have a white plastic mailbox. It came with the house, there’s no way we would have installed such a monstrosity. The only reason it’s lasted so long was that we were trying to find something great to replace it. Problem is, it’s been a year since we updated the exterior of the storefront and we haven’t found anything yet. We wanted a vertical mailbox, that would be tucked in nicely in our entryway nook. We have searched without avail, and decided to take matters in our own hands.

White plastic mailbox

We purchased a basic black vertical mailbox from Rona for $14. We brought it home, and got to customizing it.

We took the mailbox out to the garage and gave it two coats of BIN primer (lightly sanding in between).

After the primer had dried overnight, we gave it two coats of the same paint as our front door.

You remember the “728” from the mural in the backyard? Well that 728 has become a sort of logo for the storefront if you will. We also have a vinyl sticker on the front window with our complete address. We also decided to bring our “logo” to our mailbox. So I broke out my Silhouette SD, and cut out a smaller version of the 728 onto some scrap vinyl.

I pulled away the excess pieces (called weeding), used adhesive transfer paper to pull away the stickers from the backing(you can also use masking tape), and then using a steady hand stuck it onto the mailbox. I then used a creditcard to smooth out any bubbles.

Ta-Da! New custom mailbox!

SOURCE LIST:

Materials:
Pouch Mailbox: Rona
Zinnser BIN Primer (spray can): Canadian Tire
Behr Premium Plus Ultra, Semi-Gloss in Bijou Red: Home Depot
Adhesive Vynal & Transfer Paper: www.expressionsvinyl.com

Tools Used:
Silhouette SD, paint tray & small foam roller, xacto knife for working with the vinyl

Difficulty Level (on a scale of 1-5):

Two out of five

Total Cost: $15 (already owned the primer, paint & vinyl)

Guest Room Paint Colour Update

Yes…I am still talking about the guestroom paint colour. It did cause a little debate on facebook and amongst friends and family, with everyone taking different sides. If you will remember, the room started out yellow, VERY yellow. Continue reading “Guest Room Paint Colour Update”

Toronto Beer Quest

I’m exhausted! Yesterday we participated in Toronto Beer Quest 3, which was awesome. It just involved more athletic ability and less beer drinking ability than I expected… I actually RAN…lots. Running aside, it was a ton of fun.

We had 10 Prohibition beer related questions to figure out, leading us Amazing Race style to locations around the city. Once we found the locations, we needed to take a photo of our team in front of it to prove we’d been there.

Posing in front of the building which once housed the Toronto Labor Temple

We were allowed to use our feet, and TTC as our modes of transportation. They did however make it good and tricky by placing the locations away from the subway, so you did have to get out there and run or get lucky with buses and streetcars. We were allowed to use our smartphones to help in figuring out the clues, and I don’t know what we would have done without them. I had done some research on prohibition and Toronto beer history figuring I’d get a leg ahead. It did me no good! The questions usually involved a twist, heading us to find a specific item at a location and taking our photo with that. It was an urban adventure race at its best. We had a blast, managed not to freak out on each other like Amazing Race participants oft seem to do. The best part was than when we returned to the Charlotte Room (the start and finish line for the competition) we were rewarded with Mill Street Tank House Ale and pizzas and nacho’s. Running is worth it if its rewarded with beer & nachos. We will definitely be participating again next year, and bringing along some friends to join us. Now to check out more events for Toronto Beer Week!

Friday Libation – The Turbo Shandy

Today marks the start of Toronto Beer Week. From beer tastings, pairings, a homebrewing competition and of course BEER QUEST (which we will be competing in this Sunday!).

So as the Storefront Life resident beer drinker and connoisseur and in the spirit of Toronto Beer Week I bring to you… Da–da-dada!

The Turbo Shandy

A typical Shandy (or Shandygaff) is beer mixed with citrus flavored pop (7-up, sprite, or lime-it-up). But let’s not be sissies here. Lets turbo this thing up. It’s time to get… Tur-blasted!

It’s super simple.

  • 3/4 beer
  • 1/4 Smirnoff Ice

Done.

Adjust for your taste. I prefer more beer flavor to my Turbo than Smirnoff flavor. I also prefer to use a Pilsener for my Shandies or my Turbos. I also don’t use expensive beer for these. Buck-a-beer will do. I usually use Lakeport.

Whatever you do don’t buy in to the corporate re-branding of this drink and call it a “Smirnoff Rocket”. That’s some BS right there. Taking an established drink and just renaming it for your marketing purposes. There are LOTS of variations on the shandy.

  • Beer + Cider = Snake Bite
  • Beer (stout) + Sparkling wine = Black Velvet
  • Beer (stout) + Cider = Poor-man’s Black Velvet
  • Beer + Amaretto = Dr. Pepper (sometimes beer + Cola + a drop shot)

There’s a small list of possible Shandies for you kids. As usual drink safe and never drink and drive.